之前我自己配置了 一下 springboot 项目 给大家分享一下自己整合的经验 比较完整的一段代码
希望能够帮到大家
首先eclipise 下载boot 插件
- help–>Eclipse Marketplace 下的Search中搜索spring-tool-suite(网好的情况下 可以选择这种安装模式)
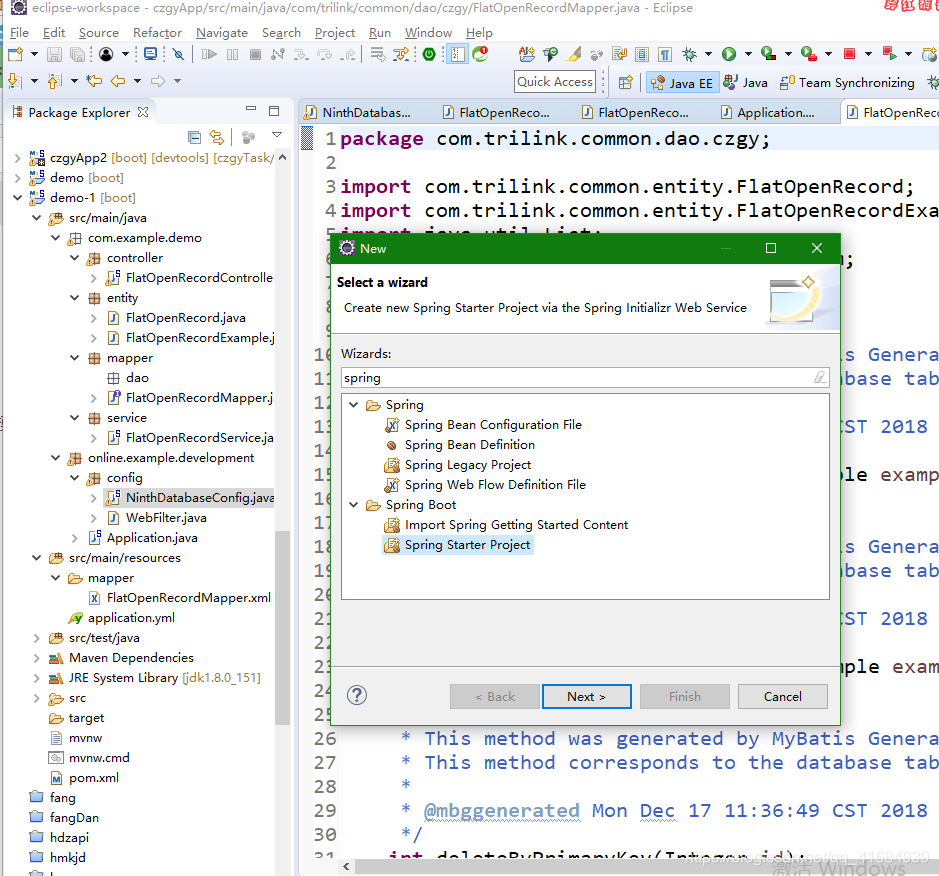
- 下载好重启eclipse 会发现 有一个 spring Starter Project 这样就可以直接创建一个 快捷的spring boot 项目
- 配置一些main函数
package online.example.development;

import org.springframework.beans.factory.annotation.Value;
import org.springframework.boot.SpringApplication;
import org.springframework.boot.autoconfigure.SpringBootApplication;
import org.springframework.boot.builder.SpringApplicationBuilder;
import org.springframework.boot.web.servlet.support.SpringBootServletInitializer;
import org.springframework.context.annotation.ComponentScan;
import org.springframework.scheduling.annotation.EnableScheduling;


@ComponentScan(value={"com.example.demo","online.example.development"})
@SpringBootApplication
//定时器注解
@EnableScheduling
public class Application extends SpringBootServletInitializer{
	 @Value("${server.port}")
	   private static String port;

	@Override
	  protected SpringApplicationBuilder configure(SpringApplicationBuilder application) {
	        return application.sources(Application.class);
	    }


	public static void main(String[] args) {

		SpringApplication.run(Application.class, args);
		System.err.println(port);
	}

}
ComponentScan 注解 描述的是项目启动的时候所要扫描的包 我配置的两个 一个是基本业务代码路径 一个是配置注入bean的文件路径 这里会报错 原因是缺少一些jar 包
所以需要早pom 中 引入对应的jar 包
<dependency>
			<groupId>org.springframework.boot</groupId>
			<artifactId>spring-boot-starter</artifactId>
		</dependency>
		<dependency>
	        <groupId>org.springframework.boot</groupId>
	        <artifactId>spring-boot-starter-tomcat</artifactId>
	        <scope>provided</scope>
		</dependency>
	<dependency>
        <groupId>org.springframework.boot</groupId>
        <artifactId>spring-boot-starter-web</artifactId>
    </dependency>

		<dependency>
			<groupId>org.springframework.boot</groupId>
			<artifactId>spring-boot-starter-test</artifactId>
			<scope>test</scope>
		</dependency>
然后一个 spring boot 项目配置完毕 如果能够正常启动 表示配置·OK
- spring boot 整合mybatis
在整合mybatis的时候 走了 很多冤枉路 这里需要注意的是
第一 扫描mapper 路径位置
第二 dataSource 的文件配置
话不多说 直接上代码
jar包依赖 必不可少
<dependency>
			<groupId>mysql</groupId>
			<artifactId>mysql-connector-java</artifactId>
		</dependency>
			<dependency>
			<groupId>org.mybatis.spring.boot</groupId>
			<artifactId>mybatis-spring-boot-starter</artifactId>
			<version>1.1.1</version>
		</dependency>
		<dependency>
			<groupId>com.github.pagehelper</groupId>
			<artifactId>pagehelper</artifactId>
			<version>4.0.2</version>
		</dependency>
		<dependency>
			<groupId>com.alibaba</groupId>
			<artifactId>druid</artifactId>
			<version>1.0.25</version>
		</dependency>
yml 配置核心所在
server:
  port: 8888
spring:
  datasource:
    url: jdbc:mysql://192.168.9.455:3306/ccgy_test?useUnicode=true&characterEncoding=utf8&autoReconnect=true&zeroDateTimeBehavior=convertToNull&allowMultiQueries=true
    username: root
    password: 123456
    driver-class-name: com.mysql.jdbc.Driver
这是坑最多的 dataSource 配置
顺带将pagehelper 也配置了 直接用即可
如果项目出错 了 在注解上面加上 @Component注解
package online.example.development.config;

import com.alibaba.druid.pool.DruidDataSource;
import com.github.pagehelper.PageHelper;
import org.apache.ibatis.plugin.Interceptor;
import org.apache.ibatis.session.SqlSessionFactory;
import org.mybatis.spring.SqlSessionFactoryBean;
import org.mybatis.spring.annotation.MapperScan;
import org.springframework.boot.context.properties.ConfigurationProperties;
import org.springframework.context.annotation.Bean;
import org.springframework.context.annotation.Configuration;
import org.springframework.core.io.support.PathMatchingResourcePatternResolver;
import org.springframework.jdbc.datasource.DataSourceTransactionManager;
import org.springframework.stereotype.Component;
import org.springframework.transaction.PlatformTransactionManager;

import javax.sql.DataSource;
import java.util.Properties;

@Configuration
@MapperScan(basePackages = "com.example.demo.mapper", sqlSessionFactoryRef = "ninthSqlSessionFactory")
public class NinthDatabaseConfig {
	//private static Logger logger = Logger.getLogger(NinthDatabaseConfig.class);

	@Bean(name = "ninthDataSource")
	@ConfigurationProperties(prefix = "spring.datasource")
	public DataSource ninthDataSource() {
		DruidDataSource druidDataSource = new DruidDataSource();
		System.err.println("加载"+druidDataSource);
		return druidDataSource;
	}

	@Bean(name = "ninthSqlSessionFactory")
	public SqlSessionFactory ninthSqlSessionFactory() throws Exception {
		SqlSessionFactoryBean sqlSessionFactoryBean = new SqlSessionFactoryBean();
	//	logger.info("ninth sqlsession--" + this.ninthDataSource().hashCode());
		sqlSessionFactoryBean.setDataSource(this.ninthDataSource());
		System.err.println("11111111111载");
		PageHelper pageHelper = new PageHelper();
		Properties properties = new Properties();
		properties.setProperty("dialect", "mysql");
		properties.setProperty("pageSizeZero", "true");
		properties.setProperty("reasonable", "false");
		properties.setProperty("params", "pageNum=pageHelperStart;pageSize=pageHelperRows;");
		properties.setProperty("supportMethodsArguments", "true");
		properties.setProperty("returnPageInfo", "none");
		pageHelper.setProperties(properties);
		Interceptor[] interceptors = new Interceptor[] { pageHelper };
		sqlSessionFactoryBean.setPlugins(interceptors);
		PathMatchingResourcePatternResolver resolver = new PathMatchingResourcePatternResolver();
		sqlSessionFactoryBean.setMapperLocations(resolver.getResources("classpath:/mapper/*.xml"));
		return sqlSessionFactoryBean.getObject();
	}


	@Bean(name = "ninthTxMan")
	public PlatformTransactionManager ninthTransactionManager() {
//		logger.info("ninth dataSource--" + this.ninthDataSource().hashCode());
		return new DataSourceTransactionManager(this.ninthDataSource());
	}
}