2019-5-3
主要内容摘自 孟宁《庖丁解牛Linux内核分析》
天下大事必作于细,天下难事必作于易
1.计算机三大法宝
- 存储程序计算机
- 函数调用堆栈
- 中断
2.虚拟一个x86的CPU硬件平台
2.1 虚拟环境搭建
sudo apt-get install qemu # 安装qemu
sudo ln -s /usr/bin/qemu-system-i386 /usr/bin/qemu # 生成qemu-system-i386的符号链接qemu
wget https://www.kernel.org/pub/linux/kernel/v3.x/linux-3.9.4.tar.xz # 下载linux-3.9.4.tar.xz
# 下载mykernel补丁
wget https://www.raw.github.com/mengning/mykernel/master/mykernel_for_linux3.9.4sc.patch
xz -d linux-3.9.4.tar.xz
tar -xvf linux-3.9.4.tar
cd linux-3.9.4
patch -p1 < ../mykernel_for_linux3.9.4sc.patch # 添加补丁,注意参数为p1不是pl
make allnoconfig
make # 编译mykernel
qemu -kernel arch/x86/boot/bzImage2.2使用mykernel编写时间片轮转多道程序内核
1.mykernel相关文件
- mypcb.h
- mymain.c
- myinterrupt.c
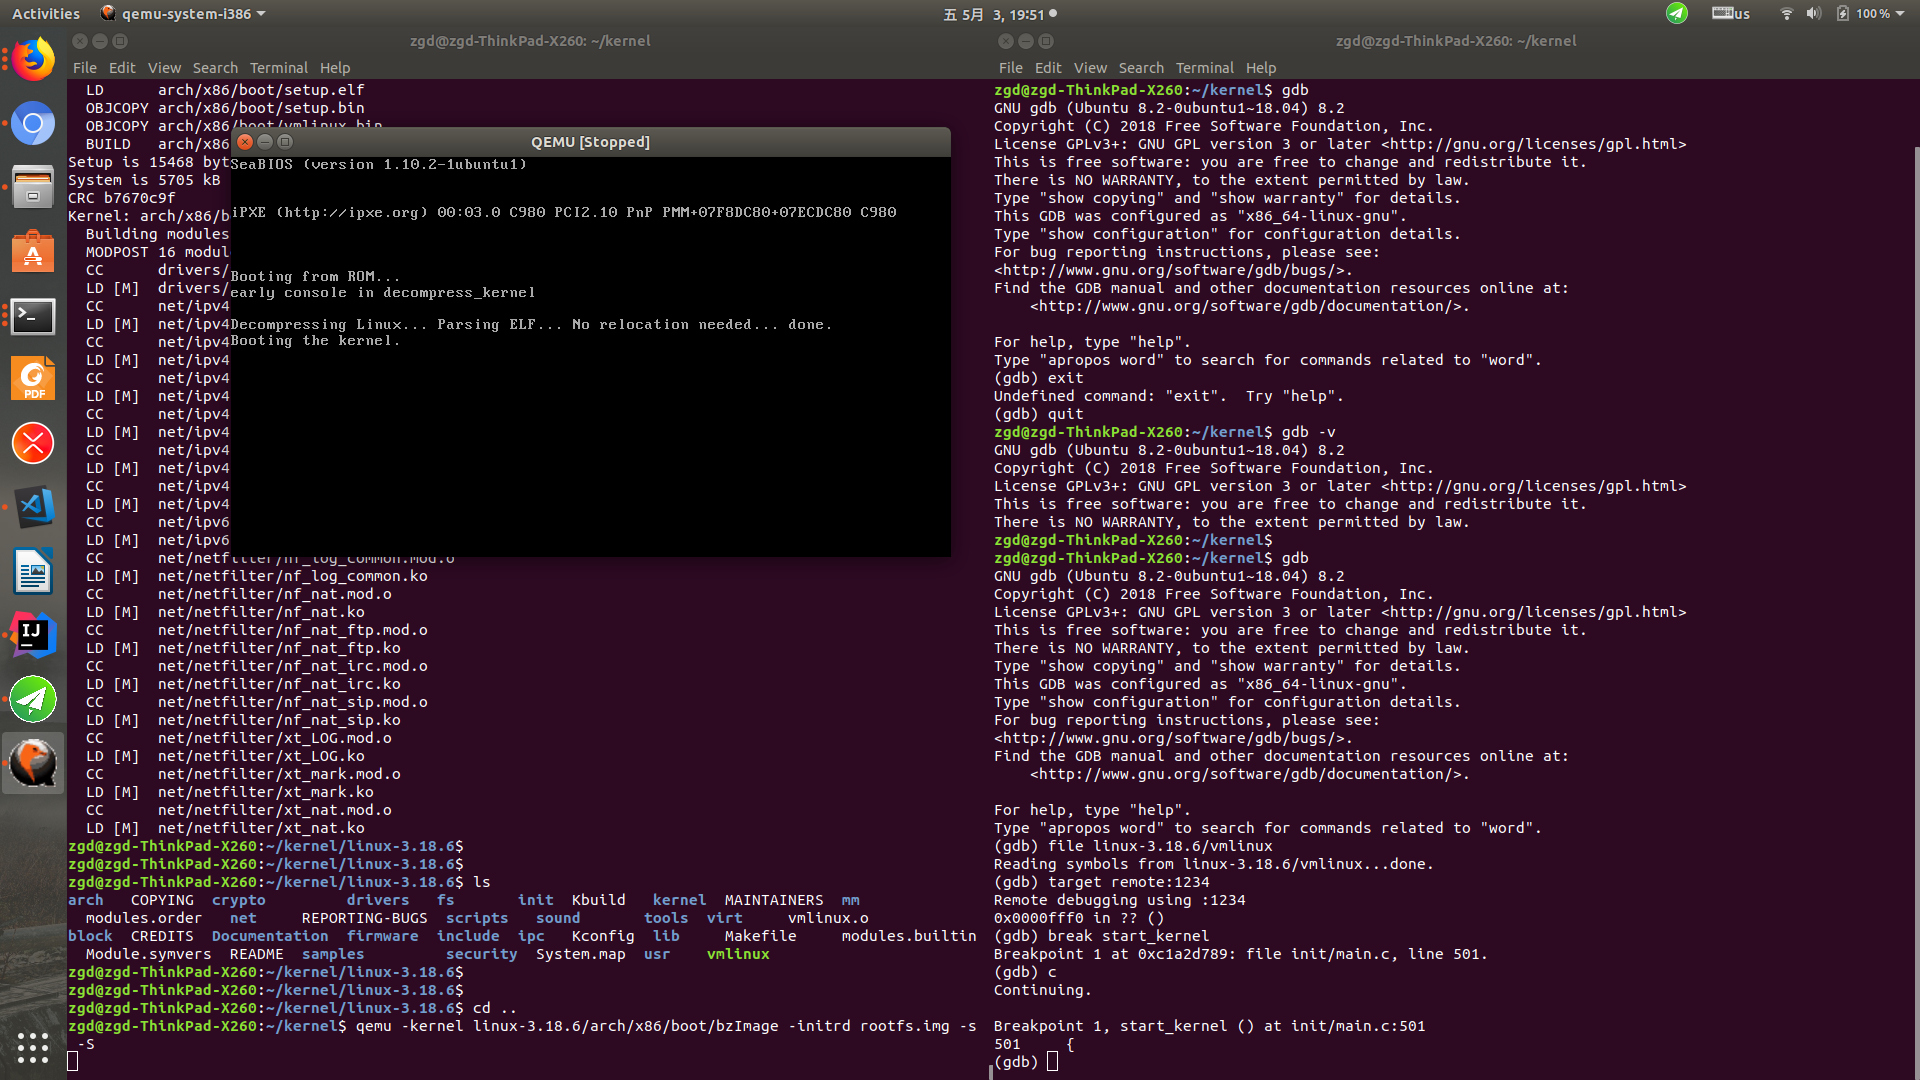
2.使用gdb调试内核
gdb # 运行gdb
# 在gdb程序中,输入:
file linux3.9.4/vmlinux # 加载符号表
target remote:1234 # 建立连接
break start_kernel # 插入断点
3.MenuOS的构造
3.1 Linux内核源代码简介
操作系统两把“宝剑”
- 中断上下文
- 进程上下文
使用版本:linux-3.18.6
内核分析中重要的文件:
- arch/x86
- init/main.c
- kernel
linux readme
- what is linux?
- on what hardware does it run?
- documentation
- installing the kernel source
- software requirements
- build directory for the kernel
- configuring the kernel
- compiling the kernel
- if something goes wrong
- 编译安装内核大概步骤
(1) 安装开发包组
(2) 下载源码文件
(3) .config:准备内核选项
(4) make menuconfig:配置内核选项
(5) make [-j #]
(6) make modules_install:安装模块
(7) make install:安装内核相关文件
(8) 安装bzImage为/boot/vmlinuz-VERSION_RELEASE
(9) 生成initramfs文件
(10) 编辑grub的配置文件
2.编译配置选项
(1) 配置内核选项
(2) 支持“更新”模式进行配置:make help
- make config:在命令行中以遍历的方式去配置内核中可配置的每一个选项。
- make menuconfig:基于curses的文本窗口界面
- make gconfig:基于GTK(GNOME)环境窗口界面
- make xconfig:基于QT(KDE)环境的窗口界面
(3) 支持“全新配置”模式进行配置
- make defconfig:基于内核为目标平台提供的默认配置进行配置
- make allyesconfig:所有选项回答为"yes"
- make allnoconfig:所有选项回答为"no"
3.编译
make [-j #] : 全部编译
3.2 构造一个简单的Linux内核
编译、运行、跟踪源代码
MenuOS:由Linux内核和该文件系统集成
qemu -kernel linux-3.18.6/arch/x86/boot/bzImage -initrd rootfs.img解释
qemu: 仿真kernel的虚拟机;
bzImage:vmLinux经过gzip压缩后的文件,是压缩的内核映像,'b'表示'big'(bzImage适用于大内核,zImage适用于小内核);
vmLinux:编译出来的最原始的内核ELF文件;
根文件系统:一般包含内存根文件和磁盘文件系统
initrd:是“initial ramdisk”简写,普通用户一般感受不到这个内存根文件系统的存在,因为普通Linux在启动时,是boot loader将存储介质中的initrd文件加载到内存,内核启动时先访问initrd文件系统(内存根文件系统),然后再切换到磁盘文件系统。为简化实验只使用了initrd根文件系统
(1)下载内核源代码并解压
wget https://www.kernel.org/pub/linux/kernel/v3.x/linux-3.18.6.tar.xz
xz -d linux-3.18.6.tar.xz
tar -xvf linux-3.18.6.tar
cd linux-3.18.6
make i386_defconfig
make
(2)制作根文件系统(返回上级目录)
mkdir rootfs
git clone https:/github.com/mengning/menu.git
cd menu
gcc pthread -o init linkable.c menu.c test.c -m32 -static
cd ../rootfs
cp ../menu/init ./ # 将init复制到rootfs下
find . | cpio -o -Hnewc | gzip -9 > ../rootfs.img # 把当前rootfs下的所有文件打包成一个镜像文件
配置内核编译选项出现的问题
zgd@zgd-ThinkPad-X260:~/kernel/linux-3.18.6$ make menuconfig
  HOSTLD  scripts/kconfig/mconf
/usr/bin/ld: scripts/kconfig/zconf.tab.o: relocation R_X86_64_32 against `.rodata.str1.1' can not be used when making a PIE object; recompile with -fPIC
/usr/bin/ld: final link failed: Nonrepresentable section on output
collect2: error: ld returned 1 exit status
scripts/Makefile.host:100: recipe for target 'scripts/kconfig/mconf' failed
make[1]: *** [scripts/kconfig/mconf] Error 1
Makefile:541: recipe for target 'menuconfig' failed
make: *** [menuconfig] Error 2
原因及解决方法
原因:gcc版本太高,ubuntu18自带gcc版本为7.4,高版本gcc默认开启-fPIC(Position independent code)支持动态库的重定位
方法:安装gcc-4.8,生成新的/usr/bin/gcc链接,重新配置menuconfig再编译即可