Nginx (engine x) 是一个高性能的HTTP和反向代理web服务器,同时也提供了IMAP/POP3/SMTP服务。Nginx是由伊戈尔·赛索耶夫为俄罗斯访问量第二的Rambler.ru站点(俄文:Рамблер)开发的,第一个公开版本0.1.0发布于2004年10月4日。
其将源代码以类BSD许可证的形式发布,因它的稳定性、丰富的功能集、示例配置文件和低系统资源的消耗而闻名。2011年6月1日,nginx 1.0.4发布。
Nginx是一款轻量级的Web 服务器/反向代理服务器及电子邮件(IMAP/POP3)代理服务器,在BSD-like 协议下发行。其特点是占有内存少,并发能力强,事实上nginx的并发能力确实在同类型的网页服务器中表现较好,中国大陆使用nginx网站用户有:百度、京东、新浪、网易、腾讯、淘宝等。
一.安装nginx1.15
1.解压缩安装包
[root@server1 ~]# tar zxf nginx-1.15.8.tar.gz

2.注释debug日志
vim nginx-1.15.8/auto/cc/gcc
171 # debug
172 #CFLAGS="$CFLAGS -g"

3.下载依赖包
[root@server1 nginx-1.15.8]# yum install pcre-devel zlib-devel gcc -y

4.测试存在特性
[root@server1 nginx-1.15.8]# ./configure --prefix=/usr/local/nginx --with-file-aio

5.编译安装
make && make install
二.启动nginx
[root@server1 sbin]# ./nginx -t
[root@server1 sbin]# ./nginx -V

[root@server1 sbin]# useradd nginx
[root@server1 nginx]# vim conf/nginx.conf
  1
  2 user  nginx nginx;
  3 worker_processes  2;
  4
  5 #error_log  logs/error.log;
  6 #error_log  logs/error.log  notice;
  7 #error_log  logs/error.log  info;
  8
  9 #pid        logs/nginx.pid;
 10
 11
 12 events {
 13     worker_connections  65535;
 14 }

[root@server1 ~]# vim /etc/security/limits.conf
 61 # End of file
 62 nginx   -       nofile  65535

启动nginx
[root@server1 nginx]# sbin/nginx
三.部署nginx1.16
1.解压缩
[root@server1 ~]# tar zxf nginx-1.16.0.tar.gz

2.测试存在特性、编译
[root@server1 ~]# cd nginx-1.16.0
[root@server1 nginx-1.16.0]# ./configure --prefix=/usr/local/nginx --with-file-aio
[root@server1 nginx-1.16.0]# make
4.热升级
[root@server1 nginx-1.16.0]# cd objs/
[root@server1 objs]# ls
autoconf.err  nginx    ngx_auto_config.h   ngx_modules.c  src
Makefile      nginx.8  ngx_auto_headers.h  ngx_modules.o
[root@server1 objs]# ./nginx -V
nginx version: nginx/1.16.0
built by gcc 4.8.5 20150623 (Red Hat 4.8.5-11) (GCC)
configure arguments: --prefix=/usr/local/nginx --with-file-aio

1.备份脚本
[root@server1 objs]# cd /usr/local/nginx/sbin/
[root@server1 sbin]# ls
nginx
[root@server1 sbin]# ./nginx -V
nginx version: nginx/1.15.8
built by gcc 4.8.5 20150623 (Red Hat 4.8.5-11) (GCC)
configure arguments: --prefix=/usr/local/nginx --with-file-aio
[root@server1 sbin]# cp nginx nginx.old
[root@server1 sbin]# ls
nginx  nginx.old

2.将新版本的脚本复制到旧版本的脚本目录下
[root@server1 sbin]# cd ~/nginx-1.16.0/objs/

[root@server1 objs]# ls
autoconf.err  nginx    ngx_auto_config.h   ngx_modules.c  src
Makefile      nginx.8  ngx_auto_headers.h  ngx_modules.o
[root@server1 objs]# cp -f nginx /usr/local/nginx/sbin/
cp: overwrite ‘/usr/local/nginx/sbin/nginx’? y

3.热升级
[root@server1 objs]# ps -ef | grep nginx		#此时旧版进程pid为3725
root      3725     1  0 20:07 ?        00:00:00 nginx: master process sbin/nginx
nginx     3726  3725  0 20:07 ?        00:00:00 nginx: worker process
nginx     3727  3725  0 20:07 ?        00:00:00 nginx: worker process
root      6286  1061  0 20:15 pts/0    00:00:00 grep --color=auto nginx
[root@server1 objs]# kill -USR2 3725				#3725master进程的两个进程不再接收新的请求,只处理当前的请求。同时打开新版本的nginx的master进程,和它的两个线程,实现热升级
[root@server1 objs]# ps -ef | grep nginx		#旧版进程和新版进程同时存在
root      3725     1  0 20:07 ?        00:00:00 nginx: master process sbin/nginx
nginx     3726  3725  0 20:07 ?        00:00:00 nginx: worker process
nginx     3727  3725  0 20:07 ?        00:00:00 nginx: worker process
root      6288  3725  0 20:16 ?        00:00:00 nginx: master process sbin/nginx
nginx     6289  6288  0 20:16 ?        00:00:00 nginx: worker process
nginx     6290  6288  0 20:16 ?        00:00:00 nginx: worker process
root      6292  1061  0 20:16 pts/0    00:00:00 grep --color=auto nginx

[root@server1 objs]# kill -HUP 6288		#重新加载配置文件,使用新的配置启动工作进程,并逐步关闭旧进程。
[root@server1 objs]# ps -ef | grep nginx
root      3725     1  0 20:07 ?        00:00:00 nginx: master process sbin/nginx
nginx     3726  3725  0 20:07 ?        00:00:00 nginx: worker process
nginx     3727  3725  0 20:07 ?        00:00:00 nginx: worker process
root      6288  3725  0 20:16 ?        00:00:00 nginx: master process sbin/nginx
nginx     6293  6288  0 20:18 ?        00:00:00 nginx: worker process
nginx     6294  6288  0 20:18 ?        00:00:00 nginx: worker process
root      6296  1061  0 20:18 pts/0    00:00:00 grep --color=auto nginx

[root@server1 objs]# kill -WINCH 3725		#逐步关闭旧版本master进程的两个worker线程
[root@server1 objs]# ps -ef | grep nginx		#旧版的两个worker线程已经关闭
root      3725     1  0 20:07 ?        00:00:00 nginx: master process sbin/nginx
root      6288  3725  0 20:16 ?        00:00:00 nginx: master process sbin/nginx
nginx     6293  6288  0 20:18 ?        00:00:00 nginx: worker process
nginx     6294  6288  0 20:18 ?        00:00:00 nginx: worker process
root      6298  1061  0 20:19 pts/0    00:00:00 grep --color=auto nginx
[root@server1 objs]# /usr/local/nginx/sbin/nginx -V		##查看此时的nginx版本为 nginx/1.16.0
nginx version: nginx/1.16.0
built by gcc 4.8.5 20150623 (Red Hat 4.8.5-11) (GCC)
configure arguments: --prefix=/usr/local/nginx --with-file-aio
热升级完成!
测试:
[root@foundation80 ~]# curl -I 172.25.80.1
HTTP/1.1 200 OK
Server: nginx/1.16.0
Date: Tue, 07 May 2019 12:35:37 GMT
Content-Type: text/html
Content-Length: 612
Last-Modified: Tue, 07 May 2019 11:58:09 GMT
Connection: keep-alive
ETag: "5cd172d1-264"
Accept-Ranges: bytes

4.热回退
如果升级出现问题,需要立刻将之前备份的版本回退
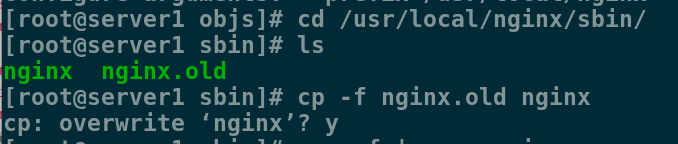
[root@server1 objs]# cd /usr/local/nginx/sbin/
[root@server1 sbin]# ls
nginx  nginx.old
[root@server1 sbin]# cp -f nginx.old nginx		##将之前备份的旧版本脚本还原
cp: overwrite ‘nginx’? y
[root@server1 sbin]#
[root@server1 sbin]# ps -ef | grep nginx
root      3725     1  0 20:07 ?        00:00:00 nginx: master process sbin/nginx
root      6288  3725  0 20:16 ?        00:00:00 nginx: master process sbin/nginx
nginx     6293  6288  0 20:18 ?        00:00:00 nginx: worker process
nginx     6294  6288  0 20:18 ?        00:00:00 nginx: worker process
root     17981  1061  0 20:48 pts/0    00:00:00 grep --color=auto nginx

[root@server1 sbin]# kill -HUP 3725
[root@server1 sbin]# ps -ef | grep nginx		#唤醒旧版本的master进程,使之产生新的worker线程
root      3725     1  0 20:07 ?        00:00:00 nginx: master process sbin/nginx
root      6288  3725  0 20:16 ?        00:00:00 nginx: master process sbin/nginx
nginx     6293  6288  0 20:18 ?        00:00:00 nginx: worker process
nginx     6294  6288  0 20:18 ?        00:00:00 nginx: worker process
nginx    17982  3725  0 20:49 ?        00:00:00 nginx: worker process
nginx    17983  3725  0 20:49 ?        00:00:00 nginx: worker process
root     17985  1061  0 20:49 pts/0    00:00:00 grep --color=auto nginx

[root@server1 sbin]# kill -USR2 6288         #回退版本的worker进程接收新的用户请求。同时新版本的master进程的worker线程不再接收新的用户请求
[root@server1 sbin]# ps -ef | grep nginx
root      3725     1  0 20:07 ?        00:00:00 nginx: master process sbin/nginx
root      6288  3725  0 20:16 ?        00:00:00 nginx: master process sbin/nginx
nginx     6293  6288  0 20:18 ?        00:00:00 nginx: worker process
nginx     6294  6288  0 20:18 ?        00:00:00 nginx: worker process
nginx    17982  3725  0 20:49 ?        00:00:00 nginx: worker process
nginx    17983  3725  0 20:49 ?        00:00:00 nginx: worker process
root     17987  1061  0 20:50 pts/0    00:00:00 grep --color=auto nginx
[root@server1 sbin]#  kill -WINCH 6288		#关闭新版本master进程的两个进程
[root@server1 sbin]# ps -ef | grep nginx
root      3725     1  0 20:07 ?        00:00:00 nginx: master process sbin/nginx
root      6288  3725  0 20:16 ?        00:00:00 nginx: master process sbin/nginx
nginx    17982  3725  0 20:49 ?        00:00:00 nginx: worker process
nginx    17983  3725  0 20:49 ?        00:00:00 nginx: worker process
root     17989  1061  0 20:51 pts/0    00:00:00 grep --color=auto nginx
[root@server1 sbin]# /usr/local/nginx/sbin/nginx -V
nginx version: nginx/1.15.8
built by gcc 4.8.5 20150623 (Red Hat 4.8.5-11) (GCC)
configure arguments: --prefix=/usr/local/nginx --with-file-aio
测试
[root@foundation80 ~]# curl -I 172.25.80.1
HTTP/1.1 200 OK
Server: nginx/1.15.8
Date: Tue, 07 May 2019 12:52:50 GMT
Content-Type: text/html
Content-Length: 612
Last-Modified: Tue, 07 May 2019 11:58:09 GMT
Connection: keep-alive
ETag: "5cd172d1-264"
Accept-Ranges: bytes

版本回退成功
日志切割,定时备份日志
nginx的日志在/usr/local/nginx/logs
1.首先写日志切割脚本
vim /usr/local/nginx/logs/logsbackup.sh

#!/bin/bash
LOG_PATH=/usr/local/nginx/logs/oldlogs		##定义切割日志后存放的路径
CUR_LOG_PATH=/usr/local/nginx/logs			##定义nginx日志存放的路径
YESTERDAY=$(date +%F -d -1day)				##定义日期为昨天

mv $CUR_LOG_PATH/access.log $LOG_PATH/${YESTERDAY}_access.log		##将昨天的access日志文件移动到切割目录,并且重命名
mv $CUR_LOG_PATH/error.log $LOG_PATH/${YESTERDAY}_error.log		##将昨天的error日志文件移动到切割目录,并且重命名
kill -USR1 $(cat /usr/local/nginx/logs/nginx.pid)

2.建立文件夹
mkdir /usr/local/nginx/logs/oldlogs
3.设置定时服务
crontab -e
0 0 * * * /bin/bash /usr/local/nginx/logs/logsbackup.sh		#每天的00:00进行日志切割备份
4.查询定时任务
[root@server1 sbin]# crontab -l
0 0 * * * /bin/bash /usr/local/nginx/logs/logsbackup.sh
