以下是按我实际操作的步骤,来描述下上传的整个过程。
一、项目描述
1.本地项目结构
E:\GitWorkspace\springboot-demo\springboot-mybatis-dubbo-zookeeper
springboot-demo下面包括了学习springboot的各种小例子,目前只有一个springboot-mybatis-dubbo-zookeeper,后面还会包括比如springboot-redis等。
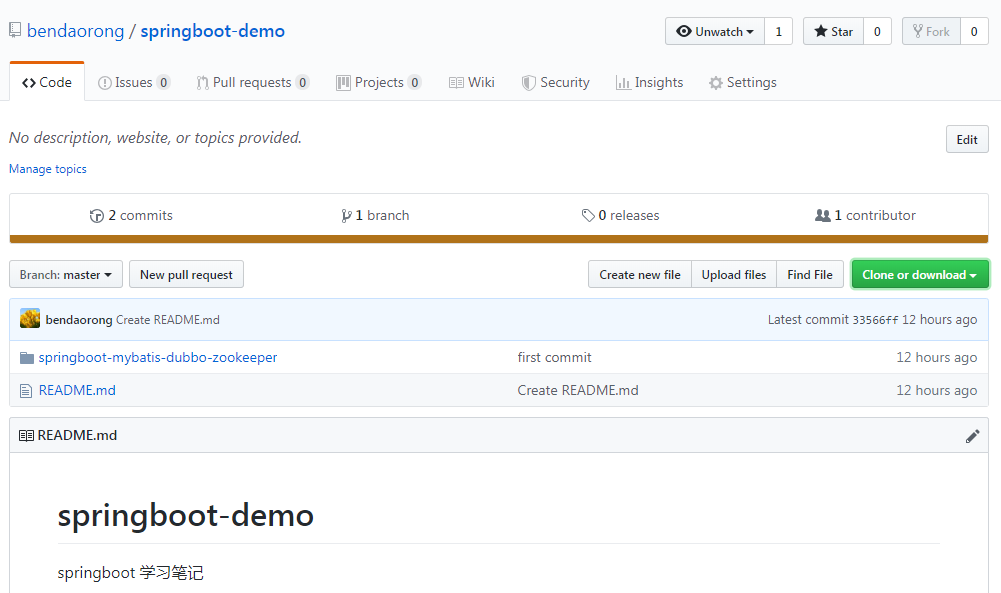
2.github项目结构
我在github上新建了一个仓库https://github.com/bendaorong/springboot-demo.git,用来保存本地练习,我会将本地springboot-demo下的所有工程都上传到该仓库。
二、准备工作
1.https://github.com/账号自行注册,并创建好远程仓库。不清楚的小伙伴可以百度下,教程很多的。创建github仓库后,进入到仓库下,此时该仓库下什么都没有,并且会有上传本地项目到该仓库的操作命令,你只要按他提示的操作就OK了,本文就是按照他的提示完成的上传。
2.git客户端安装
三、上传步骤
1.打开git客户端,进入到E:\GitWorkspace\springboot-demo目录下,执行命令 git init .
$ git init
Initialized empty Git repository in E:/GitWorkspace/springboot-demo/.git/
2.执行命令 git add . ,注意后面的 . ,添加要提交的文件
$ git add .
warning: LF will be replaced by CRLF in springboot-mybatis-dubbo-zookeeper/.idea                    /inspectionProfiles/Project_Default.xml.
The file will have its original line endings in your working directory.
warning: LF will be replaced by CRLF in springboot-mybatis-dubbo-zookeeper/.idea                    /workspace.xml.
The file will have its original line endings in your working directory.
warning: LF will be replaced by CRLF in springboot-mybatis-dubbo-zookeeper/commo                    n/pom.xml.
执行git add 命令后,通过git status命令查看,会看到已经添加的文件,此时文件显示绿色,表示待提交文件。
$ git status
On branch master

Initial commit

Changes to be committed:
  (use "git rm --cached <file>..." to unstage)

        new file:   springboot-mybatis-dubbo-zookeeper/.idea/compiler.xml
        new file:   springboot-mybatis-dubbo-zookeeper/.idea/encodings.xml
        new file:   springboot-mybatis-dubbo-zookeeper/.idea/inspectionProfiles/                    Project_Default.xml
3.执行命令 git commit -m 'first commit',将代码提交到git本地仓库。
$ git commit -m 'first commit'
[master (root-commit) d0701fc] first commit
warning: LF will be replaced by CRLF in springboot-mybatis-dubbo-zookeeper/.idea                    /inspectionProfiles/Project_Default.xml.
4.执行命令 git remote add origin https://github.com/bendaorong/springboot-demo.git 关联本地仓库和远程仓库
5.执行命令 git push -u origin master,之后按提示输入账号和密码。
$ git push -u origin master
Username for 'https://github.com': bendaorong@126.com
Counting objects: 114, done.
Delta compression using up to 4 threads.
Compressing objects: 100% (76/76), done.
Writing objects: 100% (114/114), 21.83 KiB | 0 bytes/s, done.
Total 114 (delta 17), reused 0 (delta 0)
remote: Resolving deltas: 100% (17/17), done.
To https://github.com/bendaorong/springboot-demo.git
 * [new branch]      master -> master
Branch master set up to track remote branch master from origin.
OK,大功告成,到github仓库下已经可以看到刚刚上传的项目了。
通过 git clone https://github.com/bendaorong/springboot-demo.git 就可以将项目下载到本地进行开发了。