提纲:
2.1 KVM 虚拟机克隆方法
2.2 虚拟机常用镜像格式对比
2.3 KVM 虚拟机快照功能使用方法
2.4 virsh 命令常见用法
2.5 KVM 常用镜像格式转换
2.1 KVM 虚拟机克隆方法
2.1.1 克隆 kvm 虚拟机
克隆前,centos7.0 需要提前关机。
语法:virt-clone -o 原虚拟机 -n 新虚拟机 -f 新虚拟机镜像存放路径
选项:-o old -n new
虚拟机镜像: 就是整个虚拟机文件。 丌是操作系统光盘镜像 rhel6.5.iso
比如:KVM 虚拟机的镜像文件

[root@linzi ~]# cd /var/lib/libvirt/images/
[root@linzi images]# ll
总用量 11427672
-rw------- 1 qemu qemu 10739318784 6月   6 14:03 centos7.0.qcow2
-rw-r--r-- 1 qemu qemu   962592768 6月   6 10:17 CentOS-7-x86_64-Minimal-1810.iso
drwx------ 2 root root       16384 6月   6 10:53 lost+found
[root@linzi images]# du -sh *
11G     centos7.0.qcow2
919M    CentOS-7-x86_64-Minimal-1810.iso
16K     lost+found
2.1.2 基于 centos7.0 克隆一台虚拟机:linzi2
[root@linzi ~]# virt-clone -o centos7.0 -n linzi2 -f /data2/linzi2.qcow2
正在分配 'linzi2.qcow2'                                                                                                                           |  10 GB  00:00:26

成功克隆 'linzi2'。
查看克隆的虚拟机文件和磁盘使用情况
[root@linzi ~]# ll /data2/
总用量 1462872
-rw------- 1 root root 1498021888 6月   6 14:50 linzi2.qcow2
drwx------ 2 root root      16384 6月   6 14:32 lost+found
[root@linzi ~]# du -sh /data2/*
1.4G    /data2/linzi2.qcow2
16K     /data2/lost+found
2.1.3 KVM 虚拟机组成
一台 KVM 虚拟机由两部分组成:虚拟机配置文件和镜像 img
查看虚拟机的配置文件:
[root@linzi ~]# cd /etc/libvirt/qemu/
[root@linzi qemu]# ll
总用量 16
drwxr-xr-x 2 root root    6 6月   6 11:41 autostart
-rw------- 1 root root 4601 6月   6 11:42 centos7.0.xml
-rw------- 1 root root 4575 6月   6 14:50 linzi2.xml
drwx------ 3 root root   42 6月   6 10:55 networks
查看虚拟机配置文件内容:
[root@linzi qemu]# cat centos7.0.xml
<!--
WARNING: THIS IS AN AUTO-GENERATED FILE. CHANGES TO IT ARE LIKELY TO BE
OVERWRITTEN AND LOST. Changes to this xml configuration should be made using:
  virsh edit centos7.0
or other application using the libvirt API.
-->

<domain type='kvm'>
  <name>centos7.0</name>
  <uuid>2d64a767-252b-4eab-99ec-42ab1e0a57ec</uuid>
  <memory unit='KiB'>524288</memory>
  <currentMemory unit='KiB'>524288</currentMemory>
  <vcpu placement='static'>1</vcpu>
  <os>
    <type arch='x86_64' machine='pc-i440fx-rhel7.0.0'>hvm</type>
    <boot dev='hd'/>
  </os>
  <features>
    <acpi/>
    <apic/>
  </features>
  <cpu mode='custom' match='exact' check='partial'>
    <model fallback='allow'>Broadwell</model>
  </cpu>
  <clock offset='utc'>
    <timer name='rtc' tickpolicy='catchup'/>
    <timer name='pit' tickpolicy='delay'/>
    <timer name='hpet' present='no'/>
  </clock>
  <on_poweroff>destroy</on_poweroff>
  <on_reboot>restart</on_reboot>
  <on_crash>destroy</on_crash>
  <pm>
    <suspend-to-mem enabled='no'/>
    <suspend-to-disk enabled='no'/>
  </pm>
  <devices>
    <emulator>/usr/libexec/qemu-kvm</emulator>
    <disk type='file' device='disk'>
      <driver name='qemu' type='qcow2'/>
      <source file='/var/lib/libvirt/images/centos7.0.qcow2'/>
      <target dev='vda' bus='virtio'/>
      <address type='pci' domain='0x0000' bus='0x00' slot='0x07' function='0x0'/>
    </disk>
    <disk type='file' device='cdrom'>
      <driver name='qemu' type='raw'/>
      <target dev='hda' bus='ide'/>
      <readonly/>
      <address type='drive' controller='0' bus='0' target='0' unit='0'/>
    </disk>
    <controller type='usb' index='0' model='ich9-ehci1'>
      <address type='pci' domain='0x0000' bus='0x00' slot='0x05' function='0x7'/>
    </controller>
    <controller type='usb' index='0' model='ich9-uhci1'>
      <master startport='0'/>
      <address type='pci' domain='0x0000' bus='0x00' slot='0x05' function='0x0' multifunction='on'/>
    </controller>
    <controller type='usb' index='0' model='ich9-uhci2'>
      <master startport='2'/>
      <address type='pci' domain='0x0000' bus='0x00' slot='0x05' function='0x1'/>
    </controller>
    <controller type='usb' index='0' model='ich9-uhci3'>
      <master startport='4'/>
      <address type='pci' domain='0x0000' bus='0x00' slot='0x05' function='0x2'/>
    </controller>
    <controller type='pci' index='0' model='pci-root'/>
    <controller type='ide' index='0'>
      <address type='pci' domain='0x0000' bus='0x00' slot='0x01' function='0x1'/>
    </controller>
    <controller type='virtio-serial' index='0'>
      <address type='pci' domain='0x0000' bus='0x00' slot='0x06' function='0x0'/>
    </controller>
    <interface type='bridge'>
      <mac address='52:54:00:bd:d1:58'/>
      <source bridge='br0'/>
      <model type='virtio'/>
      <address type='pci' domain='0x0000' bus='0x00' slot='0x03' function='0x0'/>
    </interface>
    <serial type='pty'>
      <target type='isa-serial' port='0'>
        <model name='isa-serial'/>
      </target>
    </serial>
    <console type='pty'>
      <target type='serial' port='0'/>
    </console>
    <channel type='unix'>
      <target type='virtio' name='org.qemu.guest_agent.0'/>
      <address type='virtio-serial' controller='0' bus='0' port='1'/>
    </channel>
    <channel type='spicevmc'>
      <target type='virtio' name='com.redhat.spice.0'/>
      <address type='virtio-serial' controller='0' bus='0' port='2'/>
    </channel>
    <input type='tablet' bus='usb'>
      <address type='usb' bus='0' port='1'/>
    </input>
    <input type='mouse' bus='ps2'/>
    <input type='keyboard' bus='ps2'/>
    <graphics type='spice' autoport='yes'>
      <listen type='address'/>
      <image compression='off'/>
    </graphics>
    <sound model='ich6'>
      <address type='pci' domain='0x0000' bus='0x00' slot='0x04' function='0x0'/>
    </sound>
    <video>
      <model type='qxl' ram='65536' vram='65536' vgamem='16384' heads='1' primary='yes'/>
      <address type='pci' domain='0x0000' bus='0x00' slot='0x02' function='0x0'/>
    </video>
    <redirdev bus='usb' type='spicevmc'>
      <address type='usb' bus='0' port='2'/>
    </redirdev>
    <redirdev bus='usb' type='spicevmc'>
      <address type='usb' bus='0' port='3'/>
    </redirdev>
    <memballoon model='virtio'>
      <address type='pci' domain='0x0000' bus='0x00' slot='0x08' function='0x0'/>
    </memballoon>
    <rng model='virtio'>
      <backend model='random'>/dev/urandom</backend>
      <address type='pci' domain='0x0000' bus='0x00' slot='0x09' function='0x0'/>
    </rng>
  </devices>
</domain>
查看原虚拟机和克隆完的虚拟机配置文件的区别:
[root@linzi qemu]# vimdiff centos7.0.xml linzi2.xml

注:这里可以看出两者的 MAC 地址是不一样的。所以对克隆或复制出来的虚拟机启动后,要修改网络,因为克隆出来的虚拟机的真实 MAC 地址和操作系统中的 ifcfg-eth0 中的 MAC 地址不一样
启动linzi2 测试一下:
[root@linzi qemu]# virsh start linzi2
域 linzi2 已开始
2.1.4 测试新克隆的机器:
进入新克隆的机器改一下IP地址即可,或者更改mac地址
2.2 虚拟机常用镜像格式对比
目前主要虚拟机的镜像格式:raw,cow, qcow,qcow2,vmdk 。
2.2.1 raw 格式镜像
raw:老牉的镜像格式,用一个字来说就是裸,也就是赤裸裸,你随便 dd 一个 file 就模拟了一个 raw格式的镜像。由于裸的彻底,性能上来说的话还是不错的。
centos6 上 KVM 和 XEN 默认的格式还是这个格式。 centos7 以上默认是 qcow2 。

裸的好处还有就是简单,支持转换成其它格式的虚拟机镜像对裸露的它来说还是很简单的(如果其它 格式需要转换,有时候还是需要它做为中间格式),空间使用来看,这个很像磁盘,使用多少就是多少(du -h 看到的大小就是使用大小)。

例: qcow2 转为 vmdk 方法是: qcow2 转为 raw ,然后把 raw 转为 vmdk 。也可以直接 qcow2 转为 vmdk
扩展: 佳能相机上的高保真用的就是这种 raw 格式。 RAW 的原意就是“未经加工” 。可以理解为:RAW 图像就是 CMOS或者 CCD图像感应器将捕捉到的光源信号转化为数字信号的原始数据。
RAW理解为“数 字底片”
缺点:不支持 snapshot 快照。
2.2.2 cow、 qcow、 qcow2 格式
1、 cow 格式:还没有成熟,就被放弃了。 后来被 qcow 格式所取代。
2、 qcow 格式:刚刚出现的时候有比较好的特性,但其性能和 raw 格式对比还是有很大的差距,目前已经被新版本的 qcow2 取代。
3、 qcow2 格式:现在比较主流的一种虚拟化镜像格式,经过一代的优化,目前 qcow2 的性能上接近 raw 裸格式的性能

qcow2 格式支持 snapshot,可以在镜像上做 N 多个快照,具有以下优点:
更小的存储空间
支持创建 image 镜像
支持多个 snapshot,对历叱 snapshot 迚行管理
支持 zlib 的磁盘压缩
支持 AES 的加密
2.2.3 vmdk 格式:
VMware 的格式,整体性能最好,因为原本 VMware 就是做虚拟化起家。从性能和功能上来说,vmdk应该算最出色的,由于 vmdk 结合了 VMware 的很多能力,目前来看,KVM 和 XEN 使用这种格式的情
况不是太多。但就 VMware 的企业级虚拟化 Esxi 来看,它的稳定性和各方面的能力都很好
2.3 KVM 虚拟机快照功能使用方法
快照的作用:1、热备 2、灾难恢复 3、回滚到历史的某个状态
快照使用空间: 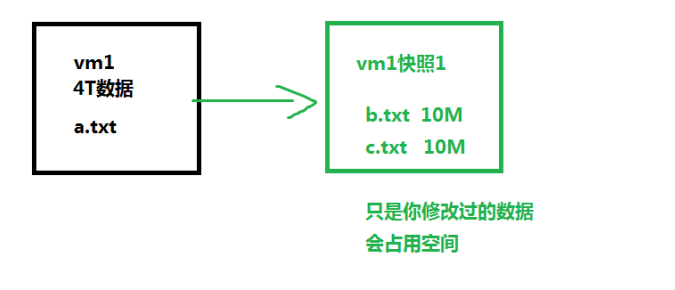
kvm 快照,分两种:
方法 1:使用 lvm 快照,如果分区是 lvm,可以利用 lvm 进行 kvm 的快照备份
方法 2:使用 qcow2 格式的镜像创建快照。
2.3.2 创建 KVM 快照
在 centos6 下,kvm 虚拟机默认使用 raw 格式的镜像格式,性能最好,速度最快,它的缺点就是不支持一些新的功能,如支持镜像,zlib 磁盘压缩,AES 加密等。
要使用快照功能,磁盘格式必须为 qcow2。
查看磁盘格式 :
[root@linzi qemu]# qemu-img info /var/lib/libvirt/images/centos7.0.qcow2
image: /var/lib/libvirt/images/centos7.0.qcow2
file format: qcow2
virtual size: 10G (10737418240 bytes)
disk size: 10G
cluster_size: 65536
Format specific information:
    compat: 1.1
    lazy refcounts: true

[root@linzi qemu]# qemu-img info /data2/linzi2.qcow2
image: /data2/linzi2.qcow2
file format: qcow2
virtual size: 10G (10737418240 bytes)
disk size: 1.4G
cluster_size: 65536
Format specific information:
    compat: 1.1
    lazy refcounts: true
注:qcow2 格式可以直接创建快照
2.3.3 对虚拟机进行快照管理
对 linzi2 虚拟机创建快照
语法: virsh snapshot-create 虚拟机的名字
例:创建一个快照
[root@linzi images]# virsh snapshot-create linzi2
已生成域快照 1559807904
注:创建快照时不需要关闭虚拟机,关机创建快照比较快,开机创建快照需要把内存中的内容写到磁盘上,记录虚拟机这一时刻的状态。
创建快照时启个名字:
语法:virsh snapshot-create-as KVM 虚拟机名 快照名
例:生一个快照,名字是: httpd
[root@linzi images]# virsh snapshot-create-as linzi2 httpd
已生成域快照 httpd

[root@linzi images]# virsh snapshot-list linzi2   #查看虚拟机镜像快照列表
 名称               生成时间              状态
------------------------------------------------------------
 1559807904           2019-06-06 15:58:24 +0800 running
 httpd                2019-06-06 16:16:01 +0800 running
查看最近一次使用的快照版本:
[root@linzi images]# virsh snapshot-current linzi2
快照配置文件在/var/lib/libvirt/qemu/snapshot/虚拟机名称下
[root@linzi images]# ll /var/lib/libvirt/qemu/snapshot/linzi2/*
-rw------- 1 root root 5447 6月   6 16:16 /var/lib/libvirt/qemu/snapshot/linzi2/1559807904.xml
-rw------- 1 root root 5493 6月   6 16:16 /var/lib/libvirt/qemu/snapshot/linzi2/httpd.xml
查看快照占用大小:
[root@linzi images]# qemu-img info /data2/linzi2.qcow2
image: /data2/linzi2.qcow2
file format: qcow2
virtual size: 10G (10737418240 bytes)
disk size: 2.2G
cluster_size: 65536
Snapshot list:
ID        TAG                 VM SIZE                DATE       VM CLOCK
1         1559807904             433M 2019-06-06 15:58:24   00:48:07.473
2         httpd                  433M 2019-06-06 16:16:01   01:05:42.410
Format specific information:
    compat: 1.1
    lazy refcounts: true
2.3.4 恢复虚拟机快照
恢复虚拟机快照必须关闭虚拟机。 注:阿里云也需要关闭后再恢复快照