Thymeleaf是个XML/XHTML/HTML5模板引擎,可以用于Web与非Web应用。
Thymeleaf的主要目标在于提供一种可被浏览器正确显示的、格式良好的模板创建方式,因此也可以用作静态建模。你可以使用它创建经过验证的XML与HTML模板。相对于编写逻辑或代码,开发者只需将标签属性添加到模板中即可。接下来,这些标签属性就会在DOM(文档对象模型)上执行预先制定好的逻辑。Thymeleaf的可扩展性也非常棒。你可以使用它定义自己的模板属性集合,这样就可以计算自定义表达式并使用自定义逻辑。这意味着Thymeleaf还可以作为模板引擎框架。
Thymeleaf的模板还可以用作工作原型,Thymeleaf会在运行期替换掉静态值。例如下面的html文件,当作为静态文件时,product name显示为Red Chair,当运行在容器中并提供product这个对象时,product name的值会自动替换为product.description对应的值。下面就简单的讲一讲springboot整合thymeleaf模板。
引入依赖
在maven(pom.xml)中直接引入:
<dependency>
     <groupId>org.springframework.boot</groupId>
     <artifactId>spring-boot-starter-thymeleaf</artifactId>
</dependency>
也可以在创建项目时候勾选thymeleaf模板,这样会自动生成。
配置视图解析器
默认
spring-boot很多配置都有默认配置,比如默认页面映射路径为
classpath:/templates/*.html
同样静态文件路径为
classpath:/static/
自定义
在application.properties(或者application.yml)中可以配置thymeleaf模板解析器属性.就像使用springMVC的JSP解析器配置一样
	#thymeleaf start
    spring.thymeleaf.mode=HTML5
    spring.thymeleaf.encoding=UTF-8
    spring.thymeleaf.content-type=text/html
    #开发时关闭缓存,不然没法看到实时页面
    spring.thymeleaf.cache=false
    #thymeleaf end
具体可以配置的参数可以查看 org.springframework.boot.autoconfigure.thymeleaf.ThymeleafProperties 这个类,上面的配置实际上就是注入到该类中的属性值.
编写demo来说明使用方法
控制器
@Controller
  public class HelloController(){
       @RequestMapping(value = "/")
       public String index(){
          return "index";
       }
     }
这样会返回一个新的视图页面index.html,当然也可以使用下面的方法
@RequestConteoller
   public class HelloController(){
      @RequestMapping(value = "/")
      public ModelAndView index(){
         return new ModelAndView("index");
      }
    }
这样能直接返回整个index页面。
view
1 <!DOCTYPE html>
 2 <html  xmlns:th="http://www.thymeleaf.org" >
 3 <head>
 4 <meta charset="UTF-8"/>
 5 <title>Title</title>
 6 </head>
 7 <body>
 8        <b th:text="hello,world!"><b/>
 9 </body>
10 </html>
注意,在html标签里一定要引入 xmlns:th=“http://www.thymeleaf.org” ,这样thymeleaf模板才会启用。至于thymeleaf的具体使用方法,以后在讲。
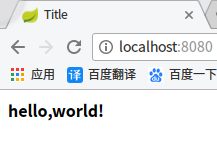
测试
访问 localhost:8080/ 这个地址,会直接跳转到 index.html 页面,并显示如下
基础语法
引入标签
首先要在html标签里引入xmlns:th="http://www.thymeleaf.org"才能使用th:*这样的语法。
获取变量值
通过在标签内部,使用 ${} 来取值,对于javaBean的话,使用 变量名.属性名 来获取,跟EL表达式一样
注意:只有写在标签内部才会生效,例如: th:text=“hello” 的意思是使用hello来代替p之前的内容,p里原来的值是为了给前端开发展示用的,这样做容易实现前后端分离。
引入URL
thymeleaf对于引入URL是采用@{…}来获取的
例如: <a th:href="@{http://www.baidu.com}">绝对路径</a> 是访问绝对路径下的URL, <a th:href="@{/}">相对路径</a> 是访问相对路径下的URL。
<a th:href="@{css/bootstrap.min.css}"> 是引入默认的static下的css文件夹下的bootstrap文件,类似的标签有: th:href 和 th:src
字符串替换
例如使用: <span th:text="'Welcome to our application, ' + ${user.name} + '!'"></span> 或者
<span th:text="|Welcome to our application, ${user.name}!|"></span> 都可以实现替换
注意:|…|中只能包含变量表达式${…},不能包含其他常量、条件表达式等。
运算符
在表达式中可以使用各类算术运算符,例如 +, -, *, /, % .例如: th:with="isEven=(${prodStat.count} % 2 == 0)"
逻辑运算符 >, <, <=,>=,==,!= 都可以使用,唯一需要注意的是使用 <,> 时需要用它的HTML转义符:
th:if="${prodStat.count} > 1"
th:text="'Execution mode is ' + ( (${execMode} == 'dev')? 'Development' : 'Production')"
条件
if/unless th:if是该标签在满足条件的时候才会显示,unless是不成立时候才显示,例如
<a th:href="@{/login}" th:unless=${session.user != null}>Login</a>
Switch thymeleaf支付switch结构,默认属性(default)用*表示,例如:
1  <div th:switch="${user.role}">
2     <p th:case="'admin'">User is an administrator</p>
3     <p th:case="#{roles.manager}">User is a manager</p>
4     <p th:case="*">User is some other thing</p>
5  </div>
循环
th:each是对于结果可以进行遍历的数据集,例如:
1 <tr th:each="prod : ${prods}">
2      <td th:text="${prod.name}">Onions</td>
3      <td th:text="${prod.price}">2.41</td>
4      <td th:text="${prod.inStock}? #{true} : #{false}">yes</td>
5 </tr>
Utilities
为了模板更加易用,Thymeleaf还提供了一系列Utility对象(内置于Context中),可以通过#直接访问:
#dates
#calendars
#numbers
#strings
arrays
lists
sets
maps
…
例如:
${#dates.format(date, 'dd/MMM/yyyy HH:mm')}
${#dates.arrayFormat(datesArray, 'dd/MMM/yyyy HH:mm')}
${#dates.listFormat(datesList, 'dd/MMM/yyyy HH:mm')}
${#dates.setFormat(datesSet, 'dd/MMM/yyyy HH:mm')}
${#dates.createNow()}
${#strings.isEmpty(name)}
${#strings.arrayIsEmpty(nameArr)}
${#strings.listIsEmpty(nameList)}
${#strings.setIsEmpty(nameSet)}
${#strings.startsWith(name,'Don')}
${#strings.endsWith(name,endingFragment)}
${#strings.length(str)}
${#strings.equals(str)}
${#strings.equalsIgnoreCase(str)}
${#strings.concat(str)}
${#strings.concatReplaceNulls(str)}
${#strings.randomAlphanumeric(count)}
补充
在spring-boot1.4之后,支持thymeleaf3,可以更改版本号来进行修改支持.
3相比2极大的提高了效率,并且不需要标签闭合,类似的link,img等都有了很好的支持,按照如下配置即可
<properties>
     <project.build.sourceEncoding>UTF-8</project.build.sourceEncoding>
     <!-- set thymeleaf version -->
     <thymeleaf.version>3.0.0.RELEASE</thymeleaf.version>
     <thymeleaf-layout-dialect.version>2.0.0</thymeleaf-layout-dialect.version>
     <!--set java version-->
     <java.version>1.8</java.version>
  </properties>
一些常用标签的使用说明
th:text 替换原来text中的东西
th:value 替换原来value的值
th:object 替换标签的对象,th:object=“对象”
th:field 填充,如图上面又对象,可以直接用*{属性}取值
th:checked 当check的值为true时候为选中,false时为未选中
th:remove 删除
th:href 用@{}替换连接地址
th:if 如果值为true的时候才显示标签,否则不显示
th:unless 不成立的时候才显示
th:each 用户循环遍历结果集
th:style 替换样式
th:action 替换action地址,用@{}取地址
th:alt 用@{}取地址
th:class 替换class的样式
th:fragment 定义一个framemet模板,在后面引用他
实例一:页面的引用与替换
日常开发中,我们经常会讲导航,页尾,菜单单独提取成模板供其他页面使用,在thymeleaf,我们可以使用th:fragment属性来定义一个模板,例如:
1 <!DOCTYPE html>
2 <html xmlns:th="http://www.thymeleaf.org"
3 xmlns:layout="http://www.ultraq.net.nz/web/thymeleaf/layout">
4 <head>
5 <meta charset="utf-8"/>
6 </head>
7 <body>
8 <div class="container-fluid all">
9 <div class="sidebar">
10 <ul class="nav">
11 <li><a th:href="@{/index}"> 首页</a></li>
12 <li><a th:href="@{/add}"> 增加用户</a></li>
13 <li><a th:href="@{#}"> 员工信息</a></li>
14 <li><a th:href="@{#}"> 工资信息</a></li>
15 <li><a th:href="@{#}"> 任务信息</a></li>
16 <li><a th:href="@{#}"> 人员调动</a></li>
17 <li><a th:href="@{#}"> 档案管理</a></li>
18 <li><a th:href="@{#}"> 历史记录</a></li>
19 </ul>
20 </div>
21 <div class="maincontent row">
22
23 <div th:fragment="content">
24 </div>
25
26 </div>
27 </div>
28 <a href="#top" id="goTop"><i class="fa fa-angle-up fa-3x"></i></a>
29 </body>
30 </html>
1.上面定义了一个叫做content的片段,我们可以使用 th:include 或者 th:replace 属性来使用他,例如我们可以新建一个简单的页尾模板,
新建一个html文件,路径如下:/WEB-INF/templates/footer.html ,然后我们可以在footer.html文件中引入上面的content片段。
1 <!DOCTYPE html>
 2 <html xmlns:th="http://www.thymeleaf.org">
 3 <head>
 4     <meta charset="UTF-8"/>
 5     <title>Title</title>
 6 </head>
 7 <body>
 8     <div th:include="footer :: content"></div>
 9 </body>
10 </html>
其中 th:include 中的参数格式为 templatename::[domselector] ,其中templatename是模板名(如footer),domselector是可选的dom选择器。如果只写templatename,不写domselector,则会加载整个模板。我们也可以使用三目表达式来写,例如 :
<div th:include="footer :: (${user.isAdmin}? #{footer.admin} : #{footer.normaluser})"></div>
模板片段可以被包含在任意th:*属性中,并且可以使用目标页面中的上下文变量。
2.不通过th:fragment引用模板,我们可以通过强大的dom选择器,在不添加任何fragment属性的情况定义模板,例如:
1 <div id="copy-section">
2 © xxxxxx
3 </div>
通过dom选择器来加载模板,如id为copy-section, <div th:include="footer :: #copy-section">
3.使用layout布局加载模板
在html标签中引用 xmlns:layout="http://www.ultraq.net.nz/web/thymeleaf/layout" ,使用layout来进行布局,然后在需要被引用的head页面,要修改的地方添加
<div layout:fragment="content"></div> 片段,例如:
1 <!DOCTYPE html>
2 <html xmlns:th="http://www.thymeleaf.org"
3 xmlns:layout="http://www.ultraq.net.nz/web/thymeleaf/layout">
4 <head>
5 <meta charset="utf-8"/>
6 </head>
7 <body>
8 <div class="container-fluid all">
9 <div class="sidebar">
10 <ul class="nav">
11 <li><a th:href="@{/index}"> 首页</a></li>
12 <li><a th:href="@{/add}"> 增加用户</a></li>
13 <li><a th:href="@{#}"> 员工信息</a></li>
14 <li><a th:href="@{#}"> 工资信息</a></li>
15 <li><a th:href="@{#}"> 任务信息</a></li>
16 <li><a th:href="@{#}"> 人员调动</a></li>
17 <li><a th:href="@{#}"> 档案管理</a></li>
18 <li><a th:href="@{#}"> 历史记录</a></li>
19 </ul>
20 </div>
21 <div class="maincontent row">
22
23 <div th:fragment="content">
24 </div>
25
26 </div>
27 </div>
28 <a href="#top" id="goTop"><i class="fa fa-angle-up fa-3x"></i></a>
29 </body>
30 </html>
然后新建一个html文件,在html中引入 layout:decorator="head" ,然后直接在body里添加 <div layout:fragment="content"></div> ,在新的页面中的div里添加需要的内容,加载出来就是整合了head.html的新页面。例如:
1 <!DOCTYPE html>
 2 <html xmlns:th="http://www.thymeleaf.org"
 3       xmlns:layout="http://www.ultraq.net.nz/web/thymeleaf/layout"
 4       layout:decorator="head">
 5 <head>
 6     <meta charset="UTF-8"/>
 7     <title>添加用户</title>
 8 </head>
 9 <body>
10
11 <div layout:fragment="content" class="col-sm-12">
12 </div>
13
14 </body>
15 </html>
在div里添加内容,加载出来的页面会包括head的内容,而新页面div的内容,会显示在head页面中的 <div th:fragment="content"></div> 中,这样使用布局更方便。
4 th:include与th:replace的区别
th:include 是加载模板的内容,而 th:replace 则会替换当前标签为模板中的标签,例如:
1 <body>
2   <div th:include="footer :: copy"></div>
3   <div th:replace="footer :: copy"></div>
4 </body>
这样显示的结果为:
1 <body>
2 <div> © 2016 </div>
3 <footer>© 2016 </footer>
4 </body>
第一个是加载了模板标签内的内容,第二个是替换了整个标签。