前期准备
首先是github官网:
https://github.com/
下载github工具:
https://git-for-windows.github.io/
进入github创建一个新的项目:

生成项目后拷贝项目网址,例如我的一个项目网址格式如下:
https://github.com/wahhae/STM32_Lib.git
秘钥认证
在下载好的Git Bash界面中注册姓名和邮箱:
git config --global user.name "user.name"

git config --global user.email "[email protected]"
例如我的注册格式如下:
git config --global user.name "lpfdewo"

git config --global user.email "[email protected]"
创建新的ssh keys:创建成功后会在文件夹中生成rd_rsa和id_rsa.pub两个文件;
ssh-keygen -t rsa -C "[email protected]"

指定目录: C:\deskbook\(说明:若在此处不输入路径,而直接按回车,则ssh keys生成后存放的路径为C:\User\.ssh)

输入密码: 123456

确认密码: 123456
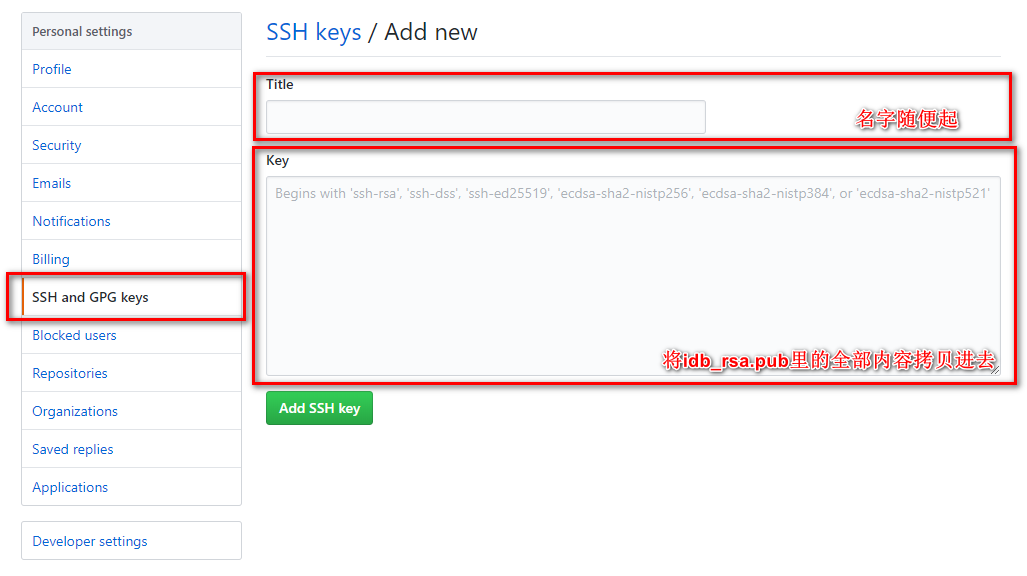
登陆GitHub账号后进入Settings,找到SSH and GPG keys
创建项目文件夹
在git bash中使用linux命令创建并进入到一个文件夹中,作为项目的文件夹:
cd /E
mkdir Git_pro
cd Git_pro
接下来初始化文件夹为git项目文件夹:
git init //把这个目录变成Git可以管理的仓库

git add README.md //文件添加到仓库,可选操作

git add . //不但可以跟单一文件,还可以跟通配符,更可以跟目录。一个点就把当前目录下所有未追踪的文件全部add了

git commit -m "first commit" //把文件提交到仓库,后面的“first commit”是你这次上传文件的标志,即你给这次上传文件定义的一个版本号

git remote add origin https://github.com/wahhae/STM32_Lib.git //将你在github新建的仓库关联到本地仓库中

git push -u origin master //把本地库的所有内容推送到远程库上
如果你勾选了Initialize this repository with a README(就是创建仓库的时候自动给你创建一个README文件),那么在上传文件的时候会报一个错误;
这是由于你新创建的那个仓库里面的README文件不在本地仓库目录中,这时我们可以通过以下命令先将内容合并以下,再执行推送命令:
git pull --rebase origin master
再后续的工程上传时,仅需要执行以下步骤:
git add .

git commit -m "上传注释"

git push -u origin master