一,vue-resource请求数据
介绍:vue-resource请求数据方式是官方提供的一个插件
步骤:
1,npm安装
![](https://img2018.cnblogs.com/blog/1408995/201906/1408995-20190622185649461-50286125.png)
![](http://upload-images.jianshu.io/upload_images/11969846-54dabade07b52b8e.png?imageMogr2/auto-orient/strip%7CimageView2/2/w/855/format/webp)
npm install vue-resource --save
或者使用cnpm淘宝镜像安装,会快很多。cnpm install vue-resource --save
加--save是为了在package.json中引用,表示在生产环境中使用。因为我们在日常开发中,如果我们要打包代码给其他人或者上传到github,又或者要发布代码时,package.json就是安装所需要的包。如果只在开发环境中使用,则只需要--save-dev,有一些只在开发环境中用,有一些要在生产环境中用。
2,在main.js入口文件中引入vue-resource
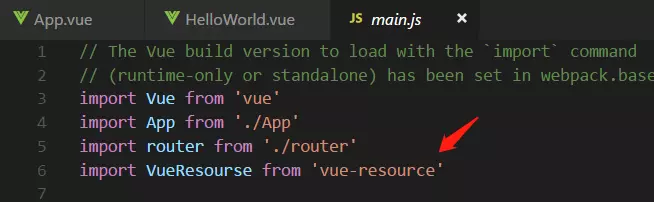
![](https://img2018.cnblogs.com/blog/1408995/201906/1408995-20190622185702450-1687710861.png)
![](http://upload-images.jianshu.io/upload_images/11969846-cccef8cbfa2be588.png?imageMogr2/auto-orient/strip%7CimageView2/2/w/654/format/webp)
引入之后要使用这个插件
![](https://img2018.cnblogs.com/blog/1408995/201906/1408995-20190622185707543-844108742.png)
![](http://upload-images.jianshu.io/upload_images/11969846-94b303eb398a190f.png?imageMogr2/auto-orient/strip%7CimageView2/2/w/388/format/webp)
如果不使用此插件的话,会报如下错误:
![](https://img2018.cnblogs.com/blog/1408995/201906/1408995-20190622185716647-678264083.png)
![](http://upload-images.jianshu.io/upload_images/11969846-8f19ce69ff2a0966.png?imageMogr2/auto-orient/strip%7CimageView2/2/w/471/format/webp)
3,在项目中用this.$http.get()等等使用,详情看 vue-resource github
实例:
![](https://img2018.cnblogs.com/blog/1408995/201906/1408995-20190622185724641-21664528.png)
![](http://upload-images.jianshu.io/upload_images/11969846-01d3e5c2b8702b47.png?imageMogr2/auto-orient/strip%7CimageView2/2/w/422/format/webp)
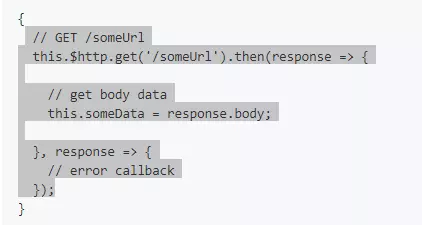
注意:this.$http.get()等等的各种http请求都是继承promise的。promise是异步的请求;其次,.then箭头函数里的this代表的是上下文。根据箭头函数this的定义,只在函数定义时就已经赋值可知,this,指代的是定义函数的对象,在vue中对象就是methods当前页面。所以this指导的是data里面的数据。如果想要获取包裹函数外函数的数据,即闭包的概念。实现方法就是在外层函数加一个var that = this;将外层的this先储存到that中。如下实例,同时还解决了跨域的问题:
![](https://img2018.cnblogs.com/blog/1408995/201906/1408995-20190622185817339-960912399.png)
二,axios请求数据
介绍:这是一个第三方的插件 github地址:https://github.com/axios/axios
第一步:npm安装 npm install axios -save
![](http://upload-images.jianshu.io/upload_images/11969846-c223220b7a06e44f.png?imageMogr2/auto-orient/strip%7CimageView2/2/w/366/format/webp)
![](https://img2018.cnblogs.com/blog/1408995/201906/1408995-20190622185830311-1611561668.png)
第二步:直接调用。和vue-resource的区别是:aixos是每在一个页面用一次就要在该页面调用一次。vue-resource是绑定了全局的了。具体使用方法可以看github:
![](https://img2018.cnblogs.com/blog/1408995/201906/1408995-20190622185848638-1115406700.png)
![](http://upload-images.jianshu.io/upload_images/11969846-802ceb4c4a17c0fa.png?imageMogr2/auto-orient/strip%7CimageView2/2/w/595/format/webp)
第三步:关于axios的跨域请求
在config->index.js->proxyTable配置如下:target填写自己想要的地址
![](https://img2018.cnblogs.com/blog/1408995/201906/1408995-20190622185907350-1725579540.png)
![](http://upload-images.jianshu.io/upload_images/11969846-07a14499a0c6041e.png?imageMogr2/auto-orient/strip%7CimageView2/2/w/957/format/webp)
如下配置,url为地址后面所带的参数,配置好后,现在npm run dev 运行就行。
![](https://img2018.cnblogs.com/blog/1408995/201906/1408995-20190622185908136-1234379034.png)
![](http://upload-images.jianshu.io/upload_images/11969846-a8fe8b6eb73a9b81.png?imageMogr2/auto-orient/strip%7CimageView2/2/w/513/format/webp)
第四步:关于多个并发请求:
![](https://img2018.cnblogs.com/blog/1408995/201906/1408995-20190622185917334-795976010.png)
![](http://upload-images.jianshu.io/upload_images/11969846-9bbae05bb527f6b4.png?imageMogr2/auto-orient/strip%7CimageView2/2/w/580/format/webp)
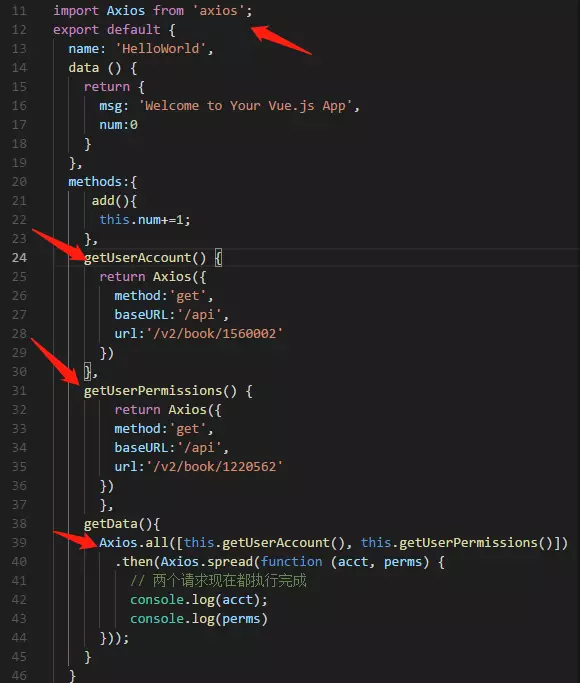
上面这个是同一地址的跨域,如果要拿不同地址的跨域,只需要更改config->index.js->proxyTable的配置,增加地址块就行。
三,关于fetch-jsonp