vue笔记(1)初识部分: https://blog.csdn.net/qq_43537987/article/details/93402865
vue笔记(2)vue中ajax:https://blog.csdn.net/qq_43537987/article/details/93403293
vue笔记(3)动画:https://blog.csdn.net/qq_43537987/article/details/93403565
vue笔记(4)组件化:https://blog.csdn.net/qq_43537987/article/details/93403973
vue笔记(5)ref的使用https://blog.csdn.net/qq_43537987/article/details/93404091
vue笔记(6)路由:https://blog.csdn.net/qq_43537987/article/details/93404522
vue笔记(7)watch,methods,computed使用nrm的使用:https://blog.csdn.net/qq_43537987/article/details/93404903
vue笔记(8)webapck:https://blog.csdn.net/qq_43537987/article/details/93405173
Vue.js
注意:
有时候使用npm i node-sass -D装不上,这时候,就必须使用 cnpm i node-sass -D
json数据中不能有注释
在普通页面中使用render函数渲染组件
- 这种方法会把app直接替代掉
- 例如这个案例中的123是显示不出来的
- 如果想要不替换app的内容,使用正常的组件使用方法即可
<div id="app"><p>123</p></div>
<script>
  var login = {
      template:'<h1>登录</h1>'
  };
  var vm  = new Vue({
      el:'#app',
      data:{},
      methods:{},
      render:function (createElements) {//createElements是一个方法,调用它,能够把指定的组件模板,渲染为html结构 ,名字随便起,create。。。。都行
          return createElements(login)
      }
  })
</script>
在使用webpack构建的Vue项目中使用模板对象?
-
方法1:修改mian属性的值为vue.js(之前为runtime-common.js)
-
方法2:mian.js中修改为
import Vue from '../node_modules/vue/dist/vue.js' -
方法3:
-
main.js
import Vue from 'vue' -
webpack.config.js
resolve: {
    alias: {
      'vue$': 'vue/dist/vue.js'
    }
  }
-
- 在
webpack.config.js中添加resolve属性:
resolve: {
    alias: {
      'vue$': 'vue/dist/vue.js'
    }
  }
在webpack中配置.vue组件页面的解析(怎么配都不好使系列???!!!!!!)
版本号再次坑逼:
不管用什么样的 版本号,一定要匹配!!
 "vue-loader": "^14.2.4",
 "vue-template-compiler": "^2.6.10",
 "vue": "^2.6.10",
- 运行
npm i vue -S将vue安装为运行依赖; - 运行
npm i vue-loader vue-template-compiler -D将解析转换vue的包安装为开发依赖; - 运行
npm i style-loader css-loader -D将解析转换CSS的包安装为开发依赖,因为.vue文件中会写CSS样式; - 在
webpack.config.js中,添加如下module规则:
module: {

    rules: [

      { test: /\.css$/, use: ['style-loader', 'css-loader'] },

      { test: /\.vue$/, use: 'vue-loader' }

    ]

  }
- 创建
App.vue组件页面:
    <template>

      <!-- 注意:在 .vue 的组件中,template 中必须有且只有唯一的根元素进行包裹,一般都用 div 当作唯一的根元素 -->

      <div>

        <h1>这是APP组件 - {{msg}}</h1>

        <h3>我是h3</h3>

      </div>

    </template>


    <script>

    // 注意:在 .vue 的组件中,通过 script 标签来定义组件的行为,需要使用 ES6 中提供的 export default 方式,导出一个vue实例对象 ,
    //导入:import
    //组件自己的数据和方法

    export default {

      data() {

        return {

          msg: 'OK'

        }

      }

    }

    </script>

    <style scoped>

    h1 {

      color: red;

    }

    </style>
- 创建
main.js入口文件:
    // 导入 Vue 组件

    import Vue from 'vue'


    // 导入 App组件

    import App from './components/App.vue'


    // 创建一个 Vue 实例,使用 render 函数,渲染指定的组件

    var vm = new Vue({

      el: '#app',

      render: c => c(App)

    });
ES6中语法使用总结
- 使用
export default和export导出模块中的成员; 对应ES5中的module.exports和export - 使用
import ** from **和import '路径'还有import {a, b} from '模块标识'导入其他模块 - 使用箭头函数:
(a, b)=> { return a-b; }
export default和export的使用方法
export default
-
使用export-default 向外暴露成员,可以使用任意变量来接受
-
在一个模块中,可以同时使用export-default 和 export
-
在一个模块中,export-default只允许向外暴露一次
export default {
    name:'zs',
    age:20
}
export
- 使用export向外暴露成员,只能使用{}的形式来接收,这种形式叫做【按需导出】
- export可以向外暴露多个成员,同时,如果某些成员,我们在import时不需要可以不在{}中定义
- 导出和接收的名称必须保持一致
test.js
export var title = 'hello'
export var content = '哈哈哈'
main.js
import {title,content} from './test.js'
console.log(title+'-----'+content)
- 如果非要贱一下改个名可以这么做
import {title as title123,content} from './test.js'
console.log(title123+'-----'+content)
在vue组件页面中,集成vue-router路由模块
NPM
npm install vue-router
与模块系统一起使用时,必须通过Vue.use()以下方式显式安装路由器:
import Vue from 'vue'
import VueRouter from 'vue-router'

Vue.use(VueRouter)
- 导入路由模块:
import VueRouter from 'vue-router'
- 安装路由模块:
Vue.use(VueRouter);
- 导入需要展示的组件:
import login from './components/account/login.vue'

import register from './components/account/register.vue'
- 创建路由对象:
var router = new VueRouter({

  routes: [

    { path: '/', redirect: '/login' },

    { path: '/login', component: login },

    { path: '/register', component: register }

  ]

});
- 将路由对象,挂载到 Vue 实例上:
var vm = new Vue({

  el: '#app',

  // render: c => { return c(App) }

  render(c) {

    return c(App);

  },

  router // 将路由对象,挂载到 Vue 实例上

});
- 改造App.vue组件,在 template 中,添加
router-link和router-view:
    <router-link to="/login">登录</router-link>

    <router-link to="/register">注册</router-link>

    <router-view></router-view>
组件中的css作用域问题
- 如果想要给单独的组件添加样式要加上scoped属性,否则每个组件都讲添加样式
- scoped是通过css属性选择器实现的
- 注意:要先导包和配置css,scss,less等
//假设这是login组件的代码部分
<style scoped>
h1 {
  color: red;
}
</style>
- 如果想写scss或者less文件要,添加lang属性
- 普通的style只支持普通的样式,如果要启用scss或less,添加lang属性
<style lang="scss">
    body {
        div{

        }
    }
</style>
使用 饿了么的 MintUI 组件
- 导入所有MintUI组件:
import MintUI from 'mint-ui'
- 导入样式表:
import 'mint-ui/lib/style.css'
- 在 vue 中使用 MintUI:
Vue.use(MintUI)
- 使用的例子:
<mt-button type="primary" size="large">primary</mt-button>
使用Mint UI 的js组件
app.vue代码
<template>
  <div>
    <h1>这是 App 组件</h1>
    <router-link to="/login">登录</router-link>
    <router-link to="/register">注册</router-link>
    <router-link to="/container">我是你爸爸</router-link>
    <router-view></router-view>
    <mt-button type="danger" @click="show">danger</mt-button>
    <mt-button plain>plain</mt-button>
  </div>
</template>

<script>
    import { MessageBox } from 'mint-ui';
  export default {
      data(){
          return {};
      },
      methods:{
          show(){
              MessageBox({
                  title: '提示',
                  message: '确定执行此操作?',
                  showCancelButton: true
              });

          }
      }
  }
</script>
<style>

</style>
Mint UI按需引入
按需引入
借助 babel-plugin-component,我们可以只引入需要的组件,以达到减小项目体积的目的。
首先,安装 babel-plugin-component:
npm install babel-plugin-component -D
然后,将 .babelrc 修改为:
{
  "presets": [
    ["es2015", { "modules": false }]
  ],
  "plugins": [["component", [
    {
      "libraryName": "mint-ui",
      "style": true
    }
  ]]]
}
如果你只希望引入部分组件,比如 Button 和 Cell,那么需要在 main.js 中写入以下内容:
import Vue from 'vue'
import { Button, Cell } from 'mint-ui'
import App from './App.vue'

Vue.component(Button.name, Button)
Vue.component(Cell.name, Cell)
/* 或写为
 * Vue.use(Button)
 * Vue.use(Cell)
 */

new Vue({
  el: '#app',
  components: { App }
})
import { Button, MessageBox} from 'mint-ui'

Vue.component(Button.name, Button)
Vue.component(MessageBox.name, MessageBox)
使用 MUI 组件
- 注意:MUI不同于Mint-UI,MUI只是开发出来的一段好用的代码片段,里面提供了配置的样式,配套的HTML代码段,类似于bootstrap,而Mint-UI是真正的组件库,是使用VUE技术封装出来的 成套的组件,可以无缝的和VUE进行集成开发。因此,从体验上讲,Mint-UI更好,因为这是别人帮我们开发好的现成的Vue组件。
- 任何项目都可以使用bootstrap和MUI,但是Mint-UI只适用于vue项目
- MUI无法使用NPM下载需要去github上手动下载
- 导入 MUI 的样式表:
import '../lib/mui/css/mui.min.css'
- 在
webpack.config.js中添加新的loader规则:
{ test: /\.(png|jpg|gif|ttf)$/, use: 'url-loader' }
- 根据官方提供的文档和example,尝试使用相关的组件
直接使用即可:
   <button type="button" class="mui-btn mui-btn-success">绿色</button>
    <button type="button" class="mui-btn mui-btn-warning">黄色</button>
    <button type="button" class="mui-btn mui-btn-danger">红色</button>
    <button type="button" class="mui-btn mui-btn-royal">紫色</button>
将项目源码托管到oschina中
-
gitee.com -> 设置->SSH公钥
-
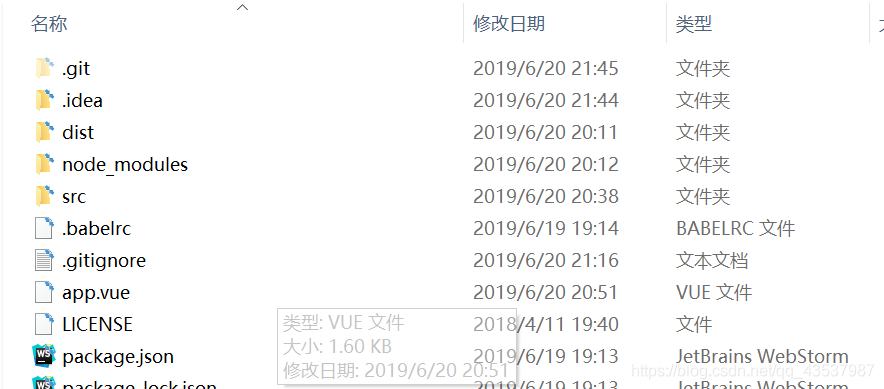
在项目根目录下创建.gitignore文件
node_modules .idea .vscode .git -
开源协议LICENSE(直接复制到项目根目录下)
- 点击头像 -> 修改资料 -> SSH公钥 如何生成SSH公钥
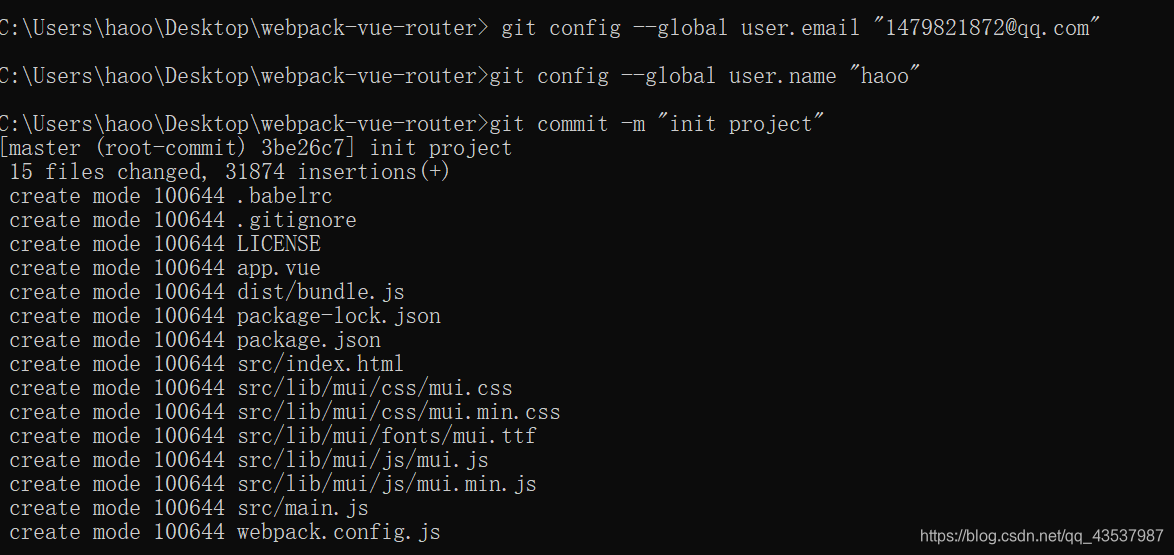
- 创建自己的空仓储,使用
git config --global user.name "用户名"和git config --global user.email ***@**.com来全局配置提交时用户的名称和邮箱 - 使用
git init在本地初始化项目
- https://blog.csdn.net/as091313/article/details/86279044
- git status
- 使用
git add .将所有文件托管到 git 中 - 使用
git commit -m "init project"将项目进行本地提交
- 使用
git remote add origin 仓储地址将本地项目和远程仓储连接,并使用origin最为远程仓储的别名 - 使用
git push -u origin master将本地代码push到仓储中
App.vue 组件的基本设置
mui拓展图标
- 头部的固定导航栏使用
Mint-UI的Header组件; - 底部的页签使用
mui的tabbar; - 购物车的图标(mui拓展图标),使用
icons-extra中的mui-icon-extra mui-icon-extra-cart,同时,应该把其依赖的字体图标文件mui-icons-extra.ttf,复制到fonts目录下! - 将底部的页签,改造成
router-link来实现单页面的切换; - Tab Bar 路由激活时候设置高亮的两种方式:
- 全局设置样式如下:
 	.router-link-active{

      	color:#007aff !important;

    }
- 或者在
new VueRouter的时候,通过linkActiveClass来指定高亮的类:
 	// 创建路由对象

    var router = new VueRouter({

      routes: [

        { path: '/', redirect: '/home' }

      ],

      linkActiveClass: 'mui-active'

    });