kickstart详解
- Kickstart文件格式官方说明:
Installation Guide for Cents 6
Installation Guide for Cents 7
kickstart文件
先来认识kickstart文件的基本内容有哪些
kickstart文件的格式
1. 命令段:指明各种安装前配置,如键盘类型等
2. 程序包段:指明要安装的程序包组或程序包,不安装的程序包等
3. 脚本段:
    + %pre: 安装前脚本
    运行环境:运行于安装介质上的微型Linux环境
    + %post: 安装后脚本
    运行环境:安装完成的系统
1. 命令段中的命令
- 必备命令
- auth
认证方式配置
- bootloader
#bootloader的安装位置及相关配置 - keyboard
#设定键盘类型 - lang
#语言类型 - part
#创建分区 - rootpw
#指明root的密码 - timezone
#时区
- 可选命令
- install 或 upgrade
#是新安装还是更新 - text
#文本安装界面 - network
#网卡配置 - firewall
#防火墙配置 - selinux
#配置selinux - poweroff
- reboot
- repo
- user
#安装完成后为系统创建新用户 - url
#指明安装源 - key –skip
#跳过安装号码,适用于rhel版本
- install 或 upgrade
2. 程序包段
%packages
package      #要安装的包
@development #要安装的包组
-byacc       #不安装的包
%end
3. 脚本段
安装前脚本
%pre
i am pre
%end
安装后脚本
%post
i am post
%end
kickstart文件生成详解
看完kickstart的文件格式应该是一头雾水,完全不知道在讲啥。那么下面我们就详细的说说kickstart文件都有什么。
说是kickstart配置文件。其实我是来讲system-config-kickstart这个程序的,作为初学者来说,如果我们直接来写kickstart配置文件我们是写不出来的。一我们可以依据某模板修改并生成新配置/root/anaconda-ks.cfg。二我们可以使用system-config-kickstart这个UI界面来生成。
注意:这个程序是图形界面,如果你是最小化安装(minimal),就算安装了也运行不了哦。
接下来我们一边使用system-config-kickstart一边来看看生成的kickstart配置文件,我们一页一页来。
1. Basic Configuration
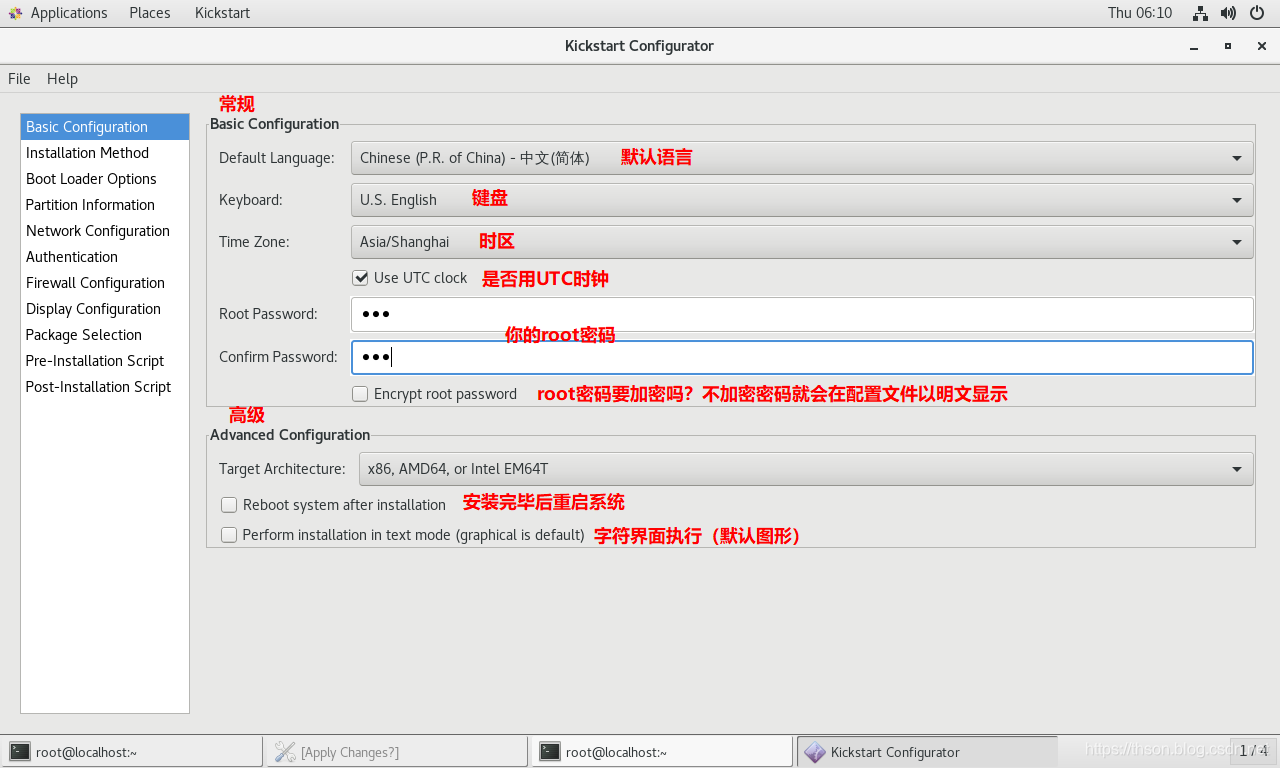
配置文件如下
┌────────────────────────────────────────────────────────┐
│#Basic Configuration
│========================================================
│#platform=x86, AMD64, or Intel EM64T
│#Default Language默认语言
│lang en_US
│# Keyboard 键盘
│keyboard 'us'
│# timezone 时区(勾选了"Use UTC clock" 会追加[--isUtc])
│timezone Asia/Shanghai
│# Root password
│rootpw --iscrypted $1$DBk7xfJp$Agxd303XUAfRKIf7gB8DG/
└──────────────────────────────────────────────────────────┘

┌────────────────────────────────────────────────────────┐
│#Advanced Configuration
│勾选就有,不勾没有
│========================================================
│# Reboot after installation
│reboot
│# Use text mode install
│text
└────────────────────────────────────────────────────────┘
2. Installation Method
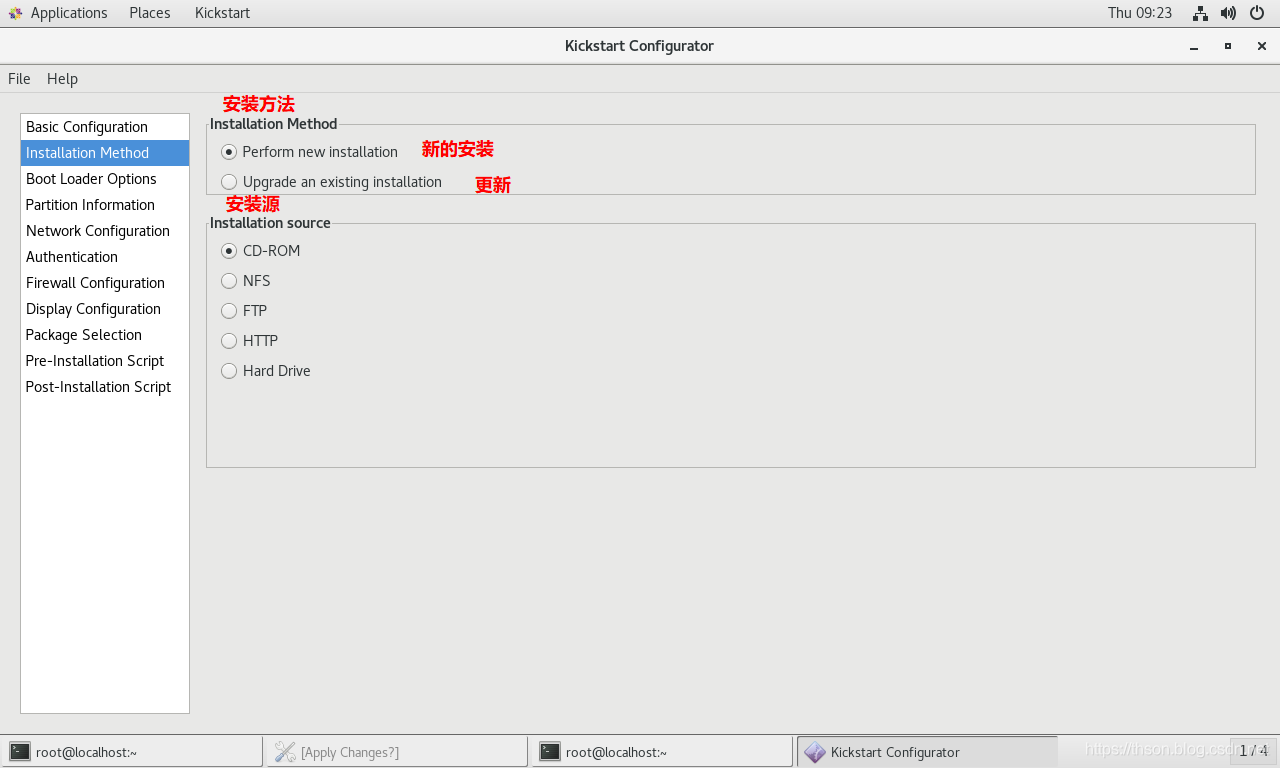
配置文件如下
┌────────────────────────────────────────────────────────┐
│#Installation Method
│========================================================
│# Install OS instead of upgrade
│install
│# Upgrade existing installation
│upgrade
└────────────────────────────────────────────────────────┘

┌────────────────────────────────────────────────────────┐
│#Installation source
│选了哪项就写哪项
│========================================================
│# Use CDROM installation media
│cdrom
│# Use NFS installation media
│nfs --server=服务器 --dir=目录
│# Use network installation
│url --url="ftp://用户名:密码@服务器/目录"
│# Use network installation
│url --url="http://服务器/目录"
│# Use hard drive installation media
│harddrive --dir=目录 --partition=分区
└────────────────────────────────────────────────────────┘
3. Boot Loader Options

配置文件如下
┌────────────────────────────────────────────────────────────────┐
│#Installation Method&GRUB options&Install Options
│=================================================================
│ ┌────────────────────────────────────┐
│ │ 选择了Do not install a boot loader  │
│ └────────────────────────────────────┘
│ # System bootloader configuration
│ bootloader --location=none
│
│ ┌────────────────────────────────────┐
│ │   选择了install new boot loader     │
│ └────────────────────────────────────┘
│ bootloader --append="ker" --location=mbr --password="123"
│#append是内核参数,location是bootloader安装位置,password是GRUB密码
└────────────────────────────────────────────────────────────────┘
4. Partition Information
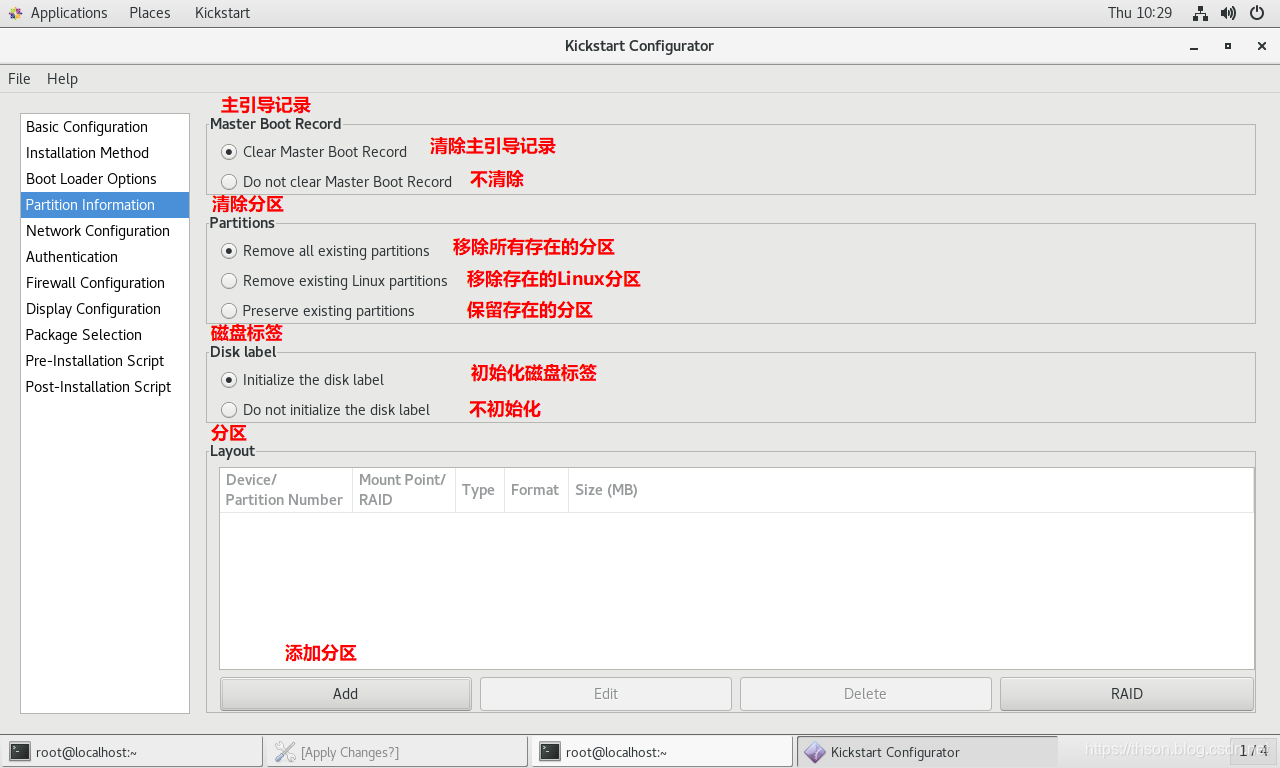
配置文件如下
┌─────────────────────────────────────────────────────┐
│# Master Boot Record
│#Master Boot Record选择了clear... 否则就没有
│======================================================
│# Clear the Master Boot Record
│zerombr
└─────────────────────────────────────────────────────┘

┌─────────────────────────────────────────────────────┐
│# Partitions&Disk Label
│======================================================
│# Partition clearing information
│clearpart --linux --initlabel
└─────────────────────────────────────────────────────┘

┌─────────────────────────────────────────────────────┐
│# Layout  分区
│part  挂载点   --fstype=文件系统  --size=大小(单位M)
│======================================================
│# Disk partitioning information
│part / --fstype="xfs" --size=10240
│part /boot --fstype="ext4" --size=1024
│part swap --fstype="swap" --size=2048
└─────────────────────────────────────────────────────┘
5. Network Configuration
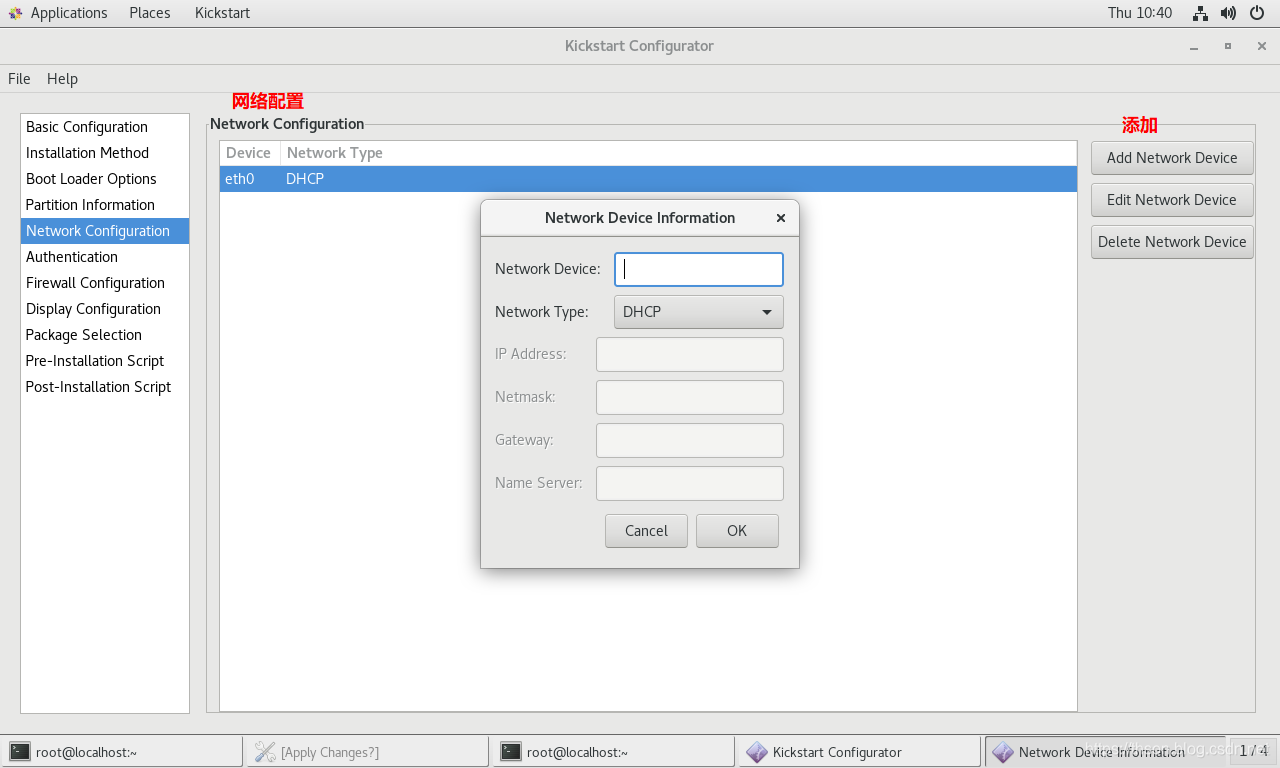
配置文件如下
┌─────────────────────────────────────────────────────┐
│# Network Configuration
│Centos7如果要写eth0,要加内核参数net.ifnames=0
│======================================================
│# Network information
│network  --bootproto=dhcp --device=eth0
└─────────────────────────────────────────────────────┘
6. Authentication
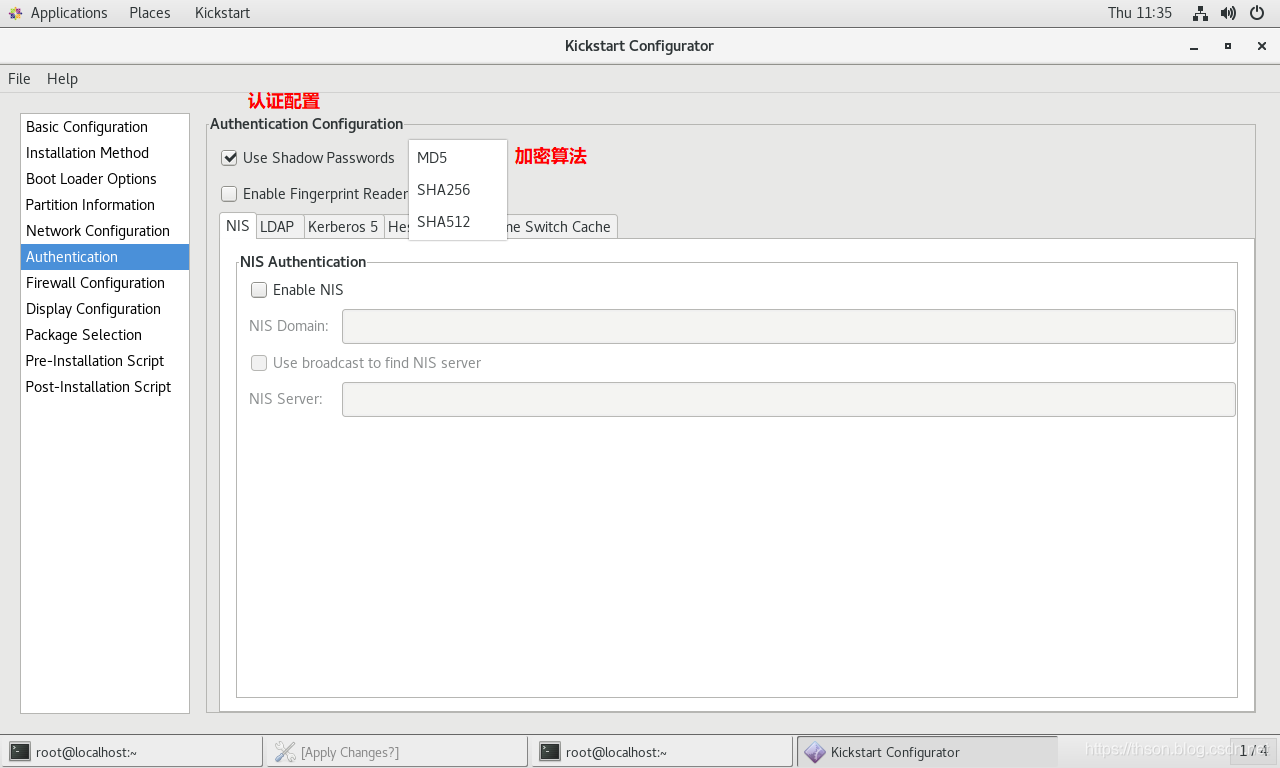
配置文件如下
┌───────────────────────────────────────────────────────────────┐
│# Authentication
│如果勾选Enable Fingerprint reader则追加参数 --enablefingerprint
│===============================================================
│# System authorization information
│auth  --useshadow  --passalgo=md5
└───────────────────────────────────────────────────────────────┘
7. Firewall Configuration
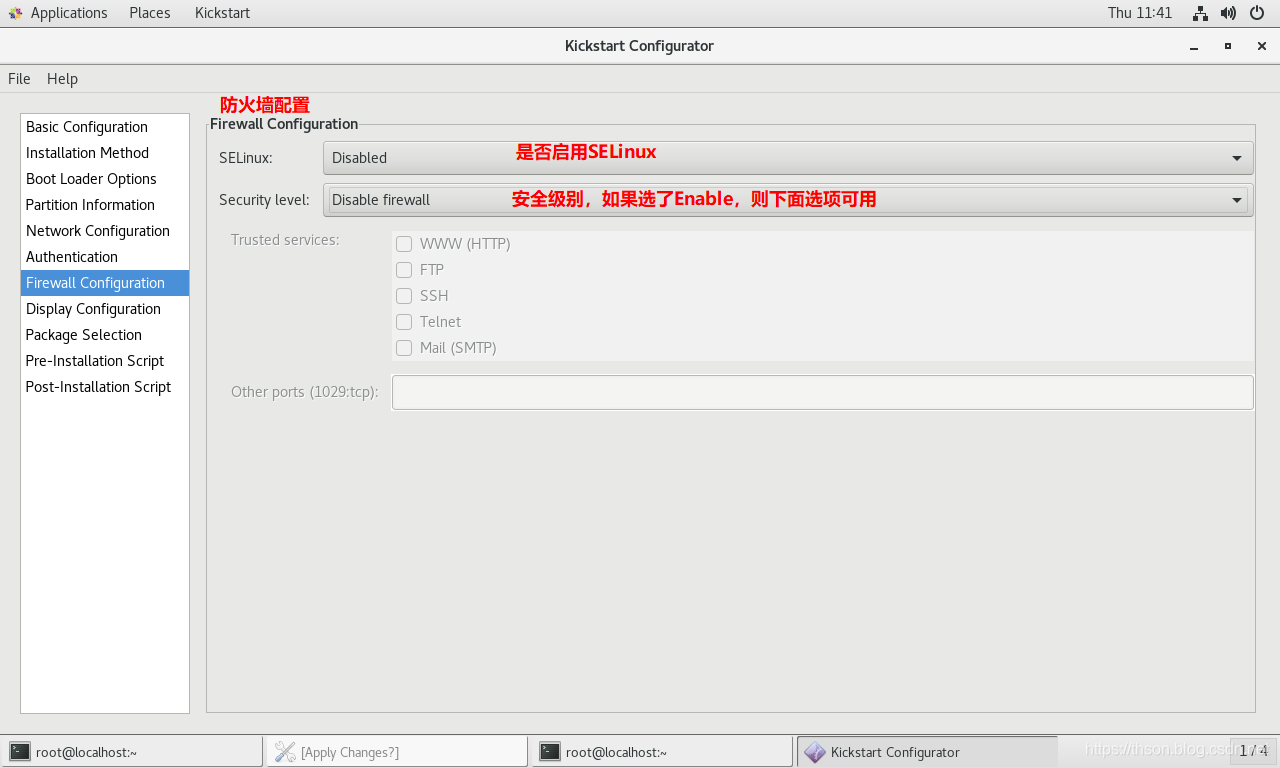
配置文件如下
┌───────────────────────────────────────────────────────────────┐
│# Firewall Configuration
│===============================================================
│# SELinux configuration
│selinux  --disabled或permissive或enforcing
│
│# Firewall configuration
│firewall  --disabled或enabled
│#如果是enable,可以在追加:--http --ftp --telnet --smtp --ssh
│#还可以追加端口:--port=555:tcp,444:udp
└───────────────────────────────────────────────────────────────┘
8. Display Configuration
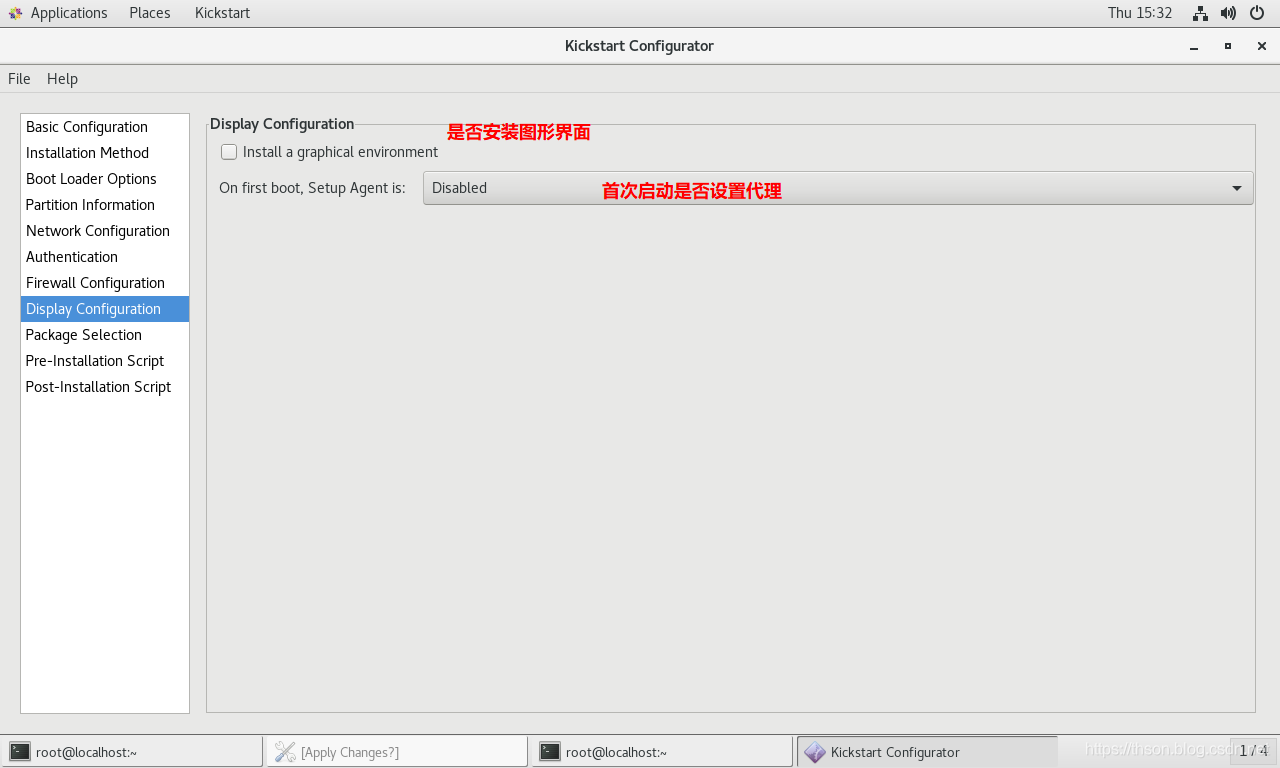
配置文件如下
┌───────────────────────────────────────────────────────────────┐
│# Display Configuration
│===============================================================
│如果选了安装图形界面,就没有下面这句话
│# Do not configure the X Window System
│skipx
│# Run the Setup Agent on first boot
│firstboot --enable或disable
└───────────────────────────────────────────────────────────────┘
9. Package Selection
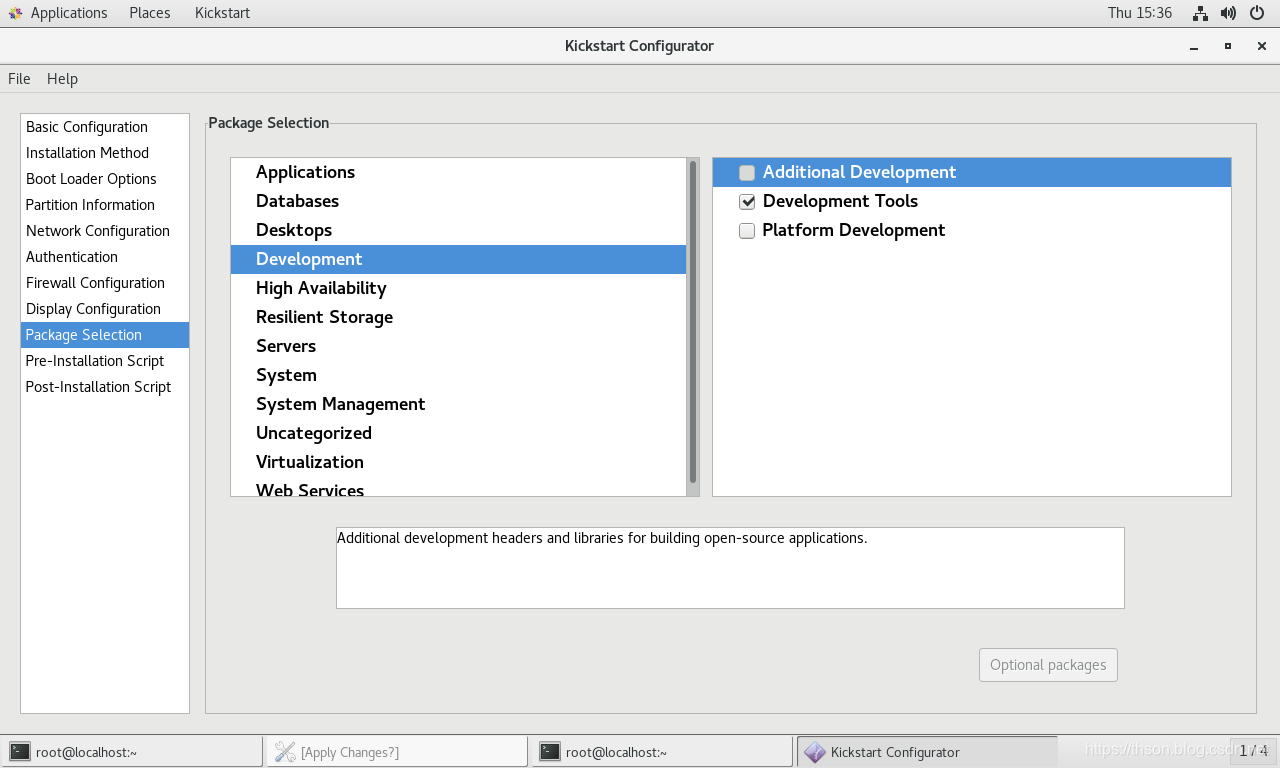
如果你的界面是什么都没有,那么需要把你现使用的yum仓库配置文件改一下
[root]$ vim /etc/yum.repos.d/***.repo

[development]
#把原来"[]"内的内容改成development就可以了,其它不变
配置文件如下
%packages
@development
-byacc
-cscope
-ctags
-diffstat
-doxygen
-elfutils
-gcc-gfortran
-git
-indent
-intltool
-patchutils
-rcs
-subversion
-swig
-systemtap
%end
10. Pre-Installation Script
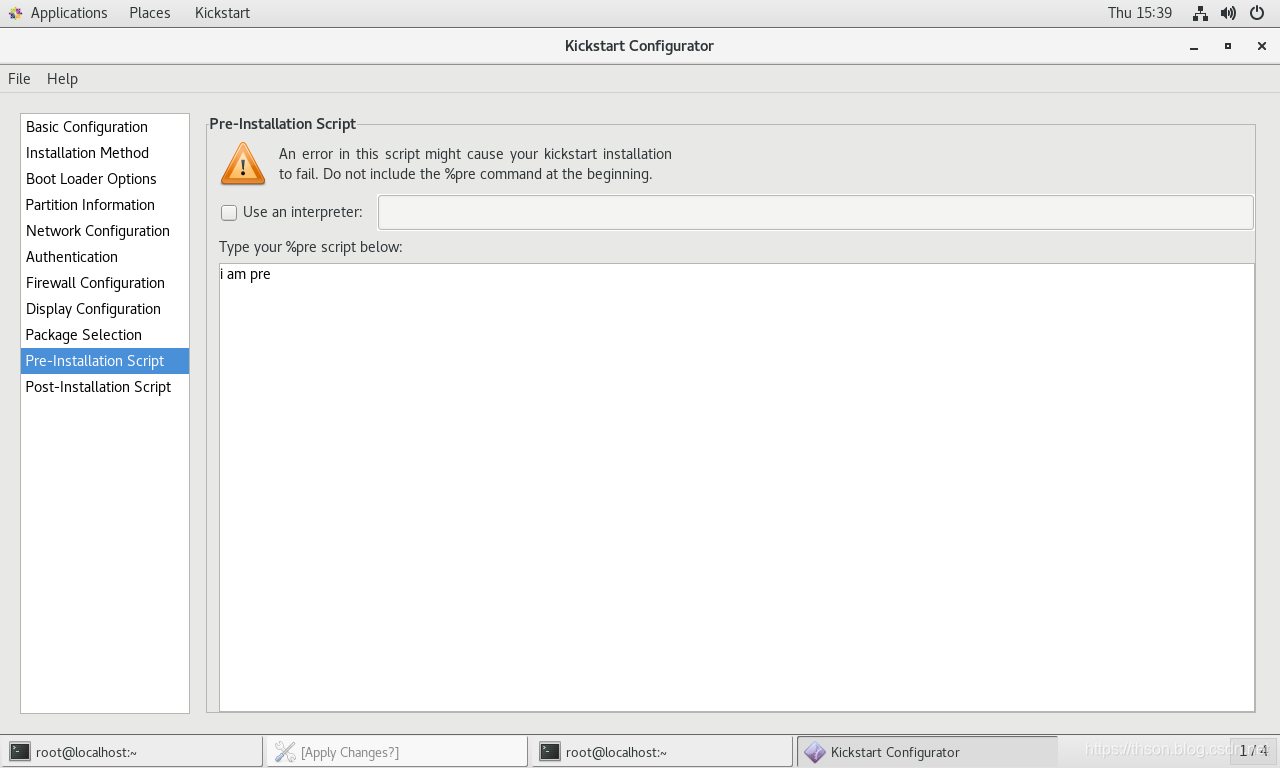
配置文件如下
%pre
这里写你的脚本
%end
11. Post-Installation Script
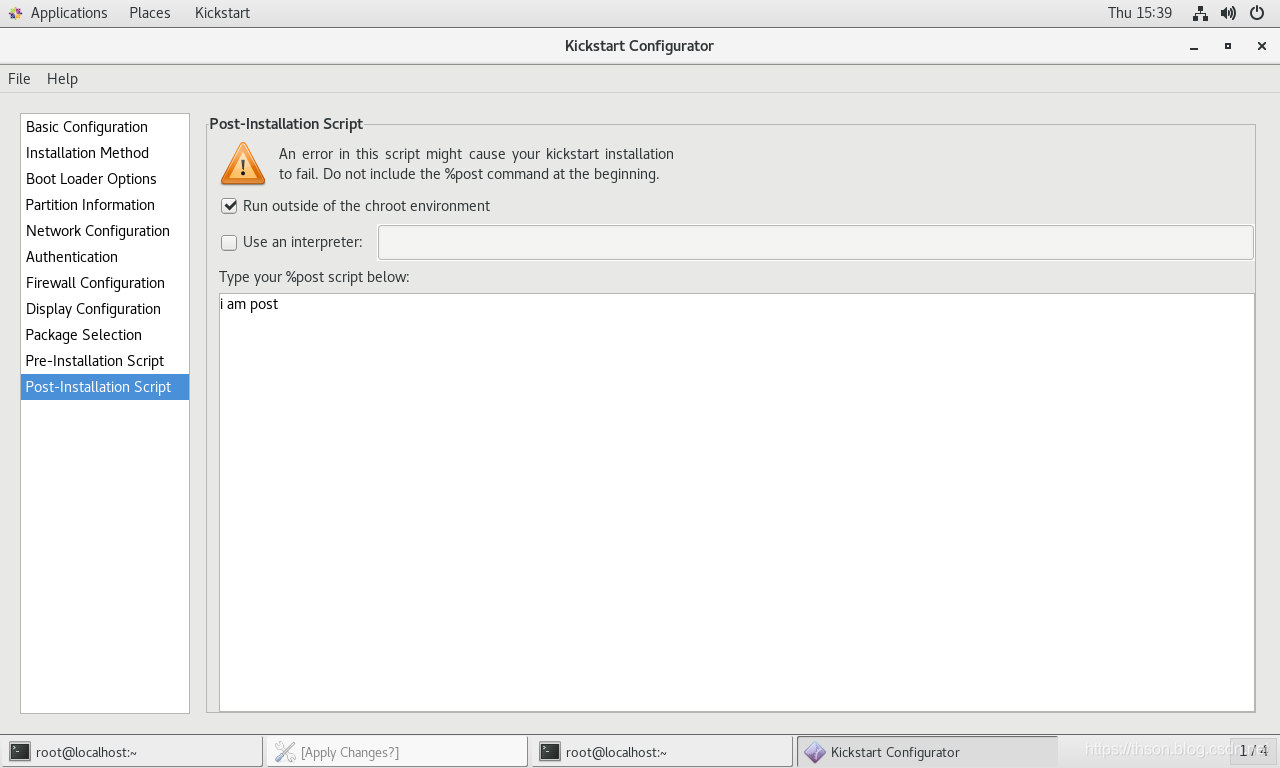
配置文件如下
%post --nochroot
这里写你的脚本
%end
kickstart文件范例
#platform=x86, AMD64, or Intel EM64T
#version=DEVEL
# Install OS instead of upgrade
install
# Keyboard layouts
keyboard 'us'
# Root password
rootpw --iscrypted $1$2TeoFGRN$EeykyMirEiMIya57QmbG71
# Use network installation
url --url="http://192.168.88.7/Centos/7/os/x86_64"
# System language
lang zh_CN
# System authorization information
auth  --useshadow  --passalgo=sha512
# Use text mode install
text
# Run the Setup Agent on first boot
firstboot --enable
# SELinux configuration
selinux --disabled
# Do not configure the X Window System
skipx

# Firewall configuration
firewall --disabled
# Network information
network  --bootproto=dhcp --device=eth0
# Reboot after installation
reboot
# System timezone
timezone Asia/Shanghai
# System bootloader configuration
bootloader --append="net.ifnames=0" --location=mbr
# Clear the Master Boot Record
zerombr
# Partition clearing information
clearpart --all --initlabel
# Disk partitioning information
part /boot --fstype="ext4" --size=2048
part / --fstype="xfs" --size=10240
part swap --fstype="swap" --size=2048

%pre
i am 安装前脚本
%end

%post --nochroot
i am 安装后脚本
%end

%packages
@development
-byacc
-cscope
-ctags
-diffstat
-doxygen
-elfutils
-gcc-gfortran
-git
-indent
-intltool
-patchutils
-rcs
-subversion
-swig
-systemtap
%end
实验:指定kickstart文件进行系统安装
讲了这么多,有什么用呢。当然有用,我们可以用我们上面制作的ks文件来自动安装系统。Linux基础_超详细VMware虚拟机安装CentOS7,可以看到,系统的安装是相对比较繁琐的,有了ks文件,我们就不用再点点点了。具体如下:
-
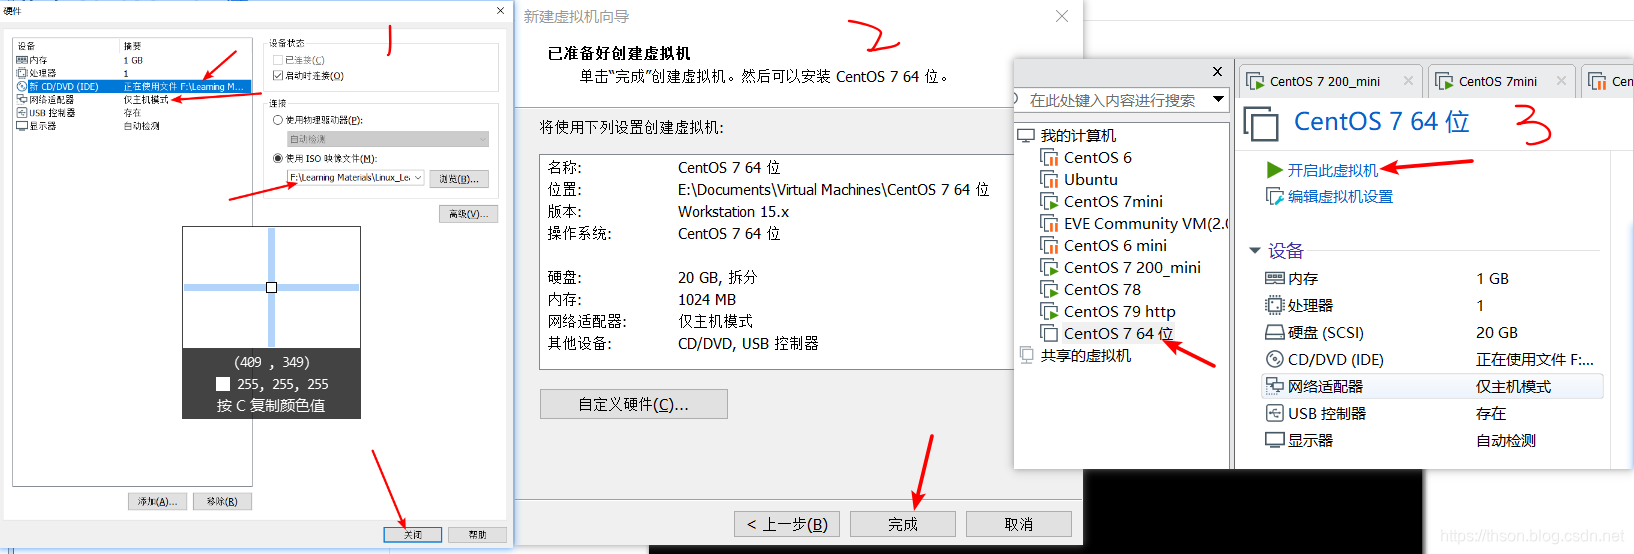
新建一个虚拟机
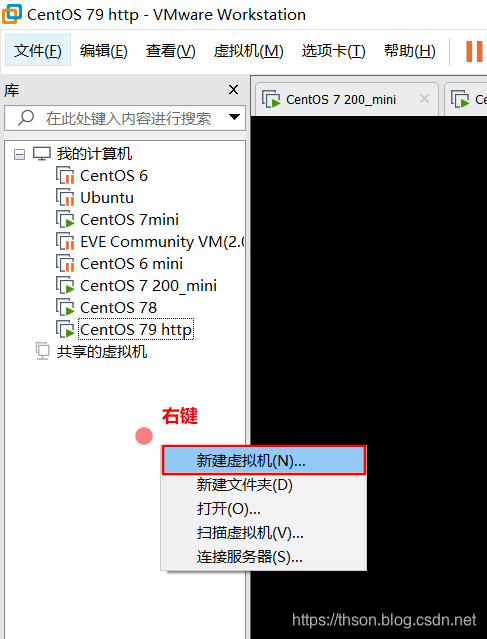
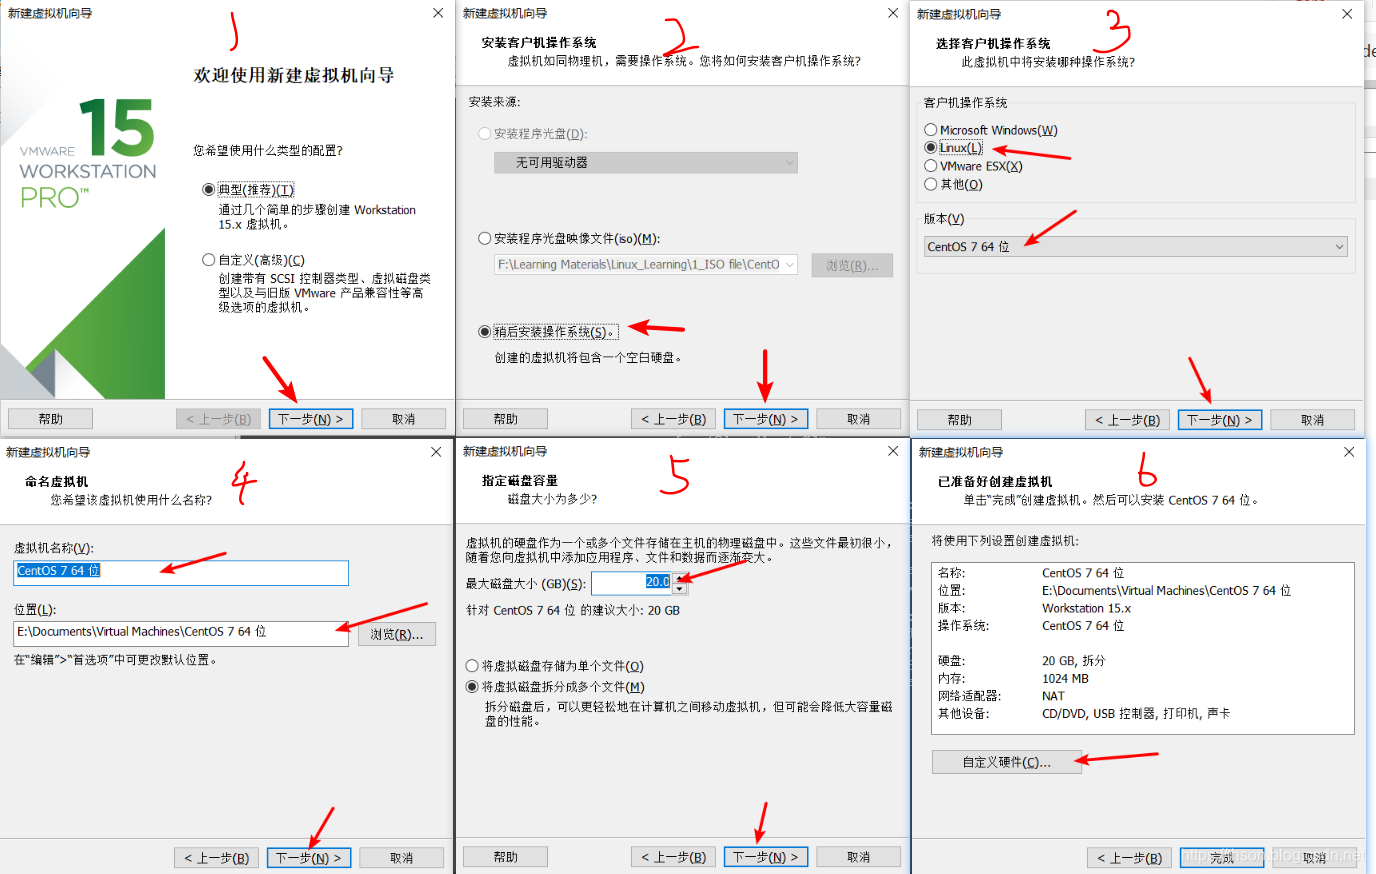
-
然后就看下图点点点
-
这里要注意了,选的网卡连接模式要能连得上你的http服务器,http服务器放着安装源,也就是上面ks文件里面的这条:
# Use network installation
url --url="http://192.168.88.7/Centos/7/os/x86_64"
-
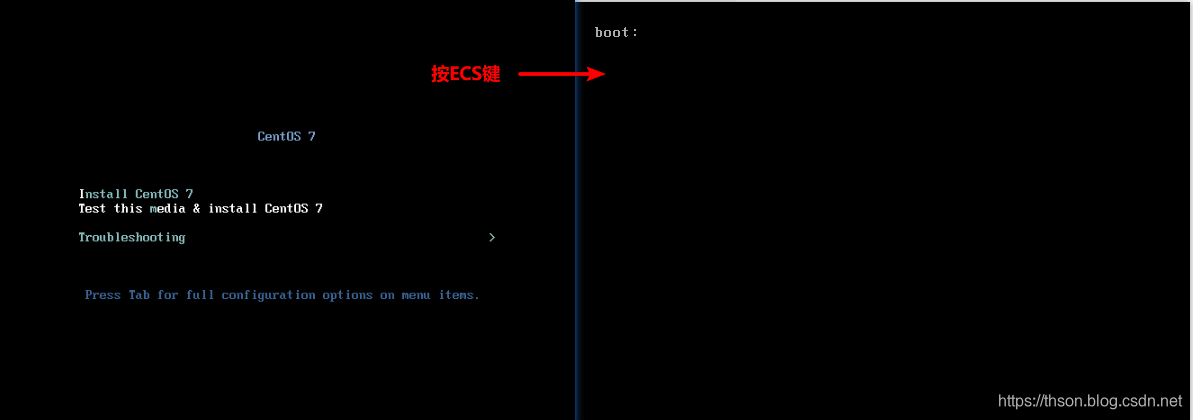
启动进入到光盘,按ECS键
-
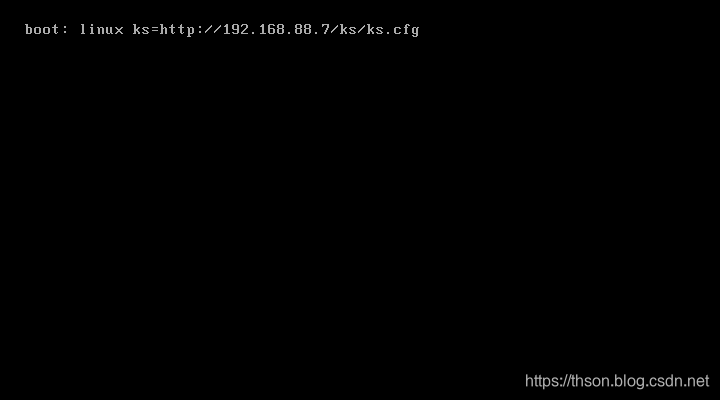
输入你刚刚生成的ks文件,你也可以放到你的http服务器
/var/www/html/目录下,然后用linux ks=http://192.168.88.1/你的ks文件,具体得看你文件放在哪了。如果你选的网卡模式选错了,不能和你的http服务器连接,那么就会报错。
-
回车,搞定,自动安装,全程不用动手。ks如果你是自己写的,那难免应付出现点未知的问题,建议初学还是用
system-config-kickstart程序来生成。还可以用检查ks文件的语法错误的命令:
ksvalidator 你的ks文件
FQA
虽然是鼠标点点点,但还是会有人选错,这里就收集一些常见问题:
- 系统安装的过程中出现
Error processing drive:pc1-0000....
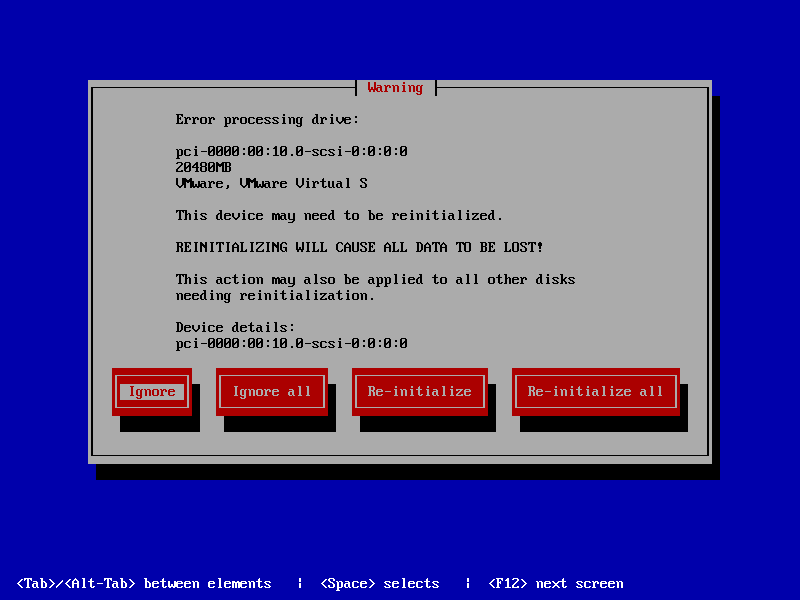
检查下你的ks文件的这几行,可能有错误
# Clear the Master Boot Record
zerombr
# Partition clearing information
clearpart --all --initlabel
- 系统安装的过程中出现
Unable to read package metadata. This may be due to a missing repodata directory...

检查下你的这行,应该是有错误
# Use network installation
url --url="http://192.168.88.2/centos/7/"