 版权声明:署名,允许他人基于本文进行创作,且必须基于与原先许可协议相同的许可协议分发本文 (Creative Commons)
目录
一:密码和授权码
在上一节中,我们讨论了oauth2的四种认证方式。在实际生产中授权和密码模式使用的最多,因此,我们主要讨论这2中方式。
至于在这个认证流程请参考上篇。
二:配置
1.认证服务器的配置:
认证服务器的配置主要就是3个部分:(1)客户端配置:配置客户端id,密码等信息。(2)令牌端点安全约束:配置token获取
验证策略。(3)token产出和存储:存储token
代码:
package springcloud.oauth2.config;

import org.springframework.beans.factory.annotation.Autowired;
import org.springframework.context.annotation.Bean;
import org.springframework.context.annotation.Configuration;
import org.springframework.security.authentication.AuthenticationManager;
import org.springframework.security.core.userdetails.UserDetailsService;
import org.springframework.security.crypto.factory.PasswordEncoderFactories;
import org.springframework.security.oauth2.config.annotation.configurers.ClientDetailsServiceConfigurer;
import org.springframework.security.oauth2.config.annotation.web.configuration.AuthorizationServerConfigurerAdapter;
import org.springframework.security.oauth2.config.annotation.web.configurers.AuthorizationServerEndpointsConfigurer;
import org.springframework.security.oauth2.config.annotation.web.configurers.AuthorizationServerSecurityConfigurer;
import org.springframework.security.oauth2.provider.token.TokenStore;
import org.springframework.security.oauth2.provider.token.store.InMemoryTokenStore;


@Configuration
public class AuthorizationServerConfiguration extends AuthorizationServerConfigurerAdapter {

  @Autowired
  private AuthenticationManager authenticationManager;

  @Autowired
  UserDetailsService userDetailsService;


  /**
   * 配置客户端详情服务
   * 客户端详细信息在这里进行初始化,你能够把客户端详情信息写死在这里或者是通过数据库来存储调取详情信息
   * @param clients
   * @throws Exception
   */
  @Override
  public void configure(ClientDetailsServiceConfigurer clients) throws Exception {
    clients.inMemory()
            .withClient("client1")
            .authorizedGrantTypes("authorization_code","refresh_token")//授权方式:授权码模式
            .scopes("test")//授权范围
            .secret(PasswordEncoderFactories.createDelegatingPasswordEncoder().encode("123456"))
            .and()
            .withClient("client2")
            .authorizedGrantTypes("password","refresh_token")//授权方式:密码模式
            .scopes("test")//授权范围
            .secret(PasswordEncoderFactories.createDelegatingPasswordEncoder().encode("123456"));
  }

  /**
   * 用来配置令牌端点(Token Endpoint)的安全约束.
   * @param security
   * @throws Exception
   */
  @Override
  public void configure(AuthorizationServerSecurityConfigurer security) throws Exception {
    /* 配置token获取合验证时的策略 */
    security.tokenKeyAccess("permitAll()").checkTokenAccess("isAuthenticated()").allowFormAuthenticationForClients();
  }

  /**
   * 用来配置授权(authorization)以及令牌(token)的访问端点和令牌服务(token services)
   * @param endpoints
   * @throws Exception
   */
//使用最基本的InMemoryTokenStore生成token,即本地内存存储
 @Bean
 public TokenStore memoryTokenStore() {
   return new InMemoryTokenStore();
 }
  @Override
  public void configure(AuthorizationServerEndpointsConfigurer endpoints) throws Exception {
    // 配置tokenStore
    endpoints.authenticationManager(authenticationManager).tokenStore(memoryTokenStore()).userDetailsService(userDetailsService);
  }
}
2.spring security的配置
主要配置:其实这个主要配置就是一个,配置授权码/账号密码是验证输入的束缚正确。
package springcloud.oauth2.config;

import org.springframework.context.annotation.Bean;
import org.springframework.security.authentication.AuthenticationManager;
import org.springframework.security.config.annotation.authentication.builders.AuthenticationManagerBuilder;
import org.springframework.security.config.annotation.web.configuration.EnableWebSecurity;
import org.springframework.security.config.annotation.web.configuration.WebSecurityConfigurerAdapter;
import org.springframework.security.core.userdetails.User;
import org.springframework.security.core.userdetails.UserDetailsService;
import org.springframework.security.crypto.factory.PasswordEncoderFactories;
import org.springframework.security.provisioning.InMemoryUserDetailsManager;

/**
 *
 * @代码描述:spring security的配置
 * @author monxz
 *
 * @time 2019年6月21日
 */
@EnableWebSecurity//开启权限验证
public class SecurityConfig extends WebSecurityConfigurerAdapter {
  /**
   * 配置这个bean会在做AuthorizationServerConfigurer配置的时候使用
   * @return
   * @throws Exception
   */
  @Bean
  @Override
  public AuthenticationManager authenticationManagerBean() throws Exception {
    return super.authenticationManagerBean();
  }


  /**
   * 配置用户
   * 使用内存中的用户,实际项目中,一般使用的是数据库保存用户,具体的实现类可以使用JdbcDaoImpl或者JdbcUserDetailsManager
   * @return
   */
  @Bean
  @Override
  protected UserDetailsService userDetailsService() {
    InMemoryUserDetailsManager manager = new InMemoryUserDetailsManager();
    manager.createUser(User.withUsername("admin").password(PasswordEncoderFactories.createDelegatingPasswordEncoder().encode("admin")).authorities("USER").build());
    return manager;
  }


  @Override
  protected void configure(AuthenticationManagerBuilder auth) throws Exception {
    auth.userDetailsService(userDetailsService());
  }
}
3.客户端配置
客户端只要在yml中声明oauth2就可以了
auth-server-url: http://localhost:8080

server:
  port: 8088
security:
  oauth2:
    client:
      client-id: client1
      client-secret: 123456
      scope: test
      access-token-uri: ${auth-server-url}/oauth/token
      user-authorization-uri: ${auth-server-url}/oauth/authorize
    resource:
      token-info-uri: ${auth-server-url}/oauth/check_token
主题配置就完成了。
三:测试
1.授权码测试
(1)获取到用户给予的授权码
response_type=code:说明这是一个授权码的类型
client_Id::客户端id
redict_url:跳转的url,注意,这里路径一定要写全
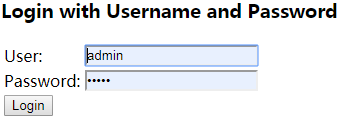
b.用户登录,授权

c.获取到授权码
![]()
(2)获取到access token 
(3)使用access-token访问资源服务器数据:
http://localhost:8088/user?access_token=xxxxxxxxxxxxxxxx
2.密码模式测试
(1)携带用户名,密码直接访问认证服务器,获取access token

(2)访问资源服务器:同上
三:总结
在这里,我们只配置2中主要的模式:授权码和密码模式。密码模式只比授权码模式少一个用户认证模式。实际上,密码模式只
是在认证服务器携带了用户名。