环境搭建
- 电脑环境
- win10 64位系统
- Python3.5安装
- 从Python官网下载python3.5安装文件,选择windows 64位版本python-3.5.2-amd64.exe。双击安装。在安装的过程中可勾选自动设置环境变量
- PyQt5.6安装
- 从PyQt官网下载安装文件,由于最新版本的PyQt5.7需要自主编译安装,无可执行的安装文件,所以我们这里下载5.6版本,找旧版本的下载地址,在这里我们我们选择64位版本的PyQt5-5.6-gpl-Py3.5-Qt5.6.0-x64-2.exe。下载后可以直接双击安装,其中有一步要指定Python的安装位置,如果上一步中已经定义过Python的环境变量,这里可以自动设置。
- 或者参考pip安装
pip install -i https://pypi.douban.com/simple pyqt5==5.6pip install -i https://pypi.douban.com/simple pyqt5-tools
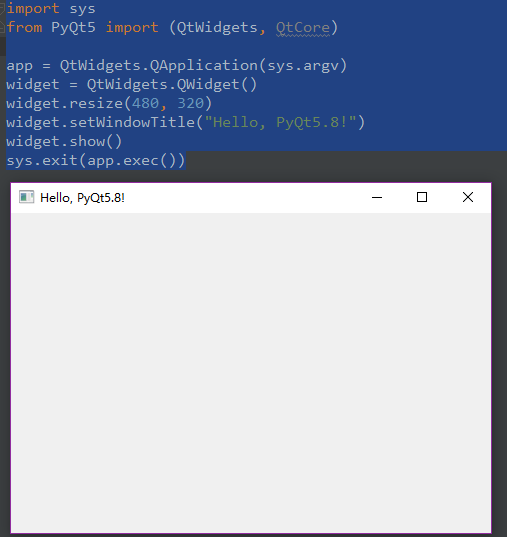
安装到这里PyQt编程环境基本满足,后续可以选择安装IDE环境。创建一个程序运行测试环境是否安装成功
1
2
3
4
5
6
7
8
9
import sys
from PyQt5 import (QtWidgets, QtCore)
app = QtWidgets.QApplication(sys.argv)
widget = QtWidgets.QWidget()
widget.resize(480, 320)
widget.setWindowTitle("Hello, PyQt5.8!")
widget.show()
sys.exit(app.exec())
- 配置pycharm
- 配置python解释器:打开pycharm->ctrl+alt+s->Project Interpreter
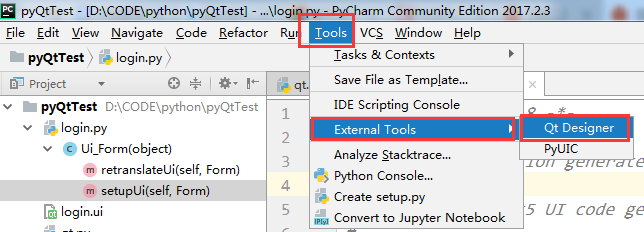
- 设置Qt Designer:打开pycharm->ctrl+alt+s->Tools->External Tools ->点击加号;
- Name:QtDesigner
- Programs:F:\Software\Python35\Lib\site-packages\PyQt5\designer.exe(Programs参数需要修改为你电脑里边的“designer.exe”路径)
- Parameters: $FileDir$ \ $FileName$
- Working directory:$FileDir$
- 配置PyUIC:打开pycharm->ctrl+alt+s->Tools->External Tools ->点击加号;
- Name:PyUIC
- Programs:F:\Software\Python35\python.exe(Programs参数需要修改为你电脑里边的“python.exe”路径)
- Parameters: -m PyQt5.uic.pyuic $FileName$ -o $FileNameWithoutExtension$.py
- Working directory:$FileDir$
使用Qt Designer
- 完成以上步骤之后,点击 Tools -》External Tools -》Qt Designer 启动我们的Qt Designer
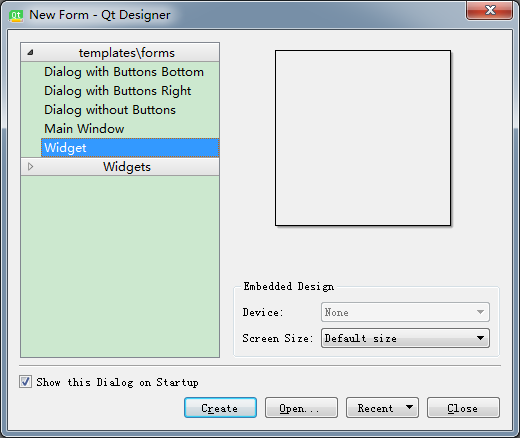
- 启动后选择:Widget,建立空白的窗口,点击 Create,其他默认就行
- 从左边 1区 拖拽,注意是“拖拽”控件到 2区,在 3区 中修改对应属性
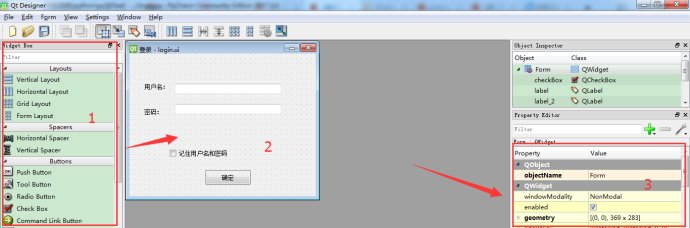
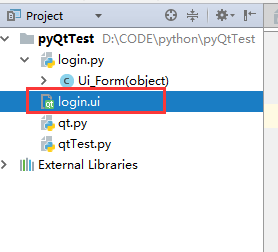
- 完成基本的界面设置之后,会看到同目录下生成了一个“.ui”的文件
- 右键 External Tools -》PyUIC ,将“.ui”文件转为“.py”文件
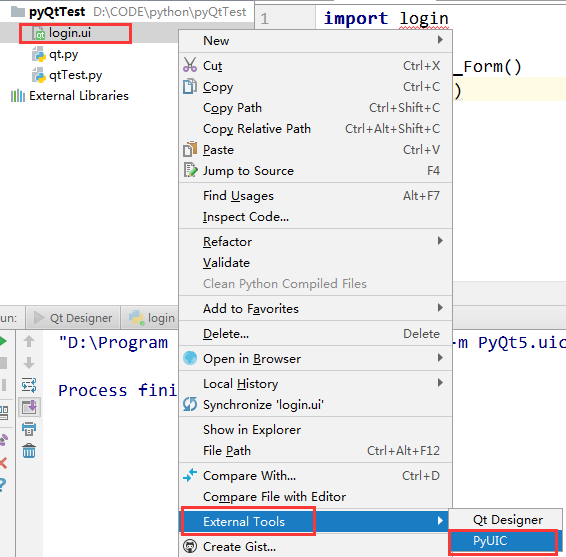
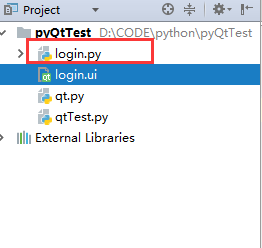
- 这时,如果一切正常,没有报错的话,会在同目录下生成对应的“.py”文件
-
将下面的代码,放到生成的“.py”文件,放到最后就行(注意缩进)
1
2
3
4
5
6
7
8
9
10
if __name__=="__main__":
import sys
from PyQt5.QtGui import QIcon
app=QtWidgets.QApplication(sys.argv)
widget=QtWidgets.QWidget()
ui=Ui_Form()
ui.setupUi(widget)
widget.setWindowIcon(QIcon('web.png'))#增加icon图标,如果没有图片可以没有这句
widget.show()
sys.exit(app.exec_()) -
运行启动,好了,恭喜你,开启了pythonGUI

打包项目生成exe文件
使用pyinstaller打包Python3.5+PyQt5.6项目生成exe文件
- pywin32安装
- pyinstaller安装
- pip install pyinstaller
- https://github.com/pyinstaller/pyinstaller/releases 下载3.3.1 源码安装
python setup.py install
- pyinstaller使用方法
pyinstaller [opts] ***.py可选的opts有:
-F, –onefile 打包成一个exe文件。
-D, –onedir 创建一个目录,包含exe文件,但会依赖很多文件(默认选项)。
-c, –console, –nowindowed 使用控制台,无界面(默认)
-w, –windowed, –noconsole 使用窗口,无控制台pyinstaller -F -w login.specspec文件用来进行配置多文件和图片等的打包配置- 打完包后,必须的配置文件和代码需要放在exe文件的相同目录下
-
打包测试
1
2
3
4
5
6
7
8
9
10
11
12
13
14
15
16
17
18
19
20
21
22
23
24
25
26
27
28
29
30
31
32
33
34
#采用一个calculator的代码对pyinstaller进行测试。
import sys
from math import *
from PyQt5.QtCore import *
from PyQt5.QtWidgets import (QApplication, QDialog, QLineEdit, QTextBrowser,
QVBoxLayout)
class Form(QDialog):
def __init__(self, parent=None):
super(Form, self).__init__(parent)
self.browser = QTextBrowser()
self.lineedit = QLineEdit("Type an expression and press Enter")
self.lineedit.selectAll()
layout = QVBoxLayout()
layout.addWidget(self.browser)
layout.addWidget(self.lineedit)
self.setLayout(layout)
self.lineedit.setFocus()
self.lineedit.returnPressed.connect(self.updateUi)
self.setWindowTitle("Calculate")
def updateUi(self):
try:
text = self.lineedit.text()
self.browser.append("%s = <b>%s</b>" % (text, eval(text)))
except:
self.browser.append("<font color=red>%s is invalid!</font>" % text)
self.lineedit.setText('')
if __name__=="__main__":
app = QApplication(sys.argv)
form = Form()
form.show()
app.exec_() -
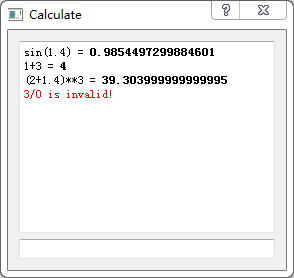
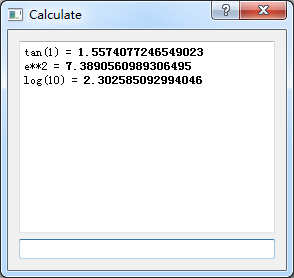
代码保存为calculator.py,直接用python解释器运行,可以得到如下窗口:
- 打开命令行窗口,进入calculator.py所在目录。运行下面指令
pyinstaller -F -w calculator.py
- pyinstaller自动执行一系列过程,最后在同目录下的dist文件夹中生成了calculator.exe。
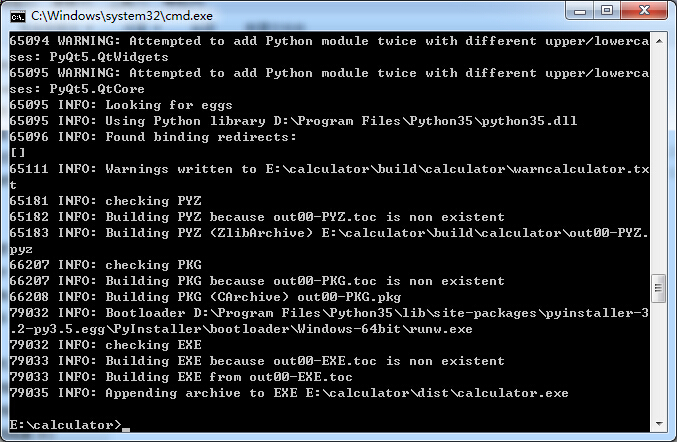

- calculator.exe运行效果与之前直接用解释器运行相同
FAQ
- pyinstaller打包pyqt5问题解决
- Cannot find existing PyQt5 plugin directories Paths checked: C:/Qt/5.6.0/plugins
- 1.创建C:/Qt/5.6.0/plugins目录,2.将pyqt5.dll,pyqt5qmlplugin.dll文件添加至目录下
- 打包成功后,打开exe文件,报错could not find or load the Qt platform plugin “windows”
- 把xxx\site-package\PyQt5\Qt\plugins\platforms 文件夹复制到生成的 目标.exe 文件目录下
- Cannot find existing PyQt5 plugin directories Paths checked: C:/Qt/5.6.0/plugins