前言
使用SpringBoot集成rabbitmq实现一个发送和接收
内容
1.引入依赖
<!--加入mq依赖-->
<dependency>
    <groupId>org.springframework.boot</groupId>
    <artifactId>spring-boot-starter-amqp</artifactId>
</dependency>
2.application.properties
#rabbitmq配置
spring.application.name=springboot-mq
spring.rabbitmq.host=192.168.17.129
spring.rabbitmq.port=5672
spring.rabbitmq.username=mytest
spring.rabbitmq.password=mytest
3.rabbitmap配置类
import org.springframework.amqp.core.Queue;
import org.springframework.context.annotation.Bean;
import org.springframework.context.annotation.Configuration;

@Configuration
public class RabbitMQConfig {

    @Bean
    public Queue mqQueue(){
        return new Queue("mqboot");
    }
}
4.发送类< 大专栏 zyzx(53)-springboot使用消息中间件/h5>@Component
public class Sender {
@Autowired
private AmqpTemplate rabbitTemplate;
public void send(){
String content = "send: hello"+new Date();
System.out.println("Sender:"+content)
this.rabbitTemplate.convertAndSend("mqboot",content);
}
}
@Component
public class Sender {

    @Autowired
    private AmqpTemplate rabbitTemplate;

    public void send(){
        String content = "send: hello"+new Date();
        System.out.println("Sender:"+content)
        this.rabbitTemplate.convertAndSend("mqboot",content);
    }
}
5.接收类
@Component
@RabbitListener(queues = "mqboot")
public class Receiver {

    @RabbitHandler
    public  void process(String data){
        System.out.println("Receiver:"+data);
    }
}
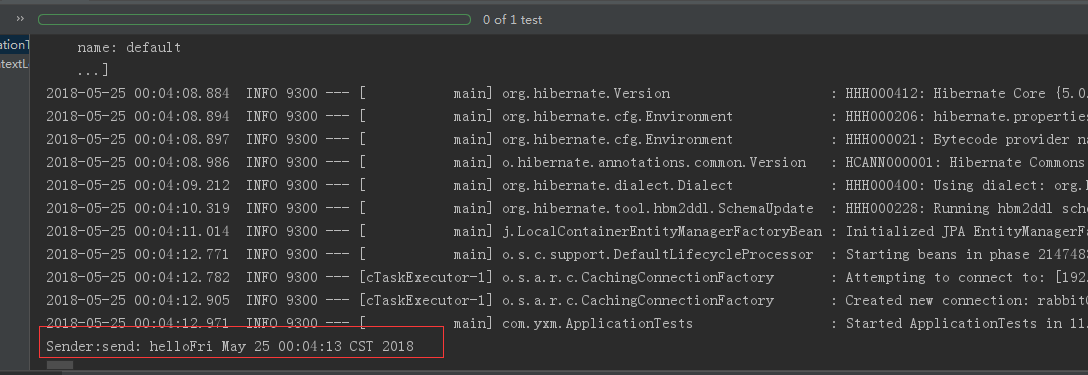
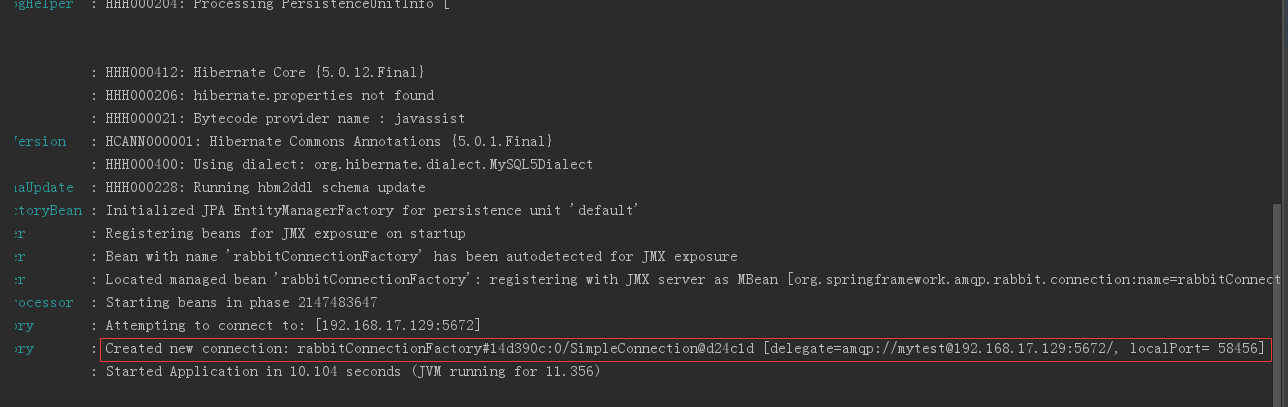
6.测试
启动springBoot
如下显示表明:连接成功:
@RunWith(SpringRunner.class)
@SpringBootTest
public class ApplicationTests {
    @Autowired
    private TeacherRepository teacherRepository;

    /*@Autowired
    private JavaMailSender   javaMailSender;*/

    @Autowired
   private Sender sender;

    @Test
    public void contextLoads() {
        //mq测试
        sender.send();
    }
}