Chapter1:碎片和UI模块化
文章目录
1.1 我们需要一种新的UI设计方式
- 在Android设备差异化小的时候,直接在Activity设计UI是很方便的;但是随着设备差异化的增大,这种方式变得困难起来,我们很难在各种差异化的设备上使用同一个Activity来统一UI。(比如,手机和平板就是两个差异很大的设备,很难使用相同的UI。)
- 对不同种设备创建各自的Activity并非一个好的方法,这会造成大量冗余代码以和复杂逻辑代码;加之Google推出的 Material Design 标准,会使Activity中的代码更为复杂。
- 碎片化 是一种好的解决方式,我们可以将UI界面模块化成小部分,再根据需要进行组合。即通过使用fragment按照组成和逻辑将UI界面分组;再根据需要使用Activity具体的设备安排fragment。
- Fragment关注设备细节,Activity关注UI界面总体。
1.2 平台架构对Fragment的支持
- 95%的设备支持碎片化,另外低版本的5%也可以通过 v4 的库来支持碎片化。
- 参考地址
1.3 Fragments和Activities之间的关系
- Fragments不是取缔Activities的,而是对Activities的增补;fragment存在于Activity之中。
- 一个Activity实例可以包含多个fragment,但是一个fragment只能存在于一个activity。
- fragment与包含它的activity密切相关,生命周期高度耦合。
- 注意:采用碎片化设计一定程度上会使程序变得复杂,因此不要过度使用;并非每个Activity都要包含Fragment,没价值的情况下不要加入Fragment。
1.4 从Activity向Fragment转移
- 大部分情况下一个Fragment是从布局资源中创建,但有时也可以和Activity一样,通过编程方式创建。和创建Activity一样,从布局文件创建Fragment也要遵循相同的规则和技术
- 使用Fragment与使用Activity最大的不同就是:我们试图将UI界面的布局划分成便于管理的小部分。
1.5 Activity为导向的开发的思考
- 我们使用一个简单例子:
- 创建布局文件 activity_main.xml:
<?xml version="1.0" encoding="utf-8"?>
<LinearLayout xmlns:android="http://schemas.android.com/apk/res/android"
    android:layout_width="match_parent"
    android:layout_height="match_parent"
    android:orientation="vertical">

    <!--List of Book Titles-->
    <ScrollView
        android:id="@+id/scrollTitles"
        android:layout_width="match_parent"
        android:layout_height="0dp"
        android:layout_weight="1">

        <RadioGroup
            android:id="@+id/bookSelectGroup"
            android:layout_width="wrap_content"
            android:layout_height="wrap_content">

            <RadioButton
                android:id="@+id/rb_book1"
                android:layout_width="wrap_content"
                android:layout_height="wrap_content"
                android:checked="true"
                android:text="@string/Book1" />

            <RadioButton
                android:id="@+id/rb_book2"
                android:layout_width="wrap_content"
                android:layout_height="wrap_content"
                android:text="@string/Book2" />

            <RadioButton
                android:id="@+id/rb_book3"
                android:layout_width="wrap_content"
                android:layout_height="wrap_content"
                android:text="@string/Book3" />
        </RadioGroup>
    </ScrollView>

    <!-- Description of selected book -->
    <ScrollView
        android:id="@+id/scrollDescription"
        android:layout_width="match_parent"
        android:layout_height="0dp"
        android:layout_weight="1">

        <TextView
            android:id="@+id/tv_description"
            android:layout_width="wrap_content"
            android:layout_height="wrap_content"
            android:gravity="fill_horizontal"
            android:paddingLeft="@dimen/activity_horizontal_margin"
            android:paddingRight="@dimen/activity_horizontal_margin"
            android:text="@string/description"
            android:textAppearance="?android:attr/textAppearanceMedium" />
    </ScrollView>

</LinearLayout>
- 使用布局文件 MainActivity.java:
    @Override
    protected void onCreate(Bundle savedInstanceState) {
        super.onCreate(savedInstanceState);
        // load the activity_main layout resource
        setContentView(R.layout.activity_main);
    }
1.5 Fragment为导向的开发的思考
我们要合理的将UI界面分片。(自然划分:将书籍选择和内容分成两个碎片)
最小化假设:
- 我们为Fragment设置越少的设定,Fragment的可复用性越高。
- 比如:上述activity_main.xml中ScrollView的layout_height属性值设为 0,这就是一个设定;如果我们设计的Fragemnt中包含一个ScrollView,且它的layout_height属性值设为 0(适用于高度计算有意义情况),那么可能在一些情况下就不能正常显示(高度计算无意义时会阻止内容显示)。
- 我们最好的方式是让碎片完全占据分配给它的位置,这样碎片对自身的位置和大小具有最佳的控制权。即:将上述layout_height 属性值设为match_paren,并指定namespace。
创建布局文件 fragment_book_list.xml:
<!-- List of Book Titles -->
<ScrollView xmlns:android="http://schemas.android.com/apk/res/android"
    android:id="@+id/scrollTitles"
    android:layout_width="match_parent"
    android:layout_height="match_parent">

    <RadioGroup
        android:id="@+id/bookSelectGroup"
        android:layout_width="wrap_content"
        android:layout_height="wrap_content">

        <RadioButton
            android:id="@+id/rb_book1"
            android:layout_width="wrap_content"
            android:layout_height="wrap_content"
            android:checked="true"
            android:text="@string/Book1" />

        <RadioButton
            android:id="@+id/rb_book2"
            android:layout_width="wrap_content"
            android:layout_height="wrap_content"
            android:text="@string/Book2" />

        <RadioButton
            android:id="@+id/rb_book3"
            android:layout_width="wrap_content"
            android:layout_height="wrap_content"
            android:text="@string/Book3" />

    </RadioGroup>
</ScrollView>
- 创建布局文件 fragment_book_desc.xml :
<!-- Description of selected book -->
<ScrollView xmlns:android="http://schemas.android.com/apk/res/android"
    android:id="@+id/scrollDescription"
    android:layout_width="match_parent"
    android:layout_height="0dp"
    android:layout_weight="1">

    <TextView
        android:id="@+id/tv_description"
        android:layout_width="wrap_content"
        android:layout_height="wrap_content"
        android:gravity="fill_horizontal"
        android:paddingLeft="@dimen/activity_horizontal_margin"
        android:paddingRight="@dimen/activity_horizontal_margin"
        android:text="@string/description"
        android:textAppearance="?android:attr/textAppearanceMedium" />
</ScrollView>
1.6 创建Fragment类
与创建Activity类似,我们不仅仅需要一个布局文件,还需要一个类;所有的fragment类必须直接或间接继承 android.app.Fragment。
在创建Fragment的过程中,Android框架会调用该Fragment上的许多方法。其中最重要的一个是onCreateView方法。onCreateView方法负责返回该Fragment所表示的视图层次结构。之后Android框架会将这个Fragment返回的视图层次结构添加到Activity的整体视图层次结构中的适当位置上。
onCreateView方法:
该方法包含三个参数,这里只介绍前两个重要的参数:
public View onCreateView(@NonNull LayoutInflater inflater, @Nullable ViewGroup container, @Nullable Bundle savedInstanceState) { ... }inflater:这是一个布局填充器(LayoutInflater)实例的引用,可以在包含Activity的Context中读取和扩展布局资源。
container:这是一个活动部局中的视图组(ViewGroup)实例的引用,也是这个Fragment的视图层次结构要添加到的地方。
LayoutInflater提供的inflater方法:
该方法会将布局资源转换为相应的视图层次结构,并返回该层次结构的根视图的引用。
public View inflate(@LayoutRes int resource, @Nullable ViewGroup root,boolean attachToRoot)resource:为布局资源ID。
root:我们传入的是container引用,root的作用是为正确格式化新视图层次结构提供了必要的参数。如果root为空,那么params就为null,那么就会返回一个没有设置参数的视图temp,即我们对resource设置的参数会无效。(比如,root空时,我们设置了 android:layout_height="10dp"会无效,会采用默认值)
//源码节选 // Temp is the root view that was found in the xml final View temp = createViewFromTag(root, name, inflaterContext, attrs); ViewGroup.LayoutParams params = null; if (root != null) { if (DEBUG) { System.out.println("Creating params from root: " +root); } // Create layout params that match root, if supplied params = root.generateLayoutParams(attrs); if (!attachToRoot) { // Set the layout params for temp if we are not // attaching. (If we are, we use addView, below) temp.setLayoutParams(params); } } ... // Decide whether to return the root that was passed in or the // top view found in xml. if (root == null || !attachToRoot) { result = temp; } ··· return result;attachToRoot:
attachToRoot值为false时表示root只是用于提供布局参数,最后返回的是新的布局层次结构。如果attachToRoot值为true,那么inflater方法会将新的视图层次结构附加到root的视图组中,然后返回root。
//源码节选
View result = root;
···
// We are supposed to attach all the views we found (int temp)
// to root. Do that now.
if (root != null && attachToRoot) {
    root.addView(temp, params);
}
...
return result;
- 创建 BookListFragment.java:
public class BookListFragment extends Fragment {

    @Nullable
    @Override
    public View onCreateView(@NonNull LayoutInflater inflater, @Nullable ViewGroup container, @Nullable Bundle savedInstanceState) {
        View viewHierarchy = inflater.inflate(R.layout.fragment_book_list, container, false);
        return viewHierarchy;
    }
}
- 创建 BookDescFragment.java:
public class BookDescFragment extends Fragment {
    @Nullable
    @Override
    public View onCreateView(@NonNull LayoutInflater inflater, @Nullable ViewGroup container, @Nullable Bundle savedInstanceState) {
        View viewHierarchy = inflater.inflate(R.layout.fragment_book_desc, container, false);
        return viewHierarchy;
    }
}
1.7 在Activity中使用Fragment
- 更新布局文件activity_main.xml:
<?xml version="1.0" encoding="utf-8"?>
<LinearLayout xmlns:android="http://schemas.android.com/apk/res/android"
    android:layout_width="match_parent"
    android:layout_height="match_parent"
    android:orientation="vertical">

    <!-- List of Book Titles -->
    <fragment
        android:id="@+id/fragmentTitles"
        android:name="com.virtual.learn101022.BookListFragment"
        android:layout_width="match_parent"
        android:layout_height="0dp"
        android:layout_weight="1" />
    <!-- Description of selected book -->
    <fragment
        android:id="@+id/fragmentDescription"
        android:name="com.virtual.learn101022.BookDescFragment"
        android:layout_width="match_parent"
        android:layout_height="0dp"
        android:layout_weight="1" />

</LinearLayout>
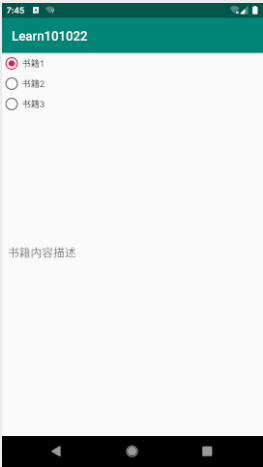
- 运行程序,UI界面与完全在Activity中定义时完全一样。至此,我们完成了以Activity为导向的开发向以Fragment为导向的开发的思路上的转变。
1.8 参考资料
- CreatingDynamicUIwithAndroidFragments,2ndEdition