1、什么是IOC?(Inversion Of Controll 控制反转)
控制反转是面向对象编程中的一种设计原则,可以用来降低计算机代码之间的耦合度,其中最常见的方式是依赖注入,还有一种方式是依赖查找(Dependency Lookup),通过控制反转,对象在被创建的时候,由一个调控系统内所有对象的外界实体将其依赖的对象的引用传递给它,也可以说,依赖被注入到对象中。
(取自百度百科https://baike.baidu.com/item/%E6%8E%A7%E5%88%B6%E5%8F%8D%E8%BD%AC/1158025?fr=aladdin)
-简单理解就是:对象之间的依赖关系应该由容器来建立(也就是将创建对象和管理对象依赖关系的事情都交给spring容器来处理)。
2、什么是DI?(Dependency Injection 依赖注入)
容器通过调用 set方法注入 或者 构造器注入 来建立对象之间的依赖关系。
注:IOC是目标 DI是手段。
3、set方法注入:
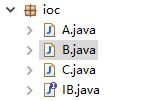
step1、创建实体类,并为类添加set方法。(下面是目录结构)
package ioc;
public class A {
	private IB b;
	public void setB(IB b) {
		System.out.println("这是A的setB方法");
		this.b = b;
	}
	public A(){
		System.out.println("这是A的无参构造");
	}
	public void service(){
		System.out.println("这是A的service方法");
		//需要调B的f1方法
		b.f1();
	}
}
package ioc;

public class B implements IB{
	public B(){
		System.out.println("这是B的无参构造");
	}
	public void f1(){
		System.out.println("这是B的f1方法");
	}

}
setp2、在配置文件当中,使用property元素来配置set方法注入(在src\resources下配置)。
注:property元素表示使用set方法注入。
name属性用于指定set方法名(容器会将b大写,前面添加set来构造方法名)
ref属性用于指定被注入的bean的id。
//name为b说明会调用setB方法 ref为b1 则被注入的bean-id为b1
<bean id="a1" class="ioc.A">
	<property name="b" ref="b1"/>
</bean>
step3、启动容器,调用getBean方法。
//启动Spring容器
ApplicationContext ac=new ClassPathXmlApplicationContext("ioc.xml");
A a=ac.getBean("a1",A.class);
a.service();	//这里调用service相当于直接调用了b的f1方法
下面是set注入的流程图:spring容器启动以后
①会去读取src\resources下的配置文件
②创建A B 对象并将 B注入到A
③通过getBean方法获取对象A(此时的对象A已经建立好了A和B的依赖关系)

4.构造器注入:
例:我们在Computer类中注入Cpu。(下面是目录结构)

step1、添加相应的带参构造器。
package ioc;

public class Computer {
	private Cpu cpu;

	public Computer(Cpu cpu) {
		System.out.println("这是Computer的有参构造");
		this.cpu = cpu;
	}

	public Computer(){
		System.out.println("这是Computer的无参构造");
	}

	@Override
	public String toString() {
		return "Computer [cpu=" + cpu + "]";
	}

}
package ioc;

public class Cpu {
	public Cpu(){
		System.out.println("这是Cpu的无参构造");
	}

}
step2、使用<constructor-arg>元素来配置构造器注入(在src\resources下配置)。
注:constructor-arg元素用来配置构造器注入。
index属性用于指定参数的下标。
ref属性用于指定被注入的bean-id。
<bean id="cpu" class="ioc.Cpu"></bean>
<bean id="cp" class="ioc.Computer">
	<constructor-arg index="0" ref="cpu"></constructor-arg>
</bean>
step3、启动容器,调用getBean方法。
ApplicationContext ac=new ClassPathXmlApplicationContext("ioc.xml");
Computer cp=ac.getBean("cp",Computer.class);
5.自动装配:
a.什么是自动装配?
容器依据某些规则,自动查找符合要求的对象,然后建立对象之间的依赖关系。
注:容器仍需要调用set方法或者构造器。
b.如何自动装配?
–使用autowire属性指定装配的规则:
1、autowire属性表示让容器自动建立对象之间的依赖关系,有三个值:
2、byName:以属性名作为bean-id查找对应的bean,然后调用set方法。
(注:如果找不到对应的bean,不会调用set方法。)
3、byType:以属性类型作为bean类型,查找对应的bean,然后调用set方法。
(注:如果找不到对应的bean,不会调用set方法,如果找到多个bean,会出错。)
4、constructor:类似于byType,只不过是调用构造器来完成注入。
例1: 使用autowire="byName"来进行自动装配。
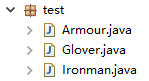
(在Ironman(钢铁侠)中装配 Glover(手套)和Armour(盔甲))。
step1、添加set方法。
package test;

public class Ironman {
	private Glover glover;
	private Armour armour;
	//因为使用byName是set方式注入,所以要有set方法
	public void setArmour(Armour armour) {
		System.out.println("这是Iroman的setArmour方法");
		this.armour = armour;
	}
	public void setGlover(Glover glover) {
		System.out.println("这是Iroman的setGlover方法");
		this.glover = glover;
	}
	public Ironman(){
		System.out.println("这是Ironman的无参构造");
	}
	@Override
	public String toString() {
		return "Ironman [glover=" + glover + ", armour=" + armour + "]";
	}
}
package test;

public class Glover {
	public Glover(){
		System.out.println("这是Glover的无参构造");
	}
}
package test;

public class Armour {
	private String name;
	//这里要给盔甲添加一个name属性,所以也要添加一个set方法
	public void setName(String name) {
		System.out.println("这是Armour的setName方法");
		this.name = name;
	}
	public Armour(){
		System.out.println("这是Armour的无参构造");
	}

	@Override
	public String toString() {
		return "Armour [name=" + name + "]";
	}
}
step2、使用autowire="byName"来配置。
<bean id="glover" class="test.Glover"/>
<bean id="armour" class="test.Armour">
	<property name="name" value="mask1"></property>
</bean>
<bean id="ironman" class="test.Ironman" autowire="byName"/>
step3、启动容器,调用getBean方法。
ApplicationContext ac=new ClassPathXmlApplicationContext("test.xml");
Ironman ironman=ac.getBean("ironman",Ironman.class);
System.out.println("ironman:"+ironman);
最后我们的输出结果为:表示注入成功。

从输出结果可以看出,在Ironman中成功注入了Glover和Armour,而在Armour中也成功添加了name为mask1的属性和属性值。
–简单说一下上面代码的对应关系:
1、因为我们使用的是byName方式装配,所以我们在定义实体类的时候,这两个必须是对应的,要不然根据name找会找不到,就会装配失败的!(看下面失败的例子)
2、因为是byName的方式装配,它使用的是set方式注入,所以一定添加set方法。

比如我们将bean中的id改一下:

那么输出结果为:说明装配失败了,根据name没找到对应的bean。

例2:使用autowire="byType"来进行自动装配。
(还是向Ironman(钢铁侠)中装配 Glover(手套)和Armour(盔甲))
step1、添加相应的实体类和set方法(因为byType也是使用set的方式注入,代码和上面的相同。)
step2、配值bean元素 和 autowire="byType"。
<bean id="glover" class="test.Glover"/>
<bean id="armour" class="test.Armour">
	<property name="name" value="mask1"></property>
</bean>
<bean id="ironman" class="test.Ironman" autowire="byType"/>
step3、启动容器,调用getBean方法,和上面的代码相同,直接看输出结果,装配成功。

下面我们看下错误的例子:我们配置两个bean-id不同但是实体类相同的bean元素。
<bean id="glover1" class="test.Glover"/>
<bean id="glover2" class="test.Glover"/>
<bean id="armour" class="test.Armour">
	<property name="name" value="mask1"></property>
</bean>
<bean id="ironman" class="test.Ironman" autowire="byType"/>
我们在来输出一下:报错了,因为使用byType类型,应该是单例的,如果找到两个或以上bean元素,就会报错,系统不知道该装配哪个才好!

错误信息:org.springframework.beans.factory.UnsatisfiedDependencyException: Error creating bean with name ‘ironman’ defined in class path resource [test.xml]: Unsatisfied dependency expressed through bean property ‘glover’: : No qualifying bean of type [test.Glover] is defined: expected single matching bean but found 2: glover1,glover2; nested exception is org.springframework.beans.factory.NoUniqueBeanDefinitionException: No qualifying bean of type [test.Glover] is defined: expected single matching bean but found 2: glover1,glover2
例3:constructor装配:
–constructor自动装配具有和byType自动装配相同的局限性。当发现多个Bean匹配某个构造器的入参时,Spring不会尝试猜测哪一个Bean更适合自动装配,会装配失败。此外,如果一个类有多个构造器,它们都满足自动装配的条件时,Spring也不会尝试猜测哪一个构造器更适合使用。
上面就是有关自动装配的内容,下面我们来看一下向元素中都可以注入哪些类型的值。
6.注入基本类型的值:
<bean id="vb" class="value.ValueBean">
	<property name="name" value="小包总"/>
	<property name="age" value="20"/>
</bean>
7.注入集合类型的值:
a.支持四种集合类型的值的注入,分别是List、Set、Properties、Map。
b.注入方式如下:
<property name="interest">
	<list>
		<value>打猎</value>
		<value>看书</value>
		<value>编程</value>
		<value>编程</value>
	</list>
</property>
<property name="city">
	<set>
		<value>洛阳</value>
		<value>金陵</value>
		<value>开封</value>
	</set>
</property>
<property name="score">
	<map>
		<entry key="english" value="59.5"/>
		<entry key="math" value="17"/>
	</map>
</property>
<property name="db">
	<props>
		<prop key="username">tom</prop>
		<prop key="pwd">1234</prop>
	</props>
</property>
8.引用的方式注入集合类型的值:
首先将我们的bean通过ref属性引用其它的bean元素。
<bean id="vb2" class="value.ValueBean">
	<property name="interest" ref="interestBean"/>
	<property name="city" ref="cityBean"/>
	<property name="score" ref="scoreBean"/>
	<property name="db" ref="dbBean"/>
</bean>
然后我们再配置所引用的bean元素。
<!-- 将集合类型的值配置成一个bean -->
<util:list id="interestBean">
	<value>打猎</value>
	<value>看书</value>
	<value>编程</value>
</util:list>
<util:set id="cityBean">
	<value>北京</value>
	<value>南京</value>
	<value>东京</value>
</util:set>
<util:map id="scoreBean">
	<entry key="english" value="80"/>
	<entry key="math" value="90"/>
</util:map>
<util:properties id="dbBean">
	<prop key="username">John</prop>
	<prop key="pwd">1234</prop>
</util:properties>
9.读取properties文件的内容:
创建一个bean,通过location属性来读取配置文件。
<!--
	读取properties文件的内容。location属性用于指定要读取的文件的位置。
	注: classpath:表示依据类路径去查找相应的文件。
-->
<util:properties id="config" location="classpath:config.properties"/>
创建一个配置文件,然后在配置文件中配置我们要注入的值。

10.spring表达式:
a、spring表达式的作用?
可以用来读取其它bean的属性。
b、用法如下图:

例:介绍完可以注入的类型和spring表达式以后我们写一下例子:
例1:注入基本类型例子:
step1、创建一个ValueBean实体类。
package value;

import java.util.List;
import java.util.Map;
import java.util.Properties;
import java.util.Set;

public class ValueBean {
	private String name;
	private int age;
	private List<String> interest;
	private Set<String> city;
	private Map<String,Double> score;
	private Properties db;

	public String getName() {
		return name;
	}

	public int getAge() {
		return age;
	}

	public List<String> getInterest() {
		return interest;
	}

	public Set<String> getCity() {
		return city;
	}

	public Map<String, Double> getScore() {
		return score;
	}

	public Properties getDb() {
		return db;
	}

	public void setScore(Map<String, Double> score) {
		this.score = score;
	}

	public void setDb(Properties db) {
		this.db = db;
	}

	public void setCity(Set<String> city) {
		this.city = city;
	}

	public ValueBean(){
		System.out.println("ValueBean的无参构造");
	}

	public void setInterest(List<String> interest) {
		this.interest = interest;
	}

	public void setName(String name) {
		System.out.println("setName()");
		this.name = name;
	}
	public void setAge(int age) {
		System.out.println("setAge()");
		this.age = age;
	}

	@Override
	public String toString() {
		return "ValueBean [name=" + name + ", age=" + age + ", interset=" + interest + ", city=" + city + ", score="
				+ score + ", db=" + db + "]";
	}
}
step2、配置xml文件。
<!--
	如果集合类注入的是对象则用<ref bean=" "></ref>
	基本类型用<value></value>
-->
<bean id="vb" class="value.ValueBean">
	<property name="name" value="小包总"></property>
	<property name="age" value="20"></property>
	<property name="interest">
		<list>
			<value>打野</value>
			<value>上单</value>
			<value>中单</value>
			<value>中单</value>
		</list>
	</property>
	<property name="city">
		<set>
			<value>洛阳</value>
			<value>金陵</value>
			<value>开封</value>
			<value>佳木斯</value>
			<value>佳木斯</value>
		</set>
	</property>
	<property name="score">
		<map>
			<entry key="英语" value="99.5"/>
			<entry key="chinese" value="99.5"/>
		</map>
	</property>
	<property name="db">
		<props>
			<prop key="username">tom</prop>
			<prop key="password">1234</prop>
		</props>
	</property>
</bean>
step3、启动容器,调用getBean方法。
ApplicationContext ac=new ClassPathXmlApplicationContext("test.xml");
Ironman ironman=ac.getBean("ironman",Ironman.class);
System.out.println("ironman:"+ironman);
输出结果:(set集合中的佳木斯只显示一个)
vb:ValueBean [name=小包总, age=20, interset=[打野, 上单, 中单, 中单], city=[洛阳, 金陵, 开封, 佳木斯], score={英语=99.5, chinese=99.5}, db={password=1234, username=tom}]
–注入其它的类型的值大同小异,就不举例子了!
例2:spring表达式的例子:
step1、创建一个实体类:SpelBean
package value;

public class SpelBean {
	private String name;
	private String interest;
	private double score;
	private String username;
	public void setName(String name) {
		this.name = name;
	}
	public void setInterest(String interest) {
		this.interest = interest;
	}
	public void setScore(double score) {
		this.score = score;
	}
	public void setUsername(String username) {
		this.username = username;
	}
	@Override
	public String toString() {
		return "SpelBean [name=" + name + ", interest=" + interest + ", score=" + score + ", username=" + username
				+ "]";
	}
}
step2、配置xml文件。
<bean id="sb1" class="value.SpelBean">
	<property name="name" value="#{vb.name}"></property>
	<property name="interest" value="#{vb.interest[0]}"></property>
	<!--
		读取map中的值有两种方式:如果包含中文字符(或者其他特殊字符)使用下面这个方法会报错
		<property name="score" value="#{vb.score.english}"></property>
		所以下面这种更常用
	-->
	<property name="score" value="#{vb.score['英语']}"></property>
	<property name="username" value="#{config.username}"></property>
</bean>
step3、启动Spring容器,调用getBean方法。
ApplicationContext ac=new ClassPathXmlApplicationContext("value.xml");
SpelBean sb1=ac.getBean("sb1",SpelBean.class);
System.out.println("sb1:"+sb1);
输出结果:
sb1:SpelBean [name=小包总, interest=打野, score=99.5, username=tom]
对应关系:
下图中是:获取id为vb name为name的值。

下图中是:获取id为vb name为interest的下标为0(第一个)的值。

下图中是:获取id为vb name为score map的key值为 英语 对应的value值。

下图中是:获取id为conf 而该bean是配置的properties文件,所以会去配置文件中找username对应的值。

图中xml文件所有的bean元素配置的property元素的name必须与实体类中的属性对应,也就是将该name首字母大写加上set后和实体类的set方法相对应(上面set方式注入时提到过)。

也可以参考一下这篇文章,写的很棒:https://blog.csdn.net/sinat_21843047/article/details/80297951#commentBox
以上就是所有的IOC和DI的内容了,真的写了好久,如果喜欢请给个赞吧,谢谢!
下一篇: spring的常用注解