文章目录
Spring

Spring目前所拥有的功能非常多,常用的DI和MVC已经是开发中的家常便饭,而且使用Spring来管理其它的框架也是习以为常的事情。Spring在项目中的最大作用就是为了解耦,降低项目整体的耦合度,尽可能做到低耦合。Spring的核心就是IOC和AOP。IOC控制反转创建bean对象,通过DI依赖注入来完成bean对象的数据封装。
IOC是一种开发思想,DI是一种开发实现
官网文档在下面的位置
https://docs.spring.io/spring/docs/current/spring-framework-reference/core.html#beans-introduction
可以通过chrome翻译来查看
1 依赖注入(DI)、控制反转(IOC)概念
虽然业界经常提到什么IOC,什么DI,其实都是一个意思,只是IOC是Spring提出的设计开发思想,而DI是代码实现方式。实际的意思就是主调对象不需要自己构造被调对象,而是向Spring请求所需的被调对象,Spring会生成指定对象,然后注入给主调对象,这整个过程就叫做依赖注入。
(PS:Spring通过set方法反射实现的依赖注入,所以需要为所有需要注入的内容添加set方法,否则无法实现注入)
深入理解DIP、IoC、DI以及IoC容器,参考博客:
https://www.cnblogs.com/liuhaorain/p/3747470.html
2 创建maven项目步骤
- 创建一个普通maven工程,然后pom.xml文件中添加spring的核心依赖:
<dependency>
  <groupId>org.springframework</groupId>
  <artifactId>spring-core</artifactId>
  <version>4.3.15.RELEASE</version>
</dependency>
<dependency>
  <groupId>org.springframework</groupId>
  <artifactId>spring-beans</artifactId>
  <version>4.3.15.RELEASE</version>
</dependency>
<dependency>
  <groupId>org.springframework</groupId>
  <artifactId>spring-context</artifactId>
  <version>4.3.15.RELEASE</version>
</dependency>
- 生成对应的java和resources文件夹,并且配置好对应的格式:

- 在resources创建spring的xml文件:(spring.xml)

- 创建一个bean类和一个console控制类(测试类)
public class Student {
    private Teacher teacher;
    private String name;
    private Double height;
    private Integer id;
    private Date birthday;
    private Set set;
    private Properties properties;
    private String[] hobby;
    private List list;
    private Map<String,Object> map;
    public Student() {
        System.out.println("正在创建对象......");
    }
    public Student(int age) {
        System.out.println("正在创建对象2......"+age);
    }
    public Student(String name) {
        System.out.println("正在创建对象3......"+name);
    }
    public Student(int age,String name) {
        System.out.println("正在创建对象4......"+age+name);
    }
    // getter,setter......
- 在spring配置文件中,创建一个bean对象(spring.xml)
<!--把Student 交给  Spring 进行管理-->
    <bean name="student" class="bean.Student"></bean>
    <bean name="Student2" class="bean.Student"></bean>
    <!--另取别名  Student2==student2 -->
    <alias name="Student2" alias="student2"></alias>
    <bean name="st" class="bean.Student">
        <constructor-arg name="name">
            <!--调用对应的构造器注入对象  并且给构造器参数设置-->
            <value>哈哈哈</value>
        </constructor-arg>
    </bean>
- 测试类
依赖注入多参数构造函数
public class TestApp {
   static  ApplicationContext  context;
    @BeforeClass
    public static void get(){
        //解析xml 获得spring上下文本对象  (获得IOC容器)  就已经把对象创建 并放入容器中
        context = new ClassPathXmlApplicationContext("spring.xml");
    }
    @Test
    public void getStudentBean() {
        System.out.println("___________________________________");
        //在IOC容器中获取对象  单例
        //利用类型获取对象
//        Student student = context.getBean(Student.class);
        //利用配置名称 获得对象
        Student student2 = (Student)context.getBean("student");
//        System.out.println(student == student2);//true
        Student student3 = (Student)context.getBean("student3");
    }
    @Test
    public void getStudentBeanConstruction() {
        System.out.println("-----------");
        Student st = (Student) context.getBean("st");
        System.out.println(st.getName());
    }
}
3 依赖注入
3.1 依赖注入String,类对象
<bean name="setPropertys" class="bean.Student">
	//一个一个属性赋值
	<property name="name">
		<value type="java.lang.String">韩梅梅</value>
    </property>
    <property name="height">
    	<value type="java.lang.Double">180.2</value>
    </property>
    <property name="id">
    	<value type="java.lang.Integer">1</value>
    </property>
    // 引用- 1997-12-12
    <property name="birthday" ref="birthdayValue"></property>
    <property name="teacher"  ref="teacher"></property>
</bean>
// 出生日期数值 对象
<bean name="birthdayValue" class="java.util.Date">
    <constructor-arg index="0"><value>1997</value></constructor-arg>
    <constructor-arg index="1"><value>12</value></constructor-arg>
    <constructor-arg index="2"><value>12</value></constructor-arg>
</bean>
<bean name="teacher" class="bean.Teacher">
///利用setter 方法   进行属性注入
	<property name="name" value="孔皓"></property>
</bean>
这种方式约束了传入的类型,只能装载String类型,开发中更多会选择此种方式,因为类型一目了然(PS:在Spring中,三种依赖注入,set方法注入和构造函数注入,当然还有后期框架整合使用到的接口注入)
3.2 依赖注入List,Array,Map,Set
<bean name="setCollection" class="bean.Student">
	 <property name="list">
		<list>
        	<value>韩梅梅</value>
            <value>12.5</value>
            <ref bean="teacher"></ref>
        </list>
	</property>
    <property name="hobby">
        <array>
            <value>孔皓瓜皮</value>
            <value>陶仟憨憨</value>
        </array>
    </property>
    <property name="map">
        <map>
            <entry key="number" value="12"></entry>
            <entry key="varchar" value="韩梅梅"></entry>
            <entry key="object"  value-ref="teacher"></entry>
        </map>
    </property>
    <property name="set">
        <set>
            <value>123412</value>
        </set>
    </property>
    <property name="properties">
        <props>
            <prop key="url">jdbc:mysql://localhost:3306/test</prop>
            <prop key="driver">com.mysql.jdbc.Driver</prop>
            <prop key="username">root</prop>
            <prop key="password">123</prop>
        </props>
    </property>
</bean>
PS:List Set Array三种接口类型,Spring都是通过Collection父接口来进行的注入,所以在xml配置中,< list>< set>< array>是可以通用的时候,但是如果在bean中定义的类型是直接的实现类类型,比如list这里定义的是ArrayList,那么Spring就只能用过list标签进行注入了,所以< set>< array>也是同理
3.3 依赖注入内部bean对象
<bean id="TwoBean" class="cn.beans.TwoBean">
	<property name="oneBean">
		<bean class="cn.beans.OneBean">
			<property name="name" value="zhangsan" />
		</bean>
	</property>
</bean>
3.4 null和空值
<bean class="bean.Teacher">
    <property name="name">
        <null/>
    </property>
</bean>

<bean class="cn.thinknovo.spring.bean.TestPerson">
    <property name="username" value=""/>
</bean>
4 Spring XML合并
如果所有的xml文件都在resources根目录下,可以通过import标签可以把其余的spring xml文件引入:

这样,我们只需要读取当前这个xml文件,就可以完成读取所有的配置内容了。当然,我们还可以在resources文件夹中创建子文件夹来进行分离,让资源文件更加有条理性。
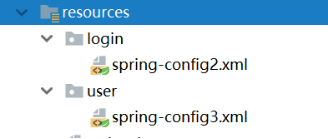
加载的时候,只需要增加对应的目录就可以了。

Struts2—— < include file = “user.xml”/>
Hibernate—— < mapping resource = “user.hbm.xml”/>
Spring—— < import resource = “spring.xml”/>