传输
npm update
cd 项目目录
vue init webpack luffycity
运行项目
打开项目已经,在pycharm的终端下运行vue项目,查看效果。
npm run dev
APP
改成空白页
<template>
  <div id="app">
  </div>
</template>

<script>

export default {
  name: 'App',
  components: {
  }
}
</script>

<style>
</style>
npm i vue-router -S
在src目录下创建router路由目录,在router目录下创建index.js路由文件
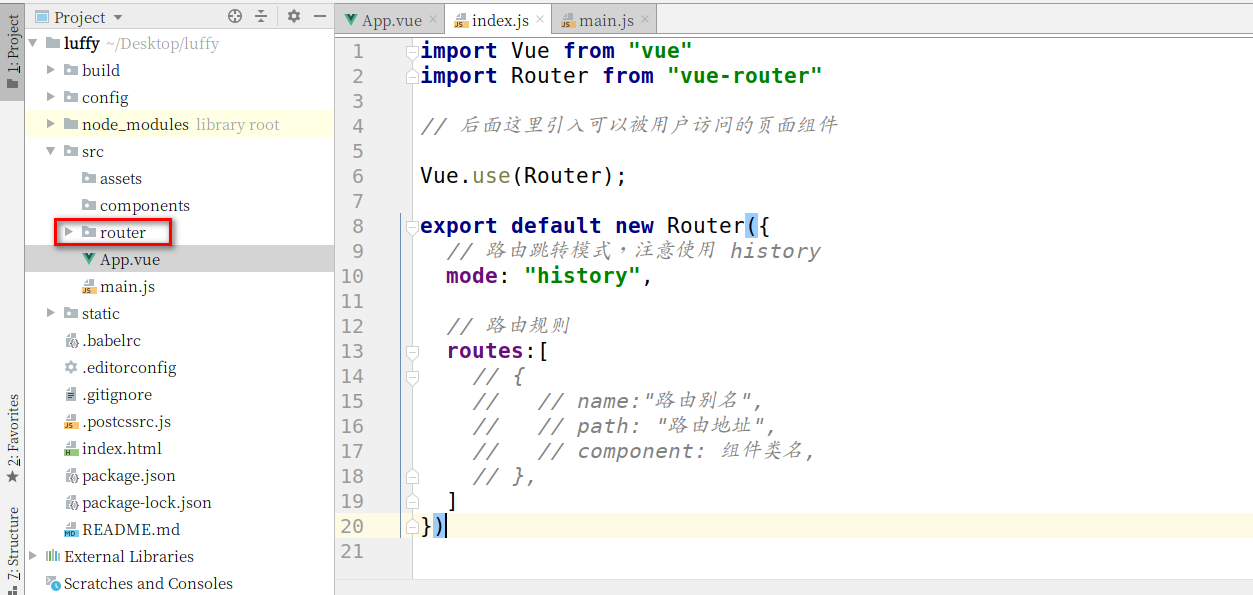
index.js路由文件中,编写初始化路由对象的代码 .
// 引入路由和vue模块,把路由模块注册vue项目中
import Vue from "vue";
import Router from "vue-router";

Vue.use(Router);

// 引入组件
import Home from "../components/Home"

// 编写路由列表提供给main.js进行初始化
export default new Router({
  // 路由模式, hash 和 history
  // 设置路由模式为‘history’,去掉默认的
  mode: "history",
  routes:[
    {
      path:"/",   // http://localhost:8081/
      name:"Home",
      component:Home,
    }
  ]
})
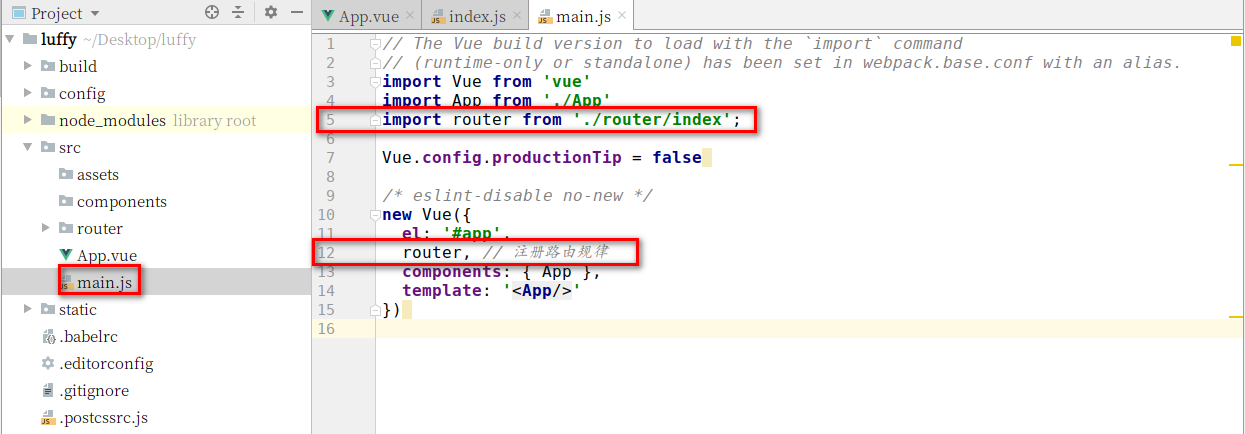
打开main.js文件,把router路由规则对象注册到vue中
代码:


// The Vue build version to load with the `import` command
// (runtime-only or standalone) has been set in webpack.base.conf with an alias.
import Vue from 'vue'
import App from './App'
import router from './router/index';

Vue.config.productionTip = false

/* eslint-disable no-new */
new Vue({
  el: '#app',
  router,
  components: { App },
  template: '<App/>'
});

代码:
<template>
  <div id="app">
    <router-view/>
  </div>
</template>

<script>
export default {
  name: 'App',
  components: {

  }
}
</script>

<style>

</style>
注意:如果在vue创建项目的时候,设置安装vue-router,则项目会自动帮我们生成上面的router目录和index.js里面的代码,以及自动到main.js里面注册路由对象。