版权声明:本文为博主原创文章,遵循 CC 4.0 BY-SA 版权协议,转载请附上原文出处链接和本声明。
POI检索
文章只是为了记录自己的学习,方便以后查看
此次只记录城市检索功能的实现,关于百度地图秘钥的申请等操作这里不做说明。
百度地图提供了三种检索功能
1.城市检索;
2. 周边检索;
3. 区域检索;
一.首先前往百度SDK下载开源代码。
https://mapopen-pub-androidsdk.cdn.bcebos.com/map/BaiduMap_AndroidSDK_v6.0.0_Sample.zip
下载解压后,找到BaiduMap_AndroidSDK_v6.0.0_Sample.zip\BaiduMap_AndroidSDK_v6.0.0_Sample\BaiduMapsApiASDemo\app\src\main\java\com\baidu\mapapi\overlayutil
中的所有java类复制,如果不知道需要哪些类,最好全部复制。如图所示:
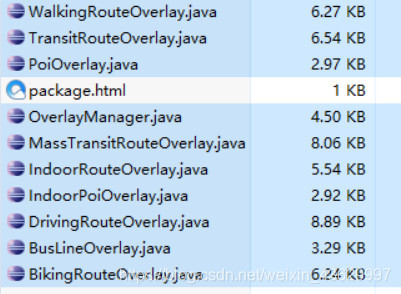
将所有类复制到你的项目中与你的MainActivity.java在同一目录下。
二.编写布局界面,使用两个文本框和一个Button按钮,两个文本框用来输入城市名和地点,在Button按钮的监听事件中进行检索事件的开启。
以下是我布局界面的主要部分
<LinearLayout
        android:layout_margin="5dp"
        android:id="@+id/top"
        android:layout_width="match_parent"
        android:layout_height="50dp">
        <EditText
            android:id="@+id/a"
            android:layout_width="0dp"
            android:layout_height="wrap_content"
            android:layout_weight="2"
            android:hint="城市名"
            android:layout_marginRight="5dp"
            />
        <EditText
            android:id="@+id/b"
            android:layout_width="0dp"
            android:layout_height="wrap_content"
            android:layout_marginLeft="5dp"
            android:layout_weight="2"
            android:hint="关联词"
            />
        <Button
            android:id="@+id/btn"
            android:layout_width="0dp"
            android:layout_weight="1"
            android:layout_height="wrap_content"
            android:text="查找"/>
    </LinearLayout>
三.在MainAcyivity.java中编写POI城市检索的操作。
在Button的监听事件中:
1.创建POI检索实例
2.设置POI检索监听者
3.发起检索请求
btn.setOnClickListener(new View.OnClickListener() {
            @Override
            public void onClick(View v) {
                mPoiSearch = PoiSearch.newInstance();
                mPoiSearch.setOnGetPoiSearchResultListener(listener);

                mPoiSearch.searchInCity((new PoiCitySearchOption())
                        .city(a.getText().toString())
                        .keyword(b.getText().toString())
                        .pageNum(10));

            }
        });
对POI检索结果的显示。
OnGetPoiSearchResultListener listener = new OnGetPoiSearchResultListener() {
        @Override
        public void onGetPoiResult(PoiResult poiResult) {
            if (poiResult == null
                    || poiResult.error == SearchResult.ERRORNO.RESULT_NOT_FOUND) {
                Toast.makeText(MainActivity.this, "未找到结果",
                        Toast.LENGTH_LONG).show();
                return;
            } else    if (poiResult.error == SearchResult.ERRORNO.NO_ERROR) {
                if (poiResult != null) {
                baiduMap.clear();
                PoiOverlay poiOverlay = new PoiOverlay(baiduMap);
                poiOverlay.setData(poiResult);
                poiOverlay.addToMap();
                poiOverlay.zoomToSpan();
                Toast.makeText(
                        MainActivity.this,
                        "检索成功!"Toast.LENGTH_SHORT).show();
                return;
            }
            mPoiSearch.destroy();
        }
        }
        @Override
        public void onGetPoiDetailResult(PoiDetailSearchResult poiDetailSearchResult) {

        }
        @Override
        public void onGetPoiIndoorResult(PoiIndoorResult poiIndoorResult) {
        }
        //废弃
        @Override
        public void onGetPoiDetailResult(PoiDetailResult poiDetailResult) {
            poiDetailResult.getAddress();
        }
    };
四.创建MyPoiOverlay继承自PoiOverlay
public class MyPoiOverlay  extends PoiOverlay {
    /**
     * 构造函数
     *
     * @param baiduMap 该 PoiOverlay 引用的 BaiduMap 对象
     */
    public MyPoiOverlay(BaiduMap baiduMap) {
        super(baiduMap);
    }
    @Override public boolean onPoiClick(int index) {
        super.onPoiClick(index);
        return true;
    }

}
五.如果你没有标注地点的图片,在运行时会报错,需要修改PoiOverlay类中的代码,找到下图所示的代码段
 /**
     * 设置POI数据
     *
     * @param poiResult    设置POI数据
     */
    public void setData(PoiResult poiResult) {
        this.mPoiResult = poiResult;
    }

    @Override
    public final List<OverlayOptions> getOverlayOptions() {
        if (mPoiResult == null || mPoiResult.getAllPoi() == null) {
            return null;
        }

        List<OverlayOptions> markerList = new ArrayList<>();
        int markerSize = 0;

        for (int i = 0; i < mPoiResult.getAllPoi().size() && markerSize < MAX_POI_SIZE; i++) {
            if (mPoiResult.getAllPoi().get(i).location == null) {
                continue;
            }

            markerSize++;
            Bundle bundle = new Bundle();
            bundle.putInt("index", i);
            markerList.add(new MarkerOptions()
               //.icon(BitmapDescriptorFactory.fromAssetWithDpi("Icon_mark" + markerSize + ".png"))
                    .icon(BitmapDescriptorFactory.fromResource(R.drawable.icon_gcoding))
                    .extraInfo(bundle)
                .position(mPoiResult.getAllPoi().get(i).location));

        }

        return markerList;
    }
将图中的
//.icon(BitmapDescriptorFactory.fromAssetWithDpi("Icon_mark" + markerSize + ".png"))`
注释掉,添加下面一行的
.icon(BitmapDescriptorFactory.fromResource(R.drawable.icon_gcoding))//原位置新添加的
这里的
R.drawable.icon_gcoding
是你自己项目里边的图片。
自此POI城市检索完成,项目运行后的结果为:
