版权声明:本文为博主原创文章,遵循 CC 4.0 BY-SA 版权协议,转载请附上原文出处链接和本声明。
在 Spring Boot 中实现定时任务,我们可以有两种选择,一是 Spring 自带的定时任务处理器 @Scheduled 注解,另一种则是使用第三方框架 Quartz。下面我们分别对这两种方法进行模拟。
1 定时任务处理器 @Scheduled 注解
首先我们在启动类添加 @EnableScheduling 注解,其中 @EnableScheduling 注解提供对定时任务的支持。
@SpringBootApplication
@EnableScheduling
public class TestApplication {

	public static void main(String[] args) {
		SpringApplication.run(TestApplication.class, args);
	}

}
然后我们创建一个类来实现定时任务功能。
@Component
public class ScheduledTest {

	//fixedRate 表示两次任务的开始时间间隔
	@Scheduled(fixedRate = 10000)
    public void fixedRate() {
        System.out.println("fixedRate " + new Date());
    }

	//fixedDelay 表示本次任务结束到下次任务开始之间的时间间隔。
    @Scheduled(fixedDelay = 4000)
    public void fixedDelay() {
        System.out.println("fixedDelay " + new Date());
    }

    //initialDelay 表示首次任务启动的延迟时间
    @Scheduled(initialDelay = 5000,fixedDelay = 2000)
    public void initialDelay() {
        System.out.println("initialDelay " + new Date());
    }
}
注意,@Scheduled 注解开启一个定时任务。且所有时间单位均为毫秒。测试结果如下:

2 Quartz 的使用
在项目中,若我们想要实现的功能比较简单,可以使用 @Scheduled 注解,否则我们一般选择使用 Quartz 来实现定时任务。
首先,与 @Scheduled 注解的使用方法相似,在启动类添加 @EnableScheduling 注解。
@SpringBootApplication
@EnableScheduling
public class TestApplication {

	public static void main(String[] args) {
		SpringApplication.run(TestApplication.class, args);
	}

}
添加 Quartz 的依赖
<dependency>
    <groupId>org.springframework.boot</groupId>
    <artifactId>spring-boot-starter-quartz</artifactId>
</dependency>
我们先创建一个任务类,需要继承 QuartzJobBean
@Component
public class Job extends QuartzJobBean {

	//执行定时任务
	@Override
	protected void executeInternal(JobExecutionContext context) throws JobExecutionException {
		System.out.println("I want to do something!" + new Date());
	}

}
然后我们再创建一个配置类
@Configuration
public class QuartzConfig {

    // 配置定时任务
    @Bean
    public JobDetail testQuartzDetail() {
        return JobBuilder.newJob(Job.class).withIdentity("Job")
                        .storeDurably().build();
    }

    // 配置定时任务的触发器,也就是什么时候触发执行定时任务
    @Bean(name = "jobTrigger")
    public Trigger testQuartzTrigger() {
        SimpleScheduleBuilder scheduleBuilder = SimpleScheduleBuilder.simpleSchedule()
                .withIntervalInSeconds(3)  // 设置时间周期单位(秒)
                .repeatForever();
        return TriggerBuilder.newTrigger().forJob(testQuartzDetail())
                    .withIdentity("Job")
                    .withSchedule(scheduleBuilder)
                    .build();
    }
}
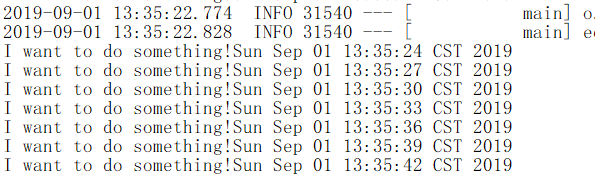
程序运行如下: