Maven构建项目模板
mvn archetype:generate:  Maven插件原型是一个Maven项目模板工具包。

-DgroupId           包名
-DartifactId        项目名
-DarchetypeArtifactId   类型maven-archetype-quickstart,创建一个Java Project,maven-archetype-webapp,创建一个Web Project
-DinteractiveMode     是否使用交互模式,如果为false,非交互式的命令后直接创建,否则会有控制台提示输入操作
先使用mvn命令构建Maven项目
mvn archetype:generate -DinteractiveMode=false -DgroupId=com.autumn -DartifactId=springbootdemo -Dversion=1.0.0
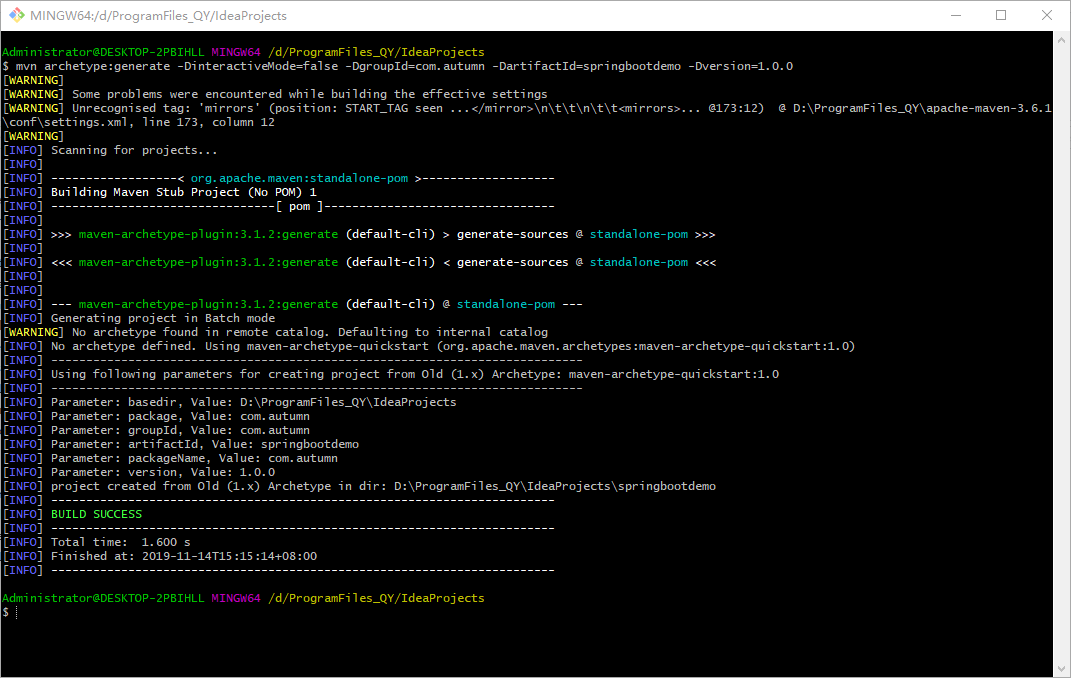
成功后模板如下,可以看出只是个叫springbootdemo的maven项目,目前和springboot还一点关系没有。
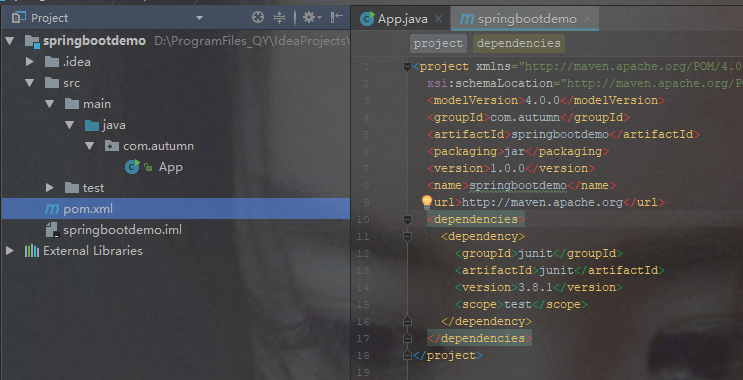
POM添加依赖
在pom文件里添加Spring Boot依赖,
对于SpingBoot测试Junit至少是4.1-4.2以上的版本,所以把版本号删除默认的就行
    <parent>
        <!-- 指定Spring Boot的版本2.2.2.BUILD-SNAPSHOT -->
        <groupId>org.springframework.boot</groupId>
        <artifactId>spring-boot-starter-parent</artifactId>
        <version>2.2.2.BUILD-SNAPSHOT</version>
        <relativePath/> <!-- lookup parent from repository -->
    </parent>

    <dependencies>
        <!--spring boot核心包-->
        <dependency>
            <groupId>org.springframework.boot</groupId>
            <artifactId>spring-boot-starter-web</artifactId>
        </dependency>
    </dependencies>


    <build>
        <plugins>
            <!--可以将应用打包成一个可执行的jar包的插件-->
            <plugin>
                <groupId>org.springframework.boot</groupId>
                <artifactId>spring-boot-maven-plugin</artifactId>
            </plugin>
        </plugins>
    </build>
也可以指定jar包和插件的仓库
    <!--jar包仓库-->
    <repositories>
        <repository>
            <id>spring-milestones</id>
            <name>Spring Milestones</name>
            <url>https://repo.spring.io/milestone</url>
        </repository>
        <repository>
            <id>spring-snapshots</id>
            <name>Spring Snapshots</name>
            <url>https://repo.spring.io/snapshot</url>
            <snapshots>
                <enabled>true</enabled>
            </snapshots>
        </repository>
    </repositories>

    <!--插件仓库-->
    <pluginRepositories>
        <pluginRepository>
            <id>spring-milestones</id>
            <name>Spring Milestones</name>
            <url>https://repo.spring.io/milestone</url>
        </pluginRepository>
        <pluginRepository>
            <id>spring-snapshots</id>
            <name>Spring Snapshots</name>
            <url>https://repo.spring.io/snapshot</url>
            <snapshots>
                <enabled>true</enabled>
            </snapshots>
        </pluginRepository>
    </pluginRepositories>
编码
编写启动类
spring boot提供了一个统一的注解@SpringBootApplication。
@SpringBootApplication = (默认属性)@Configuration + @EnableAutoConfiguration + @ComponentScan
package com.autumn;

import org.springframework.web.bind.annotation.GetMapping;
import org.springframework.web.bind.annotation.RestController;

@RestController
public class firstController {
    @GetMapping("hello")
    public String index(){
        return "HelloWorld~"+this.getClass();
    }
}
添加接口类
必须要写在App启动类一个包下才能够扫描到
@RestController注解相当于@ResponseBody + @Controller合在一起的作用。
package com.autumn;

import org.springframework.web.bind.annotation.GetMapping;
import org.springframework.web.bind.annotation.RestController;

@RestController
public class firstController {

    @GetMapping("hello")
    public String index(){
        return "HelloWorld~"+this.getClass();
    }
}
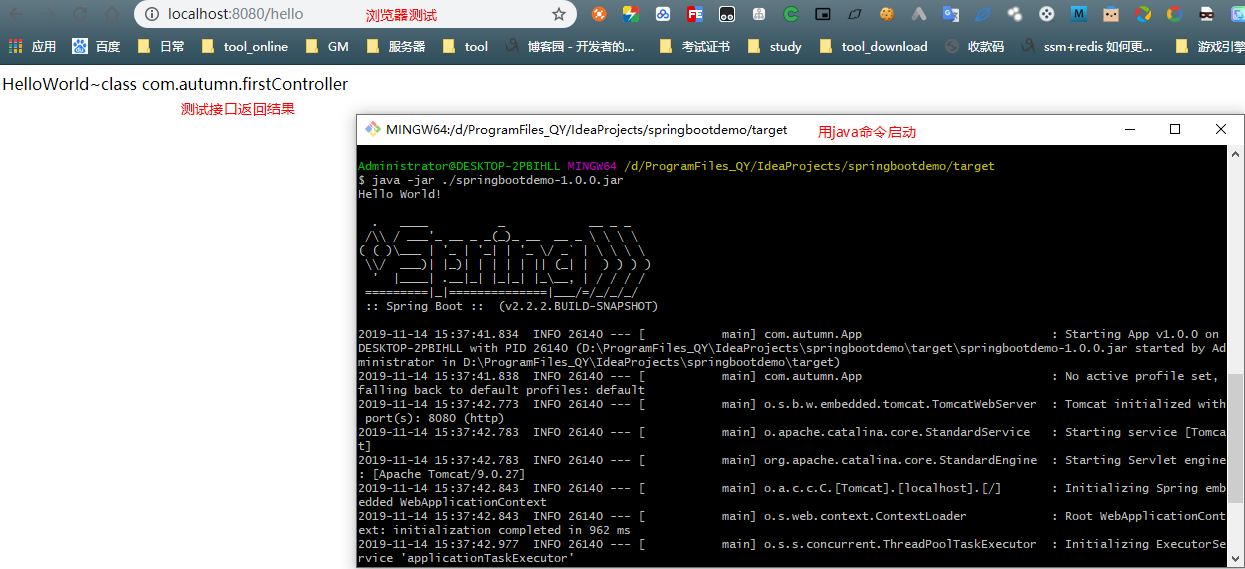
测试接口
浏览器中输入http://localhost:8080/hello

打包jar
用package打包,打包后在target文件夹下出现springbootdemo-1.0.0.jar文件

测试jar
参考