idea如何打包发布springboot
1.1.环境准备
window系统,jdk8环境,springboot项目,maven3.5.4环境
1.2.进行打包发布
打开idea编辑器,打开一个写好的demo项目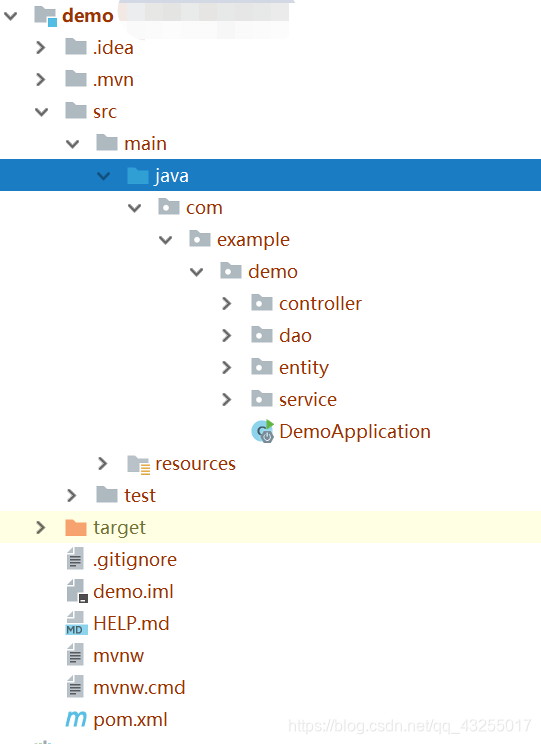
然后打开idea编辑器下方的terminal窗口,当你打开这个窗口的时候,所在的位置就是目录的根位置了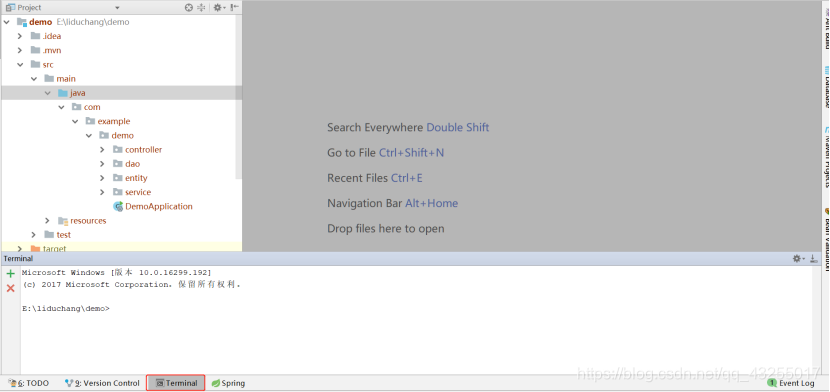
输入命令 mvn clean install -Dmaven.test.skip,这条命令就是用maven打成jar包的方式了,然后回车键。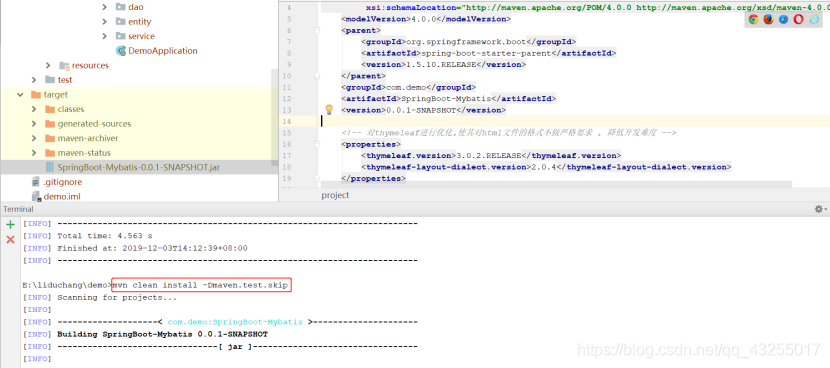
当看到BUILD SUCCESS的时候,就说明打包成功,在项目的target目录下就会出现一个jar包,默认的jar包名就是artifactId+version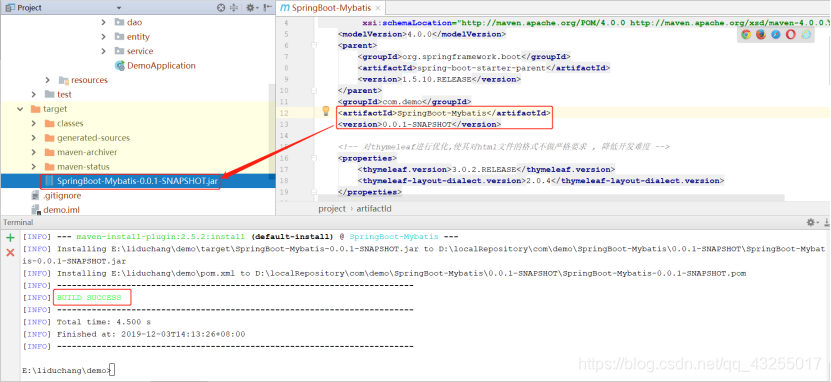
此时再进入到target目录,输入java -jar SpringBoot-Mybatis-0.0.1-SNAPSHOT.jar命令就可以运行jar包了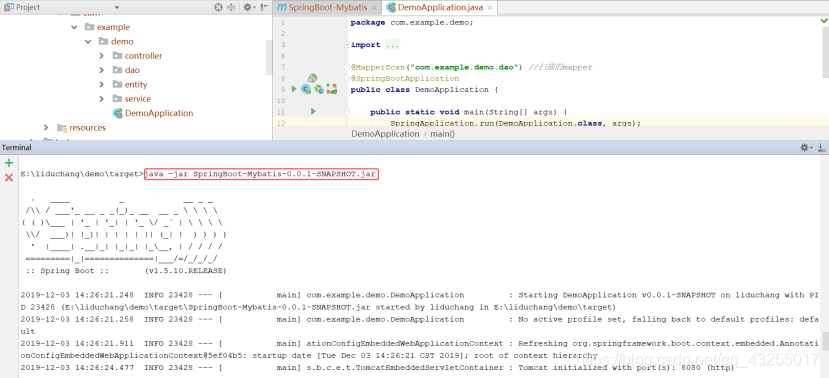
当你看到Started DemoApplication in ...的时候说明启动成功,就能在本地访问了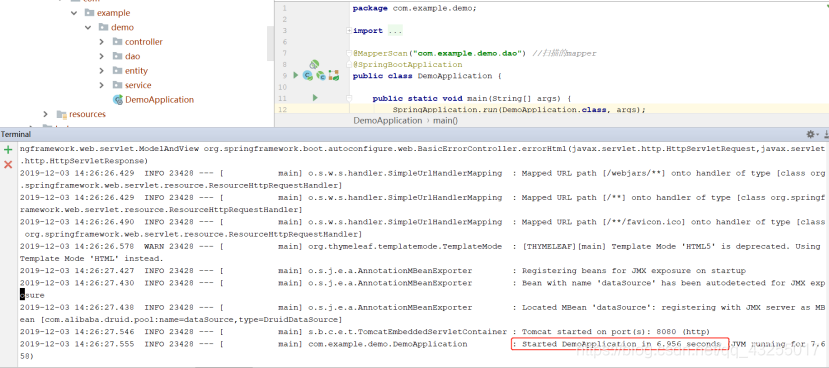
结论:这就是SpringBoot项目的在Windows环境发布,linux环境也是一样的,同样要安装jdk和maven环境。这也是springboot的神奇之处,不需要发布到Tomcat下,因为SpringBoot内嵌了web服务器包括Tomcat
特点简介
由于传统的ssm、ssh等框架繁琐的配置文件,springboot的出现就是为了简化配置文件
内嵌Web服务器包括Tomcat,只需要打成jar包就可以运行项目
SpringBoot基于全注解式的开发
SpringBoot整合Servlet
3.1.方式一
步骤:
- 写一个类MyFirstServlet继承HttpServlet,并重写doGet方法
- 在类的上面用@WebServlet标识Servlet并指明name和urlPatterns
- 在标识有@SpringBootApplication的主类上加上
@ServletComponentScan
FirstServlet.java
package com.example.servlet.myservlet;

import javax.servlet.http.HttpServlet;
import java.io.IOException;
import javax.servlet.ServletException;
import javax.servlet.annotation.WebServlet;
import javax.servlet.http.HttpServletRequest;
import javax.servlet.http.HttpServletResponse;

/**
 *SpringBoot整合Servlet方式一
 *@WebServlet(name="MyFirstServlet",urlPatterns="/myFirst")相当于如下:
 *
 *<servlet>
 * <servlet-name>MyFirstServlet</servlet-name>
 * <servlet-class>ah.szxy.servlet.FirstServlet</servlet-class>
 *</servlet>
 *<servlet-mapping>
 * <servlet-name>MyFirstServlet</servlet-name>
 * <url-pattern>/first</url-pattern>
 *</servlet-mapping>
 *
 */

@WebServlet(name="MyFirstServlet",urlPatterns="/myFirst")
public class FirstServlet extends HttpServlet {

    @Override
    protected void doGet(HttpServletRequest req, HttpServletResponse resp) throws ServletException, IOException {
        System.out.println("MyFirstServlet init............");
    }
}
ServletApplication.java
package com.example.servlet;

import org.springframework.boot.SpringApplication;
import org.springframework.boot.autoconfigure.SpringBootApplication;
import org.springframework.boot.web.servlet.ServletComponentScan;

@SpringBootApplication
@ServletComponentScan //在springBoot启动时会扫描@WebServlet,并将该类实例化
public class ServletApplication {

   public static void main(String[] args) {
      SpringApplication.run(ServletApplication.class, args);
   }

}
然后启动项目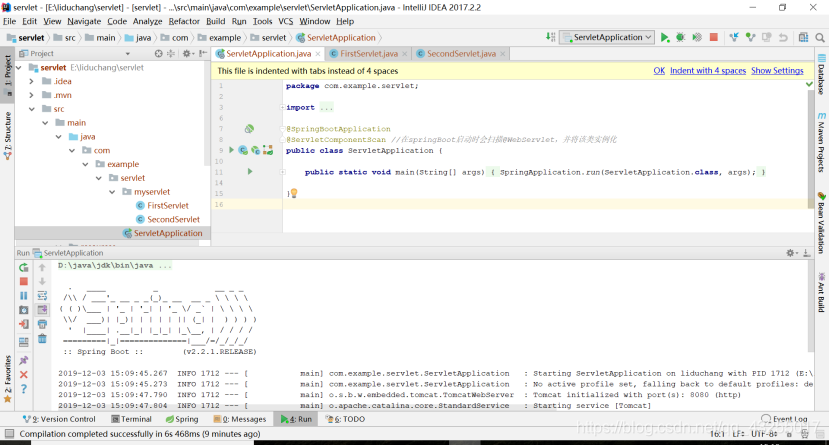
最后在浏览器输入localhost:8080/myFirstServlet,页面显示空白,在控制台打印MyFirstServlet init............
package com.example.servlet.myservlet;

import javax.servlet.ServletException;
import javax.servlet.http.HttpServlet;
import javax.servlet.http.HttpServletRequest;
import javax.servlet.http.HttpServletResponse;
import java.io.IOException;

/**
 * 整合Servlet的第二种方式
 */
public class SecondServlet extends HttpServlet {

    @Override
    protected void doGet(HttpServletRequest req, HttpServletResponse resp) throws ServletException, IOException {
        System.out.println("MySecondServlet init..........");
    }
}
ServletApplication.java
package com.example.servlet;

import com.example.servlet.myservlet.SecondServlet;
import org.springframework.boot.SpringApplication;
import org.springframework.boot.autoconfigure.SpringBootApplication;
import org.springframework.boot.web.servlet.ServletComponentScan;
import org.springframework.boot.web.servlet.ServletRegistrationBean;
import org.springframework.context.annotation.Bean;

@SpringBootApplication
//@ServletComponentScan //在springBoot启动时会扫描@WebServlet,并将该类实例化
public class ServletApplication {

   public static void main(String[] args) {
      SpringApplication.run(ServletApplication.class, args);
   }

  /**
 * 整合Servlet的第二种方式,创建ServletRegistrationBean并添加路径
 * @return
 */
@Bean
public ServletRegistrationBean getServletRegistrationBean(){
   ServletRegistrationBean bean = new ServletRegistrationBean(new SecondServlet());
   bean.addUrlMappings("/mySecond");
   return bean;
}
然后启动项目,在浏览器中访问localhost:8080/mySecondServlet,页面也是空白,在控制台就会打印MySecondServlet init..........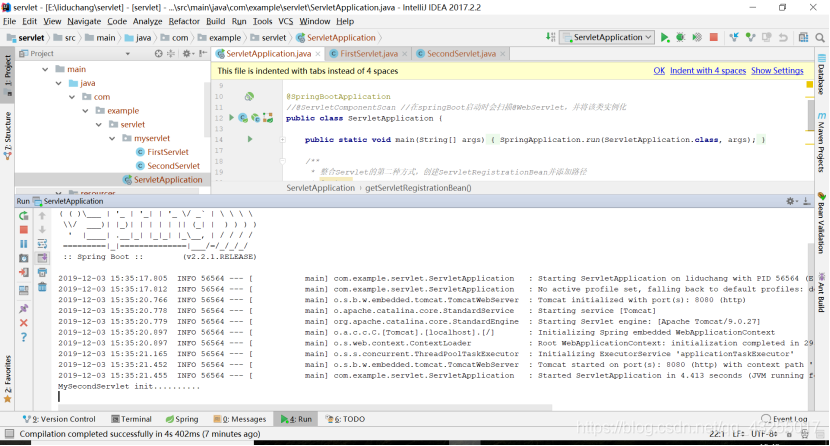
项目,结构如图所示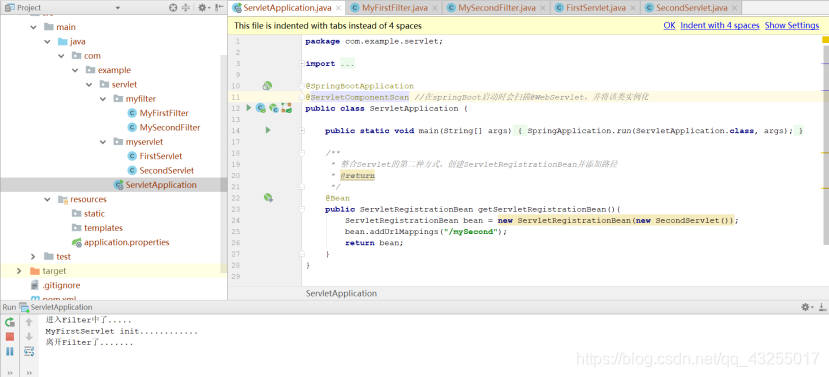
结论:
上面的两种方式推荐使用第一种基于注解的整合
虽然现在几乎用不到servlet了,但是学习SpringBoot整合servlet有助于学习的深入了解,更好的理解框架
4.SpringBoot整合Filterbr/>4.1.方式一
步骤:
创建一个MyFirstFilter类实现Filter接口,并在类上面标注@WebFilter
在@SpringBootApplication的主类上加上@ServletComponentScan注解
MyFirstFilter.java
package com.example.servlet.myfilter;

import javax.servlet.*;
import javax.servlet.annotation.WebFilter;
import java.io.IOException;

/**
 * 基于@WebFilter注解整合Filter方式一
 */
@WebFilter(filterName = "MyFirstFilter",urlPatterns = "/myFirst")
public class MyFirstFilter implements Filter {
    @Override
    public void init(FilterConfig filterConfig) throws ServletException {

    }

    @Override
    public void doFilter(ServletRequest arg0, ServletResponse arg1, FilterChain arg2) throws IOException, ServletException {
        System.out.println("进入Filter中了.....");
        arg2.doFilter(arg0,arg1);
        System.out.println("离开Filter了.......");
    }

    @Override
    public void destroy() {

    }
}
ServletApplication.java
package com.example.servlet;

import com.example.servlet.myservlet.SecondServlet;
import org.springframework.boot.SpringApplication;
import org.springframework.boot.autoconfigure.SpringBootApplication;
import org.springframework.boot.web.servlet.ServletComponentScan;
import org.springframework.boot.web.servlet.ServletRegistrationBean;
import org.springframework.context.annotation.Bean;

@SpringBootApplication
@ServletComponentScan //在springBoot启动时会扫描@WebServlet,并将该类实例化
public class ServletApplication {

   public static void main(String[] args) {
      SpringApplication.run(ServletApplication.class, args);
   }

   /**
    * 整合Servlet的第二种方式,创建ServletRegistrationBean并添加路径
    * @return
    */
   @Bean
   public ServletRegistrationBean getServletRegistrationBean(){
      ServletRegistrationBean bean = new ServletRegistrationBean(new SecondServlet());
      bean.addUrlMappings("/mySecond");
      return bean;
   }
}
4.2.方式二
步骤:
创建一个类MySecondFilter实现Filter接口,重写方法。
在@SpringBootApplication标识的主类中加@Bean的一个方法,将MySecondFilter对象注入容器中。
MySecondFilter.java
package com.example.servlet.myfilter;

import javax.servlet.*;
import java.io.IOException;

/**
 * 整合Filter的第二种方式
 */
public class MySecondFilter implements Filter {
    @Override
    public void init(FilterConfig filterConfig) throws ServletException {

    }

    @Override
    public void doFilter(ServletRequest arg0, ServletResponse arg1, FilterChain arg2) throws IOException, ServletException {
        System.out.println("进入MySecondFilter了......");
        arg2.doFilter(arg0, arg1);
        System.out.println("离开MySecondFilter了......");
    }

    @Override
    public void destroy() {

    }
}
ServletApplication.java
package com.example.servlet;

import com.example.servlet.myfilter.MySecondFilter;
import com.example.servlet.myservlet.SecondServlet;
import org.springframework.boot.SpringApplication;
import org.springframework.boot.autoconfigure.SpringBootApplication;
import org.springframework.boot.web.servlet.FilterRegistrationBean;
import org.springframework.boot.web.servlet.ServletComponentScan;
import org.springframework.boot.web.servlet.ServletRegistrationBean;
import org.springframework.context.annotation.Bean;

@SpringBootApplication
//@ServletComponentScan //在springBoot启动时会扫描@WebServlet,并将该类实例化
public class ServletApplication {

   public static void main(String[] args) {
      SpringApplication.run(ServletApplication.class, args);
   }

   /**
    * 整合Filter的第二种方式
    * 注册Filter
    */
   @Bean
   public FilterRegistrationBean getFilterRegistrationBean() {
      FilterRegistrationBean bean = new FilterRegistrationBean(new MySecondFilter());
      // bean.addUrlPatterns(new String[]{"*.do","*.jsp"});//拦截多个时
      bean.addUrlPatterns("/mySecond");
      return bean;
   }
}
然后在浏览器访问localhost:8080/mySecond,就可以看到控制台打印如下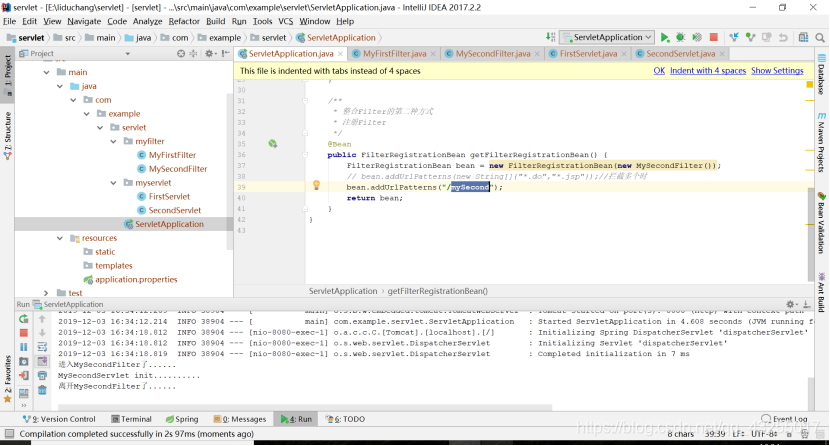
5.SpringBoot整合Listener
5.1.方式一
步骤:
创建一个类MyFirstListener实现ServletContextListener接口,重写方法
在该类上加上@WebListener注解
package com.example.servlet.mylistener;

import javax.servlet.ServletContextEvent;
import javax.servlet.ServletContextListener;
import javax.servlet.annotation.WebListener;

/**
 * springBoot 整合Listener第一种方式
 * 创建一个Servlet上下文的监听器
 * @WebListener 自动注册,相当于在web.xml中添加如下代码
 *
 *<listener>
 * <listener-class>ah.szxy.listener.FirstListener</listener-class>
 *</listener>
 */
@WebListener
public class MyFirstListener implements ServletContextListener {

    @Override
    public void contextDestroyed(ServletContextEvent arg0) {
        // TODO Auto-generated method stub
        System.out.println("MyFirstListener执行销毁了。。。");
    }

    @Override
    public void contextInitialized(ServletContextEvent arg0) {
        // TODO Auto-generated method stub
        System.out.println("MyFirstListener执行初始化了。。。");
    }
}
执行项目会打印如下,因为用了@ServletComponentScan注解,在项目启动的时候就会扫描包中是否含有servlet,若有就初始化。由于FirstServlet是基于注解初始化的,所以在项目启动的时候,就会执行初始化servlet,被Listener监听到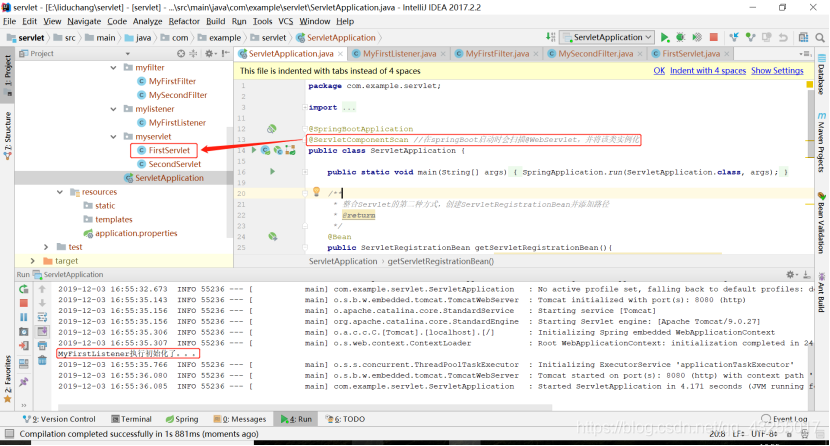
5.1.方式二
步骤:
创建一个类MySecondListener实现ServletContextListener接口,重写方法
在@SpringBootApplication标识的主类中加@Bean的一个方法,将MySecondListener对象注入容器中。
package com.example.servlet.mylistener;

import javax.servlet.ServletContextEvent;
import javax.servlet.ServletContextListener;

/**
 * 整合Listener的第二种方式
 */
public class MySecondListener implements ServletContextListener {

    @Override
    public void contextDestroyed(ServletContextEvent arg0) {
        // TODO Auto-generated method stub
        System.out.println("MySecondListener执行销毁了。。。");
    }

    @Override
    public void contextInitialized(ServletContextEvent arg0) {
        // TODO Auto-generated method stub
        System.out.println("MySecondListener执行初始化了。。。");
    }

}
package com.example.servlet;
import com.example.servlet.myfilter.MySecondFilter;
import com.example.servlet.mylistener.MySecondListener;
import com.example.servlet.myservlet.SecondServlet;
import org.springframework.boot.SpringApplication;
import org.springframework.boot.autoconfigure.SpringBootApplication;
import org.springframework.boot.web.servlet.FilterRegistrationBean;
import org.springframework.boot.web.servlet.ServletComponentScan;
import org.springframework.boot.web.servlet.ServletListenerRegistrationBean;
import org.springframework.boot.web.servlet.ServletRegistrationBean;
import org.springframework.context.annotation.Bean;
@SpringBootApplication
@ServletComponentScan //在springBoot启动时会扫描@WebServlet,并将该类实例化
public class ServletApplication {
public static void main(String[] args) {
SpringApplication.run(ServletApplication.class, args);
}
/**
* 注册listener
*/
@Bean
public ServletListenerRegistrationBean<MySecondListener> getServletListenerRegistrationBean() {
ServletListenerRegistrationBean<MySecondListener> bean = new ServletListenerRegistrationBean<MySecondListener>(
new MySecondListener());
return bean;
}
}执行项目,在控制台可以看到输出如下,两个Servlet监听器都执行了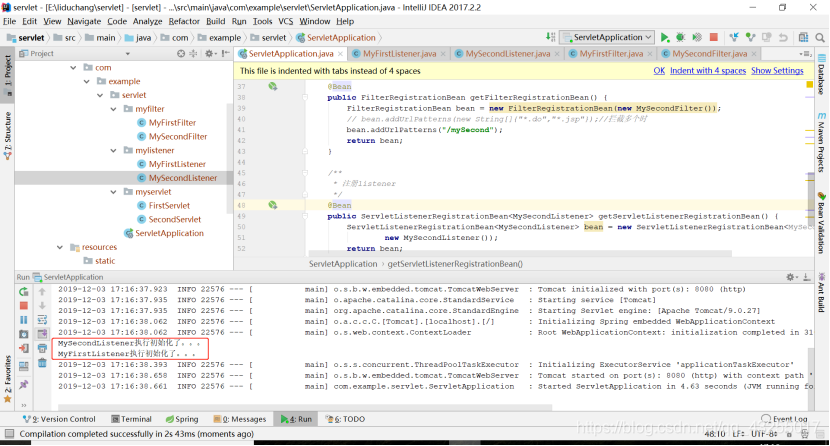
总的项目目录包结构如下: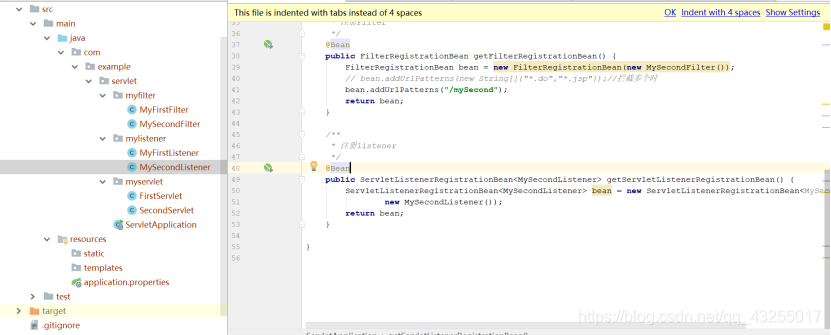
6.SpringBoot整合静态资源
6.1.在resource/static路径下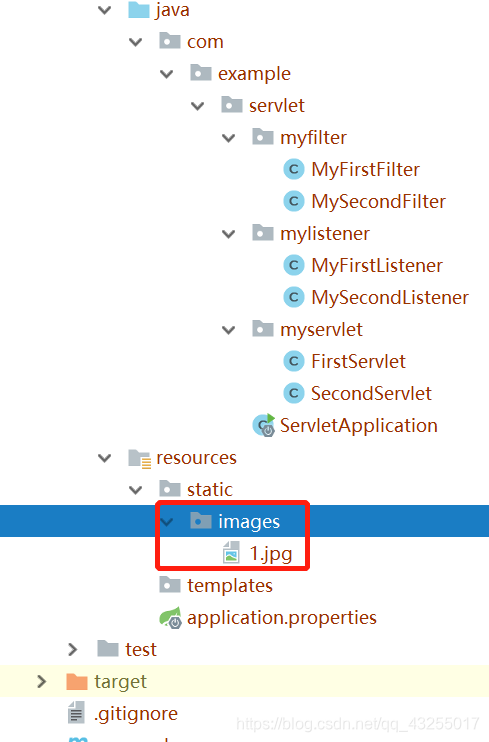
然后启动项目,在浏览器访问localhost:8080/images/1.jpg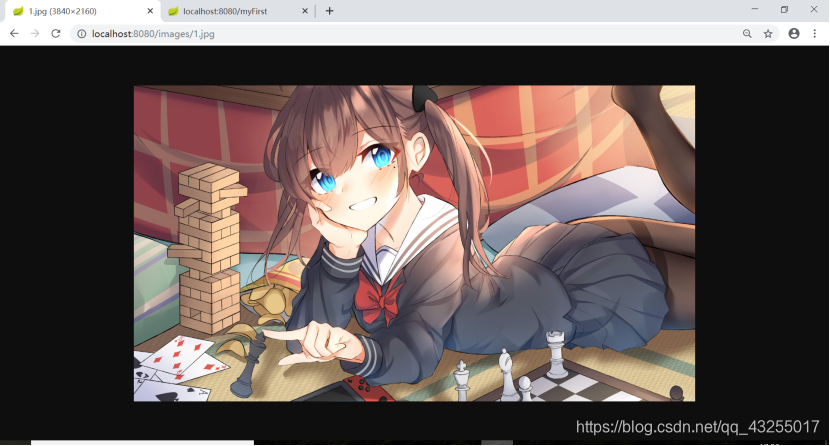
6.2.在webapp目录路径下
6.2.1.idea中为SpringBoot项目添加web
因为SpringBoot的初始化后是没有webapp目录的,需要在idea中手动加入,但不是直接创建,而是配置出来的,下面是SpringBoot项目配置webapp的教程
6.2.2.选中项目然后是ctrl+alt+shift+s,就会弹出如下页面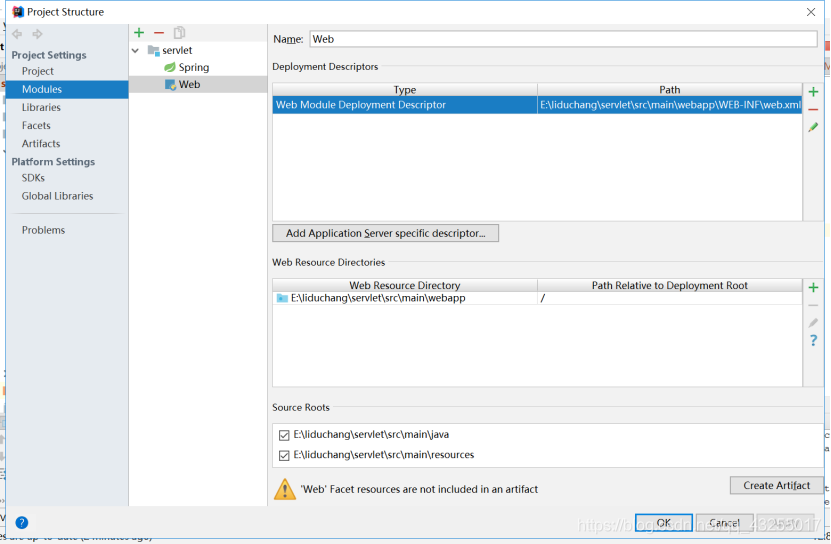
6.2.3.选中Modules,然后点击+号,如下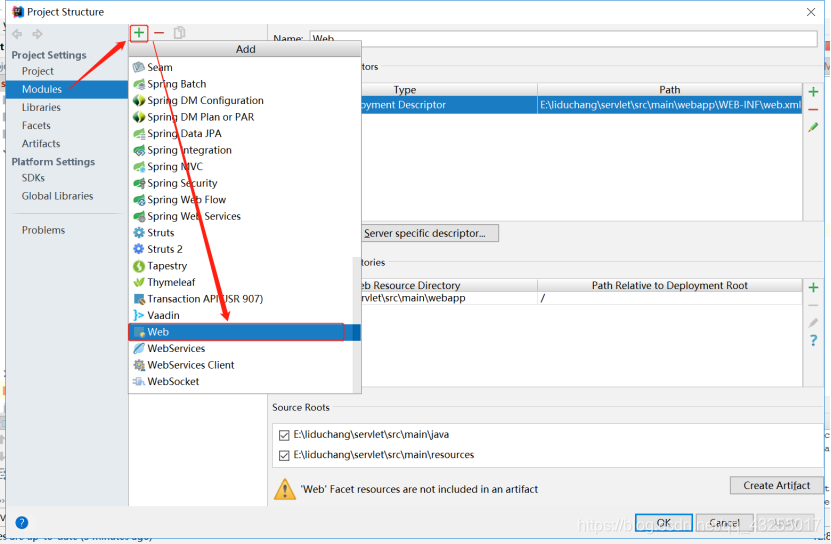
配置的目录的路径分别为:
E:\liduchang\servlet\src\main\webapp\WEB-INF\web.xml
E:\liduchang\servlet\src\main\webapp
6.2.4出现如下界面,点击铅笔进行编辑web.xml的路径,然后双击第二处同理编辑webapp的路径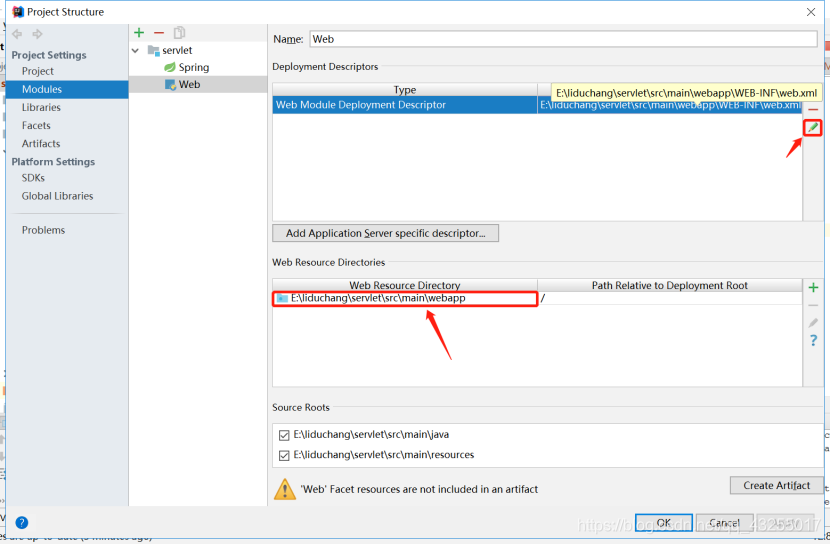
6.2.5最后配置出来的目录结构,如下图所示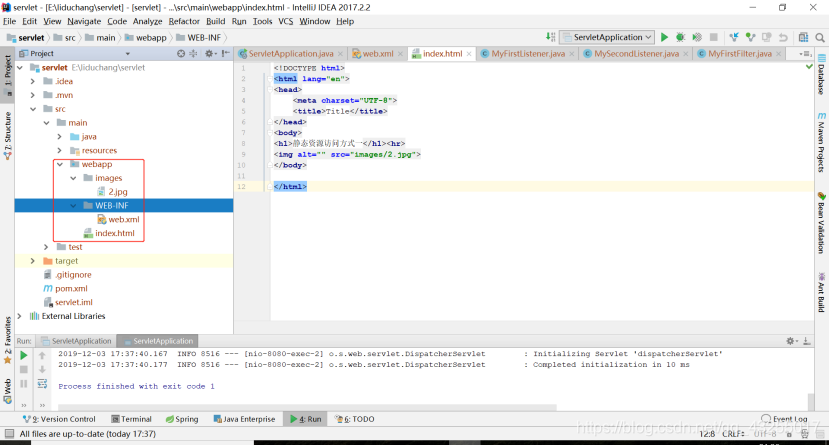
6.2.6然后再webapp先新建一个images文件夹,复制一张图片到images文件夹下,名为2.jpg,并再webapp下新建一个index.html内容如下
<!DOCTYPE html>
<html lang="en">
<head>
    <meta charset="UTF-8">
    <title>Title</title>
</head>
<body>
<h1>静态资源访问方式一</h1><hr>
<img alt="" src="images/2.jpg">
</body>
</html>
6.2.7启动项目,然后再浏览器访问localhost:8080,出现如图所示,配置成功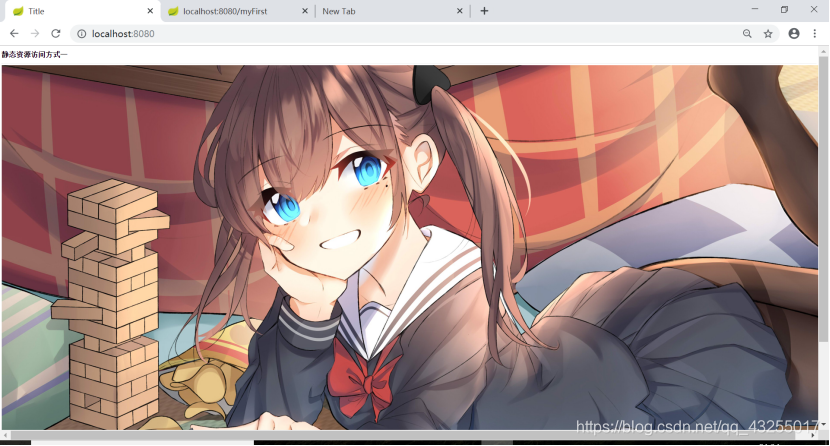
7.SpringBoot文件上传
7.1.文件上传
项目结构图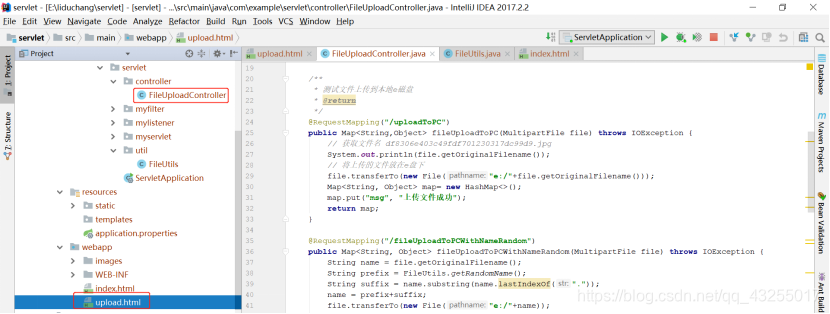
- 上传到本地磁盘,名字为原文件名
- 上传到本地磁盘,名字为随机名
- 上传到项目webapp文件夹下的images文件夹下
upload.html(文件上传主页)
<!DOCTYPE html>
<html lang="en">
<head>
    <meta charset="UTF-8">
    <title>Title</title>
</head>
<body>
<!--
    表单提交的方式为   :  post
    enctype的值为 : multipart/form-data
    file类型的输入框的name属性要和 MultipartFile 的形参一样 ,这样才能进行文件的上传
-->
<h1>文件上传到本地e盘</h1><hr>
<form action="/uploadToPC" method="post" enctype="multipart/form-data">
    <input type="file" name="file" ><br>
    <input type="submit" value="点击上传">
</form>

<h1>文件上传到e盘名字随机</h1><hr>
<form action="/fileUploadToPCWithNameRandom" method="post" enctype="multipart/form-data">
    <input type="file" name="file" ><br>
    <input type="submit" value="点击上传">
</form>

<h1>文件上传到本项目</h1><hr>
<form action="/uploadToProject" method="post" enctype="multipart/form-data">
    <input type="file" name="file" ><br>
    <input type="submit" value="点击上传">
</form>

</body>

</html>
FileUploadController.java(文件上传Controller)
package com.example.servlet.controller;

import com.example.servlet.util.FileUtils;
import org.springframework.web.bind.annotation.RequestMapping;
import org.springframework.web.bind.annotation.RestController;
import org.springframework.web.multipart.MultipartFile;

import javax.servlet.http.HttpSession;
import java.io.File;
import java.io.IOException;
import java.util.HashMap;
import java.util.Map;

/**
 * 文件上传Controller
 */
@RestController
public class FileUploadController {

    /**
     * 测试文件上传到本地e磁盘
     * @return
     */
    @RequestMapping("/uploadToPC")
    public Map<String,Object> fileUploadToPC(MultipartFile file) throws IOException {
        // 获取文件名 df8306e403c49fdf701230317dc99d9.jpg
        System.out.println(file.getOriginalFilename());
        // 将上传的文件放在e盘下
        file.transferTo(new File("e:/"+file.getOriginalFilename()));
        Map<String, Object> map= new HashMap<>();
        map.put("msg", "上传文件成功");
        return map;
    }

    @RequestMapping("/fileUploadToPCWithNameRandom")
    public Map<String, Object> fileUploadToPCWithNameRandom(MultipartFile file) throws IOException {
        String name = file.getOriginalFilename();
        String prefix = FileUtils.getRandomName();
        String suffix = name.substring(name.lastIndexOf("."));
        name = prefix+suffix;
        file.transferTo(new File("e:/"+name));
        Map<String, Object> map = new HashMap<String, Object>();
        map.put("msg", "ok");
        return map;
    }

    /**
     * 上传文件到项目的webapp下的images文件夹下
     * 不过一般文件不会上传到项目下,一般上传到本
     * 服务器的其它磁盘上,或者上传到专门的服务器
     * 上,所以这个方法只要了解就好
     * @param file
     * @return
     */
    @RequestMapping("/uploadToProject")
    public String uploadToProject(MultipartFile file, HttpSession session){
        // 通过session获取绝对路径,方法内部加上/WEB-INF/images,
        // 表示在项目的images目录下,需要创建该文件夹并进行静态资源放行
        String path= session.getServletContext().getRealPath("/images");
        System.err.println(path);
        String fileName= file.getOriginalFilename();
        File f= new File(path, fileName);
        try {
            file.transferTo(f);
        } catch (IOException e) {
            e.printStackTrace();
        }
        return "ok";
    }
}
FileUtils.java(文件随机命名工具类)
package com.example.servlet.util;

import java.util.Random;
import java.util.UUID;

/**
 * 文件名随机生成工具类
 * @version 1.0
 */
public class FileUtils {

    /**
     * 图片名生成
     */
    public static String getRandomName() {
        //取当前时间的长整形毫秒数
        long millis = System.currentTimeMillis();
        Random random = new Random();
        //获取0-1000不包含1000,的整形
        int end3 = random.nextInt(1000);
        //如果不足三位前面补0
        String str = millis + String.format("%03d", end3);
        return str;
    }

    /**
     * 商品id生成
     */
    public static long getRandomId() {
        //取当前时间的长整形值包含毫秒
        long millis = System.currentTimeMillis();
        Random random = new Random();
        //随机获取0-99不包含99,之间的整形
        int end2 = random.nextInt(99);
        //如果不足两位前面补0
        String str = millis + String.format("%02d", end2);
        long id = new Long(str);
        return id;
    }

}
在配置文件配置文件的上传的配置信息
application.properties
#设置单个文件上传大小
spring.http.multipart.maxFileSize=200MB
#设置一次请求上传文件的总容量
spring.http.multipart.maxRequestSize=200MB
更多教程请关注:非科班的科班