haproxy
1.清除nginx的环境
2.下载安装包haproxy-1.6.11.tar.gz (这里放到了家目录下)
(1).tar zxf haproxy-1.6.11.tar.gz 解压(解压后的目录中中安装说明less查看)
(2)yum install rpm-build
(3)rpmbuild -tb haproxy-1.6.11.tar.gz 把tar包转换二进制包
(4)cd /root/rpmbuild/RPMS/x86_64
(5)rpm -qpl haproxy-1.6.11-1.x86_64.rpm
(6)rpm -ivh haproxy-1.6.11-1.x86_64.rpm 安装
(7) cd /root/haproxy-1.6.11/examples
(8)cp -p /root/haproxy-1.6.11/examples/content-sw-sample.cfg /etc/haproxy/haproxy.cfg ##复制配置文件
(9) groupadd -g 200 haproxy
useradd -u 200 -g 200 haproxy
###/etc/init.d/haproxy会自动生成启动脚本
(10 ) echo “haproxy - nofile 65535” >>/etc/security/limits.conf
可以切换happroxy用户ulimit -n 查看
3.配置文件
vim /etc/haproxy/haproxy.cfg
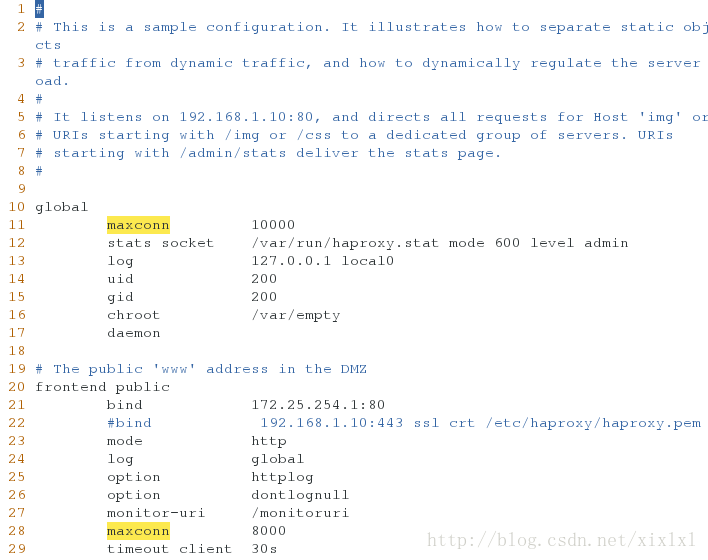
10 global ##global全局参数
11 maxconn 10000 11行最大连接数
12 stats socket /var/run/haproxy.stat mode 600 level admin
13 log 127.0.0.1 local0 #日志发送ip地址和日志类别
14 uid 200 ##haproxy用户uid gid
15 gid 200
16 chroot /var/empty ##haproxy运行的家目录
17 daemon ##后台运行
18
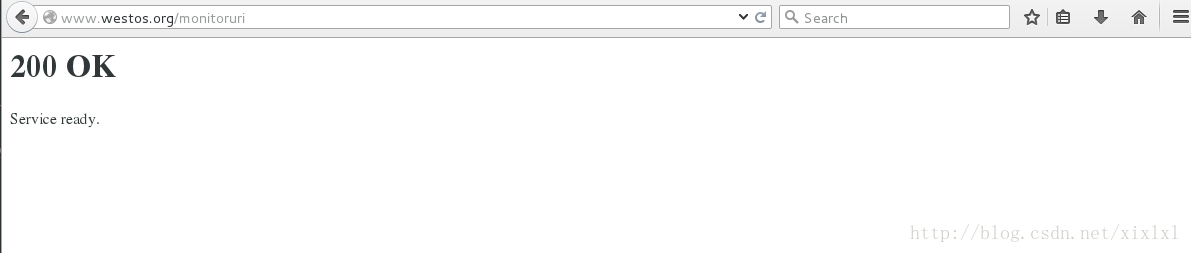
19 # The public 'www' address in the DMZ
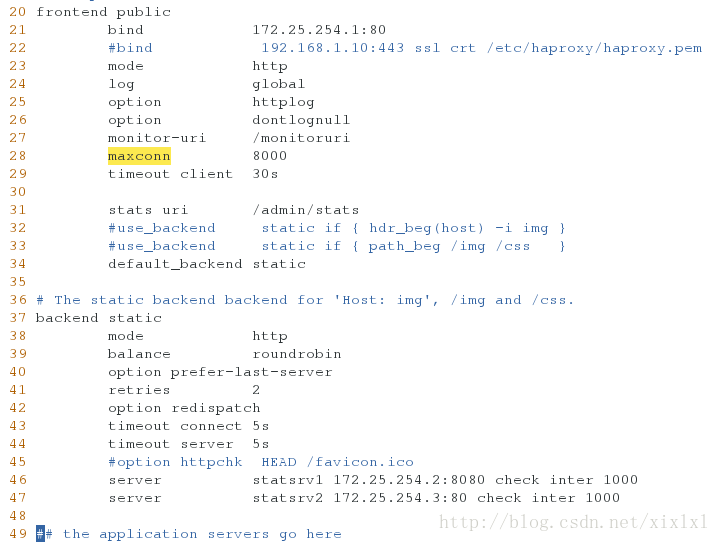
20 frontend public
21 bind 172.25.254.1:80
22 #bind 192.168.1.10:443 ssl crt /etc/haproxy/haproxy.pem
23 mode http
24 log global
25 option httplog
26 option dontlognull
27 monitor-uri /monitoruri
28 maxconn 8000
29 timeout client 30s
30
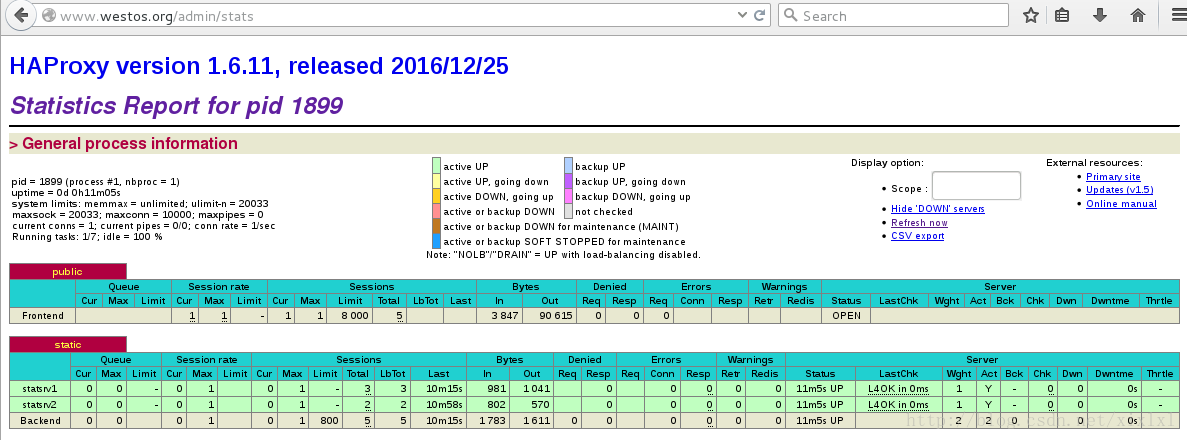
31 stats uri /admin/stats
32 #use_backend static if { hdr_beg(host) -i img }
33 #use_backend static if { path_beg /img /css }
34 default_backend static
35
36 # The static backend backend for 'Host: img', /img and /css.
37 backend static
38 mode http
39 balance roundrobin
40 option prefer-last-server
41 retries 2
42 option redispatch
43 timeout connect 5s
44 timeout server 5s
45 #option httpchk HEAD /favicon.ico
46 server statsrv1 172.25.254.2:8080 check inter 1000
47 server statsrv2 172.25.254.3:80 check inter 1000 第10行 第13行 第14,15 行
第21行是部署haproxy服务的ip
第46,47行后端服务器ip
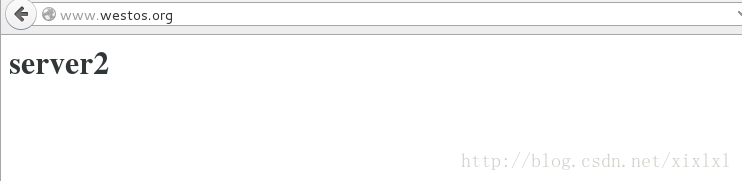
4.客户端真机测试;www.westos.org(注意,浏览器所在主机要有这个域名的解析172.25.254.1 www.westos.org,后段服务器关闭防火墙,selinux,或者添加火墙策略,对好安全上下文,开启http服务)

Haproxy服务的监控页