本片博客整理日常python使用中遇到的一些常见问题,将会持续整理中,欢迎关注。
文章目录
conda安装
下载conda
wget -c https://repo.continuum.io/miniconda/Miniconda3-latest-Linux-x86_64.sh
添加权限并运行
chmod 777 Miniconda3-latest-Linux-x86_64.sh
sh Miniconda3-latest-Linux-x86_64.sh

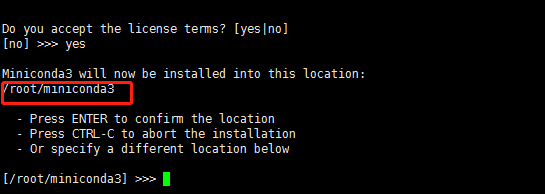
安装过程中,提示阅读用户许可协议,需要按“Enter”继续,并输入 “yes”继续安装,并列出conda安装的具体路径,这个路径保存一下:/root/miniconda3
是否初始化Miniconda3
选“no”
配置conda环境变量
vim ~/.bashrc
export  PATH="/root/miniconda3/bin:"$PATH

保存退出!
source ~/.bashrc
测试:
conda
显示如下图表示安装成功!

pip3安装tensorflow1.14.0
pip3 install tensorflow==1.14.0
```## pip安装本地whl文件

```python
pip install 本地路径文件
创建并激活虚拟环境
创建虚拟环境
conda create --name tensorflow python=3.7.0
可以事先使用python命令查看当前使用的python版本。

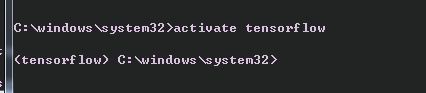
激活虚拟环境
activate tensorflow
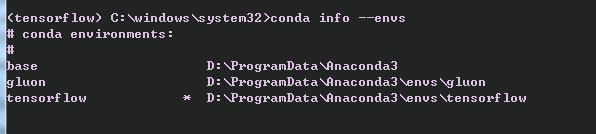
查看当前的conda环境信息
conda info --envs
Jupyter BoteBook的使用
pip3 install jupyter
生成jupyter的kernerl并指定其py虚拟环境tensorflow
python -m ipykernel install --user --name=tensorflow
查看kernel的列表
jupyter kernelspec list
获取配置文件所在路径
jupyter notebook --generate-config

这是配置文件路径:C:\Users\Administrator.jupyter\jupyter_notebook_config.py
打开jupyter环境会自动打开浏览器
jupyter notebook
修改jupyter的文件路径
其实安装了Anconda以后再其路径下就有jupyter的启动位置

右键-属性

在目标的位置修改打开位置为D:\jupuyterCode,并打开jupyter的配置文件(在C:\Users\ubt.jupyter\jupyter_notebook_config.py)找到如下位置并修改:
#用于笔记本和内核的目录。
c.NotebookApp.notebook_dir = ‘D:\jupyterCode’
当然在D盘要创建jupuyterCode文件夹,导入tensorflow的代码文件夹。
下载代码到jupyter目录下
进入D:\jupyterCode打开git终端。
git config --system http.sslbackend openssl
git config --global http.sslVerify false
git clone https://github.com/geektime-geekbang/tensorflow-101.git

然后开始使用吧!

Idea或pycharm忽略local Changes文件或文件夹
打开File-Settings-Editor-File Types,在下方输入栏中加上:
.idea;.svn-base;.exe;classes;target;*.iml;

注意:如果是idea的java工程,不要加.class,否则代码无法编译通过!
Linux安装python3.7.0
# 安装依赖
yum -y install zlib-devel bzip2-devel openssl-devel ncurses-devel sqlite-devel readline-devel tk-devel gdbm-devel db4-devel libpcap-devel xz-devel libffi-devel
# 下载
wget https://www.python.org/ftp/python/3.7.0/Python-3.7.0.tgz
# 解压
tar -zxvf Python-3.7.0.tgz
# 创建安装目录
mkdir /usr/local/python
# 编译并安装
cd Python-3.7.0
./configure --prefix=/usr/local/python
make && make install

# 建立软连接
ln -s /usr/local/python/bin/python3.7 /usr/bin/python3
ln -s /usr/local/python/bin/pip3.7 /usr/bin/pip3

# 测试:
pip3 --version
linux安装Jupyter
安装jupyter相关插件
pip install jupyter_contrib_nbextensions
jupyter contrib nbextension install --user
查看jupyter配置文件的位置
jupyter notebook --generate-config --allow-root &
生成登录密码
ipython
In [1]: from notebook.auth import passwd
In [2]: passwd()
输入密码:xxxxxxxx
验证密码:xxxxxxxx
将生成的秘钥保存起来等会儿填写在jupyter配置文件中

编写配置文件
vim /root/.jupyter/jupyter_notebook_config.py
主要修改以下内容:
c.NotebookApp.ip = 'localhost'            即对外提供访问的ip
c.NotebookApp.port = 9999                     即对外提供访问的端口
c.NotebookApp.open_browser = False            False即启动不打开浏览器
c.NotebookApp.password = u'sha1:xxxxxxdbeca8:d1f5b93d5e78xxxxxxxx4ad2xxxxxxxxa79f55dd'   这个就是上面生成的秘钥
c.NotebookApp.notebook_dir = u'/usr/local/tensorfow/code' 即设置jupyter启动后默认的根目录
启动jupyter
jupyter notebook --ip=0.0.0.0 --no-browser --allow-root

输入:http://ip:port/


