Eclipse中创建新的Spring Boot项目,第一个SpringBoot程序
1.Eclipse中安装STS插件
首先去官网下载 Download STS 3 或者 STS插件下载地址
找到符合当前Eclipse版本的下载 => Help => About Eclipse IDE Version: 2019-03 (4.11.0)
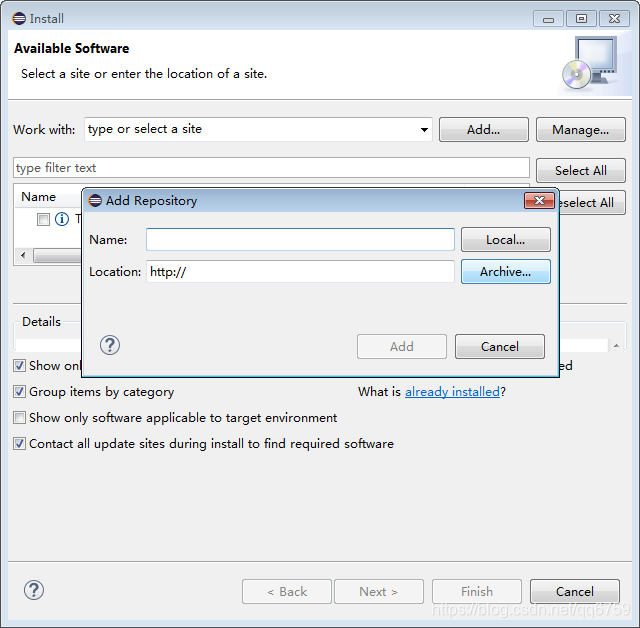
下载好之后Eclipse => Help => Install New Software => Add => Archive 选择刚刚下载好的STS插件 => Add
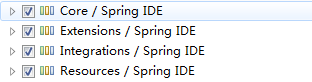
然后选中带有Spring IDE的项
一直点击Next 稍等然后重启Spring就ok了
如果嫌安装麻烦也可以直接去Spring官网 下载STS 解压后直接用,不用安装,用法和Eclipse一样。
2.创建Spring Boot项目
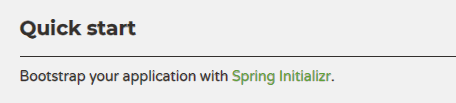
进入spring官网 => Projects => Spring Boot 最下面有一个Quick start 进入
 在Search dependencies to add下面输入web然后选择Spring Web Starter
然后点击生成按钮Generate the project (生成一个项目) 然后会下载一个压缩包解压出来
打开 Eclipse => Import (导入) => Maven => Existing Maven Projects => Next

Browse => 选择刚刚解压出来的文件夹 => Finish
Spring Boot 项目就创建出来了,目录结构:

resources:
static 静态资源(js css 图片等)
templates 模板文件(模板引擎freemarker thymeleaf;默认不支持jsp)
application.properties 配置文件
右键DemoApplication.java里面的main方法Run As => Spring Boot App 启动项目
package com.example.demo;

import org.springframework.boot.SpringApplication;
import org.springframework.boot.autoconfigure.SpringBootApplication;

@SpringBootApplication
public class DemoApplication {

	public static void main(String[] args) {
		SpringApplication.run(DemoApplication.class, args);
	}

}
运行后能在控制台看到
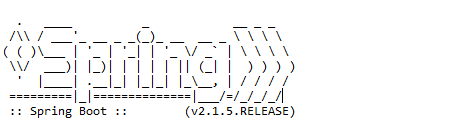
能看到Spring的标识并且能看到Spring Boot的版本号说明已经配置好了。
下面写一个spring boot的程序:
在com.example.demo下面创建一个class(类)

package com.example.demo.Controller;

import org.springframework.stereotype.Controller;
import org.springframework.web.bind.annotation.RequestMapping;
import org.springframework.web.bind.annotation.ResponseBody;

@Controller
public class demoController {

	@ResponseBody
	@RequestMapping("demo")
	public String demo() {
		return "hello world;hello spring boot";
	}

}
再次运行DemoApplication 中的main,访问浏览器http://localhost:8080/demo
hello world;hello spring bootOK!
如果出现The Tomcat connector configured to listen on port 8080 failed to start的错误,先解决端口占用再启动就可以了
=> The Tomcat connector configured to listen on port 8080 failed to start
