参考文献:第一行代码(第二版),郭霖
源码地址:https://github.com/2066972218/coolweather/commits/master
一、功能需求
1、罗列全国的省、市、县
2、查看全国任意城市的天气情况
3、自由切换城市,查看异地城市的天气情况
4、手动更新与后台自动更新天气的功能
二、可行性分析:
1、需要用到的技术有:UI、网络、数据存储、服务
2、天气信息来源:和风天气,有3000+次/天免费数据获取
3、架设服务器用于提供全国的省市县的数据信息
三、全国地区信息获取
1、访问 http://guolin.tech/api/china 得到以下全国地区数据,其包括了中国所有的省份以及省份的id: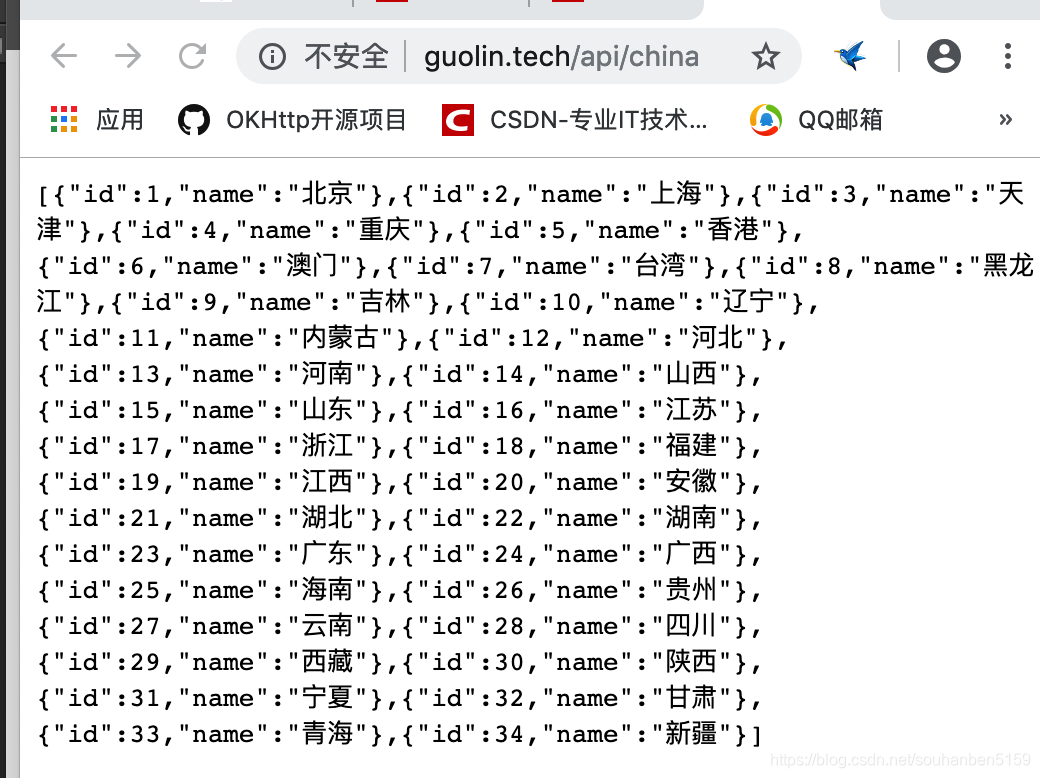
这是一个JSON格式的数组,在网址后加相应城市的id可以得到该省份城市下的所有市级城市,如:
http://guolin.tech/api/china/30
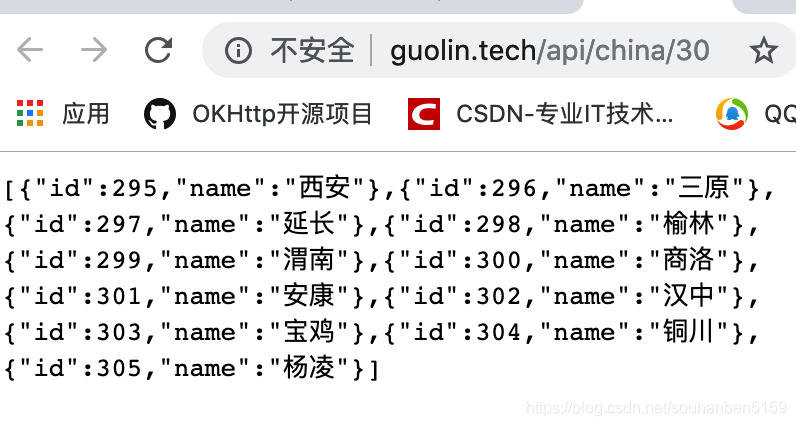 在网址后继续键入id,可以得到该市级下的县级城市:
如:http://guolin.tech/api/china/30/304
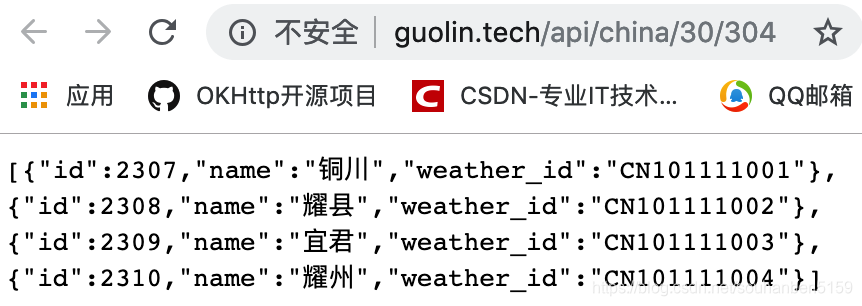
可以看到每一个县级城市都有一个weather_id,我们可以通过这个id去访问和风天气的接口,从而过去该地区的的天气情况。
2、使用和风天气的接口
注册账号:http://guolin.tech/api/weather/register
选择免费用户,注册成功后,去邮箱激活, 之后登陆该账号,https://console.heweather.com/ 查看API接口说明文档。
3、Git时间
https://github.com/ 为GitHub官网,注册登陆,点击start a project~输入Coolweather~选择Android项目类型的gitignore文件和Apach License2.0作为天气的开源协议
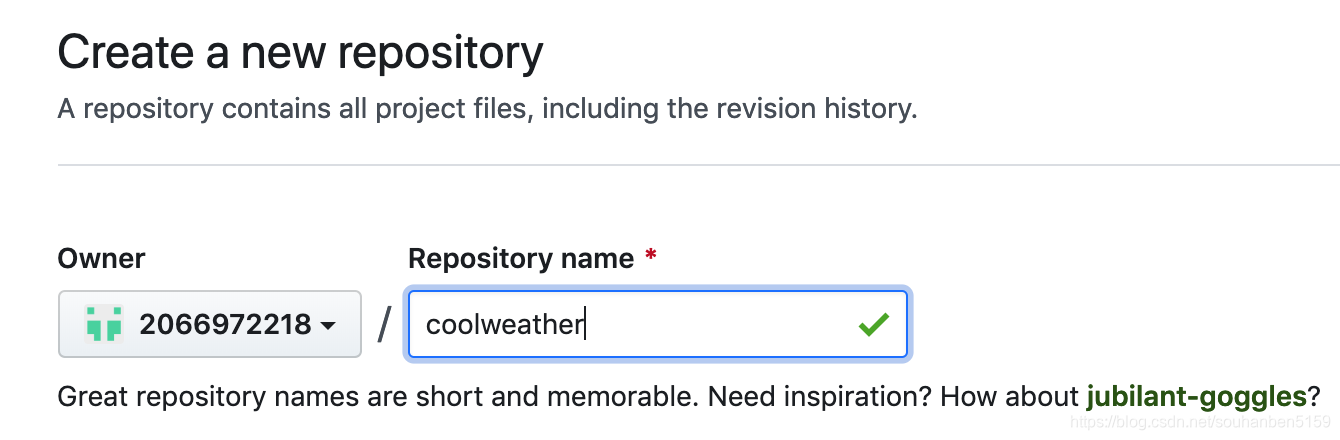
创建成功后出现以下界面,其中README.md为版本库主页说明,点击Clone or download按钮,将该复制到剪贴板: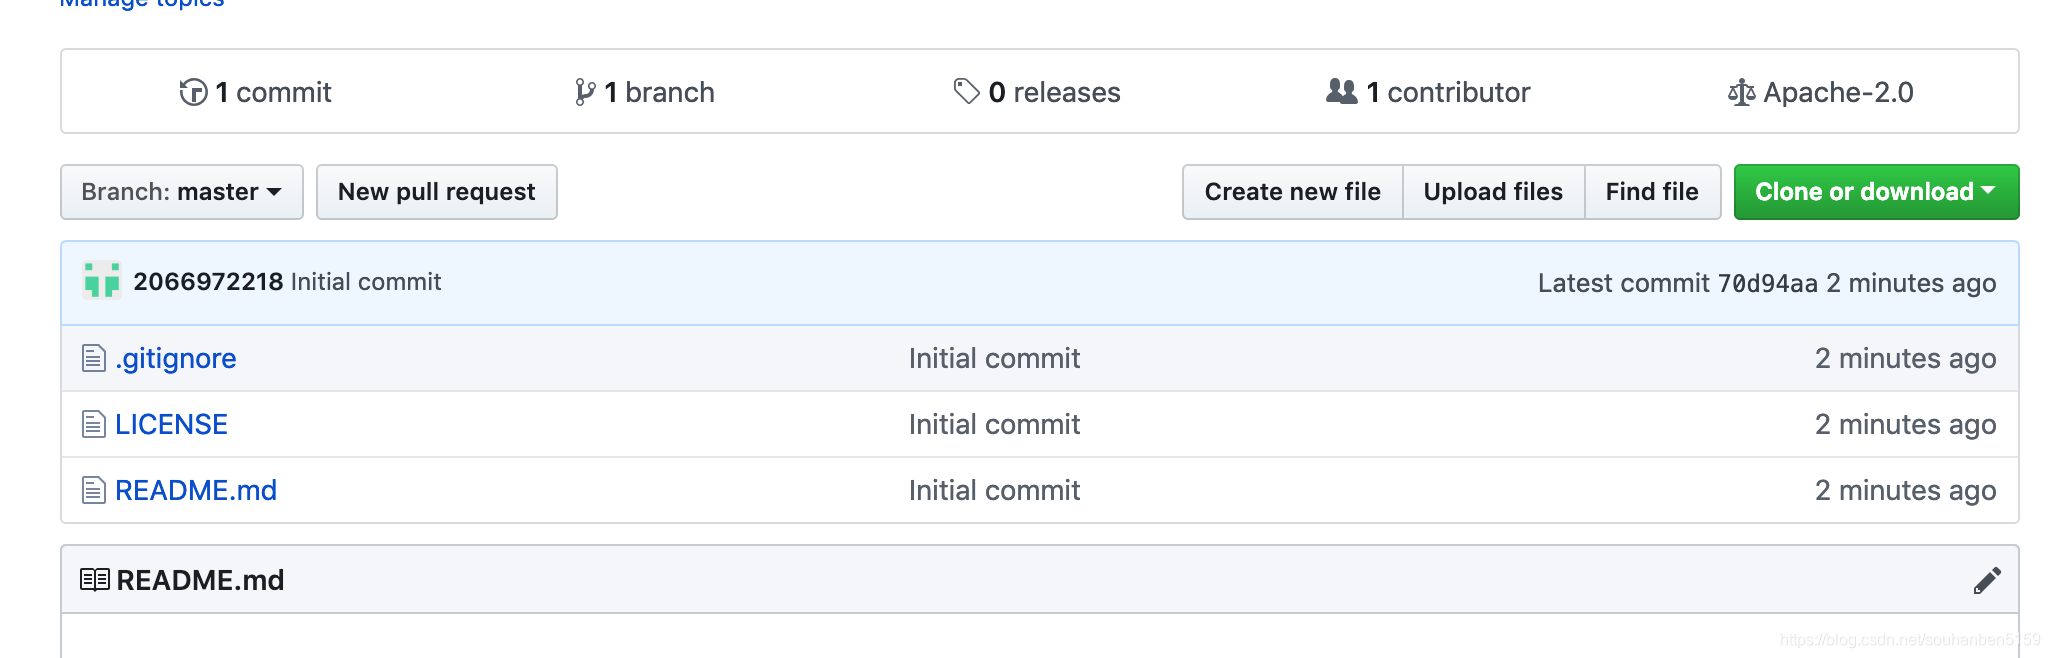
版本库主页为:https://github.com/2066972218/coolweather
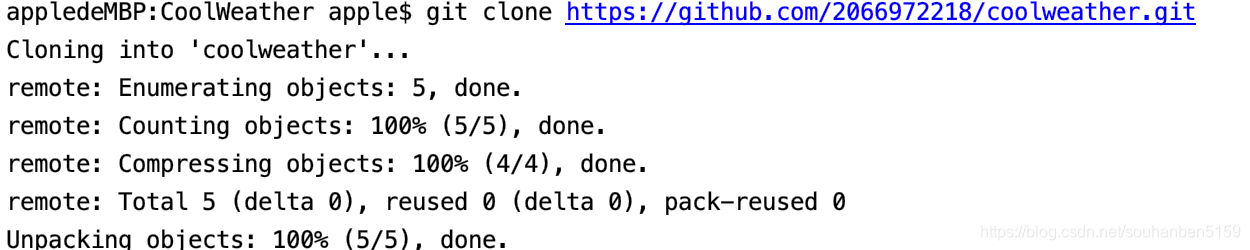
在Android Studio中新建一个项目CoolWeather,然后将远程代码库克隆值本地,在Termiminal中输入
git clone https://github.com/2066972218/coolweather.git,
如图所示,说明克隆成功。
在Android Studio中把项目文件下的CoolWeather/coolweather的所有文件,包括隐藏的.git文件剪切(mv .git .. /)到CoolWeather文件目录下。
接下来通过在Termiminal中输入一下代码,将CoolWeather项目中的文件上传到Git版本控制中。
git add .
git commit -m "First commit"
git push origin master
在执行最后一条语句时发生一个错误,借助博客链接:
https://blog.csdn.net/jingfengvae/article/details/72859130 解决。
提交成功后,看版本库已经更新成功,也就是我们的代码已经提交值远程代码库了,如图:
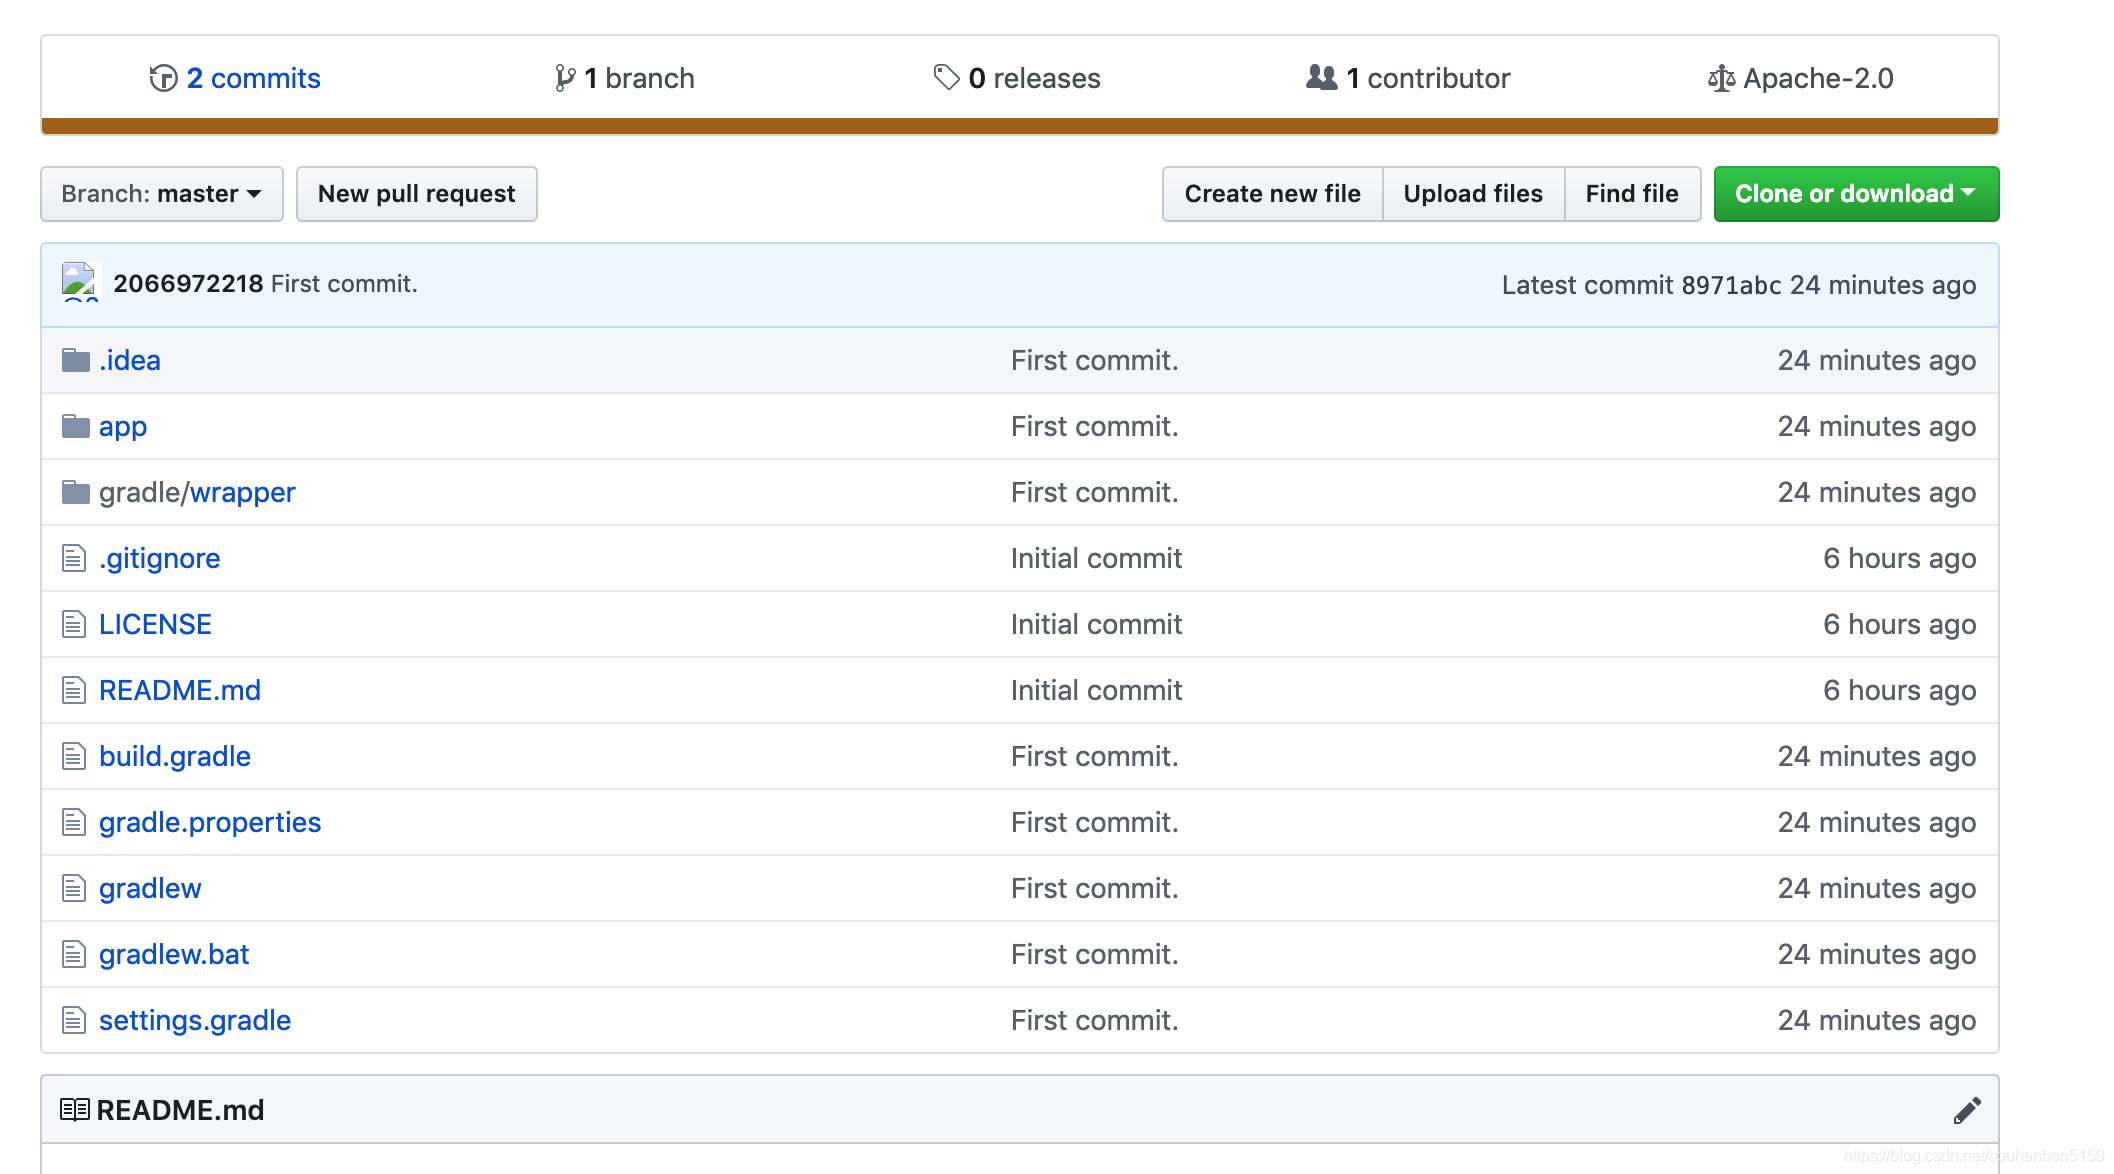
也就是我们该项目的版本控制Git创建好了,下面我们来继续项目编码。
4、数据库的创建与配置
创建4个包db、gson、service、util,db包用于存放数据库模型的代码、gson用于存放GSON模型的相关代码,util包用于存储工具相关代码。
为简化数据库的操作我们采用LitePal来管理项目的数据库,先添加好一下我们后续需要用到的依赖闭包:
    //用于对数据库进行操作
    implementation 'org.litepal.android:core:1.4.1'
    //用于进行网络请求
    implementation 'com.squareup.okhttp3:okhttp:3.4.1'
    //用于JSON解析
    implementation 'com.google.code.gson:gson:2.7'
    //用于加载和展示图片
    implementation 'com.github.bumptech.glide:glide:3.7.0'
在db包下我们创建三张表(实体类):province、city、county分别存放省市县的数据信息。
province实体类如下:
public class Province extends DataSupport {
   private int id;//每个实体类都有的字段
   private String provinceName;//记录省份名字
   private int provinceCode;//记录省的代号
   public int getId() {
       return id;
   }
   public void setId(int id) {
       this.id = id;
   }
   public String getProvinceName() {
       return provinceName;
   }
   public void setProvinceName(String provinceName) {
       this.provinceName = provinceName;
   }
   public int getProvinceCode() {
       return provinceCode;
   }
   public void setProvinceCode(int provinceCode) {
       this.provinceCode = provinceCode;
   }
}
同理,新建的City类,代码如下:
public class City extends DataSupport {
    private int id;   //每一个实体类都有一个id
    private String cityName;  //记录市名称
    private int cityCode;   //几率市的代码
    private int provinceCode;  //记录该市的上级省级代码
    public int getId() {
        return id;
    }
    public void setId(int id) {
        this.id = id;
    }
    public String getCityName() {
        return cityName;
    }
    public void setCityName(String cityName) {
        this.cityName = cityName;
    }
    public int getCityCode() {
        return cityCode;
    }
    public void setCityCode(int cityCode) {
        this.cityCode = cityCode;
    }
    public int getProvinceCode() {
        return provinceCode;
    }
    public void setProvinceCode(int provinceCode) {
        this.provinceCode = provinceCode;
    }
}
同理,记录代表区县的County类,如下:
public class County extends DataSupport {
    private int id;//每一个实体类都需有一个id
    private String countyName; //记录区县名称
    private int countyCode;//记录区县代码
    private int weatherId;//记录该区县的天气信息
    private int cityId;//该区县所属的市级代码
    public int getId() {
        return id;
    }
    public void setId(int id) {
        this.id = id;
    }
    public String getCountyName() {
        return countyName;
    }
    public void setCountyName(String countyName) {
        this.countyName = countyName;
    }
    public int getCountyCode() {
        return countyCode;
    }
    public void setCountyCode(int countyCode) {
        this.countyCode = countyCode;
    }
    public int getWeatherId() {
        return weatherId;
    }
    public void setWeatherId(int weatherId) {
        this.weatherId = weatherId;
    }
    public int getCityId() {
        return cityId;
    }
    public void setCityId(int cityId) {
        this.cityId = cityId;
    }
}
以上我们也就完成这三个实体类的内容,接下配置数据库
在main目录下创建一个assets的的路径,在该路径下创建一个litepal.xml文件,在该文件输入:
<?xml version="1.0" encoding="utf-8"?>
<litepal>
    <dbname value = "cool_weather"/>    //指定数据库名
    <version value = "1"/>     //数据库版本号
    <!--将三个实体类添加到映射列表中-->
    <list>
        <mapping class = "com.example.coolweather.db.Province"/>
        <mapping class = "com.example.coolweather.db.City"/>
        <mapping class = "com.example.coolweather.db.County"/>
    </list>
</litepal>
最后修改AndroidManifest.xml中添加以下代码:
 <application
    android:usesCleartextTraffic="true"
    android:name="org.litepal.LitePalApplication"
    android:allowBackup="true"
    android:icon="@mipmap/ic_launcher"
    android:label="@string/app_name"
    android:roundIcon="@mipmap/ic_launcher_round"
    android:supportsRtl="true"
    android:theme="@style/AppTheme">
    <activity android:name=".MainActivity">
        <intent-filter>
            <action android:name="android.intent.action.MAIN" />
            <category android:name="android.intent.category.LAUNCHER" />
        </intent-filter>
    </activity>
    </application>
现在数据库配置完毕了,数据库和表会在首次执行自行创建,现在我们将这一阶段的代码提交到版本控制中,即在Terrminal中输入如下:
git add .
git commit -m "加入创建数据库和表的各项配置"
git push origin master
5、加载全国省市县的所有数据
从上面我们知道全国的省市县信息我们都是从服务器中获取的,所有这里我们需要与服务其进行交互。在util中创建一个HttpUtil类。
public class HttpUtil {
    public static void sendOKHttpRequest(String adress, okhttp3.Callback callback){
        OkHttpClient client = new OkHttpClient();
        Request request = new Request.Builder().url(adress).build();
        client.newCall(request).enqueue(callback);
    }
}
根据三的全国地区信息知道我们获取的信息为JSON格式的,需要解析后才能存入数据库,在util文件中新建一个Utility工具类来解析和处理这些信息。如下:
public class Utility {
    /*解析和处理服务器返回的省级数据 */
    public static boolean handleProvinceResponse(String response){
        if (!TextUtils.isEmpty(response)){  //如果返回的数据不为空
            try {
                //将所有的省级数据解析出来,并组装成实体类对像
                JSONArray allProvinces = new JSONArray(response);
                for (int i=0;i<allProvinces.length();i++){
                    JSONObject provinceObject = allProvinces.getJSONObject(i);
                    Province province = new Province();
                    province.setProvinceName(provinceObject.getString("name"));
                    province.setProvinceCode(provinceObject.getInt("id"));
                    //将该实体类对象存入数据库
                    province.save();
                }
                return true;//解析成功
            } catch (JSONException e) {
                e.printStackTrace();
            }
        }
        return false;//解析失败
    }

    /*解析和处理服务器返回的市级数据 */
    public static boolean handleCityResponse(String response,int provinceId){
        if (!TextUtils.isEmpty(response)){
            try {
                JSONArray allCities = new JSONArray(response);
                for (int i=0;i<allCities.length();i++){
                    JSONObject cityObject = allCities.getJSONObject(i);
                    City city = new City();
                    city.setCityCode(cityObject.getInt("id"));
                    city.setCityName(cityObject.getString("name"));
                    city.setProvinceCode(provinceId);  //所属的省级代号
                    city.save();
                }
                return true;
            } catch (JSONException e) {
                e.printStackTrace();
            }
        }
        return false;
    }
    /*解析和处理服务器返回的县级数据 */
    public static boolean handleCountyResponse(String response,int cityId){
        if (!TextUtils.isEmpty(response)){
            try {
                JSONArray allCounties = new JSONArray(response);
                for (int i=0;i<allCounties.length();i++){
                    JSONObject countyObject = allCounties.getJSONObject(i);
                    County county = new County();
                    county.setCountyName(countyObject.getString("name"));
                    //县级天气信息
                county.setWeatherId(countyObject.getString("weather_id"));
                    //所属的市级代号
                    county.setCityId(cityId);
                    county.save();
                }
                return true;
            } catch (JSONException e) {
                e.printStackTrace();
            }
        }
        return false;
    }
}
解析出省市县的数据后,现在我们来编写界面UI,为后面我们布局复用,因为我们不实用原生的ActionBar
er,故我们在style.xml将其设置为
<style name="AppTheme" parent="Theme.AppCompat.Light.NoActionBar">
我们将界面写在碎片里,新建布局文件choose_area.xml,如下:
<?xml version="1.0" encoding="utf-8"?>
<LinearLayout xmlns:android="http://schemas.android.com/apk/res/android"
    android:layout_width="match_parent"
    android:layout_height="match_parent"
    android:orientation="vertical"
    android:background="#fff">
    <RelativeLayout
        android:layout_width="match_parent"
        android:layout_height="?attr/actionBarSize"
        android:background="@color/colorPrimary">

        <TextView
            android:id="@+id/title_text"
            android:layout_width="wrap_content"
            android:layout_height="wrap_content"
            android:layout_centerInParent="true"
            android:textColor="#fff"
            android:textSize="20sp"/>
        <Button
            android:id="@+id/back_button"
            android:layout_width="25dp"
            android:layout_height="25dp"
            android:layout_marginLeft="10dp"
            android:layout_alignParentLeft="true"
            android:layout_centerVertical="true"
            android:background="@drawable/ic_back" />
    </RelativeLayout>
    <ListView
        android:id="@+id/list_view"
        android:layout_width="match_parent"
        android:layout_height="match_parent" />
</LinearLayout>
创建一个AreaFragment继承自Fragment,在其中编写遍历全国的省市县数据,通过从数据库获取和网络获取两种方式来加载全国省市县数据,逻辑代码如下:
public class ChooseAreaFragment extends Fragment {

    public static final int LEVEL_PROVINCE=0;
    public static final int LEVEL_CITY=1;
    public static final int LEVEL_COUNTY=2;

    private ProgressDialog progressDialog;

    private TextView titleText;

    private Button backButton;

    private ListView listView;

    private ArrayAdapter<String> adapter;

    private List<String> dataList = new ArrayList<>();

    private int currentLevel;  //当前被选中的级别
    private Province selectedProvince;//被选中的省份
    private City selectedCity;//被选中的城市

    private List<Province> provinceList;//省列表
    private List<City> cityList;//市列表
    private List<County> countyList ;//县列表

    /*获取控件实例id*/
    @Override
    public View onCreateView(@NonNull LayoutInflater inflater, @Nullable ViewGroup container,
                             @Nullable Bundle savedInstanceState) {
        Log.d("ChooseAreaFragment","onCreateView");
        View view = inflater.inflate(R.layout.choose_area,container,false);
        titleText = (TextView)view.findViewById(R.id.title_text);  //获取标题栏文本id
        backButton = (Button) view.findViewById(R.id.back_button);  //获取标题栏id
        listView = (ListView)view.findViewById(R.id.list_view);    //获取Item列表id
        //获取ArrayAdapter对象
        adapter =new ArrayAdapter<>(getContext(), android.R.layout.simple_list_item_1, dataList);
        listView.setAdapter(adapter);//设置并初始化适配器
        return view;//将视图返回
    }

    /*点击事件集合*/
    @Override
    public void onActivityCreated(@Nullable Bundle savedInstanceState) {
        Log.d("ChooseAreaFragment","onActivityCreated");
        super.onActivityCreated(savedInstanceState);
        //列表任意一栏被点击,则...
        listView.setOnItemClickListener(new AdapterView.OnItemClickListener() {
            @Override
            public void onItemClick(AdapterView<?> parent, View view, int position, long id) {
                Log.d("ChooseAreaFragment","列表被点了的...");
                if (currentLevel == LEVEL_PROVINCE){   //当前选中的级别为省份时
                    selectedProvince = provinceList.get(position);  //当前点击为选中状态
                    queryCities();//查询市的方法
                }
                else if (currentLevel == LEVEL_CITY){
                    selectedCity = cityList.get(position);
                    queryCounties();
                }
            }
        });
        backButton.setOnClickListener(new View.OnClickListener() {
            @Override
            public void onClick(View v) {
                if (currentLevel == LEVEL_COUNTY){
                    queryCities();
                }
                else if (currentLevel == LEVEL_CITY){
                    queryProvinces();
                }
            }
        });
        queryProvinces();
    }

    private void queryCities() {
        titleText.setText(selectedProvince.getProvinceName());  //设置市的标题内容
        backButton.setVisibility(View.VISIBLE);  //设置返回按钮可见
        //查询被选中的省份城市的市区
        cityList = DataSupport.where("provinceid=?",String.valueOf(selectedProvince.
                        getId())).find(City.class);
        Log.d("ChooseAreaFragment","市级");
        if (cityList.size()>0){ //如果省列表不为空,则...
            dataList.clear();
            for (City city:cityList){ //遍历每一份省的市级城市
                dataList.add(city.getCityName()); //添加到数据列表中
            }
            adapter.notifyDataSetChanged();//通知适配器数据更新了
            listView.setSelection(0);
            currentLevel = LEVEL_CITY;
        }
        else{
            int provinceCode = selectedProvince.getProvinceCode();  //获取被选取省级代码
            String address = "http://guolin.tech/api/china/"+provinceCode;//获取被选取地区的网络地址
            Log.d("ChooseAreaFragment","准备在网络中获取地址信息");
            queryFromServer(address,"city");   // 在网络中查询
        }
    }
    /*根据传入的地址和类型从服务器查询省市县数据*/
    private void queryFromServer(String adress, final String type) {
        showProgressDialog();
        //   发送一条网络请求
        HttpUtil.sendOKHttpRequest(adress, new Callback() {

            //请求加载失败
            @Override
            public void onFailure(Call call, IOException e) {
                //通过runOnUiThread方法回到主线程逻辑
                getActivity().runOnUiThread(new Runnable() {
                    @Override
                    public void run() {
                        closeProgressDialog();
                        Toast.makeText(getContext(),"加载失败",Toast.LENGTH_SHORT).show();
                    }
                });
            }

            @Override
            public void onResponse(Call call, Response response) throws IOException {
                Log.d("ChooseAreaFragment","加载地区信息...");
                String responseText = response.body().string();
                boolean result = false;
                if ("province".equals(type)){
                    result = Utility.handleProvinceResponse(responseText);
                }
                else if ("city".equals(type)){
                    result = Utility.handleCityResponse(responseText,selectedProvince.getId());
                }
                else if ("county".equals(type)){
                    result = Utility.handleCountyResponse(responseText, selectedCity.getId());
                }
                if (result)
                {
                    getActivity().runOnUiThread(new Runnable() {
                        @Override
                        public void run() {
                            Log.d("ChooseAreaFragment","开启线程更新UI");
                            closeProgressDialog();
                            if ("province".equals(type)){
                                queryProvinces();
                            }
                            else if ("city".equals(type)){
                                queryCities();
                            }
                            else if ("county".equals(type)){
                                queryCounties();
                            }
                        }
                    });
                }

                if ("city".equals(type)){
                    result = Utility.handleProvinceResponse(responseText);
                }
                if ("county".equals(type)){
                    result = Utility.handleProvinceResponse(responseText);
                }


            }
        });
    }

    /*显示进度对话框*/
    private void showProgressDialog() {
        if (progressDialog==null){
            progressDialog = new ProgressDialog(getActivity());
            progressDialog.setMessage("正在加载...");
            progressDialog.setCanceledOnTouchOutside(false);

        }
        progressDialog.show();
    }

    private void queryCounties() {
        titleText.setText(selectedCity.getCityName());
        backButton.setVisibility(View.VISIBLE);
        countyList = DataSupport.where("cityid = ?", String.valueOf(selectedCity.getId())).find(County.class);
        if (countyList.size()>0){
            dataList.clear();
            for (County county:countyList){
                dataList.add(county.getCountyName());
            }
            adapter.notifyDataSetChanged();
            listView.setSelection(0);
            currentLevel=LEVEL_COUNTY;
        }
        else {
            int provinceCode = selectedProvince.getProvinceCode();
            int cityCode = selectedCity.getCityCode();
            String address = "http://guolin.tech/api/china/"+provinceCode+"/"+cityCode;
            queryFromServer(address,"county");
        }
    }

    /*全国所有的省,优先查询数据库,如果没有再去服务器查询*/
    private void queryProvinces() {
        titleText.setText("中国");
        Log.d("ChooseAreaFragment","查询省中...");
        backButton.setVisibility(View.GONE);
        provinceList = DataSupport.findAll(Province.class);
        if (provinceList.size()>0){
            dataList.clear();
            for (Province province:provinceList){
                dataList.add(province.getProvinceName());
            }
            adapter.notifyDataSetChanged();
            listView.setSelection(0);
            currentLevel = LEVEL_PROVINCE;
        }
        else {
            Log.d("ChooseAreaFragment","服务器查询省中...");
            String address = "http://guolin.tech/api/china";
            queryFromServer(address,"province");
        }
    }
    private void closeProgressDialog() {
        if (progressDialog!=null){
            progressDialog.dismiss();
        }
    }
}
接下来将碎片县市县碎片县市在主布局中,修改activity.xml
<?xml version="1.0" encoding="utf-8"?>
<FrameLayout
    xmlns:android="http://schemas.android.com/apk/res/android"
    xmlns:tools="http://schemas.android.com/tools"
    android:layout_width="match_parent"
    android:layout_height="match_parent">
    <fragment
        android:id="@+id/choose_area_fragment"
        android:layout_width="match_parent"
        android:layout_height="match_parent"
        android:name = "com.example.coolweather.ChooseAreaFragment" />
</FrameLayout>
添加网络访问权限:
<uses-permission android:name="android.permission.INTERNET"/>
别忘了添加:
android:usesCleartextTraffic="true"
运行过程中出现一个错误为:
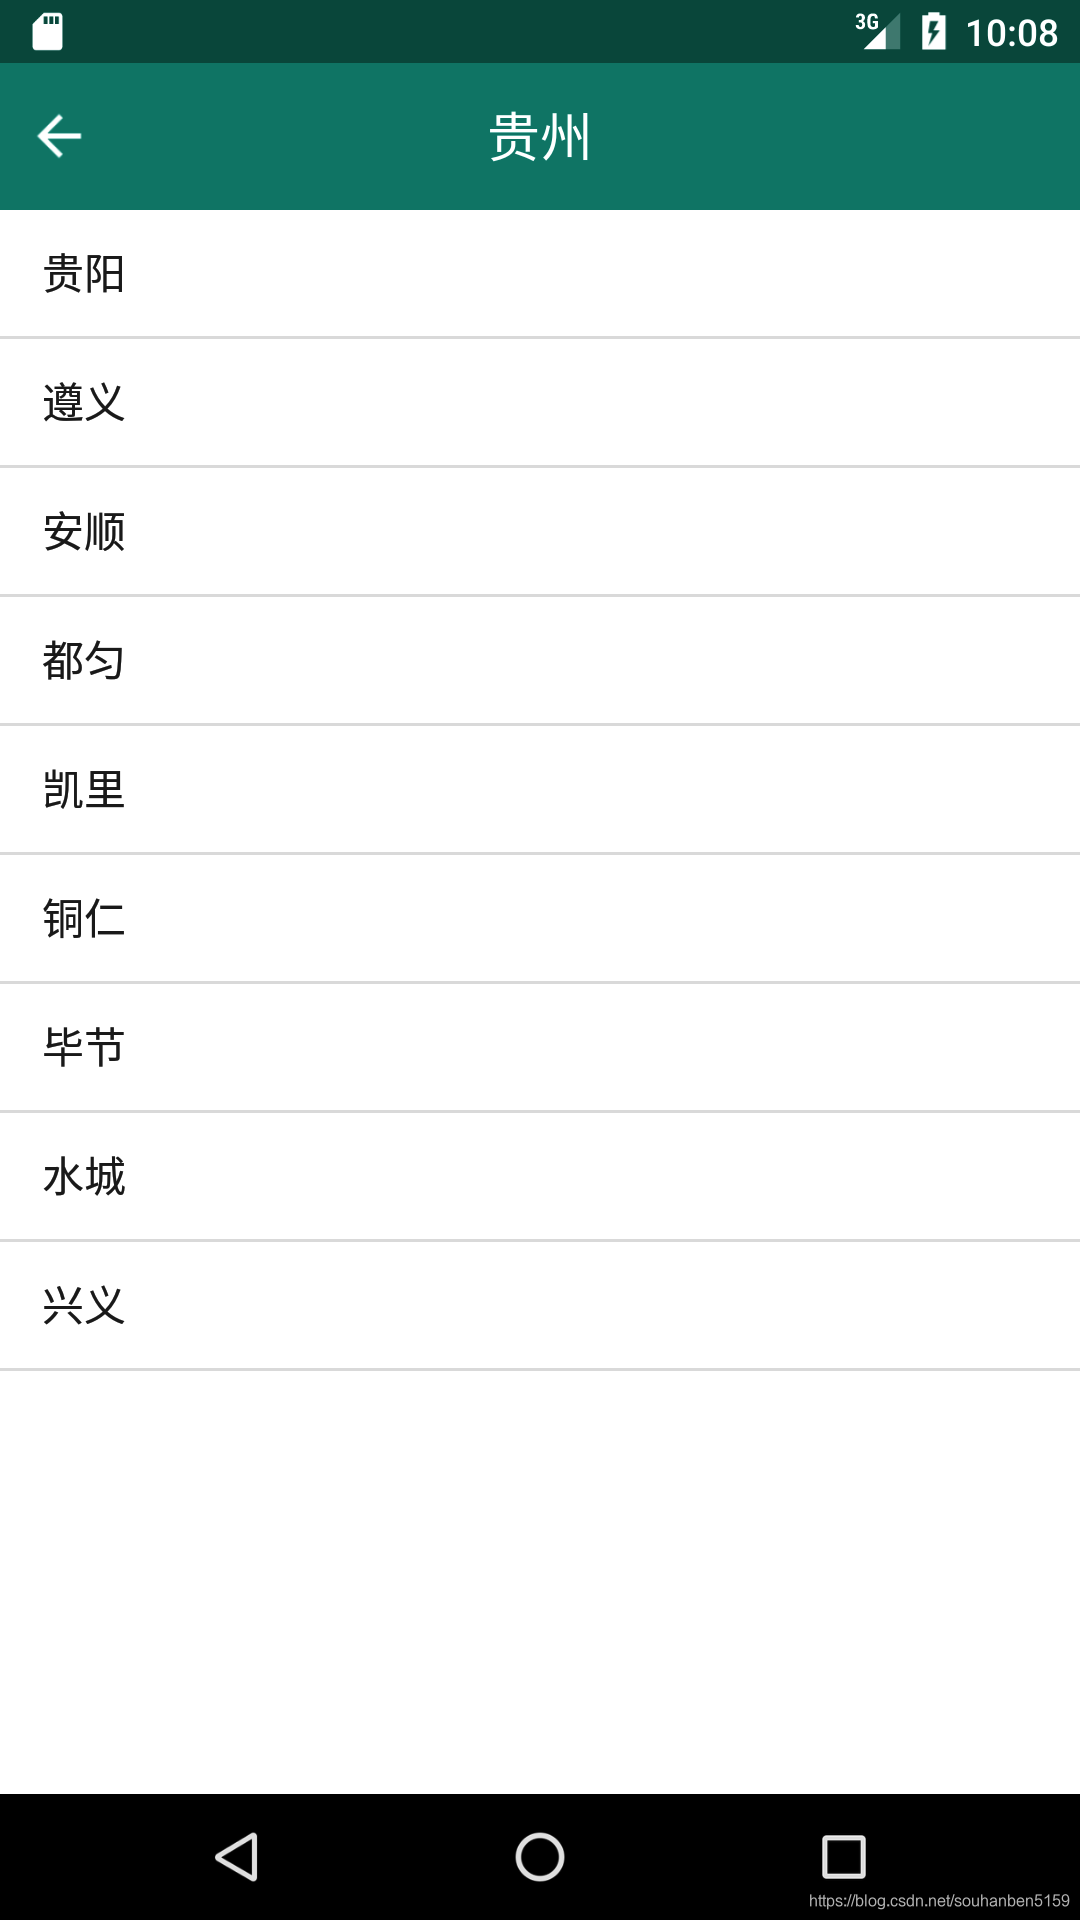
no such column: provinceId (code 1): , while compiling: SELECT * FROM city WHERE provinceId
说是在city中没有找到provinceId者一列的数据库,经分析为数据库在没有创建city列表前有创建国数据库,所有这里我们将litepal.xml中的版本号升级为2,即:
<version value = "2"/> //数据库版本号
查看下运行图:
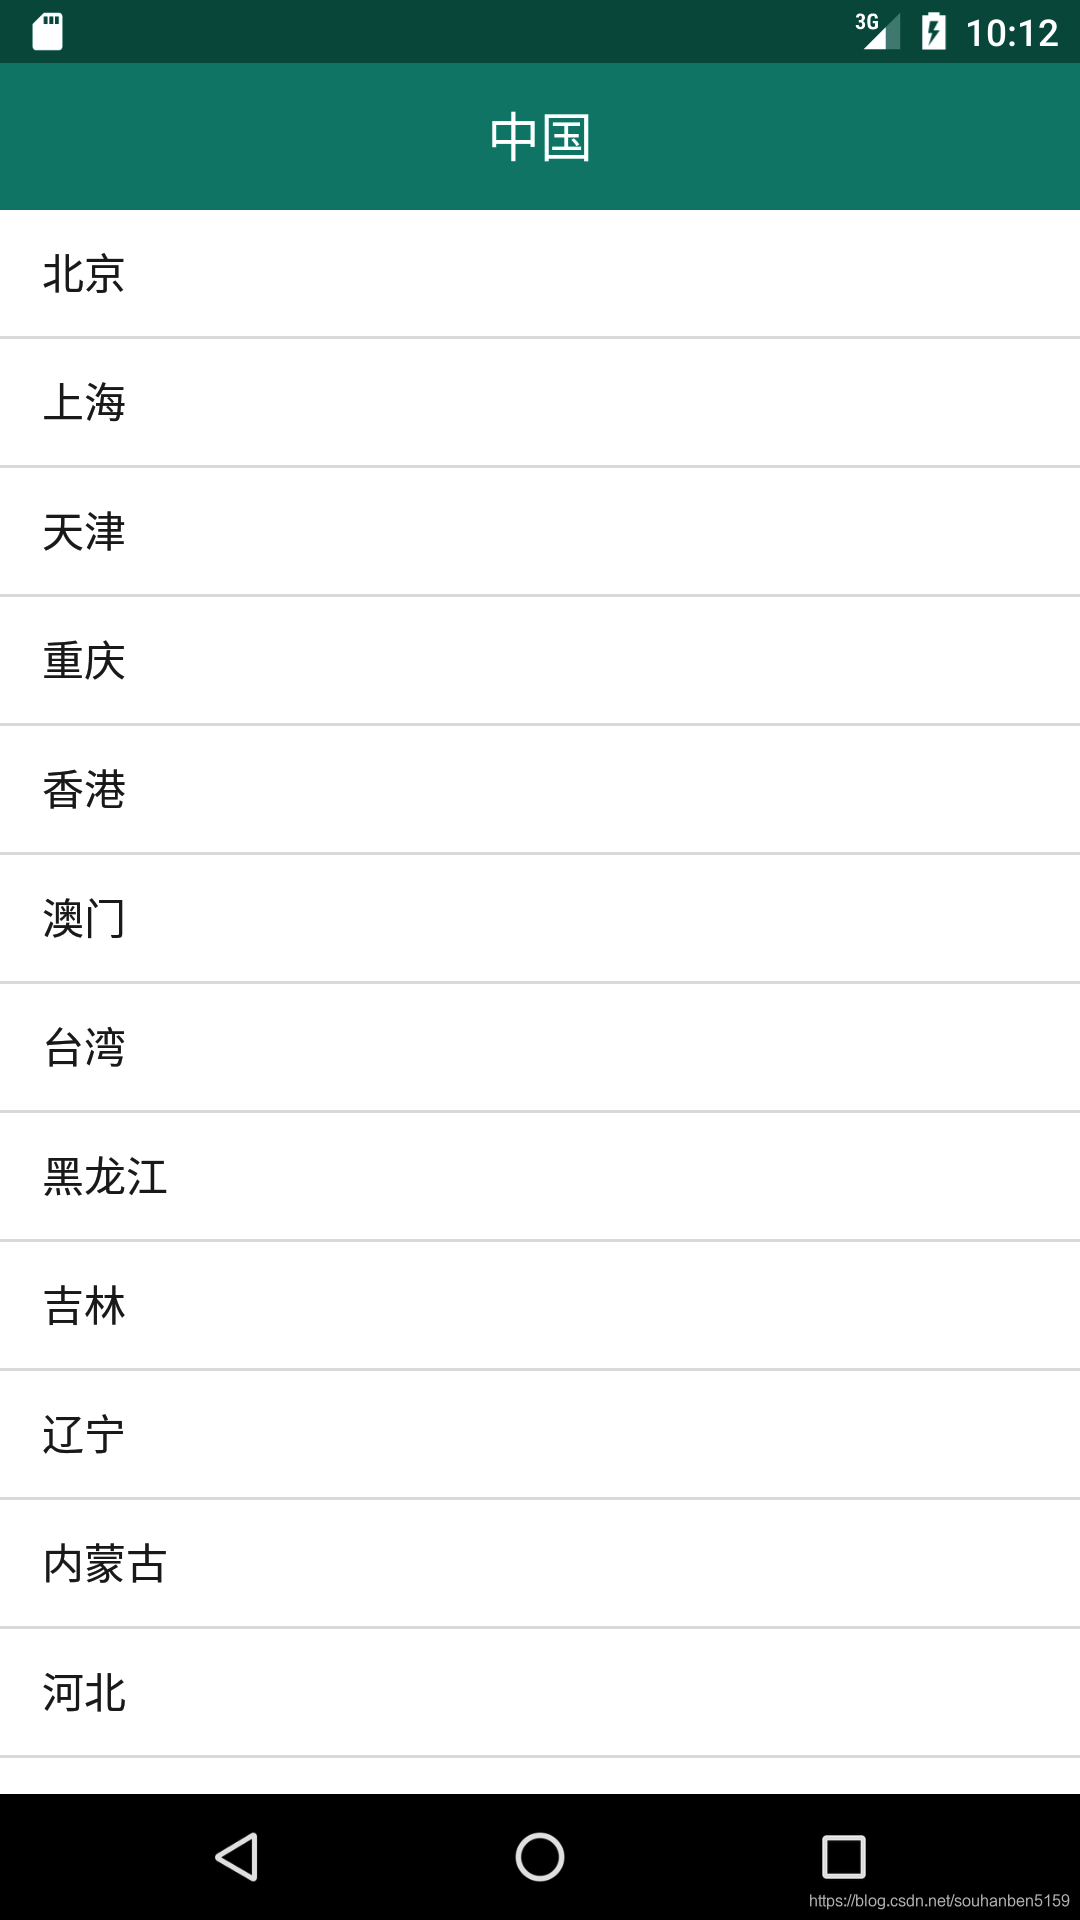
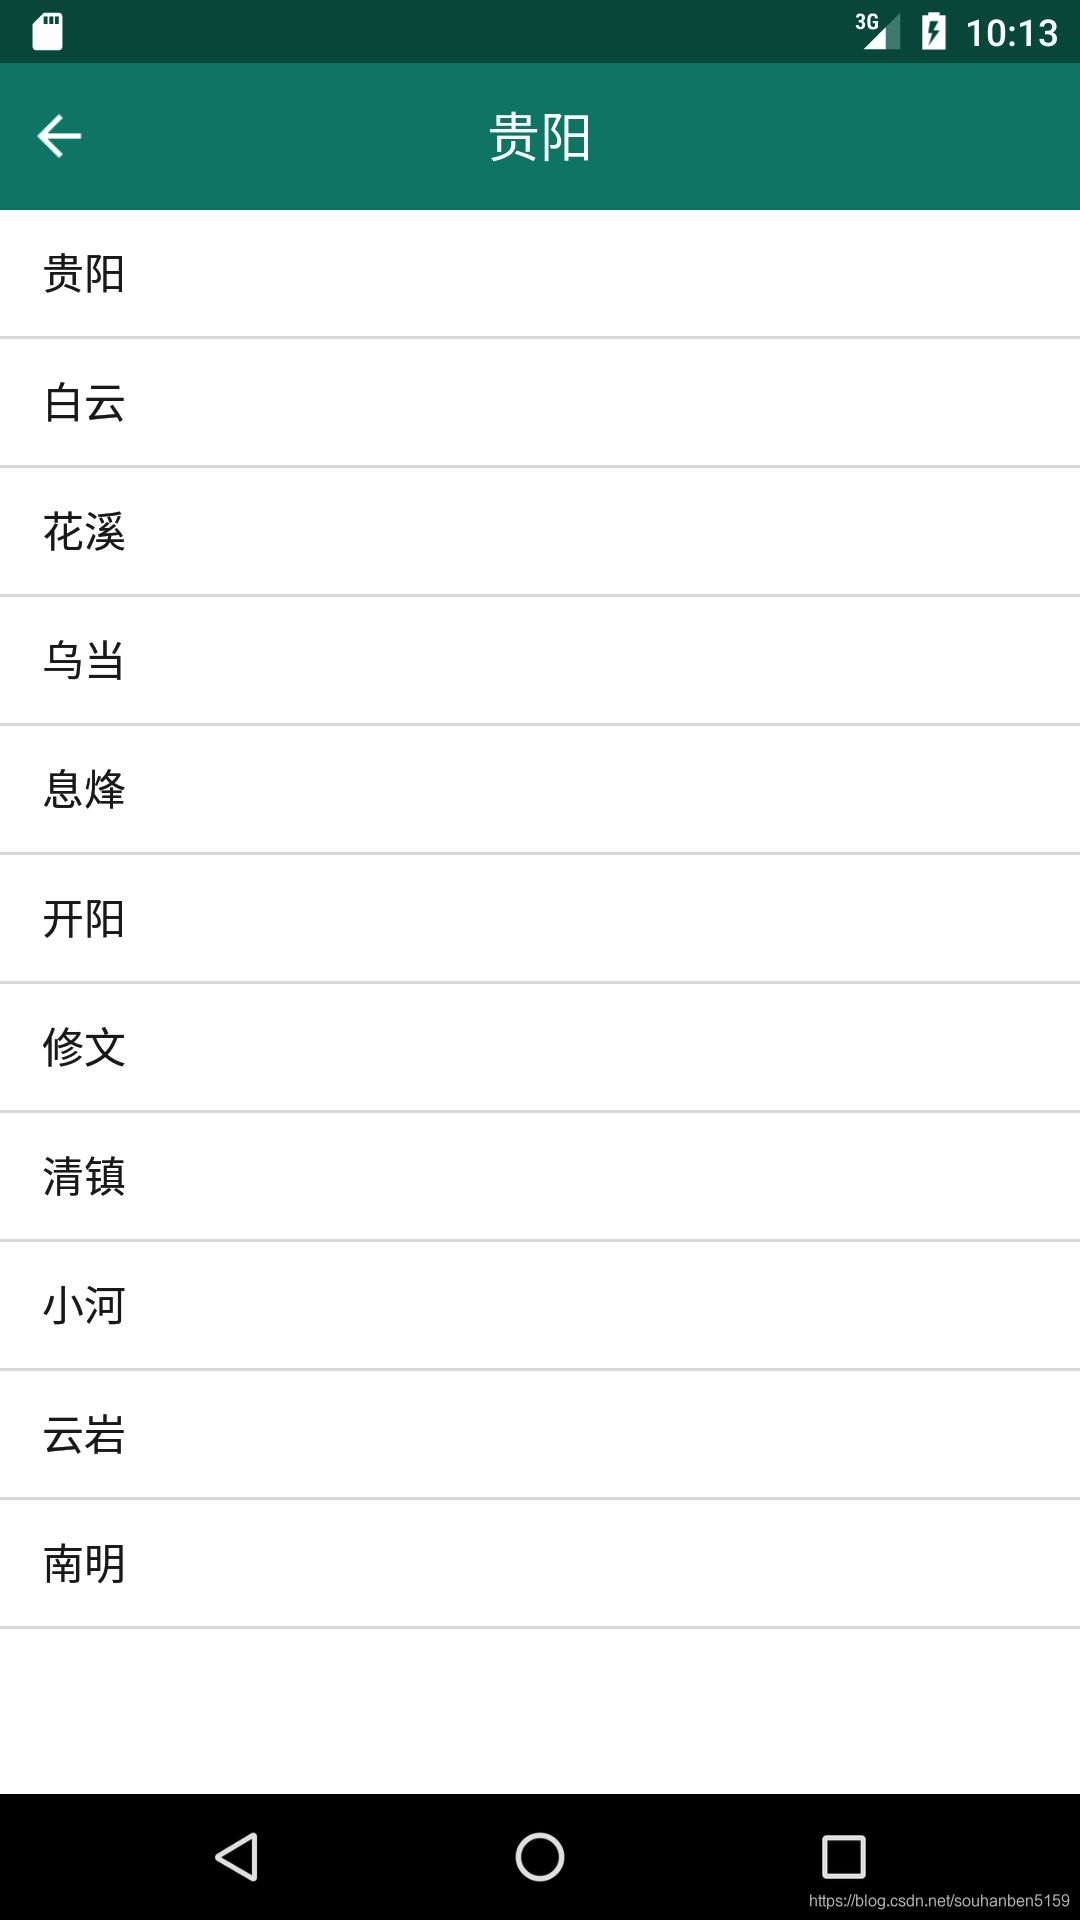
第一部分也就完成了,将代码提交到远程仓库:
CoolWeather apple$ git add .

CoolWeather apple$ git commit -m "遍历中国省市县三级列表显示功能"

CoolWeather apple$ git push origin master
6、显示天气信息
由于获取的天气信息较为复杂,我们采用GSON来获取天气信息。
在gson包中建立一个Basic类,来显示城市的基础信息:
public class Basic {
    @SerializedName("city")   //JSON字段和Java字段建立映射
    public String cityName;   //城市名
    @SerializedName("id")
    public String weather_id;  //天气情况
    public Update update;
    public class Update {
        @SerializedName("loc")
        public String updateTime;   //天气更新时间
    }
}
同理,新建一个AQI类:
public class AQI {
    public AQICity city;
    public class AQICity{
        public String aqi;
        public String pm25;
    }
}
新建一个Now类显示温度和天气情况:
public class Now {
    @SerializedName("tmp")
    public String tempeture;
    @SerializedName("cond")
    public More more;
    private class More {
        @SerializedName("txt")
        public String info;
    }
}
新建一个Suggestion类来推荐日常活动:
public class Suggestion {
    @SerializedName("comf")
    public Comfort comfort;
    @SerializedName("cw")
    public  CarWash carWash;
    public Sport sport;
    public class Comfort {
        @SerializedName("txt")
        public String info;
    }
    public class CarWash{
        @SerializedName("txt")
        public String info;
    }
    private class Sport {
        @SerializedName("txt")
        public String info;
    }
}
继续在gson包下新建一个Forecas的类开表示未来的天气情况,其包含的会是一个数组:
public class Forecast {
    public String data;
    @SerializedName("tmp")
    public Temperature temperature;
    @SerializedName("cond")
    public More more;
    public class Temperature {
        public  String max;
        public String min;
    }
    private class More {
        @SerializedName("txt_d")
        public String info;
    }
}
新建一个总的实例类,在gson下的Weather类来引用刚创建的各个实体类:
public class Weather {
   public String status;  //返回是否成功返回值
   public Basic basic;
   public Forecast forecast;
   public AQI aqi;
   public Now now;
   @SerializedName("daily_forecast")
   public List<Forecast> forecastList;  //解析出数组
GSon所有的实体类都定义好后,下面来编写天气界面UI
创建一个活动为WeatherActivity,布局指定为activity_weather.xml,这个界面我们用分模块来构建布局UI,后面在使用include来集成:
首先建立一个title.xml作为头布局,在该头布局中放置两个TextView用于分别显示:城市名和显示更新事件,如下:
<?xml version="1.0" encoding="utf-8"?>
<RelativeLayout
   xmlns:android="http://schemas.android.com/apk/res/android"
   android:layout_width="match_parent"
   android:layout_height="?attr/actionBarSize">
   <TextView
       android:id="@+id/title_city"
       android:layout_width="wrap_content"
       android:layout_height="wrap_content"
       android:layout_centerInParent="true"
       android:textColor="#fff"
       android:textSize="20sp"/>
   <TextView
       android:id="@+id/title_update_time"
       android:layout_width="wrap_content"
       android:layout_height="wrap_content"
       android:layout_marginRight="10dp"
       android:layout_alignParentRight="true"
       android:layout_centerVertical="true"
       android:textColor="#fff"
       android:textSize="16sp"/>
</RelativeLayout>
在新建一个now.xml来显示天气信息,包括当前气温和天气概况,如下:
<LinearLayout
   xmlns:android="http://schemas.android.com/apk/res/android"
   android:orientation="vertical"
   android:layout_width="match_parent"
   android:layout_height="wrap_content">
   <!--显示当前气温-->
   <TextView
       android:layout_width="wrap_content"
       android:layout_height="wrap_content"
       android:id="@+id/degree_text"
       android:layout_gravity="end"
       android:textSize="60sp"
       android:textColor="#fff"
       />
   <!--显示天气概况-->
   <TextView
       android:layout_width="wrap_content"
       android:layout_height="wrap_content"
       android:id="@+id/weather_info_text"
       android:layout_gravity="end"
       android:textSize="20sp"
       android:textColor="#fff"/>
</LinearLayout>
在新建forecast.xml来显示未来几天的天气:
<?xml version="1.0" encoding="utf-8"?>
<!--外层定义了半透明的背景-->
<LinearLayout
    xmlns:android="http://schemas.android.com/apk/res/android"
    android:layout_width="match_parent"
    android:layout_height="wrap_content"
    android:orientation="vertical"
    android:layout_margin="15dp"
    android:background="#8000">
    <!--定义了一个标题-->
    <TextView
        android:layout_width="wrap_content"
        android:layout_height="wrap_content"
        android:layout_marginLeft="15dp"
        android:layout_marginTop="15dp"
        android:text="预报"
        android:textColor="#fff"
        android:textSize="20sp"/>
    <!--未来几天天气信息的布局,需要根据服务器返回的数据在代码中动态添加-->
    <LinearLayout
        android:layout_width="match_parent"
        android:layout_height="wrap_content"
        android:orientation="vertical"
        android:id="@+id/forecast_layout">
    </LinearLayout>
</LinearLayout>
在定义一个未来天气的子项布局forecast_item.xml,如下:
<?xml version="1.0" encoding="utf-8"?>
<!--未来某一天的天气信息-->
<LinearLayout
    xmlns:android="http://schemas.android.com/apk/res/android"
    android:layout_width="match_parent"
    android:layout_height="wrap_content"
    android:layout_margin="15dp">
    <!--天气时间-->
    <TextView
        android:id="@+id/data_text"
        android:layout_width="0dp"
        android:layout_height="wrap_content"
        android:layout_gravity="center_vertical"
        android:layout_weight="2"
        android:textColor="#fff"/>
    <!--天气概况-->
    <TextView
        android:id="@+id/info_text"
        android:layout_width="0dp"
        android:layout_height="wrap_content"
        android:layout_gravity="center_vertical"
        android:layout_weight="1"
        android:gravity="center"
        android:textColor="#fff"/>
    <!--最高温度-->
    <TextView
        android:id="@+id/max_text"
        android:layout_width="0dp"
        android:layout_height="wrap_content"
        android:layout_gravity="center"
        android:layout_weight="1"
        android:gravity="right"
        android:textColor="#fff"/>
    <!--最低气温-->
    <TextView
        android:id="@+id/min_text"
        android:layout_width="0dp"
        android:layout_height="wrap_content"
        android:layout_gravity="center"
        android:layout_weight="1"
        android:gravity="right"
        android:textColor="#fff"/>
</LinearLayout>
新建一个aqi.xml作为空气质量的布局
<?xml version="1.0" encoding="utf-8"?>
<LinearLayout
    xmlns:android="http://schemas.android.com/apk/res/android"
    android:orientation="vertical"
    android:layout_width="match_parent"
    android:layout_height="wrap_content"
    android:layout_margin="15dp"
    android:background="#8000">
    <TextView
        android:layout_width="wrap_content"
        android:layout_height="wrap_content"
        android:layout_marginLeft="15dp"
        android:layout_marginTop="15dp"
        android:text="空气质量"
        android:textColor="#fff"
        android:textSize="20sp"/>
    <LinearLayout
        android:layout_width="match_parent"
        android:layout_height="wrap_content"
        android:layout_margin="15dp">
        <RelativeLayout
            android:layout_width="0dp"
            android:layout_height="match_parent"
            android:layout_weight="1">
            <LinearLayout
                android:layout_width="match_parent"
                android:layout_height="wrap_content"
                android:orientation="vertical"
                android:layout_centerInParent="true">

                <TextView
                    android:id="@+id/aqi_text"
                    android:layout_width="wrap_content"
                    android:layout_height="wrap_content"
                    android:layout_gravity="center"
                    android:textColor="#fff"
                    android:textSize="40sp"/>

                <TextView
                    android:layout_width="wrap_content"
                    android:layout_height="wrap_content"
                    android:layout_gravity="center"
                    android:text="AQI指数"
                    android:textColor="#fff"/>
            </LinearLayout>
        </RelativeLayout>
        <RelativeLayout
            android:layout_width="0dp"
            android:layout_height="match_parent"
            android:layout_weight="1">
            <LinearLayout
                android:layout_width="match_parent"
                android:layout_height="wrap_content"
                android:orientation="vertical"
                android:layout_centerInParent="true">

                <TextView
                    android:id="@+id/pm25_text"
                    android:layout_width="wrap_content"
                    android:layout_height="wrap_content"
                    android:layout_gravity="center"
                    android:textColor="#fff"
                    android:textSize="40sp"/>
                <TextView
                    android:layout_width="wrap_content"
                    android:layout_height="wrap_content"
                    android:layout_gravity="center"
                    android:text="PM2.5指数"
                    android:textColor="#fff"/>
            </LinearLayout>
        </RelativeLayout>
    </LinearLayout>
</LinearLayout>
在新建一个suggestion.xml来作为生活建立信息布局,如下:
<?xml version="1.0" encoding="utf-8"?>
<LinearLayout
    xmlns:android="http://schemas.android.com/apk/res/android"
    android:orientation="vertical"
    android:layout_width="match_parent"
    android:layout_height="wrap_content"
    android:layout_margin="15dp"
    android:background="#8000">
    <TextView
        android:layout_width="wrap_content"
        android:layout_height="wrap_content"
        android:layout_marginLeft="15dp"
        android:layout_marginTop="15dp"
        android:text="生活建议"
        android:textColor="#fff"
        android:textSize="20sp" />
    <!--舒适度-->
    <TextView
        android:id="@+id/comfort_text"
        android:layout_width="wrap_content"
        android:layout_height="wrap_content"
        android:layout_margin="15dp"
        android:textColor="#fff"/>
    <!--洗车指数-->
    <TextView
        android:id="@+id/car_wash_text"
        android:layout_width="wrap_content"
        android:layout_height="wrap_content"
        android:layout_margin="15dp"
        android:textColor="#fff"/>
    <!--运动建议-->
    <TextView
        android:id="@+id/sport_text"
        android:layout_width="wrap_content"
        android:layout_height="wrap_content"
        android:layout_margin="15dp"
        android:textColor="#fff"/>
</LinearLayout>
最后将以上编写的布局引入到activity_weather.xml中,如下:
<?xml version="1.0" encoding="utf-8"?>
<FrameLayout
    xmlns:android="http://schemas.android.com/apk/res/android"
    android:layout_width="match_parent"
    android:layout_height="match_parent"
    android:background="@color/colorPrimary">
    <ScrollView
        android:id="@+id/weather_layout"
        android:layout_width="match_parent"
        android:layout_height="match_parent"
        android:scrollbars="none"
        android:overScrollMode="never">
        <LinearLayout
            android:layout_width="match_parent"
            android:layout_height="wrap_content"
            android:orientation="vertical">
            <include layout="@layout/title"/>
            <include layout="@layout/now"/>
            <include layout="@layout/forecast"/>
            <include layout="@layout/api"/>
            <include layout="@layout/suggestion"/>
        </LinearLayout>
    </ScrollView>
</FrameLayout>
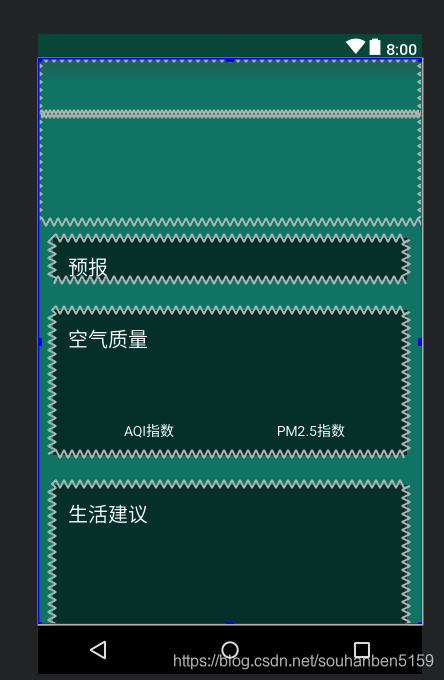
以上天气UI我们就编写完毕了,看一下效果:
接下来,开始逻辑部分的实现,首先得在Utility类中添加解析天气JSON数据的方法:
 /*将返回的JSON数据解析成Weather实体类*/
    public static Weather handleWeatherResponse(String response){
        try {
            //通过JSONObject和JSONArray将天气数据中的主体内容解析出来
            JSONObject jsonObject = new JSONObject(response);
            JSONArray jsonArray = jsonObject.getJSONArray("HeWeather");
            String weatherContent = jsonArray.getJSONObject(0).toString();
            //将JSON数据转换成Weather对象
            return new Gson().fromJson(weatherContent,Weather.class);
        } catch (JSONException e) {
            e.printStackTrace();
        }
        return null;
    }
接着,在WeatherActivity中去请求天气数据,以及将数据展示到界面上,记得key值需要自己去和风天气官网去获取,每个人每个应用的的key不一样:
public class WeatherActivity extends AppCompatActivity {

   private ScrollView weatherLayout;

   private TextView titleCity;

   private TextView titleUpdateTime;

   private TextView degreeText;  //气温

   private TextView weatherInfoText;  //天气概况

   private LinearLayout forecastLayout;

   private TextView aqiText;

   private TextView pm25Text;

   private TextView comfortText;

   private TextView carWashText;

   private TextView sportText;

   @Override
   protected void onCreate(Bundle savedInstanceState) {
       super.onCreate(savedInstanceState);
       setContentView(R.layout.activity_weather);
       initView();
       //定义缓存对象
       SharedPreferences prefs= PreferenceManager.getDefaultSharedPreferences(this);
       String weatherString = prefs.getString("weather",null);
       if (weatherString!=null){
           //有缓存时直接解析天气数据
           Weather weather = Utility.handleWeatherResponse(weatherString);
           showWeatherInfo(weather);
       }
       else {
           //无缓存时去服务器查询天气信息
           String weatherId = getIntent().getStringExtra("weather_id");
           weatherLayout.setVisibility(View.INVISIBLE);
           requestWeather(weatherId);
       }
   }
    /*根据天气ID请求天气信息*/
   private void requestWeather(final String weatherId) {
       String weatherUrl = "http://guolin.tech/api/weather?cityid = "+
               weatherId+"&key = 8614c6b9de8145b3a0ef78a277cc2db4";
       HttpUtil.sendOKHttpRequest(weatherUrl, new Callback() {
           @Override
           public void onFailure(Call call, IOException e) {
               e.printStackTrace();
               runOnUiThread(new Runnable() {
                   @Override
                   public void run() {
                       Toast.makeText(WeatherActivity.this,"从网上获取天气信息失败",
                               Toast.LENGTH_SHORT).show();
                   }
               });
           }
           @Override
           public void onResponse(Call call, Response response) throws IOException {
               final String responseText = response.body().string();
               final Weather weather = Utility.handleWeatherResponse(responseText);
               runOnUiThread(new Runnable() {
                   @Override
                   public void run() {
                       if (weather!=null&&"ok".equals(weather.status)) {
                           SharedPreferences.Editor editor = PreferenceManager.
                                   getDefaultSharedPreferences(WeatherActivity.this).edit();
                           editor.putString("weather",responseText);
                           editor.apply();
                           showWeatherInfo(weather);
                       }
                       else {
                           Toast.makeText(WeatherActivity.this,"获取天气信息失败",
                                   Toast.LENGTH_SHORT).show();
                       }
                   }
               });
           }
       });
   }

   //缓存数据下处理并展示Weather实体类中的数据
   private void showWeatherInfo(Weather weather) {
       String cityName = weather.basic.cityName;
       String updateTime = weather.basic.update.updateTime.split(" ")[1]; //split:分解
       String degree = weather.now.tempeture+"°C";
       String weatherInfo = weather.now.more.info;
       titleCity.setText(cityName);
       titleUpdateTime.setText(updateTime);
       degreeText.setText(degree);
       weatherInfoText.setText(weatherInfo);
       forecastLayout.removeAllViews();
       for (Forecast forecast : weather.forecastList){
           View view = LayoutInflater.from(this).inflate(R.layout.forecast_item,forecastLayout,false);
           TextView dateText = (TextView)view.findViewById(R.id.date_text);
           TextView infoText = (TextView)view.findViewById(R.id.info_text);
           TextView maxText = (TextView)view.findViewById(R.id.max_text);
           TextView minText = (TextView)view.findViewById(R.id.min_text);
           dateText.setText(forecast.date);
           infoText.setText(forecast.more.info);
           maxText.setText(forecast.temperature.max);
           minText.setText(forecast.temperature.min);
           forecastLayout.addView(view);
       }
       if (weather.aqi != null){
                aqiText.setText(weather.aqi.city.aqi);
                pm25Text.setText(weather.aqi.city.pm25);
       }
       String comfort = "舒适度:" +weather.suggestion.comfort.info;
       String carWash = " 洗车指数:" +weather.suggestion.carWash.info;
       String sport = "运动建议:" +weather.suggestion.sport.info;
       comfortText.setText(comfort);
       carWashText.setText(carWash);
       sportText.setText(sport);
       weatherLayout.setVisibility(View.VISIBLE);
   }

   //初识化控件
   private void initView() {
       weatherLayout = (ScrollView) findViewById(R.id.weather_layout);
       titleCity = (TextView)findViewById(R.id.title_city);
       titleUpdateTime = (TextView)findViewById(R.id.title_update_time);
       degreeText = (TextView)findViewById(R.id.degree_text);
       weatherInfoText = (TextView)findViewById(R.id.weather_info_text);
       forecastLayout = (LinearLayout)findViewById(R.id.forecast_layout);
       aqiText = (TextView)findViewById(R.id.api_text);
       pm25Text = (TextView)findViewById(R.id.pm25_text);
       comfortText = (TextView) findViewById(R.id.comfort_text);
       carWashText = (TextView) findViewById(R.id.car_wash_text);
       sportText = (TextView)findViewById(R.id.sport_text);
   }
}
实现省市县列表界面跳转到天气界面的逻辑:
,修改ChooseAreaFragment,如下:
   //列表任意一栏被点击,则...
        listView.setOnItemClickListener(new AdapterView.OnItemClickListener() {
            @Override
            public void onItemClick(AdapterView<?> parent, View view, int position, long id) {
                Log.d("ChooseAreaFragment","列表被点了的...");
                if (currentLevel == LEVEL_PROVINCE){   //当前选中的级别为省份时
                    selectedProvince = provinceList.get(position);  //当前点击为选中状态
                    queryCities();//查询市的方法
                }
                else if (currentLevel == LEVEL_CITY){
                    selectedCity = cityList.get(position);
                    queryCounties();
                }

                /*以下实现地区天气界面*/
                else if (currentLevel == LEVEL_COUNTY){
                    String weatherId = countyList.get(position).getWeatherId();
                    Intent intent = new Intent(getActivity(),WeatherActivity.class);
                    intent.putExtra("weather_id",weatherId);
                    startActivity(intent);
                    getActivity().finish();
                }
            }
        });
在MainActivity中加入一个缓存数据的判断如下:
public class MainActivity extends AppCompatActivity {
    @Override
    protected void onCreate(Bundle savedInstanceState) {
        super.onCreate(savedInstanceState);
        setContentView(R.layout.activity_main);
        SharedPreferences prefs = PreferenceManager.getDefaultSharedPreferences(this);
        if (prefs.getString("weather",null)!=null){
            Intent intent = new Intent(this,WeatherActivity.class);
            startActivity(intent);
            finish();
        }
    }
}
运行程序后发现和风天气的API接口以及更新升级了,也就是以上代码运行会存在Bug,如图:

所以去看一下和风天气的开发文档:
https://www.heweather.com/documents/sdk/android
在来开发。
