一、什么是AWT
Awt(Abstract Window Toolkit)全称抽象窗口工具集。是基本的GUI类库,AWT也是窗口框架,包含不同平台的窗口系统改中的公共组件。
优点:1. 界面风格与OS窗口
           2. 一次编写,多平台运行
缺点:就是感觉丑丑的,哈哈。
二、AWT的组件和容器
1. Frame
Frame是一个带有标题和边框的顶级窗口。
一个可以设置其大小、位置、背景颜色以及可见性等的窗口。
小段代码:
public class FrameTest {
    public static void main(String[] args) {
        Frame frame = new Frame("我的java图像窗口");

        frame.setVisible(true);

        frame.setSize(400,400);

        frame.setLocation(100,100);

        frame.setBackground(new Color(0, 145, 136));

        frame.setResizable(false);

    }
}
嗯,是这样子的
不过点那个叉叉是关不了这个窗口的,办法之后再说啦,目前可以可以终止运行来关掉这个窗口。
也可以一次创建多个窗口,可以运用继承和封装的思想
小段代码:
public class FrameTest2 {
    public static void main(String[] args) {

        MyFrame myFrame1 = new MyFrame(100, 100, 300, 300, Color.BLUE);
        MyFrame myFrame2 = new MyFrame(400, 100, 300, 300, Color.CYAN);
        MyFrame myFrame3 = new MyFrame(100, 400, 300, 300, Color.YELLOW);
        MyFrame myFrame4= new MyFrame(400, 400, 300, 300, Color.RED);
    }
}

class MyFrame extends Frame {
    static int i = 0;
    MyFrame(int x,int y,int w,int h,Color color){
        super("MyFrame"+i);
        setBounds(x,y,w,h);
        setBackground(color);
        setVisible(true);
    }
}

。。。这些歌词不要介意
2. 面板panel
Panel是最简单的容器类。一个面板提供了一个应用程序可以连接任何其他组件的空间,包括其他面板。不能单独存在。
添加一个监听器监听事件,运用适配器模式监听窗口关闭事件,这样就可以正常的关闭窗口以及结束运行。
小段代码:
public class PanelTest {
    public static void main(String[] args) {
        Frame frame = new Frame("练习");
        Panel panel = new Panel();
        frame.setLayout(null);
        frame.setBounds(200,200,400,400);
        frame.setVisible(true);
        panel.setBounds(20,20,100,100);
        frame.setBackground(Color.BLUE);
        panel.setBackground(Color.RED);
        frame.add(panel);
        frame.addWindowListener(new WindowAdapter() {
            @Override
            public void windowClosing(WindowEvent e) {

                System.exit(0);
            }
        });
    }
}
结果:

注意:panel设置坐标是相对于frame的位置。
3. 布局管理器
- 流式布局
小段代码:
public class 流式布局1 {
    public static void main(String[] args) {
        Frame frame = new Frame("流式布局");
        Button button1 = new Button("1");
        Button button2 = new Button("2");
        Button button3 = new Button("3");
        frame.setLayout(new FlowLayout());
        frame.setBounds(100,100,400,400);
        frame.add(button1);
        frame.add(button2);
        frame.add(button3);
        frame.setVisible(true);


    }
}
结果:

- 东南西北布局
小段代码:
public class BorderLayoutTest {
    public static void main(String[] args) {
        Frame frame = new Frame("BorderLayoutTest");
        Button east = new Button("East");
        Button west = new Button("West");
        Button south = new Button("South");
        Button north = new Button("North");
        Button center = new Button("Center");
        frame.add(center,BorderLayout.CENTER);
        frame.add(east,BorderLayout.EAST);
        frame.add(west,BorderLayout.WEST);
        frame.add(south,BorderLayout.SOUTH);
        frame.add(north,BorderLayout.NORTH);
        frame.setBounds(100,100,400,400);
        frame.setVisible(true);

    }
}
结果:

- 表格布局Grid
小段代码:
public static void main(String[] args) {
        Frame frame = new Frame("TestGridLayout");
		frame.setBounds(100,100,400,400);
        Button btn1 = new Button("btn1");
        Button btn2 = new Button("btn2");
        Button btn3 = new Button("btn3");
        Button btn4 = new Button("btn4");
        Button btn5 = new Button("btn5");
        Button btn6 = new Button("btn6");

        frame.setLayout(new GridLayout(3,2));

        frame.add(btn1);
        frame.add(btn2);
        frame.add(btn3);
        frame.add(btn4);
        frame.add(btn5);
        frame.add(btn6);

        //frame.pack();
        frame.setVisible(true);

    }
结果是:

- 小练习
小段代码:
public class Test {
    public static void main(String[] args) {
        Frame frame = new Frame("Test");
        frame.setBounds(100,100,400,400);
        frame.setLayout(null);
        frame.setBackground(Color.black);
        frame.setVisible(true);
        frame.setLayout(new GridLayout(2,1));

        Panel panel1 = new Panel(new BorderLayout());
        Panel panel2 = new Panel(new GridLayout(2,1));
        Panel panel3 = new Panel(new BorderLayout());
        Panel panel4 = new Panel(new GridLayout(2,2));

        Button b1 = new Button("b1");
        Button b2 = new Button("b2");
        Button b3 = new Button("b3");
        Button b4 = new Button("b4");
        Button b5 = new Button("b5");
        Button b6 = new Button("b6");
        Button b7 = new Button("b7");
        Button b8 = new Button("b8");
        Button b9 = new Button("b9");
        Button b0 = new Button("b0");

        panel1.add(b0,BorderLayout.EAST);
        panel2.add(b1);
        panel2.add(b2);
        panel1.add(panel2,BorderLayout.CENTER);
        panel1.add(b3,BorderLayout.WEST);
        panel3.add(b4,BorderLayout.EAST);
        panel3.add(panel4,BorderLayout.CENTER);
        panel4.add(b5);
        panel4.add(b6);
        panel4.add(b7);
        panel4.add(b8);
        panel3.add(b9,BorderLayout.WEST);
        frame.add(panel1);
        frame.add(panel3);
        //frame.pack();
    }
}
结果:

4. 事件监听
xddm:
public class ActionEventTest {
    public static void main(String[] args) {
        Frame frame = new Frame("ActionEventTest");
        Button button = new Button();
        MyActionListener myActionListener = new MyActionListener();
        button.addActionListener(myActionListener);
        frame.add(button,BorderLayout.CENTER);
        frame.pack();

        windowClose(frame);
        frame.setVisible(true);


    }
    private static void windowClose(Frame frame){
        frame.addWindowListener(new WindowAdapter() {
            @Override
            public void windowClosing(WindowEvent e) {
                System.exit(0);
            }
        });
    }
}

class MyActionListener implements ActionListener{

    @Override
    public void actionPerformed(ActionEvent e) {
        System.out.println("别点我,点我刘恒就是猪");
    }
}
结果:
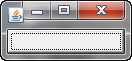

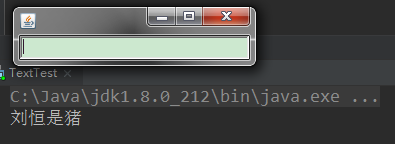
5. 输入框TestField监听
小段代码:
public class TextTest {
    public static void main(String[] args) {

        new MyFrame();
    }
}
class MyFrame extends Frame{
    public MyFrame() {
        TextField textField = new TextField();
        add(textField);
        MyActionListener2 myActionListener2 = new MyActionListener2();
        textField.addActionListener(myActionListener2);
        textField.setEchoChar('*');
        setVisible(true);
        pack();
        addWindowListener(new WindowAdapter() {
            @Override
            public void windowClosing(WindowEvent e) {
                System.exit(0);
            }
        });
    }

    }

     class MyActionListener2 implements ActionListener {

         @Override
         public void actionPerformed(ActionEvent e) {
             TextField textField = (TextField)e.getSource();
             System.out.println(textField.getText());
             textField.setText("");

         }
     }
学到的计算器:
public class Calc {
    public static void main(String[] args) {
       new Calclator().loadFrame();
    }
}
class Calclator extends Frame{
    TextField num1 ,num2,num3;
    public void loadFrame(){
        num1 = new TextField(10);
        num2 = new TextField(10);
        num3 = new TextField(20);
        Button button = new Button("=");
        Label label = new Label("+");
        button.addActionListener(new MyCalcActionListener2(this));
        setLayout(new FlowLayout());
        add(num1);
        add(label);
        add(num2);
        add(button);
        add(num3);

        pack();
        setVisible(true);
        addWindowListener(new WindowAdapter() {
            @Override
            public void windowClosing(WindowEvent e) {
                System.exit(0);
            }
        });
    }
}
class MyCalcActionListener2 implements ActionListener{
    Calclator calclator=null;

    public MyCalcActionListener2(Calclator calclator) {
        this.calclator = calclator;
    }
    @Override
    public void actionPerformed(ActionEvent e) {
        int n1 = Integer.parseInt(calclator.num1.getText());
        int n2 = Integer.parseInt(calclator.num2.getText());
        calclator.num3.setText("" + (n1 + n2));
        calclator.num1.setText("");
        calclator.num2.setText("");
    }
}

当然,遮盖开可以运用内部类的思想,更好的包装起来。
public class TestCalc {
    public static void main(String[] args) {
        new Calculator().loadFrame();
    }
}

//计算器类
class Calculator extends Frame{

    //属性
    TextField num1,num2,num3;

    //方法
    public void loadFrame(){

        num1 = new TextField(10);//字符数
        num2 = new TextField(10);//字符数
        num3 = new TextField(20);//字符数
        Button button = new Button("=");
        Label label = new Label("+");

        button.addActionListener(new MyCalculatorListener());

        //布局
        setLayout(new FlowLayout());
        add(num1);
        add(label);
        add(num2);
        add(button);
        add(num3);

        pack();
        setVisible(true);
    }

    //监听器类
    //内部类最大的好处,就是可以畅通无阻的访问外部的属性和方法!
    private class MyCalculatorListener implements ActionListener{

        @Override
        public void actionPerformed(ActionEvent e) {
            //1. 获得加数和被加数
            //2. 将这个值 + 法运算后,放到第三个框
            //3. 清除前两个框
            int n1 = Integer.parseInt(num1.getText());
            int n2 = Integer.parseInt(num2.getText());
            num3.setText(""+(n1+n2));
            num1.setText("");
            num2.setText("");
        }
    }

}
7. 画笔
小段代码:
public class PaintTest {
    public static void main(String[] args) {
        new MyPaint().loadFrame2();
    }
}
class MyPaint extends Frame{
    public void loadFrame2(){
        setBounds(100,100,600,600);
        setVisible(true);
    }
    @Override
    public void paint(Graphics g) {
        g.setColor(Color.red);
        g.fillOval(150,150,100,100);
        //g.fillRect(150,200,200,200);
    }

8. 鼠标监听事件

public class MouseListenerTest {
    public static void main(String[] args) {
        new MyFrame2("画图");
    }
}

class MyFrame2 extends Frame {
    ArrayList points;

    public MyFrame2(String title) {
        super(title);
        setBounds(200, 200, 400, 300);
        points = new ArrayList<>();


        setVisible(true);
        this.addMouseListener(new MyMouseListener());

    }

    @Override
    public void paint(Graphics g) {
        Iterator iterator = points.iterator();
        while (iterator.hasNext()) {
            Point point = (Point) iterator.next();
            g.setColor(Color.BLUE);
            g.fillOval(point.x, point.y, 10, 10);
        }
    }

    public void addPaint(Point point) {
        points.add(point);
    }

    private class MyMouseListener extends MouseAdapter {
        @Override
        public void mousePressed(MouseEvent e) {
            MyFrame2 frame = (MyFrame2) e.getSource();
            frame.addPaint(new Point(e.getX(), e.getY()));

            frame.repaint();
        }
    }

}
结果:

9. 窗口监听
小段代码:
public class TestWindow {
    public static void main(String[] args) {
        new WindowFrame();
    }
}

class WindowFrame extends Frame{
    public WindowFrame(){
        setBackground(Color.blue);
        setBounds(100,100,200,200);
        setVisible(true);
        //addWindowListener(new MyWindowListener());

        this.addWindowListener(
            new WindowAdapter() {
                @Override
                public void windowClosing(WindowEvent e) {
                    System.out.println("windowClosing");
                    System.exit(0);
                }
                @Override
                public void windowActivated(WindowEvent e) {
                    WindowFrame source = (WindowFrame) e.getSource();
                    source.setTitle("被激活了");
                    System.out.println("windowActivated");
                }
            }
        );
    }

}

10. 键盘监听
小段代码:
public class TestKeyListener {
    public static void main(String[] args) {
        new KeyFrame();
    }
}

class KeyFrame extends Frame{
    public KeyFrame(){
        setBounds(1,2,300,400);
        setVisible(true);

        this.addKeyListener(new KeyAdapter() {
            //键盘按下
            @Override
            public void keyPressed(KeyEvent e) {
                //获得键盘下的键是哪一个,当前的码
                int keyCode = e.getKeyCode(); //不需需要去记录这个数值,直接使用静态属性 VK_XXX
                System.out.println(keyCode);
                if (keyCode == KeyEvent.VK_UP) {
                    System.out.println("你按下了上键");
                }
                //根据按下不同操作,产生不同结果;
            }
        });
    }
}
