刚出差回来,忙完一阵子,今天得以有空,那就多多更新下博客了。
源码托管地址:https://github.com/cddofficial/SpringCloudRepo
目录

3.2.1 复制得到eureka-client-coke-ribbon-hystrix微服务
3.2.2 修改eureka-client-coke-ribbon-hystrix
3.3.1 复制得到微服务eureka-client-coke-feign-hystrix
3.3.2 修改eureka-client-coke-feign-hystrix
3.3.4 Fallback的升级FallbackFactory
1 雪崩效应
前面我们知道了微服务间是如何通信的,在一个复杂的业务场景中,可能处理一个业务逻辑,要调用很多个微服务,其中最后一个要调用的微服务发生了异常,后面的一连串微服务调用都会发生异常,导致这个异常范围越来越大,最后甚至整服务器集群都会瘫痪。这就是传说中的可怕的 雪崩效应。
接下来,给大家用图演示下,雪崩效应。各个服务器状态,绿色表示正常,红色表示异常。
2019-11-25 15:44:25,服务器A发生异常,如下图:

2019-11-25 15:44:45,服务器A,B,C发生异常,如下图:

2019-11-25 15:45:05,服务器A,B,C,D,E整个服务器都发生异常,如下图:

那么我们如何避免这种级联失败(雪崩效应)呢?请继续往下看。
2. 解决方案
2.1 超时机制
通过网络请求其他服务,都必须设置超时。正常情况下,一个远程调用RPC(Remote Procedure Call)一般在几十毫秒内就响应了。当依赖不可用或者因为网络问题,响应会变得特别长。而通常情况下,一个RPC对应了一个线程/进程,如果响应太慢,那么这个线程/进程将得不到释放。每一个线程/进程对会耗费一部分资源,当有大量线程/进程得不到释放,服务器资源会被耗尽,会导致很多服务不可用。所以每个请求都必须设置超时时间。
2.1.1 使用RestTemplate+Ribbon
在向spring容器中注册RestTemplate的bean时,设置其超时时间,如下图:

附加
有人可能会说设置ribbon超时时间,目前我们这个版本的不允许这样设置,就算设置了也不会生效,设置方式如下:

为什么没生效呢?我们来看下源码,RibbonProperties类。
并没有setReadTimeout方法

也没有setConnectTimeout方法

这应该就是在application.yml中设置ribbon超时时间不生效的原因吧,其他的SpringCloud版本我没有试。大家有兴趣可以去试一试,可以多多交流。
2.1.2 使用Feign
# feign也支持hystrix,设置超时时间
hystrix.command.serverMethod.execution.isolation.thread.timeoutInMilliseconds: 1000
2.2 断路器hystrix
我们先了解断路器,在我们的日常生活中,每个人家里都应该有断路器,就是我们日常所说的管电的闸,当我们正在用一个大功率的电器时,电线电流过大,这时候要是不关闭电源可能电线会着火发生火灾。我们靠什么来及时快速的切断电源呢(当电流电压异常时),就是断路器,我们日常的所说的电闸。
同样的道理,在系统中有大量的请求超时了,再不会让服务消费者去再次请求了,这里就要用到断路器避免不必要的资源浪费。
断路器的原理是当判断服务异常时(例如:有大量请求超时),会让后面再来请求快速失败。断路器模式就像是那些容易导致错误的一种代理。这种代理能够记录最近调用发生错误的次数。然后决定是否允许操作继续或者立即返回错误。
3 hystrix断路器
3.1 简介
hystrix 中文名为“豪猪”,即平时很温顺,在感受到危险的时候,用刺保护自己;在危险过去后,还是一个温顺的肉球。
Hystrix是Netflix的一个防止级联失败的类库。
3.2 Ribbon与Hystrix实战
3.2.1 复制得到eureka-client-coke-ribbon-hystrix微服务
复制eureka-client-coke-ribbon微服务重命名为eureka-client-coke-ribbon-hystrix(如何复制?请看eureka——实战中的 “2.4.1 创建可乐微服务” 的 “复制得到eureka-client-coke“),导入到IDE工具中。如下图:

3.2.2 修改eureka-client-coke-ribbon-hystrix
1 添加依赖
给pom文件中添加hystrix依赖,如下图:

整个pom文件代码如下:
<?xml version="1.0" encoding="UTF-8"?>
<project xmlns="http://maven.apache.org/POM/4.0.0"
	xmlns:xsi="http://www.w3.org/2001/XMLSchema-instance"
	xsi:schemaLocation="http://maven.apache.org/POM/4.0.0 https://maven.apache.org/xsd/maven-4.0.0.xsd">
	<modelVersion>4.0.0</modelVersion>
	<parent>
		<groupId>org.springframework.boot</groupId>
		<artifactId>spring-boot-starter-parent</artifactId>
		<version>2.0.7.RELEASE</version>
		<relativePath /> <!-- lookup parent from repository -->
	</parent>

	<groupId>com.cdd.cloud</groupId>
	<artifactId>eureka-client-coke-ribbon-hystrix</artifactId>
	<version>0.0.1-SNAPSHOT</version>
	<name>eureka-server-service-discover</name>
	<description>Demo project for Spring Boot</description>

	<properties>
		<java.version>1.8</java.version>
		<project.build.sourceEncoding>UTF-8</project.build.sourceEncoding>
	</properties>

	<dependencies>
		<!-- hystrix依赖 -->
		<dependency>
			<groupId>org.springframework.cloud</groupId>
			<artifactId>spring-cloud-starter-netflix-hystrix</artifactId>
		</dependency>

		<!-- eureka client依赖 -->
		<dependency>
			<groupId>org.springframework.cloud</groupId>
			<artifactId>spring-cloud-starter-netflix-eureka-client</artifactId>
		</dependency>

		<!-- web依赖 -->
		<dependency>
			<groupId>org.springframework.boot</groupId>
			<artifactId>spring-boot-starter-web</artifactId>
		</dependency>

		<!-- 连接mysql所需依赖 -->
		<dependency>
			<groupId>org.springframework.boot</groupId>
			<artifactId>spring-boot-starter-jdbc</artifactId>
		</dependency>
		<dependency>
			<groupId>mysql</groupId>
			<artifactId>mysql-connector-java</artifactId>
			<scope>runtime</scope>
		</dependency>

		<!-- 测试需要依赖 -->
		<dependency>
			<groupId>org.springframework.boot</groupId>
			<artifactId>spring-boot-starter-test</artifactId>
			<scope>test</scope>
		</dependency>
	</dependencies>

	<!-- 引入spring cloud的依赖,不能少,主要用来管理Spring Cloud生态各组件的版本 -->
	<dependencyManagement>
		<dependencies>
			<dependency>
				<groupId>org.springframework.cloud</groupId>
				<artifactId>spring-cloud-dependencies</artifactId>
				<version>Finchley.SR2</version>
				<type>pom</type>
				<scope>import</scope>
			</dependency>
		</dependencies>
	</dependencyManagement>

	<!-- 添加spring-boot的maven插件,不能少,打jar包时得用 -->
	<build>
		<plugins>
			<plugin>
				<groupId>org.springframework.boot</groupId>
				<artifactId>spring-boot-maven-plugin</artifactId>
			</plugin>
		</plugins>
	</build>

</project>
2 修改启动类
修改启动类的名称为:EurekaClientCokeRibbonHystrixApplication,并且给启动类上打上注解@EnableCircuitBreaker。启动类代码如下:
package com.cdd.demo;

import org.springframework.boot.SpringApplication;
import org.springframework.boot.autoconfigure.SpringBootApplication;
import org.springframework.cloud.client.circuitbreaker.EnableCircuitBreaker;
import org.springframework.cloud.client.loadbalancer.LoadBalanced;
import org.springframework.cloud.netflix.eureka.EnableEurekaClient;
import org.springframework.context.annotation.Bean;
import org.springframework.web.client.RestTemplate;

@SpringBootApplication
@EnableEurekaClient  //eureka client 注解
@EnableCircuitBreaker  // 启用断路器
public class EurekaClientCokeRibbonHystrixApplication {

	public static void main(String[] args) {
		SpringApplication.run(EurekaClientCokeRibbonHystrixApplication.class, args);
	}

	@Bean   // 向spring容器中中注册RestTemplate
	@LoadBalanced  // 负载均衡注解
	public RestTemplate restTemplate() {
		return new RestTemplate();
	}
}
3. 修改CokeController
给findById方法添加一个调用异常回调方法findByIdFallback,把该回调方法名通过@HystrixCommand注解配置到findById方法上。代码如下:
package com.cdd.demo.controller;

import org.springframework.beans.factory.annotation.Autowired;
import org.springframework.web.bind.annotation.GetMapping;
import org.springframework.web.bind.annotation.PathVariable;
import org.springframework.web.bind.annotation.RestController;
import org.springframework.web.client.RestTemplate;

import com.cdd.demo.entity.User;
import com.netflix.hystrix.contrib.javanica.annotation.HystrixCommand;

@RestController
public class CokeController {

	// 注入RestTemplate
	@Autowired
	private RestTemplate restTemplate;

	// 通过RestTemplate向用户微服务发送请求
	@GetMapping("/coke/{id}")
	@HystrixCommand(fallbackMethod="findByIdFallback")   // 发生异常回调方法,配置方法名
	public User findById(@PathVariable Long id) {
		// 方法getForObject当前请求路径参数已经换成了用户微服务的 serviceId,
		return this.restTemplate.getForObject("http://eureka-client-user/user/" + id, User.class);
	}

	// 发生异常回调方法
	// 返回,参数要和原方法一致
	public User findByIdFallback(@PathVariable Long id) {
		User user = new User();
		user.setId(0l);
		user.setName("微服务");
		return user;
	}
}
3.2.3 测试
1. 启动服务注册服务
2. 启动用户微服务,启动2个实例(详情可以参照SpringCloud(五)Feign——更好用的通信方式中2.3启动服务中2启动用户微服务)。切记要以debug模式启动哦
3 启动eureka-client-coke-ribbon-hystrix微服务
4 先来看下服务注册列表,浏览器中输入:http://localhost:8761/ ,响应页面如下,可以服务都启动成功了,并且也都注册上了:

5 根据页面响应测试
先给用户微服务的UserController里的findById方法打上一个断点,如下图:

接下来请求http://localhost:9001/coke/2
首先我们的IDE工具进入到了断点,如下图:

我们不释放这个断点,让进程一直等在这个,这时候再回到浏览器页面,可以看到响应页面已经有了,返回了我们刚才写的回调方法findByIdFallback()方法执行的结果,如下图:
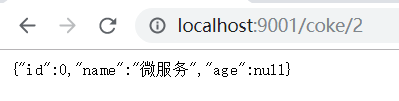
到这里说明我们刚才的断路器生效了。
6. 根据微服务健康信息测试
(1)pom文件添加依赖
给eureka-client-coke-ribbon-hystrix微服务的pom文件添加监控依赖,依赖截图如下:

整个pom文件的代码如下:
<?xml version="1.0" encoding="UTF-8"?>
<project xmlns="http://maven.apache.org/POM/4.0.0"
	xmlns:xsi="http://www.w3.org/2001/XMLSchema-instance"
	xsi:schemaLocation="http://maven.apache.org/POM/4.0.0 https://maven.apache.org/xsd/maven-4.0.0.xsd">
	<modelVersion>4.0.0</modelVersion>
	<parent>
		<groupId>org.springframework.boot</groupId>
		<artifactId>spring-boot-starter-parent</artifactId>
		<version>2.0.7.RELEASE</version>
		<relativePath /> <!-- lookup parent from repository -->
	</parent>

	<groupId>com.cdd.cloud</groupId>
	<artifactId>eureka-client-coke-ribbon-hystrix</artifactId>
	<version>0.0.1-SNAPSHOT</version>
	<name>eureka-server-service-discover</name>
	<description>Demo project for Spring Boot</description>

	<properties>
		<java.version>1.8</java.version>
		<project.build.sourceEncoding>UTF-8</project.build.sourceEncoding>
	</properties>

	<dependencies>
		<!-- hystrix依赖 -->
		<dependency>
			<groupId>org.springframework.cloud</groupId>
			<artifactId>spring-cloud-starter-netflix-hystrix</artifactId>
		</dependency>

		<!-- eureka client依赖 -->
		<dependency>
			<groupId>org.springframework.cloud</groupId>
			<artifactId>spring-cloud-starter-netflix-eureka-client</artifactId>
		</dependency>

		<!-- web依赖 -->
		<dependency>
			<groupId>org.springframework.boot</groupId>
			<artifactId>spring-boot-starter-web</artifactId>
		</dependency>

		<!-- 连接mysql所需依赖 -->
		<dependency>
			<groupId>org.springframework.boot</groupId>
			<artifactId>spring-boot-starter-jdbc</artifactId>
		</dependency>
		<dependency>
			<groupId>mysql</groupId>
			<artifactId>mysql-connector-java</artifactId>
			<scope>runtime</scope>
		</dependency>

		<!-- 监控依赖 -->
		<dependency>
			<groupId>org.springframework.boot</groupId>
			<artifactId>spring-boot-starter-actuator</artifactId>
		</dependency>

		<!-- 测试需要依赖 -->
		<dependency>
			<groupId>org.springframework.boot</groupId>
			<artifactId>spring-boot-starter-test</artifactId>
			<scope>test</scope>
		</dependency>
	</dependencies>

	<!-- 引入spring cloud的依赖,不能少,主要用来管理Spring Cloud生态各组件的版本 -->
	<dependencyManagement>
		<dependencies>
			<dependency>
				<groupId>org.springframework.cloud</groupId>
				<artifactId>spring-cloud-dependencies</artifactId>
				<version>Finchley.SR2</version>
				<type>pom</type>
				<scope>import</scope>
			</dependency>
		</dependencies>
	</dependencyManagement>

	<!-- 添加spring-boot的maven插件,不能少,打jar包时得用 -->
	<build>
		<plugins>
			<plugin>
				<groupId>org.springframework.boot</groupId>
				<artifactId>spring-boot-maven-plugin</artifactId>
			</plugin>
		</plugins>
	</build>

</project>
(2)配置显示详细健康信息
在eureka-client-coke-ribbon-hystrix微服务的application.yml文件中,配置显示详细健康信息。Spring Boot 1.x与2.x端点的差异比较大,详情可参照:https://github.com/spring-projects/spring-boot/wiki/Spring-Boot-2.0-Migration-Guide#endpoints。
application.yml中新增配置截图如下:
整个文件代码如下:
server:
port: 9001
spring:
application:
name: eureka-client-coke #服务名称
datasource:
url: jdbc:mysql://localhost:3306/test?serverTimezone=UTC&useUnicode=true&characterEncoding=utf8
driver-class-name: com.mysql.jdbc.Driver
username: root
password: root
eureka:
client:
serviceUrl:
defaultZone: http://localhost:8761/eureka/
instance:
prefer-ip-address: true #显示真实ip,不是必须的
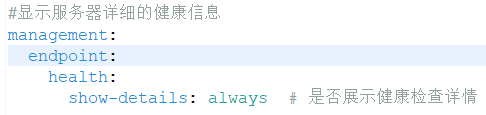
#显示服务器详细的健康信息
management:
endpoint:
health:
show-details: always # 是否展示健康检查详情
(3)重新启动eureka-client-coke-ribbon-hystrix微服务(服务注册服务,两个用户微服务实例也要在运行状态哦)
(4)浏览器请求:http://localhost:9001/actuator/health,响应页面如下,可以看到这个服务的很多信息,主要看下面的断路器hystrix状态信息(这里用的时火狐浏览器,响应的json数据会一个树状展示更好看;用google浏览器返回的就是一堆数据了)。

(5)接下来我们把用户微服务的两个实例全部停掉,多次刷新请求http://192.168.50.12:9001/coke/1页面(实际上去向用户微服务发请求了,这时候用户微服务停掉了,肯定会触发断路器打开)。刷新多次等会再去访问http://localhost:9001/actuator/health,就可以看到断路器打开了。(至于http://192.168.50.12:9001/coke/1请求要刷新几次等多久我具体也没记时过,可以两个请求轮流刷,一会就可以看到断路器打开了,不会要很长时间的),如下图:

3.3 Feign与Hystrix实战
3.3.1 复制得到微服务eureka-client-coke-feign-hystrix
复制eureka-client-coke-feign微服务重命名为eureka-client-coke-feign-hystrix(如何复制?请看eureka——实战中的 “2.4.1 创建可乐微服务” 的 “复制得到eureka-client-coke“),导入到IDE工具中。如下图:

3.3.2 修改eureka-client-coke-feign-hystrix
1.添加依赖
(1)hystrix依赖
feign很好的支持了hystrix所以,不用再引入hystrix依赖了。我们可以pom文件中所示hystrix,就可以搜到hystrix相关依赖(注意:feign对hystrix的支持只是部分支持,再用到某些功能hystrix的某些功能时,还要引入hystrix依赖。例如:hystrix.stream),如下图:

(2)监控依赖
在pom文件中添加监控依赖,截图如下:

整个文件代码如下:
<?xml version="1.0" encoding="UTF-8"?>
<project xmlns="http://maven.apache.org/POM/4.0.0"
	xmlns:xsi="http://www.w3.org/2001/XMLSchema-instance"
	xsi:schemaLocation="http://maven.apache.org/POM/4.0.0 https://maven.apache.org/xsd/maven-4.0.0.xsd">
	<modelVersion>4.0.0</modelVersion>
	<parent>
		<groupId>org.springframework.boot</groupId>
		<artifactId>spring-boot-starter-parent</artifactId>
		<version>2.0.7.RELEASE</version>
		<relativePath /> <!-- lookup parent from repository -->
	</parent>

	<groupId>com.cdd.cloud</groupId>
	<artifactId>eureka-client-coke-feign-hystrix</artifactId>
	<version>0.0.1-SNAPSHOT</version>
	<name>eureka-server-service-discover</name>
	<description>Demo project for Spring Boot</description>

	<properties>
		<java.version>1.8</java.version>
		<project.build.sourceEncoding>UTF-8</project.build.sourceEncoding>
	</properties>

	<dependencies>
		<!-- feign组件依赖 -->
		<dependency>
			<groupId>org.springframework.cloud</groupId>
			<artifactId>spring-cloud-starter-openfeign</artifactId>
		</dependency>

		<!-- eureka client依赖 -->
		<dependency>
			<groupId>org.springframework.cloud</groupId>
			<artifactId>spring-cloud-starter-netflix-eureka-client</artifactId>
		</dependency>

		<!-- web依赖 -->
		<dependency>
			<groupId>org.springframework.boot</groupId>
			<artifactId>spring-boot-starter-web</artifactId>
		</dependency>

		<!-- 连接mysql所需依赖 -->
		<dependency>
			<groupId>org.springframework.boot</groupId>
			<artifactId>spring-boot-starter-jdbc</artifactId>
		</dependency>
		<dependency>
			<groupId>mysql</groupId>
			<artifactId>mysql-connector-java</artifactId>
			<scope>runtime</scope>
		</dependency>

		<!-- 监控依赖 -->
		<dependency>
			<groupId>org.springframework.boot</groupId>
			<artifactId>spring-boot-starter-actuator</artifactId>
		</dependency>

		<!-- 测试需要依赖 -->
		<dependency>
			<groupId>org.springframework.boot</groupId>
			<artifactId>spring-boot-starter-test</artifactId>
			<scope>test</scope>
		</dependency>
	</dependencies>

	<!-- 引入spring cloud的依赖,不能少,主要用来管理Spring Cloud生态各组件的版本 -->
	<dependencyManagement>
		<dependencies>
			<dependency>
				<groupId>org.springframework.cloud</groupId>
				<artifactId>spring-cloud-dependencies</artifactId>
				<version>Finchley.SR2</version>
				<type>pom</type>
				<scope>import</scope>
			</dependency>
		</dependencies>
	</dependencyManagement>

	<!-- 添加spring-boot的maven插件,不能少,打jar包时得用 -->
	<build>
		<plugins>
			<plugin>
				<groupId>org.springframework.boot</groupId>
				<artifactId>spring-boot-maven-plugin</artifactId>
			</plugin>
		</plugins>
	</build>

</project>
2.修改application.yml文件
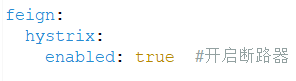
在feign中hystrix是默认不开启的,首先开启断路器hystrix,截图如下:
展示健康检查详情,修改的部分截图如下:

最后整个application.yml文件内容如下:
server:
  port: 9001

spring:
  application:
    name: eureka-client-coke  #服务名称
  datasource:
    url: jdbc:mysql://localhost:3306/test?serverTimezone=UTC&useUnicode=true&characterEncoding=utf8
    driver-class-name: com.mysql.jdbc.Driver
    username: root
    password: root

eureka:
  client:
    serviceUrl:
      defaultZone: http://localhost:8761/eureka/
  instance:
    prefer-ip-address: true  #显示真实ip,不是必须的

feign:
  hystrix:
    enabled: true  #开启断路器

management:
  endpoint:
    health:
      show-details: always  #展示健康检查详情
3. 修改启动类
启动类重命名为EurekaClientCokeFeignHystrixApplication,启动类上也不用打@EnableCircuitBreaker 注解了,修改后的代码如下:
package com.cdd.demo;

import org.springframework.boot.SpringApplication;
import org.springframework.boot.autoconfigure.SpringBootApplication;
import org.springframework.cloud.netflix.eureka.EnableEurekaClient;
import org.springframework.cloud.openfeign.EnableFeignClients;

@SpringBootApplication
@EnableEurekaClient  //eureka client 注解
@EnableFeignClients  //启用feign组件注解
public class EurekaClientCokeFeignHystrixApplication {

	public static void main(String[] args) {
		SpringApplication.run(EurekaClientCokeFeignHystrixApplication.class, args);
	}
}
4.新建HystrixClientFallback类
com.cdd.demo包下新建一个包config,在config包下新建一个HystrixClientFallback类,该类代码如下:
package com.cdd.demo.config;

import org.springframework.stereotype.Component;

import com.cdd.demo.entity.User;
import com.cdd.demo.feign.UserFeignClient;

@Component
public class HystrixClientFallback implements UserFeignClient{

	@Override
	public User findById(long id) {
		User user = new User();
		user.setId(-1L);
		user.setName("Fallback");
		return user;
	}

}
5.修改UserFeignClient接口
配置@FeignClient注解的fallback属性值,代码如下:
package com.cdd.demo.feign;

import org.springframework.cloud.openfeign.FeignClient;
import org.springframework.web.bind.annotation.GetMapping;
import org.springframework.web.bind.annotation.PathVariable;

import com.cdd.demo.config.HystrixClientFallback;
import com.cdd.demo.entity.User;

@FeignClient(name="eureka-client-user",fallback=HystrixClientFallback.class)
public interface UserFeignClient {

	@GetMapping("/user/{id}")
	public User findById(@PathVariable long id);
}
3.3.3 测试
启动服务注册服务eureka-server-service-discover,启动用户微服务2个实例,启动eureka-client-coke-feign-hystrix微服务。
测试方法和步骤和上面“3.2.3 测试”一样,只不过回调页面不同(这是我们刚才配置在UserFeignClient接口@FeignClient注解里面的HystrixClientFallback类的内容)如下:

其他基本都一样。
3.3.4 Fallback的升级FallbackFactory
紧挨着的上面实例中我们给UserFeignClient接口的@FeignClient注解配置的是fallback属性值,配置了这个属性等服务提供者发生异常(实例中式用户微服务发生异常了),不能打印异常信息。下面我们用FallbackFacotry来配置,等发生异常时,可以打印出异常信息。
1 复制得到eureka-client-coke-feign-hystrix-fallbackfactory微服务
复制eureka-client-coke-feign-hystrix微服务重命名为eureka-client-coke-feign-hystrix-fallbackfactory(如何复制?请看eureka——实战中的 “2.4.1 创建可乐微服务” 的 “复制得到eureka-client-coke“),并且导入到IDE工具中,如下图:

2 修改启动类
修改启动类的名称为EurekaClientCokeFeignHystrixFallbackFactoryApplication,启动类代码如下:
package com.cdd.demo;

import org.springframework.boot.SpringApplication;
import org.springframework.boot.autoconfigure.SpringBootApplication;
import org.springframework.cloud.netflix.eureka.EnableEurekaClient;
import org.springframework.cloud.openfeign.EnableFeignClients;

@SpringBootApplication
@EnableEurekaClient  //eureka client 注解
@EnableFeignClients  //启用feign组件注解
public class EurekaClientCokeFeignHystrixFallbackFactoryApplication {

	public static void main(String[] args) {
		SpringApplication.run(EurekaClientCokeFeignHystrixFallbackFactoryApplication.class, args);
	}
}
3.添加UserFeignClientWithFallbackFactory接口
在config包中添加UserFeignClientWithFallbackFactory接口,代码如下:
package com.cdd.demo.config;

import com.cdd.demo.feign.UserFeignClient;

public interface UserFeignClientWithFallbackFactory extends UserFeignClient {

}
4. 添加HystrixClientFallbackFactory类
在config包中添加HystrixClientFallbackFactory类,代码如下:
package com.cdd.demo.config;

import org.slf4j.Logger;
import org.slf4j.LoggerFactory;
import org.springframework.stereotype.Component;

import com.cdd.demo.entity.User;
import com.cdd.demo.feign.UserFeignClient;

import feign.hystrix.FallbackFactory;

@Component
public class HystrixClientFallbackFactory implements FallbackFactory<UserFeignClient> {

	private static final Logger LOG = LoggerFactory.getLogger(UserFeignClientWithFallbackFactory.class);

	@Override
	public UserFeignClient create(Throwable cause) {

		// 打印异常日志
		LOG.info("fallback reason is:{}", cause.getMessage());

		// 制定回调方法
		return new UserFeignClientWithFallbackFactory() {
			@Override
			public User findById(long id) {
				User user = new User();
				user.setId(-2L);
				user.setName("Fallback的升级FallbackFactory");
				return user;
			}

		};
	}
}
5 修改UserFeignClient接口
修改该接口的@FeignClient注解里面的属性配置,现在来配置fallbackFactory属性。代码如下:
package com.cdd.demo.feign;

import org.springframework.cloud.openfeign.FeignClient;
import org.springframework.web.bind.annotation.GetMapping;
import org.springframework.web.bind.annotation.PathVariable;

import com.cdd.demo.config.HystrixClientFallbackFactory;
import com.cdd.demo.entity.User;

@FeignClient(
		name="eureka-client-user",
//		fallback=HystrixClientFallback.class,  // fallback与fallbackFactory不能同时配置
		fallbackFactory=HystrixClientFallbackFactory.class)
public interface UserFeignClient {

	@GetMapping("/user/{id}")
	public User findById(@PathVariable long id);
}
6 测试
启动服务注册服务eureka-server-service-discover,启动用户微服务2个实例,启动
eureka-client-coke-feign-hystrix-fallbackfactory微服务。
该微服务的健康信息和断路器打开关闭,我们在这里不测了,大家可以自己去试下。在这里我们只测下响应页面和是否打印出了异常日志。
接着我们停掉用户微服务的两个实例,再来进行下面的测试。
浏览器请求:http://192.168.50.12:9001/coke/1 ,现在响应页面就是我们刚才在HystrixClientFallbackFactory类中的配置了,如图:

再来看下eureka-client-coke-feign-hystrix-fallbackfactory微服务微服务的控制台信息。

红色框内日志表示:负载均衡没有可用的用户微服务eureka-client-user。的确是这样啊,我们刚才手动停了用户微服务的两个实例。
3.4 Hystrix监控
微服务整合了Hystrix,同时当引入了spring-boot-starter-actuator 依赖,就会存在一个/actuator/hystrix.stream 端点,用来监控Hystrix Command。我们可以查看下该微服务的一些hystrix监控信息,请往下看。
3.4.1 初步查看监控信息
1. 修改eureka-client-coke-ribbon-hystrix微服务
我们在微服务eureka-client-coke-ribbon-hystrix的application.yml文件中去让 /hystrix.stream端点暴露出来,默认是不暴露的。截图如下:

整个application.yml文件代码如下:
server:
  port: 9001

spring:
  application:
    name: eureka-client-coke  #服务名称
  datasource:
    url: jdbc:mysql://localhost:3306/test?serverTimezone=UTC&useUnicode=true&characterEncoding=utf8
    driver-class-name: com.mysql.jdbc.Driver
    username: root
    password: root

eureka:
  client:
    serviceUrl:
      defaultZone: http://localhost:8761/eureka/
  instance:
    prefer-ip-address: true  #显示真实ip,不是必须的


#显示服务器详细的健康信息
management:
  endpoint:
    health:
      show-details: always  # 是否展示健康检查详情
  endpoints:
    web:
      exposure:
        include: 'hystrix.stream'  # 暴露‘hystrix.stream’端点
2. 启动服务
启动服务注册服务eureka-server-service-discover,用户微服务eureka-client-user启动两个实例(以不同的端口号启动两次就行),启动eureka-client-coke-ribbon-hystrix微服务。
启动完成后,来查看下服务注册列表。浏览器中访问:localhost:8761,响应页面如下:

3. 查看监控信息
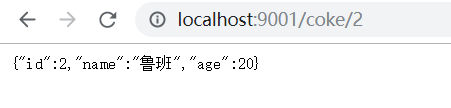
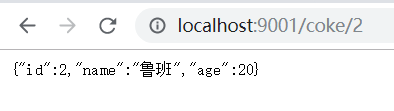
先访问下http://localhost:9001/coke/2请求(可乐微服务去请求用户微服务)。响应页面如下:
接下来在google浏览器(google浏览器会返回一堆数据,火狐浏览器会弹出一个下载文件框)中访问http://localhost:9001/actuator/hystrix.stream,查看监控信息。如下图:

3.4.2 Dashboard查看监控信息
Hystrix Dashboard是作为断路器状态的一个组件,提供了数据监控和友好的图形化界面。,说白了。就是通过配置Hystrix Dashboard去查看监控信息。
1. 复制得到hystrix-dashboard-demo项目
复制微服务eureka-server-service-discover重命名为hystrix-dashboard-demo项目(如何复制?请看eureka——实战中的 “2.4.1 创建可乐微服务” 的 “复制得到eureka-client-coke“)。导入到IDE工具中,项目结构如下图:

2 修改hystrix-dashboard-demo项目
(1)修改pom文件。
pom文件除过测试的依赖留下,其他依赖全部删掉,再添加Dashboard依赖,截图如下:

整个pom文件代码如下:
<?xml version="1.0" encoding="UTF-8"?>
<project xmlns="http://maven.apache.org/POM/4.0.0" xmlns:xsi="http://www.w3.org/2001/XMLSchema-instance"
	xsi:schemaLocation="http://maven.apache.org/POM/4.0.0 https://maven.apache.org/xsd/maven-4.0.0.xsd">
	<modelVersion>4.0.0</modelVersion>
	<parent>
		<groupId>org.springframework.boot</groupId>
		<artifactId>spring-boot-starter-parent</artifactId>
		<version>2.0.7.RELEASE</version>
		<relativePath/> <!-- lookup parent from repository -->
	</parent>

	<groupId>com.cdd.cloud</groupId>
	<artifactId>hystrix-dashboard-demo</artifactId>
	<version>0.0.1-SNAPSHOT</version>
	<name>eureka-server-service-discover</name>
	<description>Demo project for Spring Boot</description>

	<properties>
		<java.version>1.8</java.version>
		<project.build.sourceEncoding>UTF-8</project.build.sourceEncoding>
	</properties>

	<dependencies>
		<!-- dashboard依赖 -->
		<dependency>
			<groupId>org.springframework.cloud</groupId>
			<artifactId>spring-cloud-starter-netflix-hystrix-dashboard</artifactId>
		</dependency>

		<!-- 测试依赖 -->
		<dependency>
			<groupId>org.springframework.boot</groupId>
			<artifactId>spring-boot-starter-test</artifactId>
			<scope>test</scope>
		</dependency>
	</dependencies>

	<!-- 引入spring cloud的依赖,不能少,主要用来管理Spring Cloud生态各组件的版本 -->
    <dependencyManagement>
	    <dependencies>
	      <dependency>
	        <groupId>org.springframework.cloud</groupId>
	        <artifactId>spring-cloud-dependencies</artifactId>
	        <version>Finchley.SR2</version>
	        <type>pom</type>
	        <scope>import</scope>
	      </dependency>
	    </dependencies>
  	</dependencyManagement>

	<!-- 添加spring-boot的maven插件,不能少,打jar包时得用 -->
	<build>
		<plugins>
			<plugin>
				<groupId>org.springframework.boot</groupId>
				<artifactId>spring-boot-maven-plugin</artifactId>
			</plugin>
		</plugins>
	</build>

</project>
(2)修改application.yml文件
这个项目不注册到服务注册中心,只配置端口为8090,整个application.yml文件内容如下:
server:
  port: 8090
3.启动服务
启动hystrix-dashboard-demo项目(服务注册服务,用户微服务的2个实例,eureka-client-coke-ribbon-hystrix微服务都要在运行状态,没有启动的就先启动吧)
4.Dashboard查看监控信息
(1)浏览器中先发个请求:http://localhost:9001/coke/2,如下图:
(2)浏览器中再看下那一堆监控信息数据是否响应,访问http://localhost:9001/actuator/hystrix.stream,如下图:

(3)浏览器访问http://localhost:8090/hystrix,进入监控首业,如下图:

(4)在这个页面中填入信息,如下图
第一个红色方框中的地址,就是第(2)步中的访问地址。这里配置延迟(delay):2秒,标题:“Hystrix-Dashboard-Demo”,点击Monitor Stream按钮。

之后弹出响应页面如下图,就是对微服务eureka-client-coke-ribbon-hystrix的监控信息了。

这个就是对监控信息的图形化展示了。
这个实例是对微服务eureka-client-coke-ribbon-hystrix的监控,是对ribbon + hystrix应用的监控。那如果要对feign + hystrix应用的监控呢?其实是一样的,唯一不同就是给feign + hystrix应用(例如:微服务eureka-client-coke-feign-hystrix)加上hystrix依赖。feign对hystrix的支持是部分的,要用hystrix.stream还需要引入hystrix依赖。
这个是对单个微服务进行监控,那么多个的情况呢?这个如何解决,感兴趣的同学可以看下turbine这个东西。当然也可以给我留言讨论交流哦。
断路器hystrix部分就说到这里了,有什么问题或建议欢迎大家提出来。
