可以说条件注解是spring boot的一个重要的基石,像之前我们常用的profile都是条件注解的一个特殊化,这篇文章主要来整理一下条件注解的实现
创建maven项目
创建一个简单的maven项目,引入spring-context依赖

 <dependencies>
        <dependency>
            <groupId>org.springframework</groupId>
            <artifactId>spring-context</artifactId>
            <version>5.1.9.RELEASE</version>
        </dependency>
    </dependencies>
首先我们创建一个父类接口,定义接口方法
public interface Friut{
	String
}
然后在创建两个实现类
package com.zhouym.condition;

/**
 * 〈〉
 *
 * @author zhouym
 * @create 2019/8/28
 * @since 1.0.0
 */
public class Banana implements Fruit {

    public String showName() {
        return "香蕉";
    }
}
package com.zhouym.condition;

/**
 * 〈〉
 *
 * @author zhouym
 * @create 2019/8/28
 * @since 1.0.0
 */
public class Apple implements Fruit {

    public String showName() {
        return "苹果";
    }
}
接下来再配置条件类,实现condition接口,重写matches方法,这里面写你需要满足条件的的代码,条件满足则会创建对应的Bean
package com.zhouym.condition.config;

import org.springframework.context.annotation.Condition;
import org.springframework.context.annotation.ConditionContext;
import org.springframework.core.type.AnnotatedTypeMetadata;

/**
 * 〈〉
 *
 * @author zhouym
 * @create 2019/8/28
 * @since 1.0.0
 */
public class BananaCondition implements Condition {

    public boolean matches(ConditionContext conditionContext, AnnotatedTypeMetadata annotatedTypeMetadata) {
        return conditionContext.getEnvironment().getProperty("fruit").equals("banana");
    }

}
package com.zhouym.condition.config;

import org.springframework.context.annotation.Condition;
import org.springframework.context.annotation.ConditionContext;
import org.springframework.core.type.AnnotatedTypeMetadata;

/**
 * 〈〉
 *
 * @author zhouym
 * @create 2019/8/28
 * @since 1.0.0
 */
public class AppleCondition implements Condition {

    public boolean matches(ConditionContext conditionContext, AnnotatedTypeMetadata annotatedTypeMetadata) {
        return conditionContext.getEnvironment().getProperty("fruit").equals("apple");
    }
}
接下里创建配置类
package com.zhouym.condition.config;

import com.zhouym.condition.Apple;
import com.zhouym.condition.Banana;
import com.zhouym.condition.Fruit;
import org.springframework.context.annotation.Bean;
import org.springframework.context.annotation.Conditional;
import org.springframework.context.annotation.Configuration;

/**
 * 〈〉
 *
 * @author zhouym
 * @create 2019/8/28
 * @since 1.0.0
 */
@Configuration
public class FruitConfig {

    @Bean("fruit")
    @Conditional(BananaCondition.class)
    Fruit banana(){
        return new Banana();
    }

    @Bean("fruit")
    @Conditional(AppleCondition.class)
    Fruit apple(){
        return new Apple();
    }
}
声明这是一个配置类,使用@Configuration,通过Bean注解向spring容器中注册这个Bean对象,两个 Bean 的返回值都为其父类对象 Fruit,@Conditional注解表示当在条件类中的返回值为true时,对应的bean就会生效
接下来再main主方法中进行测试
package com.zhouym.condition;

import com.zhouym.condition.config.FruitConfig;
import org.springframework.context.annotation.AnnotationConfigApplicationContext;

/**
 * 〈〉
 *
 * @author zhouym
 * @create 2019/8/28
 * @since 1.0.0
 */
public class Main {
    public static void main(String[] args) {
        AnnotationConfigApplicationContext ctx = new AnnotationConfigApplicationContext();
        ctx.getEnvironment().getSystemProperties().put("fruit","banana");
        ctx.register(FruitConfig.class);
        ctx.refresh();
        Fruit fruit = (Fruit)ctx.getBean("fruit");
        System.out.println(fruit.showName());
    }
}
首先我们通过AnnotationConfigApplicationContext实例来加载java配置类,然后将properties加入到environment环境中,然后注册这个配置类,刷新spring 容器,然后我们就可以通过Fruit属性的不同获取bean的实例对象了
来看看输出结果
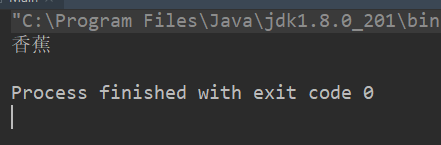
还有一个是通过profile,相当于是condition的升级版,它常用与在开发环境和生产环境中切换,其实呢profile就是利用条件注解来实现的,我们可以对上面的配置类进行改变
package com.zhouym.condition.config;

import com.zhouym.condition.Apple;
import com.zhouym.condition.Banana;
import com.zhouym.condition.Fruit;
import org.springframework.context.annotation.Bean;
import org.springframework.context.annotation.Conditional;
import org.springframework.context.annotation.Configuration;

/**
 * 〈〉
 *
 * @author zhouym
 * @create 2019/8/28
 * @since 1.0.0
 */
@Configuration
public class FruitConfig {

    @Bean("fruit")
    @Profile("banana")
    Fruit banana(){
        return new Banana();
    }

    @Bean("fruit")
    @Profile("apple")
    Fruit apple(){
        return new Apple();
    }
}
测试类
package com.zhouym.condition;

import com.zhouym.condition.config.FruitConfig;
import org.springframework.context.annotation.AnnotationConfigApplicationContext;

/**
 * 〈〉
 *
 * @author zhouym
 * @create 2019/8/28
 * @since 1.0.0
 */
public class Main {
    public static void main(String[] args) {
        AnnotationConfigApplicationContext ctx = new AnnotationConfigApplicationContext();
        ctx.getEnvironment().setActiveProfiles("banana");
        ctx.register(FruitConfig.class);
        ctx.refresh();
        Fruit fruit = (Fruit)ctx.getBean("fruit");
        System.out.println(fruit.showName());
    }
}
来看看profile这个注解的源码
@Target({ElementType.TYPE, ElementType.METHOD})
@Retention(RetentionPolicy.RUNTIME)
@Documented
@Conditional({ProfileCondition.class})
public @interface Profile {
    String[] value();
}
再来看看这个条件注解类ProfileCondition
class ProfileCondition implements Condition {
    ProfileCondition() {
    }

    public boolean matches(ConditionContext context, AnnotatedTypeMetadata metadata) {
        MultiValueMap<String, Object> attrs = metadata.getAllAnnotationAttributes(Profile.class.getName());
        if (attrs != null) {
            Iterator var4 = ((List)attrs.get("value")).iterator();

            Object value;
            do {
                if (!var4.hasNext()) {
                    return false;
                }

                value = var4.next();
            } while(!context.getEnvironment().acceptsProfiles(Profiles.of((String[])((String[])value))));

            return true;
        } else {
            return true;
        }
    }
}
通过上述源码可以知道,其实profile也是通过实现Condition注解的,我们在条件注解中写的那一套东西,只不过 @Profile 注解自动帮我们实现了而已。@Profile 虽然方便,但是不够灵活,因为具体的判断逻辑不是我们自己实现的。而 @Conditional 则比较灵活。
