mybatis框架管理dao层
spring主要管理service层
springmvc管理cortroller层
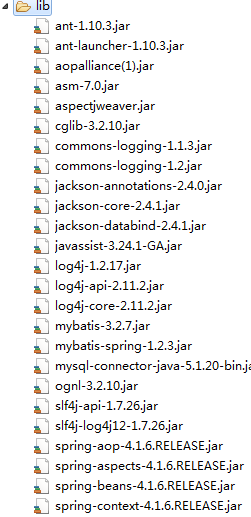
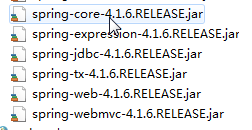
1.导包
2.编写web.xml.当Tomcat启动时,就加载web.xml文件,把它里面的放到spring容器中(webApplicationContext,它是applicationContext的子接口)。
<?xml version="1.0" encoding="UTF-8"?>
<web-app xmlns:xsi="http://www.w3.org/2001/XMLSchema-instance"
 xmlns="http://xmlns.jcp.org/xml/ns/javaee"
 xsi:schemaLocation="http://xmlns.jcp.org/xml/ns/javaee http://xmlns.jcp.org/xml/ns/javaee/web-app_3_1.xsd"
 id="WebApp_ID" version="3.1">
	<!-- 设置spring配置文件的位置和名字 -->
	<context-param>
		<param-name>contextConfigLocation</param-name>
		<param-value>classpath:applicationContext.xml</param-value>
	</context-param>
	<!-- 监听器加载spring -->
	<listener>
		<listener-class>org.springframework.web.context.ContextLoaderListener</listener-class>
	</listener>

	<!-- 字符编码过滤器 -->
	<filter>
		<filter-name>encoding</filter-name>
		<filter-class>org.springframework.web.filter.CharacterEncodingFilter</filter-class>
		<init-param>
			<param-name>encoding</param-name>
			<param-value>utf-8</param-value>
		</init-param>
	</filter>
	<filter-mapping>
		<filter-name>encoding</filter-name>
		<url-pattern>/*</url-pattern>
	</filter-mapping>

	<!-- 配置springMVC -->
	<servlet>
		<servlet-name>mvc</servlet-name>
		<servlet-class>org.springframework.web.servlet.DispatcherServlet</servlet-class>
		<init-param>
			<param-name>contextConfigLocation</param-name>
			<param-value>classpath:spring*.xml</param-value>
		</init-param>
		<load-on-startup>1</load-on-startup>
	</servlet>
	<servlet-mapping>
		<servlet-name>mvc</servlet-name>
		<!-- 所有请求都进入springMVC(除了jsp文件) -->
		<url-pattern>/</url-pattern>
	</servlet-mapping>
</web-app>
3.编写实体类
package com.boke.pojo;
public class User {
	private int id;
	private String name;
	private String password;
	private String statue;
	private String type;
	public int getId() {
		return id;
	}
	public void setId(int id) {
		this.id = id;
	}
	public String getName() {
		return name;
	}
	public void setName(String name) {
		this.name = name;
	}
	public String getPassword() {
		return password;
	}
	public void setPassword(String password) {
		this.password = password;
	}
	public String getStatue() {
		return statue;
	}
	public void setStatue(String statue) {
		this.statue = statue;
	}
	public String getType() {
		return type;
	}
	public void setType(String type) {
		this.type = type;
	}
	@Override
	public String toString() {
		return "User [id=" + id + ", name=" + name + ", password=" + password + ", statue=" + statue + ", type=" + type
				+ "]";
	}
}
下面开始整合spring框架和mybatis框架
4.编写mybatis的配置文件 applicationContext.xml
<?xml version="1.0" encoding="UTF-8"?>
<beans xmlns="http://www.springframework.org/schema/beans"
	xmlns:context="http://www.springframework.org/schema/context"
    xmlns:tx="http://www.springframework.org/schema/tx"
    xmlns:aop="http://www.springframework.org/schema/aop"
    xmlns:xsi="http://www.w3.org/2001/XMLSchema-instance"
    xsi:schemaLocation="
        http://www.springframework.org/schema/beans
        http://www.springframework.org/schema/beans/spring-beans.xsd
        http://www.springframework.org/schema/aop
        http://www.springframework.org/schema/aop/spring-aop.xsd
        http://www.springframework.org/schema/tx
        http://www.springframework.org/schema/tx/spring-tx.xsd
        http://www.springframework.org/schema/context
        http://www.springframework.org/schema/context/spring-context.xsd">
        <!--配置数据源-->
    <bean id="dataSource" class="org.springframework.jdbc.datasource.DriverManagerDataSource">
   		<property name="driverClassName" value="com.mysql.jdbc.Driver"></property>
   		<property name="url" value="jdbc:mysql://localhost:3306/daily"></property>
   		<property name="username" value="root"></property>
   		<property name="password" value="1234"></property>
   </bean>
  <!--生成session工厂-->
   <bean id="util" class="org.mybatis.spring.SqlSessionFactoryBean">
   		<property name="dataSource" ref="dataSource"></property>
   </bean>
  <!--映射类-->
   <bean id="mapper" class="org.mybatis.spring.mapper.MapperScannerConfigurer">
   		<property name="basePackage" value="com.boke.mapper"></property>
   		<property name="sqlSessionFactory" ref="util"></property>
   </bean>
   <!-- 注解配置service  aop -->
	<context:component-scan base-package="com.boke.serviceimpl"></context:component-scan>

</beans>
5.编写dao层/mapper层(注解方式)
public interface UserMapper {
	@Select("select * from user")
	List<User> selall();
	@Insert("insert into user value(default,#{name},#{statue},#{password},#{type})")
	int insuser(User u);
	@Delete("delete from user where id=#{0}")
	int deluser(int id);
}
到这里就把mybatis配好了
6.编写服务层的配置文件springservice.xml,主要为了声明式事务处理和通知
<?xml version="1.0" encoding="UTF-8"?>
<beans xmlns="http://www.springframework.org/schema/beans"
	xmlns:context="http://www.springframework.org/schema/context"
    xmlns:tx="http://www.springframework.org/schema/tx"
    xmlns:aop="http://www.springframework.org/schema/aop"
    xmlns:xsi="http://www.w3.org/2001/XMLSchema-instance"
    xsi:schemaLocation="
        http://www.springframework.org/schema/beans
        http://www.springframework.org/schema/beans/spring-beans.xsd
        http://www.springframework.org/schema/aop
        http://www.springframework.org/schema/aop/spring-aop.xsd
        http://www.springframework.org/schema/tx
        http://www.springframework.org/schema/tx/spring-tx.xsd
        http://www.springframework.org/schema/context
        http://www.springframework.org/schema/context/spring-context.xsd">
	<!-- 注解配置service  aop 因为在applicationContext,xml配置了,所以这里就不需要了-->
	<!--
		<context:component-scan base-package="com.boke.service"></context:component-scan>
	-->
	<bean id="txmanager" class="org.springframework.jdbc.datasource.DataSourceTransactionManager">
		<property name="dataSource" ref="dataSource"></property>
	</bean>
	<!-- 配置声明式事务 -->
	<tx:advice id="txadvice" transaction-manager="txmanager">
		<tx:attributes>
			<tx:method name="ins*"/>
			<tx:method name="del*"/>
			<tx:method name="selall" read-only="true"/>
		</tx:attributes>
	</tx:advice>
	<!--切面  -->
	<aop:config>
		<!--切点  -->
		<aop:pointcut expression="execution(* com.boke.serviceimpl.*.*(..))" id="mypoint"/>
		<!--通知 -->
		<aop:advisor advice-ref="txadvice" pointcut-ref="mypoint"/>
	</aop:config>
</beans>
编写服务层
7.服务层接口:
public interface UserService {
	List<User> selall();

	int insuser(User u);

	int deluser(int id);
	void login();
}
8.服务层实现
package com.boke.serviceimpl;

import java.util.List;
import javax.annotation.Resource;
import org.springframework.beans.factory.annotation.Autowired;
import org.springframework.stereotype.Service;
import com.boke.mapper.UserMapper;
import com.boke.pojo.User;
import com.boke.service.UserService;
//@Service("userService")用来代替配置文件的<bean id="" class=""></bean>,用来实例化该类,创建的该类对象名为 userService,
@Service("userService")
public class UserServiceImpl implements UserService {
	//@Resource用来自动通过byName映射,若byName不匹配则通过byTypey.
	@Resource
	private UserMapper userMapper;
	@Override
	public List<User> selall() {
		return userMapper.selall();
	}
	public void login(){
		System.out.println("login哈哈哈");
	}
	@Override
	public int insuser(User u) {
		return userMapper.insuser(u);
	}
	@Override
	public int deluser(int id) {
		return userMapper.deluser(id);
	}
}
到这里就把spring和mybatis整合完毕了,下面来加入springMVC框架
9.编写springmvc.xml文件
<?xml version="1.0" encoding="UTF-8"?>
<beans xmlns="http://www.springframework.org/schema/beans"
	xmlns:context="http://www.springframework.org/schema/context"
    xmlns:mvc="http://www.springframework.org/schema/mvc"
    xmlns:xsi="http://www.w3.org/2001/XMLSchema-instance"
    xsi:schemaLocation="
        http://www.springframework.org/schema/beans
        http://www.springframework.org/schema/beans/spring-beans.xsd
        http://www.springframework.org/schema/mvc
        http://www.springframework.org/schema/mvc/spring-mvc.xsd
        http://www.springframework.org/schema/context
        http://www.springframework.org/schema/context/spring-context.xsd">

	<!-- 扫描该包下的控制器注解 -->
	<context:component-scan base-package="com.boke.controller">
	</context:component-scan>

	<mvc:annotation-driven></mvc:annotation-driven>

	<!-- 静态配置 -->
	<mvc:resources location="/js/" mapping="/js/**"></mvc:resources>
	<mvc:resources location="/css/" mapping="/css/**"></mvc:resources>
	<mvc:resources location="/images/" mapping="/images/**"></mvc:resources>
</beans>
10.编写controller层
package com.boke.controller;

import java.util.List;

import javax.annotation.Resource;

import org.springframework.beans.factory.annotation.Autowired;
import org.springframework.stereotype.Controller;
import org.springframework.stereotype.Service;
import org.springframework.web.bind.annotation.RequestMapping;
import org.springframework.web.bind.annotation.ResponseBody;

import com.boke.pojo.User;
import com.boke.service.UserService;
//@Controller与service层的@Service功能等效
@Controller
public class ControllerTest {
	@Resource
	private UserService userService;
	@ResponseBody
	@RequestMapping("test")
	public String test(){
		System.out.println("哈哈哈哈");
		userService.login();
		List<User> list = userService.selall();
		System.out.println(list);
		return list.toString();
	}
}
到这里ssm框架就整合完毕了
配置过程遇到版本不匹配问题。
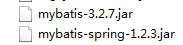
刚开始用的mybatis-3.5.jar.与mybatis-spring-1.2.3.jar不能匹配,一直报
异常-java.lang.AbstractMethodError: org.mybatis.spring.transaction.SpringManagedTransaction.getTimeout异常。
