今天开始学习Spring,结果发现就卡在了配置环境那里,话不多说,想说一下自己踩的坑,以防再犯类似的错误会想不起来。
1.需要的环境:idea软件
下载地址:https://www.jetbrains.com/idea/
关于idea的安装配置过程可以参考大佬的博客:https://blog.csdn.net/linshaolun0701/article/details/90287220
JDK
下载地址:https://www.oracle.com/technetwork/java/javase/downloads/jdk13-downloads-5672538.html
注意:下载JDK的时候需要根据自己的电脑配置进行下载,笔者是Windows系统,所以下载的JDK是如下图所示的可执行文件

2.idea中创建spring工程
1>新建Maven工程


这里我用的是最新版的JDK(jdk13) ,根据自己的需求选择JDK。
然后什么都不需要选择,直接next就可以,如下图所示:

接下来的命名,根据自己的需求和爱好来就行:

2>双击如下图所示的工程名就看我一看到工程下的具体信息
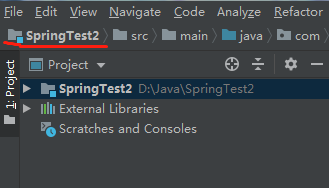
初始配置如下图所示,注意标红的地方:

3>引入外部依赖源
双击打开pom.xml文件,在文件中添加图中红框标示出来的代码
 然后选择右下角的“Import Changes”

过一段时间,左下角会出现build successfully的标志,同时左下角的External Libraries中会多出来几个文件,文件的版本就是上图中所设的version版本,如下图所示:

上述编译的过程中,如果出现“Error : java 不支持发行版本5”,原因就是项目及环境使用的Java编译版本配置不一样。需要修改成一样的版本,我这里都改成了我本地下载的最新版本13,具体的修改方法参考博客:https://blog.csdn.net/qq_22076345/article/details/82392236
里面有很详细的介绍。
4>建立依赖注入(几个类文件)
java文件下增加一个包,包下添加两个类HelloWorld和Main
resources文件下添加一个xml文件

HelloWorld类中的代码如下所示:
package com.atguigu.spring.beans;
public class HelloWorld {
private String user;
public void setUser(String user) {
this.user = user;
}
public HelloWorld(String user){
this.user = user;
}
public HelloWorld(){
}
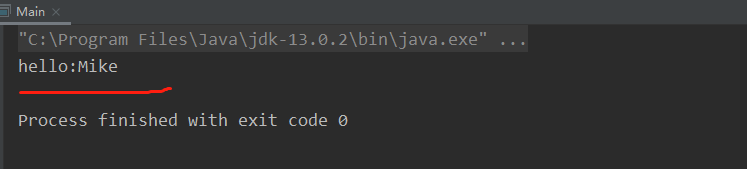
public void hello() {
System.out.println("hello:"+user);
}
}
Main类的代码实现如下图所示:
package com.atguigu.spring.beans;

import org.springframework.context.ApplicationContext;
import org.springframework.context.support.ClassPathXmlApplicationContext;

public class Main {
    public static void main(String[] args){
        //1.创建Spring的IOC容器对象
        ApplicationContext ctx=new ClassPathXmlApplicationContext("applicationContext.xml");
        //2.从IOC容器中获取Bean实例
        HelloWorld helloWorld=(HelloWorld)(ctx.getBean("helloWorld"));
        //调用hello方法
        helloWorld.hello();
    }
}
xml文件中的内容:
<?xml version="1.0" encoding="UTF-8"?>
<beans xmlns="http://www.springframework.org/schema/beans"
       xmlns:xsi="http://www.w3.org/2001/XMLSchema-instance"
       xmlns:util="http://www.springframework.org/schema/util"
       xmlns:p="http://www.springframework.org/schema/p"
       xsi:schemaLocation="http://www.springframework.org/schema/beans http://www.springframework.org/schema/beans/spring-beans.xsd
		http://www.springframework.org/schema/util http://www.springframework.org/schema/util/spring-util-4.0.xsd">

    <!-- 配置一个 bean -->
    <bean id="helloWorld" class="com.atguigu.spring.beans.HelloWorld">
        <!-- 为属性赋值 -->
        <property name="user" value="Mike"></property>
    </bean>
</beans>
输出如下图所示的结果,说明配置成功:
工程代码见:
