编辑器IDEA,运行环境jdk-1.8
1.创建hello world
1.创建springboot依赖包
<!--springboot依赖-->
    <parent>
        <groupId>org.springframework.boot</groupId>
        <artifactId>spring-boot-starter-parent</artifactId>
        <version>2.1.8.RELEASE</version>
    </parent>
    <dependencies>
        <dependency>
            <groupId>org.springframework.boot</groupId>
            <artifactId>spring-boot-starter-web</artifactId>
        </dependency>
    </dependencies>
2.创建主程序
import org.springframework.boot.SpringApplication;
import org.springframework.boot.autoconfigure.SpringBootApplication;

/**
 * @SpringBootApplication标注一个主程序,说明这是一个springboot应用
 */
@SpringBootApplication
public class HelloWorld {
    public static void main(String[] args) {
        /*启动spring应用*/
        SpringApplication.run(HelloWorld.class,args);
    }
}
3.创建controller类
import org.springframework.stereotype.Controller;
import org.springframework.web.bind.annotation.RequestMapping;
import org.springframework.web.bind.annotation.ResponseBody;

@Controller
public class HelloController {

    @ResponseBody
    @RequestMapping("/hello")
    public String hello(){
        return "hello world!";
    }

}
4.回到主程序,执行代码。运行成功后,浏览器输入localhost:8080/hello
2.简化部署
1.在pom.xml内添加如下代码:
<!--该插件可以将应用打包成可执行的jar包-->
    <build>
        <plugins>
            <plugin>
                <groupId>org.springframework.boot</groupId>
                <artifactId>spring-boot-maven-plugin</artifactId>
            </plugin>
        </plugins>
    </build>
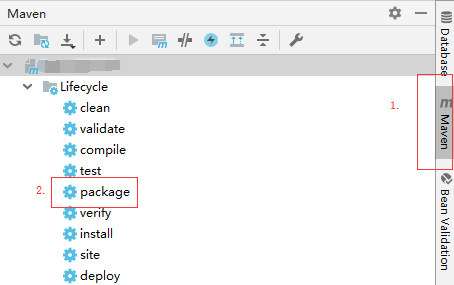
2.点击右侧maven,双击你的项目下的lifecycle-package。最终打包内容在项目目录下target下。
cmd运行方式:
进入jar所在目录,(这里你的jar包名称为xxx.jar)
java -jar xxx.jar
即使运行环境没有tomcat也能运行