目录
1.下载
从http://www.boost.org上下载到目前最新的boost库:https://www.boost.org/users/history/version_1_67_0.html中的boost_1_67_0.zip
2.得到源代码之后,使用vs2017的cl.exe编译


3.建立编译工具
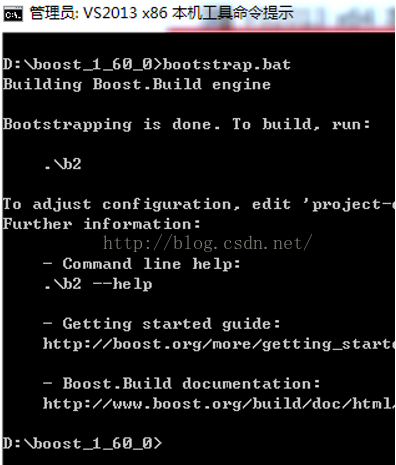
1)进入下载的boost目录下:
cd \d D:\ThirdPart\boost_1_67_02) 执行脚本:bootstrap.bat
等待一分钟后本目录下生成b2.exe和bjam.exe则便表示生成成功
4.指定编译命令(最费时间)
指定msvc版本14.1(不清楚的查一下)对应的是vs2017,--stagedir是指定编译后存放的目录
bjam stage --toolset=msvc-14.1 --without-graph --without-graph_parallel --stagedir="D:\ThirdPart\boost_1_67_0\bin\vc14" link=static runtime-link=shared runtime-link=static threading=multi debug release
5.开始使用boost
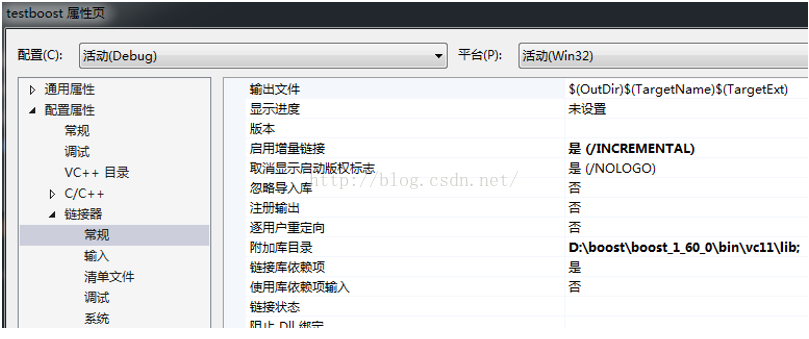
首先需要设定文件包含目录:
我的boost库解压在D盘下

设定库目录:
然后建立我们的第一个boost项目,代码如下:
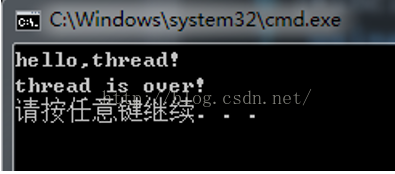
-
#include "boost/thread.hpp"

#include "iostream"

using namespace std;


void mythread()

{

cout << " hello,thread! " << endl;

}


int _tmain(int argc, _TCHAR* argv[])

{

boost::function<void()> f(mythread);

boost::thread t(f);

t.join();

cout << " thread is over! " << endl;


return 0;

}