1. 商品分类
1.1 表结构
tb_item_cat 商品分类表
| 字段 |
类型 |
长度 |
含义 |
| Id |
Bigint |
|
主键 |
| Parent_id |
Bigint |
|
上级ID |
| Name |
varchar |
|
分类名称 |
| Type_id |
Bigint |
|
类型模板ID |
1.2 商品列表
1.2.1 后端代码
1)服务接口 pinyougou-sellergoods-interface 的 ItemCatService
	/** 查询下级分类列表
	 * @param id
	 * @return
	 */
	public List<TbItemCat> findByParentId(Long parentId);
2)服务实现
	@Override
	public List<TbItemCat> findByParentId(Long parentId) {
		TbItemCatExample example = new TbItemCatExample();
		example.createCriteria().andParentIdEqualTo(parentId);
		return itemCatMapper.selectByExample(example );
	}
3)web层 /pinyougou-manager-web 的 ItemCatController
	/** 查询下级分类列表
	 * @param id
	 * @return
	 */
	@RequestMapping("/findByParentId")
	public List<TbItemCat> findByParentId(Long parentId){
		return itemCatService.findByParentId(parentId);
	}
1.2.2 前端代码
1)service层js
	//查询下级列表
	this.findByParentId=function(parentId){
		return $http.get('../itemCat/findByParentId.do?parentId='+parentId);
	}
2)controller层js
	// 根据上级ID查询下级列表
	$scope.findByParentId = function(parentId) {
		itemCatService.findByParentId(parentId).success(function(data) {
			$scope.list = data;
		});
	}
3)页面改造
1. 头文件引入

2. 添加必要指令
 3. 列表改造

1.2 导航栏——面包屑
实现思路:
1)定义两个实体对象分别记录2级菜单与3级菜单
2)定义一个级别grade,默认级别为1
3)定义一个方法setGrade,用于改变grade的值
4)定义一个查询方法,参数为当前实体,内部调用findByParentID
在itemCatController中定义
// 面包屑功能
	$scope.grade = 1;
	$scope.setGrade = function(value) {
		$scope.grade = value;
	}

	$scope.selectList = function(p_entity) {
		if($scope.grade == 1){
			$scope.entity_1 = null;
			$scope.entity_2 = null;
		} else if($scope.grade == 2){
			$scope.entity_1 = p_entity;
			$scope.entity_2 = null;
		} else if($scope.grade == 3){
			$scope.entity_2 = p_entity;
		}

		$scope.findByParentId(p_entity.id);
	}
在item_cat.html中修改


实现效果:

2. 商品录入
2.1 基本信息的录入
2.1.1 后台
1)dao层
添加主键返回
 <selectKey resultType="java.lang.Long" order="AFTER" keyProperty="id">
		SELECT LAST_INSERT_ID() AS id
</selectKey>
2)POJO
新建组合实体类
package com.pinyougou.povo;

import java.io.Serializable;
import java.util.List;

import com.pinyougou.pojo.TbGoods;
import com.pinyougou.pojo.TbGoodsDesc;
import com.pinyougou.pojo.TbItem;

/**
 * 商品组合类
 * @author Administrator
 */
public class Goods implements Serializable{
	private TbGoods goods;				// 商品SPU
	private TbGoodsDesc goodsDesc;		// 商品扩展信息
	private List<TbItem> itemList;		// 商品sku

	public TbGoods getGoods() {
		return goods;
	}
	public void setGoods(TbGoods goods) {
		this.goods = goods;
	}
	public TbGoodsDesc getGoodsDesc() {
		return goodsDesc;
	}
	public void setGoodsDesc(TbGoodsDesc goodsDesc) {
		this.goodsDesc = goodsDesc;
	}
	public List<TbItem> getItemList() {
		return itemList;
	}
	public void setItemList(List<TbItem> itemList) {
		this.itemList = itemList;
	}

}
3)接口与服务层
/**
	 * 增加
	 */
	@Override
	public void add(Goods goods) {
		// 保存商品
		TbGoods tGoods = goods.getGoods();
		tGoods.setAuditStatus("0");//设置未申请状态
		goodsMapper.insert(tGoods);

		// 保存商品详情
		TbGoodsDesc goodsDesc = goods.getGoodsDesc();
		goodsDesc.setGoodsId(tGoods.getId());
		goodsDescMapper.insert(goodsDesc);
	}
4)web层
	/**
	 * 增加
	 * @param goods
	 * @return
	 */
	@RequestMapping("/add")
	public Result add(@RequestBody Goods goods){
		try {
			String name = SecurityContextHolder.getContext().getAuthentication().getName();
			// 设置店铺名称
			goods.getGoods().setSellerId(name);
			goodsService.add(goods);
			return new Result(true, "增加成功");
		} catch (Exception e) {
			e.printStackTrace();
			return new Result(false, "增加失败");
		}
	}
2.1.2 前端
1)controller层js
	//保存
	$scope.add=function(){
		goodsService.add( $scope.entity  ).success(
			function(response){
				if(response.success){
					alert("添加成功!");
					$scope.entity = {};
				}else{
					alert(response.message);
				}
			}
		);
	}
2)页面改造
1. 引入头文件
2. 数据绑定
3. 指令添加
2.2 商品图片录入
2.2.1 后端
1)依赖引入
在pinyougou-shop-web中引入文件上传依赖包
<!-- 文件上传组件 -->
<dependency>
	<groupId>commons-fileupload</groupId>
	<artifactId>commons-fileupload</artifactId>
</dependency>
在pinyougou-common中引入fastDFS依赖
<dependency>
	<groupId>org.csource.fastdfs</groupId>
	<artifactId>fastdfs</artifactId>
</dependency>
然后在 在pinyougou-shop-web添加pinyougou-common依赖
<dependency>
	<groupId>com.pinyougou</groupId>
	<artifactId>pinyougou-common</artifactId>
	<version>0.0.1-SNAPSHOT</version>
</dependency>
2)在pinyougou-common中创建fastDFS工具类
package util;

import org.csource.common.NameValuePair;
import org.csource.fastdfs.ClientGlobal;
import org.csource.fastdfs.StorageClient1;
import org.csource.fastdfs.StorageServer;
import org.csource.fastdfs.TrackerClient;
import org.csource.fastdfs.TrackerServer;

public class FastDFSClient {

	private TrackerClient trackerClient = null;
	private TrackerServer trackerServer = null;
	private StorageServer storageServer = null;
	private StorageClient1 storageClient = null;

	public FastDFSClient(String conf) throws Exception {
		if (conf.contains("classpath:")) {
			conf = conf.replace("classpath:", this.getClass().getResource("/").getPath());
		}
		ClientGlobal.init(conf);
		trackerClient = new TrackerClient();
		trackerServer = trackerClient.getConnection();
		storageServer = null;
		storageClient = new StorageClient1(trackerServer, storageServer);
	}

	/**
	 * 上传文件方法
	 * <p>Title: uploadFile</p>
	 * <p>Description: </p>
	 * @param fileName 文件全路径
	 * @param extName 文件扩展名,不包含(.)
	 * @param metas 文件扩展信息
	 * @return
	 * @throws Exception
	 */
	public String uploadFile(String fileName, String extName, NameValuePair[] metas) throws Exception {
		String result = storageClient.upload_file1(fileName, extName, metas);
		return result;
	}

	public String uploadFile(String fileName) throws Exception {
		return uploadFile(fileName, null, null);
	}

	public String uploadFile(String fileName, String extName) throws Exception {
		return uploadFile(fileName, extName, null);
	}

	/**
	 * 上传文件方法
	 * <p>Title: uploadFile</p>
	 * <p>Description: </p>
	 * @param fileContent 文件的内容,字节数组
	 * @param extName 文件扩展名
	 * @param metas 文件扩展信息
	 * @return
	 * @throws Exception
	 */
	public String uploadFile(byte[] fileContent, String extName, NameValuePair[] metas) throws Exception {

		String result = storageClient.upload_file1(fileContent, extName, metas);
		return result;
	}

	public String uploadFile(byte[] fileContent) throws Exception {
		return uploadFile(fileContent, null, null);
	}

	public String uploadFile(byte[] fileContent, String extName) throws Exception {
		return uploadFile(fileContent, extName, null);
	}
}
3)添加fastDFS配置文件
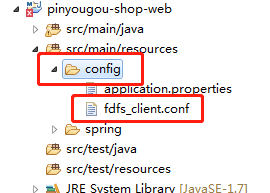
4)在pinyougou-shop-web工程application.properties添加配置fastDFS服务器url路径
FILE_SERVER_URL=http://192.168.25.133/5)配置SpringMVC的多媒体解析器
<!-- 配置多媒体解析器 -->
<bean id="multipartResolver" class="org.springframework.web.multipart.commons.CommonsMultipartResolver">
		<property name="defaultEncoding" value="UTF-8"></property>
		<!-- 设定文件上传的最大值5MB,5*1024*1024 -->
		<property name="maxUploadSize" value="5242880"></property>
</bean>
6)文件上传Controller层
package com.pinyougou.shop.controller;

import org.springframework.beans.factory.annotation.Value;
import org.springframework.web.bind.annotation.RequestMapping;
import org.springframework.web.bind.annotation.RestController;
import org.springframework.web.multipart.MultipartFile;

import entity.Result;
import util.FastDFSClient;

@RestController
public class UploadController {

	@Value("${FILE_SERVER_URL}")
	private String FILE_SERVER_URL;

	@RequestMapping("/upload")
	public Result upload(MultipartFile file ){
		try {
			String fullName = file.getOriginalFilename();
			String exeName = fullName.substring(fullName.lastIndexOf(".")+1);
			FastDFSClient client = new FastDFSClient("classpath:config/fdfs_client.conf");
			String fileId = client.uploadFile(file.getBytes(),exeName);
			String picUrl = FILE_SERVER_URL + fileId; // 图片完整地址
			return new Result(true, picUrl);
		} catch (Exception e) {
			e.printStackTrace();
			return new Result(false, "上传失败!");
		}
	}

}
2.2.2 前端
1)服务层uploadService.js
app.service("uploadService",function($http){
	this.uploadFile = function() {
		var formData=new FormData();
	    formData.append("file",file.files[0]);
		return $http({
            method:'POST',
            url:"../upload.do",
            data: formData,
            headers: {'Content-Type':undefined},
            transformRequest: angular.identity
        });
	}
});

/*
 * 	headers: {'Content-Type':undefined},
 * 上传的是文件的时候,需要指定Content-Type为undefined,不指定,默认的是json类型
 * transformRequest: angular.identity,angular提供的对表单进行二进制序列化
 * 两者搭配使用,就是指定的上传文件的类型(multipart/form-data)
 *
 */
2)controller层goodsController.js
$scope.uploadFile = function() {
		uploadService.uploadFile().success(function(res) {
			if(res.success){
				$scope.imgEntity.url = res.message;
			} else{
				alert(res.message);
			}
		}).error(function(){
			alert("上传文件出错!");
		});
	}
3)html改造
1. 引入uploadService.js文件
2. 将每一个表格图片定义成一个实体,记录图片信息

测试:

2.3 图片列表展示
前面完成了图片上传功能,现在要实现点击保存之后,上传的图片能在固定列表区域显示,实现思路是,每次点击保存的时候,将图片实体存放在一个集合中,然后在页面循环这个集合即可
controller层的js
	// 定义组合对象结构
	$scope.entity = {goodsDesc:{itemImages:[]}};
	$scope.addImgToList = function() {
		$scope.entity.goodsDesc.itemImages.push($scope.imgEntity);
	}
页面

实现效果:

2.4 选择商品分类
2.4.1 一级分类显示
1)后端
将pinyougou-manager-web工程的ItemCatController拷贝到pinyougou-shop-web工程
2)前端
(1)将pinyougou-manager-web的itemCatService拷贝到pinyougou-shop-web工程
(2)在goodsController中添加方法
$scope.selectItemCatList = function() {
		itemCatService.findByParentId(0).success(function(data) {
			$scope.itemCat1List = data;
		});
	}
(3)html改造

2.4.2 二级分类与三级分类
在goodsController中添加监听,例如:
$scope.$watch('entity.goods.category1Id',function(newValue,oldvalue){
		itemCatService.findByParentId(newValue).success(function(data) {
			$scope.itemCat2List = data;
		});
	});
改造html

2.5 品牌选择
我们在前面做了个模板功能,其中记录了每一个模板对应的品牌,所以这里直接根据模板id查询对应的品牌即可
2.5.1 后端
将pinyougou-manager-web中的TypeTemplateController拷贝到pinyougou-shop-web工程中
2.5.2 前端
1)拷贝pinyougou-manager-web中的typeTemplateService.js到pinyougou-shop-web
2)在controller中注入typeTemplateService
3)界面引入typeTemplateService.js
4)监控模板id,生成品牌列表
// 读取品牌信息
	$scope.$watch('entity.goods.typeTemplateId', function(newValue, oldValue) {
		typeTemplateService.findOne(newValue).success(
       		  function(response){
       			  	$scope.typeTemplate = response;
       			  	$scope.typeTemplate.brandIds= JSON.parse( $scope.typeTemplate.brandIds);//品牌列表
       		  }
        );
    });
5)页面改造
<div class="col-md-2 title">品牌</div>
<div class="col-md-10 data">
	<select class="form-control" ng-model="entity.goods.brandId" ng-options="brand.id as brand.text for brand in typeTemplate.brandIds"></select>
</div>
2.6 扩展属性
修改goodsController.js ,在用户更新模板ID时,读取模板中的扩展属性赋给商品的扩展属性。
//模板ID选择后  更新模板对象
    $scope.$watch('entity.goods.typeTemplateId', function(newValue, oldValue) {
    	typeTemplateService.findOne(newValue).success(
       		  function(response){
       			  $scope.typeTemplate=response;//获取类型模板
       			  $scope.typeTemplate.brandIds= JSON.parse( $scope.typeTemplate.brandIds);//品牌列表
$scope.entity.goodsDesc.customAttributeItems=JSON.parse( $scope.typeTemplate.customAttributeItems);//扩展属性
       		  }
        );
    });
修改goods_edit.html
 <!--扩展属性-->
<div class="tab-pane" id="customAttribute">
     <div class="row data-type">
	        <div ng-repeat="pojo in entity.goodsDesc.customAttributeItems">
		       <div class="col-md-2 title">{{pojo.text}}</div>
		       <div class="col-md-10 data">
	<input class="form-control" ng-model="pojo.value" placeholder="{{pojo.text}}">	            </div>
	         </div>
</div>
</div>
2.7 规格选择
2.7.1 显示规格列表选项
1)后端
(1)在pinyougou-sellergoods-service工程中的TypeTemplateService接口添加方法findSpecList并实现
@Override
public List<Map> findSpecList(Long id) {
	// 根据模板id,查询模板对象
	TbTypeTemplate typeTemplate = typeTemplateMapper.selectByPrimaryKey(id);

	// 获取模板规格
	String specIds = typeTemplate.getSpecIds();
	// [{"id":26,"text":"尺码"},{"id":32,"text":"机身内存"},{"id":34,"text":"内存容量"},{"id":33,"text":"电视屏幕尺寸"},{"id":27,"text":"网络"}]
	List<Map> specList = JSONArray.parseArray(specIds, Map.class);
	for(Map m : specList){
		TbSpecificationOptionExample example = new TbSpecificationOptionExample();
		example.createCriteria().andSpecIdEqualTo(((Integer)m.get("id")).longValue());
		// 根据map的id,获取所有规格
		List<TbSpecificationOption> options = specificationOptionMapper.selectByExample(example );
		m.put("options", options);
	}
	return specList;
}
(2)在pinyougou-shop-web工程的TypeTemplateController添加方法
@RequestMapping("/findSpecList")
public List<Map> findSpecList(Long id){
	return typeTemplateService.findSpecList(id);
}
2)前端
(1)在pinyougou-shop-web工程中的typeTemplateService.js中加入代码
	// 查询规格列表
	this.findSpecList = function(id) {
		return $http.get("../typeTemplate/findSpecList.do?id="+id);
	}
(2)在goodsController.js中加入代码

(3)html页面改造

2.7.2 保存规格选项
1)勾选数据构建
首先在baseController.js中定义一个方法
	/*
	 * 定义集合在集合中查询指定的key与value是否存在
	 * 存在返回该对象
	 * 不存在返回null
	 * */
	$scope.searchObjectByKey = function(list,key,keyValue) {
		// 为空直接返回null
		if(!list || list.length < 1){
			return null;
		}

		for(var i = 0 ; i < list.length ; i++){
			if(list[i][key] === keyValue){
				return list[i];
			}
		}
		// 找不到也返回null
		return null;

	}
然后,在goodsController.js中定义方法
// 更新规格列表
	$scope.updateSpecAttribute = function(name,value){
		var object = $scope.searchObjectByKey($scope.entity.goodsDesc.specificationItems,"attributeName",name);
		// 如果存在
		if(object != null){
			object.attributeValue.push(value);
			console.log(JSON.stringify(object));
		} else {
			$scope.entity.goodsDesc.specificationItems.push({"attributeName":name,"attributeValue":[value]});
		}
	}
界面绑定方法
![]()
效果如图:

2)取消勾选数据构建
在check的调用方法上加一个源事件$event

然后,给updateSpecAttribute方法加一个参数$event
最后当Object不等于null的时候,进行判断,如图;

2.8 SKU商品信息
2.8.1 变量构建

1)在goodsController.js中添加生成sku列表的函数
/**
	 * 生成sku列表
	 * */
	$scope.createItemList = function() {
		// 初始化列表
		$scope.entity.itemList=[{spec:{},price:0,num:99999,status:'0',isDefault:'0' } ];
		// [{"attributeName":"网络","attributeValue":["移动3G","移动4G"]},{"attributeName":"机身内存","attributeValue":["128G"]}]
		var items = $scope.entity.goodsDesc.specificationItems;
		for(var i = 0 ; i < items.length ; i++){
			$scope.entity.itemList = caculateItenList($scope.entity.itemList,items[i].attributeName,items[i].attributeValue);
		}

	}

	function caculateItenList(list,columnName,values) {
		var newList = [];
		// 循环集合
		for(var i = 0 ; i < list.length; i++){
			for(var j = 0 ; j < values.length; j++){
				// 深克隆原来的行
				var item = JSON.parse(JSON.stringify(list[i]));
				item.spec[columnName] = values[j];
				newList.push(item);
			}
		}
		return newList;
	}
2)前端添加点击事件

效果:

2.8.2 变量绑定sku表格
1)表头的绑定
因为表头是动态的,所以用循环的方式自动生成,循环变量就是entity.goodsDesc.specificationItems,例如:

2)tbody的绑定
表体与表头动态部分可以共用一个循环变量,例如;

效果如图:

2.8.3 列表保存后端
pinyougou-shop-web工程下的GoodsServiceImpl方法下
/**
 * 增加
 */
@Override
public void add(Goods goods) {
	// 保存商品
	TbGoods tGoods = goods.getGoods();
	tGoods.setAuditStatus("0");//设置未申请状态
	goodsMapper.insert(tGoods);

	// 保存商品详情
	TbGoodsDesc goodsDesc = goods.getGoodsDesc();
	goodsDesc.setGoodsId(tGoods.getId());
	goodsDescMapper.insert(goodsDesc);

	// 保存sku信息
	List<TbItem> itemList = goods.getItemList();
	for(TbItem item : itemList){
		// 1. 构建标题:SPU名称 + 规格选项值
		String title = tGoods.getGoodsName();
		Map<String,Object> map = (Map<String, Object>) JSONObject.parse(item.getSpec()) ;
		for(String key : map.keySet()){
			title += " " + map.get(key);
		}
		item.setTitle(title);

		// 存图片  第一张
		List<Map> imgs = JSONArray.parseArray(goodsDesc.getItemImages(), Map.class);
		if(!CollectionUtils.isEmpty(imgs)){
			String url = (String) imgs.get(0).get("url");
			item.setImage(url);
		}

		// 商品三级分类
		item.setCategoryid(tGoods.getCategory3Id());

		// 创建日期和更新日期
		item.setCreateTime(new Date());
		item.setUpdateTime(new Date());

		// goodID 与 sellID(商家id)
		item.setGoodsId(tGoods.getId());
		item.setSellerId(tGoods.getSellerId());

		// 分类名称(为了solor搜索方便)
		TbItemCat itemCate = itemCateMapper.selectByPrimaryKey(tGoods.getCategory3Id());
		item.setCategory(itemCate.getName());

		// 品牌
		TbBrand brand = brandMapper.selectByPrimaryKey(tGoods.getBrandId());
		item.setBrand(brand.getName());

		// 商家店铺名称
		TbSeller seller = sellerMapper.selectByPrimaryKey(tGoods.getSellerId());
		item.setSeller(seller.getNickName());

		// 保存到数据库
		itemMapper.insert(item);
	}
}
2.9 是否启用规格
2.9.1 前端

2.9.2 后端
后端,做个判断,如果启用规则,即值为1的时候,执行之前的逻辑,否则,不需要循环,手动创建对象,设置值,直接insert即可
3. 商品管理
3.1 列表显示
3.1.1 后端
修改pinyougou-shop-web工程的GoodsController.java的findPage方法
/**
	 * 返回全部列表
	 * @return
	 */
	@RequestMapping("/findPage")
	public PageResult  findPage(@RequestBody TbGoods goods,int page,int rows){
		String sellerId = SecurityContextHolder.getContext().getAuthentication().getName();
		goods.setSellerId(sellerId);
		return goodsService.findPage(goods,page, rows);
	}
3.1.2 前端
pinyougou-shop-web工程中goods.html
1)引入头文件
2)引入分页插件
3)变量绑定
4)在goodsController.js中新增如下代码即可
/*
	 * 商品列表部分
	 * */
	// 1. 状态
	$scope.status = ["未审核","已审核","审核未通过","已关闭"];
	$scope.itemCat1List = [];
	// 2. 分类名称
	$scope.findItemList = function() {
		itemCatService.findAll().success(function(response){
			for(var i = 0 ; i < response.length; i ++){
				$scope.itemCat1List[response[i].id] = response[i].name;
			}
		});
	}
注意:这里的分类名称有两种方式获取
方案一:在后端代码写关联查询语句,返回的数据中直接有分类名称。
方案二:在前端代码用ID去查询后端,异步返回商品分类名称。
我这里使用的是方案二,根据分类ID得到分类名称,所以我们将返回的分页结果以数组形式再次封装
5)html页面调用该方法
效果如图:

3.2 商品修改
3.2.1 基本信息读取
我们首选读取商品分类、商品名称、品牌,副标题,价格等信息
1)后端
将findOne的返回值改成组合实体类
/**
 * 根据ID获取实体
 * @param id
 * @return
 */
@Override
public Goods findOne(Long id){
	Goods goods = new Goods();

	// 获取商品信息
	TbGoods tGoods = goodsMapper.selectByPrimaryKey(id);
	goods.setGoods(tGoods);

	// 获取商品详情
	TbGoodsDesc tGoodsDesc = goodsDescMapper.selectByPrimaryKey(id);
	goods.setGoodsDesc(tGoodsDesc);

	return goods;
}
2)前端
引入$location,用于读取url中的参数id
(1)基本信息显示

(2)富文本内容赋值

(3)图片列表显示
从数据库查询出来的图片信息是一个json字符串,所以我们需要在前端做一下处理

(4)扩展属性的显示

注意:这里仅仅这样改也不能正确的显示扩展属性,是因为在模板id监控的那里,做了覆盖,所以,需要修改那处的逻辑

(5)规格的显示
在findOne方法中将规格转换成json数组
$scope.entity.goodsDesc.specificationItems = JSON.parse($scope.entity.goodsDesc.specificationItems);然后,利用ng-checked指令,将符合条件的勾选

js代码
/*
 * 商品规格选项勾选
 * */
$scope.checkAttributeValue = function(specName,value) {
	var obj = $scope.searchObjectByKey($scope.entity.goodsDesc.specificationItems,"attributeName",specName);
	if(obj){
		console.log("obj = " + obj);
		if(obj.attributeValue.indexOf(value) >= 0 ){
			return true;
		} else {
			return false;
		}
	}
	return false;
}
(6)商品sku列表
A. 后端:在GoodsServiceImpl的findOne方法中加载SKU商品数据
		//查询SKU商品列表
		TbItemExample example=new TbItemExample();
		com.pinyougou.pojo.TbItemExample.Criteria criteria = example.createCriteria();
		criteria.andGoodsIdEqualTo(id);//查询条件:商品ID
		List<TbItem> itemList = itemMapper.selectByExample(example);
		goods.setItemList(itemList);
B. 前端:在goodsController.js修改findOne方法的代码
//查询实体
$scope.findOne=function(){
	........
	goodsService.findOne(id).success(
		function(response){
			$scope.entity= response;
			.........
			//SKU列表规格列转换
			for( var i=0;i<$scope.entity.itemList.length;i++ ){
$scope.entity.itemList[i].spec =
JSON.parse( $scope.entity.itemList[i].spec);
			}
		}
	);
}
(7)保存修改
A. 后端:修改pinyougou-sellergoods-service的GoodsServiceImpl的update方法
/**
 * 修改
 */
@Override
public void update(Goods goods){


	// 修改商品信息
	goodsMapper.updateByPrimaryKey(goods.getGoods());

	// 修改商品详情
	goodsDescMapper.updateByPrimaryKey(goods.getGoodsDesc());

	// 修改sku
	// 1. 修改之前先删除原来商品sku信息
	TbItemExample example = new TbItemExample();
	example.createCriteria().andGoodsIdEqualTo(goods.getGoods().getId());
	itemMapper.deleteByExample(example);

	// 2. 再保存商品sku信息
	saveItems(goods);


}
B. 前端:修改goodsController.js ,新增保存的方法
//保存
$scope.save=function(){
	//提取文本编辑器的值
	$scope.entity.goodsDesc.introduction=editor.html();
	var serviceObject;//服务层对象
	if($scope.entity.goods.id!=null){//如果有ID
		serviceObject=goodsService.update( $scope.entity ); //修改
	}else{
		serviceObject=goodsService.add( $scope.entity  );//增加
	}
	serviceObject.success(
		function(response){
			if(response.success){
				alert("保存成功!");
				$scope.entity = {};
				// 情况富文本编辑器的内容
				editor.html('');
				window.location.href="/admin/goods.html"
			}else{
				alert(response.message);
			}
		}
	);
}
C. 页面上建add()改成save()

