文章目录
1.Spring 简介
- Spring是 分层 的轻量级开源框架
- Spring核心是IOC(控制反转) 和 AOP(面向切面编程)
什么是IOC和AOP放到后面讲解 - Spring提供了对各种优秀框架的支持和 整合
2.Spring 的优点
2.1 IOC解耦
- 可以将对象间的依赖关系交由Spring管理
- 避免编码造成的过度耦合
2.2 支持AOP
- 可以使用切面编程思想对方法进行增强
2.3 支持声明式事务
- 可以通过配置或注解的方式管理事务
- 不需要硬编码管理事务
2.4 方便测试
2.5 方便集成
2.6使用简单
2.7设计精良
3.IOC容器
3.1 什么是IOC
IOC,英文全称(Inversion Of Control),也叫控制反转,即将对象的创建交给第三方工厂来完成,所以其底层原理是工厂设计模式。
3.2 IOC的作用
1.解耦
- 利用第三方工厂创建对象,解决代码的耦合性问题
2.存储对象
- 可以将创建出来的对象存起来重复使用
3.管理依赖关系
- 可以将依赖对象注入到需要的对象当中
注:依赖注入相当于赋值的意思
比如说有一个User类,里面有一个Account属性。则可以创建Account对象,再将其注入到User对象中。
4.管理对象的创建顺序
- 可以根据依赖关系先后创建对象
3.3 IOC编程入门
首先创建一个maven工程:pom.xml中导入相关依赖,Spring IOC需要的依赖为spring-context。为了方便测试导入junit依赖
如代码所示:
<?xml version="1.0" encoding="UTF-8"?>

<project xmlns="http://maven.apache.org/POM/4.0.0" xmlns:xsi="http://www.w3.org/2001/XMLSchema-instance" xsi:schemaLocation="http://maven.apache.org/POM/4.0.0 http://maven.apache.org/xsd/maven-4.0.0.xsd">
  <modelVersion>4.0.0</modelVersion>
  <groupId>ithaibo</groupId>
  <artifactId>spring01_ioc_02</artifactId>
  <version>1.0-SNAPSHOT</version>
  <packaging>war</packaging>

  <dependencies>

<!--    导入spring ioc依赖-->
    <dependency>
      <groupId>org.springframework</groupId>
      <artifactId>spring-context</artifactId>
      <version>5.0.2.RELEASE</version>
    </dependency>

<!--    导入单元测试依赖-->
    <dependency>
      <groupId>junit</groupId>
      <artifactId>junit</artifactId>
      <version>4.12</version>
    </dependency>

  </dependencies>

</project>
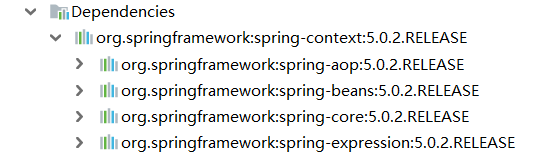
虽然只导入了spring-context,其实包括了这么多
导入了相关依赖后,我们来到resource目录创建相关配置文件,如下图,一定要导入了spring的依赖后这个选项才会出来,我们取名叫applicationContext.xml
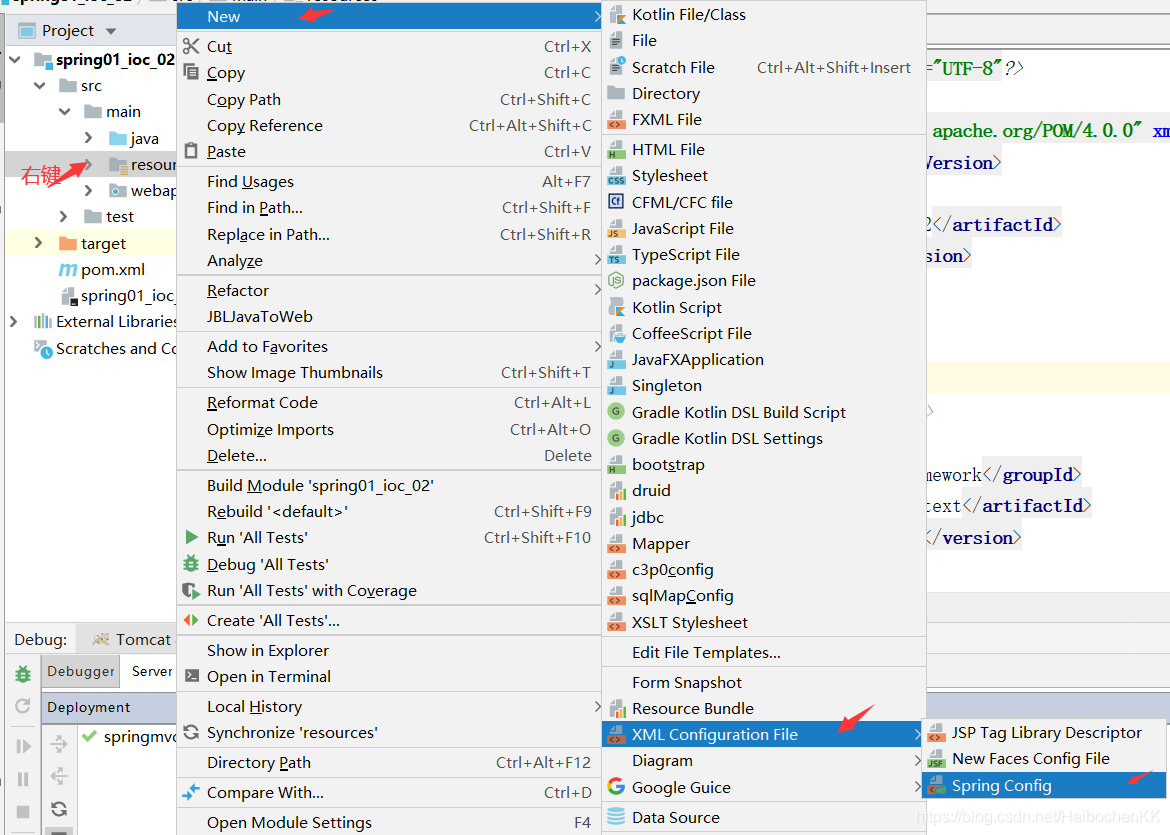
创建出来内容长这个样子
<?xml version="1.0" encoding="UTF-8"?>
<beans xmlns="http://www.springframework.org/schema/beans"
       xmlns:xsi="http://www.w3.org/2001/XMLSchema-instance"
       xsi:schemaLocation="http://www.springframework.org/schema/beans http://www.springframework.org/schema/beans/spring-beans.xsd">

</beans>
我们说IOC是用来创建对象的,所以我们来新建一个User类:
package com.chenhaibo.ioc;

public class User {
    private int id;
    private String name;

    public User() {
    }

    public User(int id, String name) {
        this.id = id;
        this.name = name;
    }

    public int getId() {
        return id;
    }

    public void setId(int id) {
        this.id = id;
    }

    public String getName() {
        return name;
    }

    public void setName(String name) {
        this.name = name;
    }

    @Override
    public String toString() {
        return "User{" +
                "id=" + id +
                ", name='" + name + '\'' +
                '}';
    }
}
接下来配置beans.xml文件,将User对象创建并添加到IOC容器中
<?xml version="1.0" encoding="UTF-8"?>
<beans xmlns="http://www.springframework.org/schema/beans"
       xmlns:xsi="http://www.w3.org/2001/XMLSchema-instance"
       xsi:schemaLocation="http://www.springframework.org/schema/beans http://www.springframework.org/schema/beans/spring-beans.xsd">
<!--
      定义对象: 创建对象, 并且添加到IOC容器
          id: 对象名称(唯一)
          class: 全限定类名
  -->
<bean id="user" class="com.chenhaibo.ioc.User"></bean>

</beans>
bean标签:用来创建对象,并将对象添加到IOC容器当中。
- id属性为对象的名称,作为唯一标识,方便外界引用。
- class属性为类的全限定类名,用来反射创建对象的
用bean标签将User对象创建并放到IOC容器中后,我们就可以直接从IOC容器中拿到User对象。
于是我们来一个测试类测试以下:
   @Test
    public void testIoc(){

        //创建IOC容器
        ClassPathXmlApplicationContext ioc = new ClassPathXmlApplicationContext("beans.xml");

        //根据字节码对象,从IOC容器中获取User对象
        User user = ioc.getBean(User.class);
        //根据id,从IOC容器中获取User对象
        User user1 = (User) ioc.getBean("user");
        System.out.println(user);
        System.out.println(user1);
        System.out.println(user==user1);
    }
这边需要介绍一下创建IOC容器的第一种方式(还有其他方式),解析资源xml文件的方式
ClassPathXmlApplicationContext ioc = new ClassPathXmlApplicationContext("beans.xml");
执行结果如下:
User{id=0, name='null'}
User{id=0, name='null'}
true
从结果可以看出,根据字节码对象和applicationContext.xml中配置的id都可以从IOC中拿到User对象,并且两次拿到的为同一个对象,所以,bean标签创建对象默认为单例模式。
其实只要bean标签中增加一个属性scope="prototype"就可以变成多例模式:
如果不配置,**默认是scope=“singleton”**单例模式。
<bean id="user" class="com.chenhaibo.ioc.User" scope="prototype"></bean>
再次执行测试代码:
User{id=0, name='null'}
User{id=0, name='null'}
false
即两次拿到的User对象不是同一个。
以上就是spring IOC的小入门啦。
3.4 bean标签的相关属性
- id: 名称(唯一)
- class: 必选属性: 字节码路径
- name: 对象的别名: 可以设置多个(,分隔或空格分隔)
- init-method: 指定初始化方法: 在构造方法之后执行
- destroy-method: 指定销毁方法: 在容器销毁前执行
- lazy-init: 是否延迟创建对象
默认是false: 不会延迟创建: 在容器创建时创建
true: 表示延迟创建, 延迟到使用时 - scope:定义bean的作用范围
默认是singleton:单例模式
prototype:多例模式
request:web项目中,将对象存入request域中
session:web项目中,将对象存入session域中
globalsession:web项目中,将对象应用于集群环境,没有集群相当于
session
3.5 IOC容器的创建方式
- 资源文件创建方式
ClassPathXmlApplicationContext
ClassPathXmlApplicationContext context = new ClassPathXmlApplicationContext("applicationContext.xml");
- 系统文件创建方式
FileSystemXmlApplicationContext
FileSystemXmlApplicationContext context = new FileSystemXmlApplicationContext("D:\IDEA_Project\JavaEE\spring01_ioc_02\src\main\resources\applicationContext.xml");
- 注解配置创建方式
AnnotationConfigApplicationContext
@Test
public void testAnnotation() {
    AnnotationConfigApplicationContext context = new AnnotationConfigApplicationContext(Config.class);
}

@Configuration
static class Config{

    @Bean("user")
    public User createUser(){
        return new User();
    }
}
3.6 依赖注入(DI:Dependency Injection)
- 什么是依赖注入?
IOC给对象赋值的一种功能
- xml 注入方式
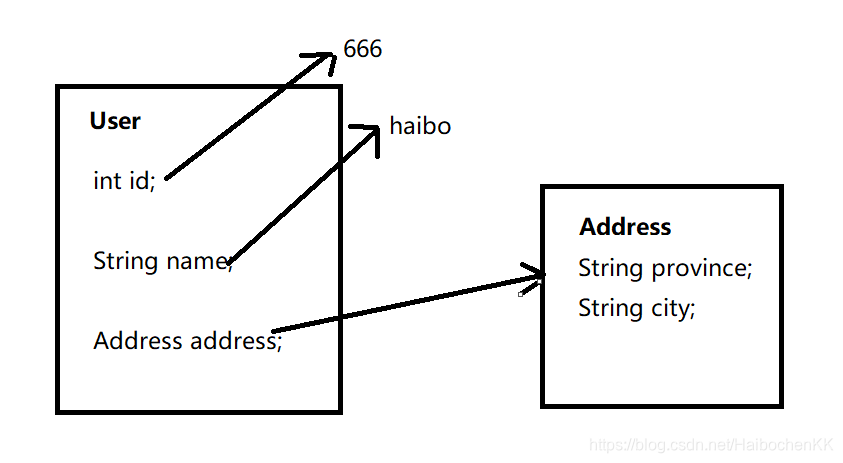
以上图为例,以下为xml方式依赖注入的方法
1.注入参数和注入对象
<!--    创建User对象并用构造方法的方式依赖注入-->
    <bean id="user" class="cn.ithaibo.domain.User">
        <constructor-arg name="id" value="666"/>
        <constructor-arg name="name" value="haibo"/>
<!--        注入对象,需要用ref属性引入-->
        <constructor-arg name="address" ref="address"/>
    </bean>
<!--    创建Address对象并用set方法的方式依赖注入-->
    <bean id="address" class="cn.ithaibo.domain.Address">
        <property name="province" value="福建"/>
        <property name="city" value="厦门"/>
    </bean>
值得注意的是,采用constructor-arg标签–构造方法的方式注入,实体类中需要给出带参的构造方法,
采用property–set方法的方式注入(较常用),实体类中需要给出set方法。
2.注入数组和注入集合
实体类Employee
public class Employee {
    private String[] array;
    private List<String> list;
    private Set<String> set;
    private Map<String,String> map;
    private Properties props;

    public void setArray(String[] array) {
        this.array = array;
    }

    public void setList(List<String> list) {
        this.list = list;
    }

    public void setSet(Set<String> set) {
        this.set = set;
    }

    public void setMap(Map<String, String> map) {
        this.map = map;
    }

    public void setProps(Properties props) {
        this.props = props;
    }

    @Override
    public String toString() {
        return "Employee{" +
                "array=" + Arrays.toString(array) +
                ", list=" + list +
                ", set=" + set +
                ", map=" + map +
                ", props=" + props +
                '}';
    }
}
通过xml文件创建Employee对象并进行依赖注入
<!--    创建Employee对象并用set方法依赖注入-->
    <bean id="employee" class="cn.ithaibo.domain.Employee">
<!--        注入数组-->
        <property name="array">
            <array>
                <value>1</value>
                <value>1</value>
            </array>
        </property>
<!--        注入list集合-->
        <property name="list">
            <list>
                <value>2</value>
                <value>2</value>
            </list>
        </property>
<!--        注入set集合-->
        <property name="set">
            <set>
                <value>1</value>
                <value>2</value>
                <value>3</value>
            </set>
        </property>
<!--        注入map集合-->
        <property name="map">
            <map>
                <entry key="id" value="666"/>
                <entry key="name" value="haibo"/>
            </map>
        </property>
<!--        注入properties-->
        <property name="props">
            <props>
                <prop key="id">666</prop>
                <prop key="name">haibo</prop>
            </props>
        </property>
    </bean>
3.7注解方式创建对象及依赖注入
为了方便经常会使用注解的方式创建对象添加到IOC容器中,用注解的方式进行依赖注入。以下为注解方式的使用方法:
在配置文件中增加如下标签(必要):
    <!-- 添加Spring组件扫描配置: 通知Spring使用了注解 -->
    <context:component-scan base-package="cn.ithaibo.domain"/>
Address实体类:
//Component注解:创建对象并添加到ioc容器中
@Component
public class Address {
//Value注解:给参数注入值
    @Value("福建")
    String province;
    @Value("厦门")
    String city;
}
User实体类:
//Component注解:创建对象并添加到ioc容器中
@Component
public class User {
	//Value注解:给参数注入值
    @Value("666")
    int id;
    //Value注解:给参数注入值
    @Value("haibo")
    String name;
    //Autowired注解:注入对象
    @Autowired
    Address address;
}
使用上述注解,可以代替applicationContext.xml中的bean标签。
-
创建对象并添加到IOC容器中的注解有
@Component: 修饰类
@Repository: 修饰类, 修饰持久层类
@Service: 修饰类, 修饰业务层类
@Controller: 修饰类, 修饰视图层类 -
依赖注入的注解有
@Autowired: 修饰属性, 方法
作用: 注入一个容器中已经存在的对象 (代替ref)
@Qualifier: 修饰属性, 方法 (一般配合@Autowired)。
@Resource: 相当于@Autowired+@Qualifier
name属性:容器中对象的名称
