本文主要给大家介绍了关于Spring向页面传值和接受页面传过来的参数的相关内容,分享出来供大家参考学习,下面来一起看看详细的介绍:
一、从页面接收参数
spring MVC接收请求提交的参数值的几种方法:
1、使用HttpServletRequest获取。
|
1
2
3
4
5
|
@RequestMapping
(
"/login.do"
)
public
String login(HttpServletRequest request){
String name = request.getParameter(
"name"
)
String pass = request.getParameter(
"pass"
)
}
|
2、使用@RequestParam注解。
|
1
2
3
4
5
6
7
8
|
@RequestMapping
(
"/login.do"
)
public
String login(HttpServletRequest request,
String name,
@RequestParam
(
"pass"
)String password)
// 表单属性是pass,用变量password接收
{
syso(name);
syso(password)
}
|
3、使用自动机制封装成实体参数。
|
1
2
3
4
5
6
7
8
9
10
11
|
<form action=
"login.do"
>
用户名:<input name=
"name"
/>
密码:<input name=
"pass"
/>
<input type=
"submit"
value=
"登陆"
>
</form>
//封装的User类
public
class
User{
private
String name;
private
String pass;
}
|
|
1
2
3
4
5
6
|
@RequestMapping
(
"/login.do"
)
public
String login(User user)
{
syso(user.getName());
syso(user.getPass());
}
|
二、向页面传值
当Controller组件处理后,需要向响应JSP传值时,可以使用的方法:
1),使用HttpServletRequest 和 Session 然后setAttribute() ,就和Servlet中一样
Model数据会利用HttpServletRequest的Attribute传值到success.jsp中
|
1
2
3
4
5
6
7
|
@RequestMapping
(
"/login.do"
)
public
ModelAndView login(String name,String pass){
User user = userService.login(name,pwd);
Map<String,Object> data =
new
HashMap<String,Object>();
data.put(
"user"
,user);
return
new
ModelAndView(
"success"
,data);
}
|
2),使用ModelAndView对象
3),使用ModelMap对象
使用ModelMap参数对象示例:
ModelMap数据会利用HttpServletRequest的Attribute传值到success.jsp中
|
1
2
3
4
5
6
7
|
@RequestMapping
(
"/login.do"
)
public
String login(String name,String pass ,ModelMap model){
User user = userService.login(name,pwd);
model.addAttribute(
"user"
,user);
model.put(
"name"
,name);
return
"success"
;
}
|
4),使用@ModelAttribute注解
使用@ModelAttribute示例
在Controller方法的参数部分或Bean属性方法上使用@ModelAttribute数据会利用HttpServletRequest的Attribute传值到success.jsp中
|
1
2
3
4
5
6
7
8
9
10
|
@RequestMapping
(
"/login.do"
)
public
String login(
@ModelAttribute
(
"user"
) User user){
//TODO
return
"success"
;
}
@ModelAttribute
(
"name"
)
public
String getName(){
return
name;
}
|
5)Session存储:可以利用HttpServletReequest的getSession()方法
|
1
2
3
4
5
6
7
8
9
|
@RequestMapping
(
"/login.do"
)
public
String login(String name,String pwd
ModelMap model,HttpServletRequest request){
User user = serService.login(name,pwd);
HttpSession session = request.getSession();
session.setAttribute(
"user"
,user);
model.addAttribute(
"user"
,user);
return
"success"
;
}
|
6)自定义Map
|
1
2
3
4
5
6
7
8
9
10
11
|
@ResponseBody
@RequestMapping
(value =
"/updatestatus"
, method = RequestMethod.POST)
public
Map<String, Object> updateStatus(HttpServletRequest request) {
Map<String, Object> result =
new
HashMap<String, Object>();
String id = request.getParameter(
"id"
);
SystemAdministrator sysadmin=systemAdminBiz.get(Integer.valueOf(id));
sysadmin.setStatus(
1
);
boolean
flag = systemAdminBiz.update(sysadmin);
result.put(
"status"
, flag);
return
result;
}
|
|
1
2
3
4
5
6
7
8
9
10
11
12
13
14
|
@RequestMapping
(value =
"/list"
, method = {RequestMethod.POST,RequestMethod.GET})
public
String queryAdministrator(HttpServletRequest request,ModelMap model) {
Integer roleId = request.getParameter(
"roleListById"
) ==
null
?
0
: Integer.parseInt(request.getParameter(
"roleListById"
));
Map<String, Object> properties =
new
HashMap<String, Object>();
if
(roleId.intValue() >
0
) {
properties.put(
"role:="
, roleId);
model.put(
"roleId"
, roleId);
}
List<SystemAdministrator> administrator = systemAdminBiz.find(properties);
List<SystemRole> systemRole = systemRoleBiz.getAll();
model.put(
"administratorList"
, administrator);
model.put(
"roleList"
, systemRole);
return
"sys_admin_list"
;
}
|
7)Spring MVC 默认采用的是转发来定位视图,如果要使用重定向,可以如下操作
1,使用RedirectView
2,使用redirect:前缀
|
1
2
3
4
|
public
ModelAndView login(){
RedirectView view =
new
RedirectView(
"regirst.do"
);
return
new
ModelAndView(view);
}
|
或者用如下方法,工作中常用的方法:
|
1
2
3
4
|
public
String login(){
//TODO
return
"redirect:regirst.do"
;
}
|
三、实例讲解:
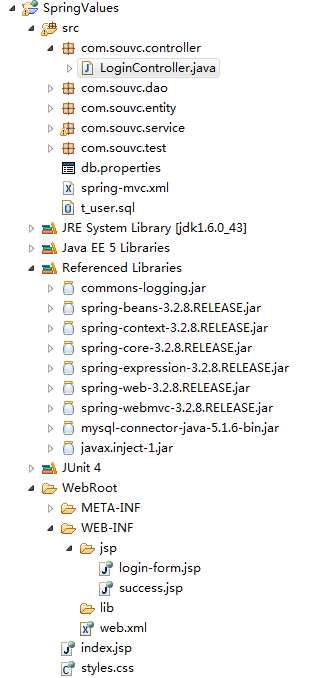
步骤一:创建新Web项目,导入Spring MVC包和业务层UserService
1. 创建Web项目导入相关的jar包:
2. 导入前述业务层UserService类以及依赖的类,等。
User类代码如下:
|
1
2
3
4
5
6
7
8
9
10
11
12
13
14
15
16
17
18
19
20
21
22
23
24
25
26
27
28
29
30
31
32
33
34
35
36
37
38
39
40
41
42
43
44
45
46
47
48
49
50
51
52
53
54
55
56
57
58
59
60
61
62
63
64
65
66
67
68
69
70
71
72
73
74
75
76
77
78
79
80
81
82
83
|
package
com.souvc.entity;
import
java.io.Serializable;
public
class
User
implements
Serializable {
private
static
final
long
serialVersionUID = -603439325380668432L;
private
int
id;
private
String name;
private
String pwd;
private
String phone;
public
User() {
}
public
User(
int
id, String name, String pwd, String phone) {
this
.id = id;
this
.name = name;
this
.pwd = pwd;
this
.phone = phone;
}
public
User(String name, String pwd, String phone) {
super
();
this
.name = name;
this
.pwd = pwd;
this
.phone = phone;
}
public
int
getId() {
return
id;
}
public
void
setId(
int
id) {
this
.id = id;
}
public
String getName() {
return
name;
}
public
void
setName(String name) {
this
.name = name;
}
public
String getPwd() {
return
pwd;
}
public
void
setPwd(String pwd) {
this
.pwd = pwd;
}
public
String getPhone() {
return
phone;
}
public
void
setPhone(String phone) {
this
.phone = phone;
}
@Override
public
int
hashCode() {
return
id;
}
@Override
public
boolean
equals(Object obj) {
if
(
this
== obj)
return
true
;
if
(obj ==
null
)
return
false
;
if
(obj
instanceof
User) {
User o = (User) obj;
return
this
.id == o.id;
}
return
true
;
}
@Override
public
String toString() {
return
id +
","
+ name +
","
+ pwd +
","
+ phone;
}
}
|
UserDao接口代码如下:
|
1
2
3
4
5
6
7
8
9
10
11
12
13
14
15
|
package
com.souvc.dao;
import
com.souvc.entity.User;
/**
* 用户数据访问对象接口
*/
public
interface
UserDao {
/** 根据唯一用户名查询系统用户, 如果没有找到用户信息返回null */
public
User findByName(String name);
// public User add(String name, String pwd, String phone);
// public User find(int id);
// public User delete(int id);
// public void update(User user);
}
|
UserService类代码如下:
|
1
2
3
4
5
6
7
8
9
10
11
12
13
14
15
16
17
18
19
20
21
22
23
24
25
26
27
28
29
30
31
32
33
34
35
36
37
38
39
40
41
|
package
com.souvc.service;
import
java.io.Serializable;
import
javax.annotation.Resource;
import
org.springframework.stereotype.Service;
import
com.souvc.dao.UserDao;
import
com.souvc.entity.User;
/** 业务层 注解 */
@Service
// 默认的Bean ID是 userService
public
class
UserService
implements
Serializable {
private
static
final
long
serialVersionUID = 7360372166489952236L;
private
UserDao userDao;
// @Resource //自动匹配userDao对象并注入
@Resource
(name =
"userDao"
)
public
void
setUserDao(UserDao userDao) {
this
.userDao = userDao;
//
}
public
UserDao getUserDao() {
return
userDao;
}
/** 登录系统功能 */
public
User login(String name, String pwd)
throws
NameOrPwdException,
NullParamException {
if
(name ==
null
|| name.equals(
""
) || pwd ==
null
|| pwd.equals(
""
)) {
throw
new
NullParamException(
"登录参数不能为空!"
);
}
User user = userDao.findByName(name);
if
(user !=
null
&& pwd.equals(user.getPwd())) {
return
user;
}
throw
new
NameOrPwdException(
"用户名或者密码错误"
);
}
}
|
NameOrPwdException类代码如下:
|
1
2
3
4
5
6
7
8
9
10
11
12
13
14
15
16
17
18
19
|
package
com.souvc.service;
/** 用户名或者密码错误 */
public
class
NameOrPwdException
extends
Exception {
public
NameOrPwdException() {
}
public
NameOrPwdException(String message) {
super
(message);
}
public
NameOrPwdException(Throwable cause) {
super
(cause);
}
public
NameOrPwdException(String message, Throwable cause) {
super
(message, cause);
}
}
|
NullParamException类代码如下:
|
1
2
3
4
5
6
7
8
9
10
11
12
13
14
15
16
17
18
19
|
package
com.souvc.service;
/** 参数为空 */
public
class
NullParamException
extends
Exception {
public
NullParamException() {
}
public
NullParamException(String message) {
super
(message);
}
public
NullParamException(Throwable cause) {
super
(cause);
}
public
NullParamException(String message, Throwable cause) {
super
(message, cause);
}
}
|
JdbcDataSource类代码如下:
|
1
2
3
4
5
6
7
8
9
10
11
12
13
14
15
16
17
18
19
20
21
22
23
24
25
26
27
28
29
30
31
32
33
34
35
36
37
38
39
40
41
42
43
44
45
46
47
48
49
50
51
52
53
54
55
56
57
58
59
60
61
62
63
64
65
66
67
68
69
70
71
72
73
74
75
76
77
78
79
80
81
|
package
com.souvc.dao;
import
java.io.Serializable;
import
java.sql.Connection;
import
java.sql.DriverManager;
import
java.sql.SQLException;
import
org.springframework.beans.factory.annotation.Value;
import
org.springframework.stereotype.Component;
/** 组件注解 */
@Component
public
class
JdbcDataSource
implements
Serializable {
private
static
final
long
serialVersionUID = -8925981939329398101L;
private
String driver;
@Value
(
"#{jdbcProps.url}"
)
private
String url;
@Value
(
"#{jdbcProps.user}"
)
private
String user;
@Value
(
"#{jdbcProps.pwd}"
)
private
String pwd;
public
String getDriver() {
return
driver;
}
/** 必须使用Bean属性输入, 否则不能进行JDBC Driver注册 */
@Value
(
"#{jdbcProps.driver}"
)
public
void
setDriver(String driver) {
try
{
// 注册数据库驱动
Class.forName(driver);
this
.driver = driver;
}
catch
(Exception e) {
throw
new
RuntimeException(e);
}
}
public
String getUrl() {
return
url;
}
public
void
setUrl(String url) {
this
.url = url;
}
public
String getUser() {
return
user;
}
public
void
setUser(String user) {
this
.user = user;
}
public
String getPwd() {
return
pwd;
}
public
void
setPwd(String pwd) {
this
.pwd = pwd;
}
public
Connection getConnection()
throws
SQLException {
Connection conn = DriverManager.getConnection(url, user, pwd);
return
conn;
}
public
void
close(Connection conn) {
if
(conn !=
null
) {
try
{
conn.close();
}
catch
(SQLException e) {
e.printStackTrace();
}
}
}
}
|
MysqlUserDao类代码如下:
|
1
2
3
4
5
6
7
8
9
10
11
12
13
14
15
16
17
18
19
20
21
22
23
24
25
26
27
28
29
30
31
32
33
34
35
36
37
38
39
40
41
42
43
44
45
46
47
48
49
50
51
52
53
54
55
56
57
58
59
60
61
62
63
64
65
66
67
68
69
|
package
com.souvc.dao;
import
java.io.Serializable;
import
java.sql.Connection;
import
java.sql.PreparedStatement;
import
java.sql.ResultSet;
import
java.sql.SQLException;
import
org.springframework.beans.factory.annotation.Autowired;
import
org.springframework.beans.factory.annotation.Qualifier;
import
org.springframework.stereotype.Repository;
import
com.souvc.entity.User;
/** 持久层 注解 */
@Repository
(
"userDao"
)
// 指定特定的Bean ID 方便setUserDao注入
public
class
MysqlUserDao
implements
UserDao, Serializable {
private
static
final
long
serialVersionUID = 7385842613248394287L;
private
JdbcDataSource dataSource;
public
MysqlUserDao() {
}
/** 创建 MysqlUserDAO 对象必须依赖于JDBCDataSource实例 */
public
MysqlUserDao(JdbcDataSource dataSource) {
this
.dataSource = dataSource;
}
@Autowired
// 按照类型自动装配
public
void
setDataSource(
@Qualifier
(
"jdbcDataSource"
)
JdbcDataSource dataSource) {
this
.dataSource = dataSource;
}
public
JdbcDataSource getDataSource() {
return
dataSource;
}
/** 根据唯一用户名查询系统用户, 如果没有找到用户信息返回null */
public
User findByName(String name) {
System.out.println(
"利用JDBC技术查找User信息"
);
String sql =
"select id, name, pwd, phone from users where name=?"
;
Connection conn =
null
;
try
{
conn = dataSource.getConnection();
PreparedStatement ps = conn.prepareStatement(sql);
ps.setString(
1
, name);
ResultSet rs = ps.executeQuery();
User user =
null
;
while
(rs.next()) {
user =
new
User();
user.setId(rs.getInt(
"id"
));
user.setName(rs.getString(
"name"
));
user.setPwd(rs.getString(
"pwd"
));
user.setPhone(rs.getString(
"phone"
));
}
rs.close();
ps.close();
return
user;
}
catch
(SQLException e) {
e.printStackTrace();
throw
new
RuntimeException(e);
}
finally
{
dataSource.close(conn);
}
}
}
|
db.properties文件内容如下:
|
1
2
3
4
5
|
# config
for
Mysql
driver=com.mysql.jdbc.Driver
url=jdbc:mysql:
//localhost:3306/souvc
user=root
pwd=
123456
|
spring-mvc.xml文件代码如下:
MySQL数据库初始化SQL代码如下:
|
1
2
3
4
5
6
7
8
9
10
11
12
13
|
DROP
TABLE
users;
CREATE
TABLE
USERS
(
ID
DOUBLE
(7, 0) ,
NAME
VARCHAR
(50) ,
PWD
VARCHAR
(50),
PHONE
VARCHAR
(50) ,
PRIMARY
KEY
(id)
);
INSERT
INTO
Users (id,
NAME
, pwd, phone)
VALUES
(1,
'Tom'
,
'123'
,
'110'
);
INSERT
INTO
Users (id,
NAME
, pwd, phone)
VALUES
(2,
'Jerry'
,
'abc'
,
'119'
);
INSERT
INTO
Users (id,
NAME
, pwd, phone)
VALUES
(3,
'Andy'
,
'456'
,
'112'
);
|
3. 为项目添加JUnit4 API,然后添加测试类TestCase和测试方法testUserService()用于测试上述配置是否正确。TestCase类代码如下:
|
1
2
3
4
5
6
7
8
9
10
11
12
13
14
15
16
17
18
19
20
21
22
23
24
25
26
27
28
|
package
com.souvc.test;
import
java.util.Properties;
import
org.junit.Test;
import
org.springframework.context.ApplicationContext;
import
org.springframework.context.support.ClassPathXmlApplicationContext;
import
com.souvc.dao.JdbcDataSource;
import
com.souvc.entity.User;
import
com.souvc.service.UserService;
public
class
TestCase {
@Test
public
void
testUserService()
throws
Exception {
String cfg =
"spring-mvc.xml"
;
ApplicationContext ac =
new
ClassPathXmlApplicationContext(cfg);
Properties obj = ac.getBean(
"jdbcProps"
, Properties.
class
);
JdbcDataSource ds = ac.getBean(
"jdbcDataSource"
, JdbcDataSource.
class
);
System.out.println(obj);
System.out.println(ds);
System.out.println(ds.getConnection());
UserService service = ac.getBean(
"userService"
, UserService.
class
);
User user = service.login(
"Tom"
,
"123"
);
System.out.println(user);
}
}
|
执行测试方法testUserService() ,在控制台输出的结果:
|
1
2
3
|
{user=root, url=jdbc:mysql://localhost:3306/souvc, driver=com.mysql.jdbc.Driver, pwd=123456}
com.souvc.dao.JdbcDataSource@1cb1a4e2
com.mysql.jdbc.JDBC4Connection@3d04fc23
|
利用JDBC技术查找User信息
|
1
|
1,Tom,123,110
|
这个结果说明业务层UserService工作正常。
4. 配置Spring MVC 核心控制器DispatcherServlet到web.xml。web.xml配置部分代码参考如下:
|
1
2
3
4
5
6
7
8
9
10
11
12
13
14
15
16
17
18
19
20
21
22
23
24
25
26
|
<?
xml
version
=
"1.0"
encoding
=
"UTF-8"
?>
xsi:schemaLocation="http://java.sun.com/xml/ns/javaee
<
welcome-file-list
>
<
welcome-file
>index.jsp</
welcome-file
>
</
welcome-file-list
>
<
servlet
>
<
servlet-name
>springmvc</
servlet-name
>
<
servlet-class
>
org.springframework.web.servlet.DispatcherServlet
</
servlet-class
>
<
init-param
>
<
param-name
>contextConfigLocation</
param-name
>
<
param-value
>classpath:spring-mvc.xml</
param-value
>
</
init-param
>
<
load-on-startup
>1</
load-on-startup
>
</
servlet
>
<
servlet-mapping
>
<
servlet-name
>springmvc</
servlet-name
>
<
url-pattern
>*.form</
url-pattern
>
</
servlet-mapping
>
</
web-app
>
|
5. 部署项目到Tomcat并且启动,测试Spring MVC配置是否正常。
在输出结果中出现内容, 并且没有异常就会说明Spring MVC部署正常。
步骤二:实现login-action1.form登录流程,测试利用HttpServletRequrst传值方法
1. 在WEB-INF/jsp文件夹下添加login-form.jsp文件,代码如下所示:
|
1
2
3
4
5
6
7
8
9
10
11
12
13
14
15
16
17
18
19
20
21
22
23
24
25
26
27
28
29
30
31
32
33
34
35
36
37
38
39
40
41
42
43
44
45
46
47
48
49
50
51
52
53
54
55
56
57
58
59
60
61
62
63
64
65
66
67
|
<%@ page pageEncoding="utf-8" contentType="text/html; charset=utf-8"%>
<!DOCTYPE HTML>
<%@taglib prefix="c" uri="http://java.sun.com/jsp/jstl/core" %>
<
c:url
var
=
"base"
value
=
"/"
></
c:url
>
<
html
>
<
head
>
<
title
>Login Form</
title
>
<
link
rel
=
"stylesheet"
type
=
"text/css"
href
=
"${base}styles.css"
rel
=
"external nofollow"
rel
=
"external nofollow"
>
</
head
>
<
body
>
<
h6
>${message}</
h6
>
<
form
method
=
"post"
action
=
"${base}login/login-action1.form"
>
<
div
>
<
h2
>登录 login-action1.form</
h2
>
<
p
><
label
>用户</
label
><
input
type
=
"text"
name
=
"name"
></
p
>
<
p
><
label
>密码</
label
><
input
type
=
"password"
name
=
"pwd"
></
p
>
<
h3
><
input
type
=
"submit"
value
=
"登录"
></
h3
>
</
div
>
</
form
>
<
form
method
=
"post"
action
=
"${base}login/login-action2.form"
>
<
div
>
<
h2
>登录 login-action2.form</
h2
>
<
p
><
label
>用户</
label
><
input
type
=
"text"
name
=
"name"
></
p
>
<
p
><
label
>密码</
label
><
input
type
=
"password"
name
=
"pwd"
></
p
>
<
h3
><
input
type
=
"submit"
value
=
"登录"
></
h3
>
</
div
>
</
form
>
<
form
method
=
"post"
action
=
"${base}login/login-action3.form"
>
<
div
>
<
h2
>登录 login-action3.form</
h2
>
<
p
><
label
>用户</
label
><
input
type
=
"text"
name
=
"name"
></
p
>
<
p
><
label
>密码</
label
><
input
type
=
"password"
name
=
"pwd"
></
p
>
<
h3
><
input
type
=
"submit"
value
=
"登录"
></
h3
>
</
div
>
</
form
>
<
form
method
=
"post"
action
=
"${base}login/login-action4.form"
>
<
div
>
<
h2
>登录 login-action4.form</
h2
>
<
p
><
label
>用户</
label
><
input
type
=
"text"
name
=
"name"
></
p
>
<
p
><
label
>密码</
label
><
input
type
=
"password"
name
=
"pwd"
></
p
>
<
h3
><
input
type
=
"submit"
value
=
"登录"
></
h3
>
</
div
>
</
form
>
<
form
method
=
"post"
action
=
"${base}login/login-action5.form"
>
<
div
>
<
h2
>登录 login-action5.form</
h2
>
<
p
><
label
>用户</
label
><
input
type
=
"text"
name
=
"name"
></
p
>
<
p
><
label
>密码</
label
><
input
type
=
"password"
name
=
"pwd"
></
p
>
<
h3
><
input
type
=
"submit"
value
=
"登录"
></
h3
>
</
div
>
</
form
>
<
form
method
=
"post"
action
=
"${base}login/login-action6.form"
>
<
div
>
<
h2
>登录 login-action6.form</
h2
>
<
p
><
label
>用户</
label
><
input
type
=
"text"
name
=
"name"
></
p
>
<
p
><
label
>密码</
label
><
input
type
=
"password"
name
=
"pwd"
></
p
>
<
h3
><
input
type
=
"submit"
value
=
"登录"
></
h3
>
</
div
>
</
form
>
</
body
>
</
html
>
|
方法一解释:
利用HttpServletRequest对象进行浏览器页面到控制器传值。
方法二解释:
使用@RequestParam注解声明表单密码输入框pwd的值注入到password变量,表单中用户名输入框根据名字映自动射注入name变量。 @RequestMapping注解将login-action2.form映射到了checkLogin2()方法。这样就与login- form.jsp表单对应。
方法三解释:
这里采用user作为参数, Spring会自动的将页面表单参数name,pwd注入到user对象的相应属性name,pwd传递到方法中。@RequestMapping将请求login-action3.form映射到方法checkLogin3() 。
方法四解释:
在处理方法完成后返回一个ModelAndView对象。
方法五解释:
ModelMap属性值与页面login-form.jsp之间的数据对应。
方法六解释:
@ModelAttribute声明的属性与login-form.jsp页面的值关系。
用户名或者密码错误时候出现的时候,能够记住用户名。
在前述案例中,用户登录成功以后, 可以利用HttpServletRequest对象的getSession()方法访问Session对象, 这样就可以保持用户登录状态了。
2. 为页面添加样式文件styles.css,样式文件保存在WebRoot文件夹下,styles.css文件代码如下所示:
|
1
2
3
4
5
6
7
8
9
10
11
12
13
14
15
16
17
18
19
20
21
22
23
24
25
26
27
28
29
30
31
32
33
34
35
36
37
38
39
40
41
42
43
44
45
46
|
* {
margin
:
0
;
padding
:
0
;
}
h
6
{
text-align
:
center
;
color
:
red
;
padding
:
10px
;
font-size
:
14px
;
}
form {
padding
:
10px
;
float
:
left
;
}
form div {
border
:
1px
gray
solid
;
width
:
320px
;
padding
:
8px
;
}
form p input {
width
:
180px
}
form h
2
input {
text-align
:
center
;
}
form h
2
{
background
:
black
;
color
:
white
;
padding
:
4px
;
}
form p {
background
:
#ddd
;
padding
:
4px
8px
0
8px
;
}
form h
3
{
background
:
#ddd
;
padding
:
8px
;
}
|
3. 在WEB-INF/jsp文件夹下添加success.jsp文件,这个文件是登录成功以后显示的界面,代码如下所示:
|
1
2
3
4
5
6
7
8
9
10
11
12
13
14
15
|
<%@ page pageEncoding="utf-8" contentType="text/html; charset=utf-8"%>
<!DOCTYPE HTML>
<%@taglib prefix="c" uri="http://java.sun.com/jsp/jstl/core"%>
<
c:url
var
=
"base"
value
=
"/"
></
c:url
>
<
html
>
<
head
>
<
title
>Success</
title
>
<
link
rel
=
"stylesheet"
type
=
"text/css"
href
=
"${base}styles.css"
rel
=
"external nofollow"
rel
=
"external nofollow"
>
</
head
>
<
body
>
<
h6
>
${user.name}登录成功!
</
h6
>
</
body
>
</
html
>
|
上述页面中,使用EL表达式和标准标签库配合显示界面数据, 其中<c:url var="base" value="/"></c:url>和${base}用于解决绝对路径问题。
4. 创建控制器类LoginController,在该类中使用注解@Controller的方式进行配置:
1)使用@Controller将LoginController声明为控制器Bean组件。
2)使用@RequestMapping("/login")声明对LoginController组件的请求在/login 路径下。
3)流程控制方法loginForm(),用于显示登录表单页面。使用@RequestMapping注解将映射请求/login-form.form到loginForm()方法。
4)增加userService属性,并且使用@Resource注解声明在运行期间注入userService对象。
5)增加控制流程方法checkLogin1() ,使用@RequestMapping注解将请求/login-action1.form映 射到checkLogin1()方法。checkLogin1()方法调用userService的login方法,实现登录流程。 checkLogin1()方法主要是测试JSP页面到控制器的数据传输方式。
LoginController类代码如下所示:
|
1
2
3
4
5
6
7
8
9
10
11
12
13
14
15
16
17
18
19
20
21
22
23
24
25
26
27
28
29
30
31
32
33
34
35
36
37
38
39
40
41
42
43
44
45
46
47
48
49
50
51
52
53
54
55
56
57
58
59
60
61
62
63
64
65
66
67
68
69
70
71
72
73
74
75
76
77
78
79
80
81
82
83
84
85
86
87
88
89
90
91
92
93
94
95
96
97
98
99
100
101
102
103
104
105
106
107
108
109
110
111
112
113
114
115
116
117
118
119
120
121
122
123
124
125
126
127
128
129
130
131
132
133
134
135
136
137
138
139
140
141
142
143
144
145
146
147
148
149
150
151
152
153
154
155
156
157
158
159
160
161
162
163
164
165
166
167
168
169
170
171
172
173
174
175
176
177
178
179
180
181
182
183
184
185
186
187
188
189
190
191
192
193
194
195
196
197
198
199
200
201
202
203
204
205
206
207
208
209
210
211
212
213
214
215
216
217
218
219
220
221
222
223
224
225
226
227
|
package
com.souvc.controller;
import
java.util.HashMap;
import
java.util.Map;
import
java.util.Random;
import
javax.annotation.Resource;
import
javax.servlet.http.HttpServletRequest;
import
org.springframework.stereotype.Controller;
import
org.springframework.ui.ModelMap;
import
org.springframework.web.bind.annotation.ModelAttribute;
import
org.springframework.web.bind.annotation.RequestMapping;
import
org.springframework.web.bind.annotation.RequestParam;
import
org.springframework.web.servlet.ModelAndView;
import
com.souvc.entity.User;
import
com.souvc.service.NameOrPwdException;
import
com.souvc.service.NullParamException;
import
com.souvc.service.UserService;
@Controller
//@SessionAttributes("user")
@RequestMapping
(
"/login"
)
public
class
LoginController {
@Resource
// 请求Spring注入资源 userService
private
UserService userService;
@RequestMapping
(
"/login.form"
)
public
String loginForm() {
// 可以向表单界面传递一些参数
return
"login-form"
;
}
@RequestMapping
(
"/login-action1.form"
)
// Spring MVC 自动参数注入HttpServletRequest
public
String checkLogin1(HttpServletRequest req) {
System.out.println(
"---方法一---"
);
// 优点直接简洁,缺点需要自己处理数据类型转换, 不支持文件上传功能
String name = req.getParameter(
"name"
);
String pwd = req.getParameter(
"pwd"
);
System.out.println(name);
System.out.println(pwd);
try
{
User user = userService.login(name, pwd);
// 登录成功将登录用户信息保存到当前会话中
req.getSession().setAttribute(
"user"
, user);
return
"success"
;
}
catch
(NameOrPwdException e) {
e.printStackTrace();
req.setAttribute(
"message"
, e.getMessage());
return
"login-form"
;
}
catch
(NullParamException e) {
e.printStackTrace();
req.setAttribute(
"message"
, e.getMessage());
return
"redirect:login.form"
;
}
catch
(RuntimeException e) {
e.printStackTrace();
req.setAttribute(
"message"
, e.getMessage());
return
"error"
;
}
}
@RequestMapping
(
"/login-action2.form"
)
public
String checkLogin2(String name,
@RequestParam
(
"pwd"
)
String password,
// 映射表单属性不同的参数
HttpServletRequest req) {
System.out.println(
"---方法二---"
);
// 优点, 自动转换数据类型, 缺点可能出现数据类型转换异常
System.out.println(name);
System.out.println(password);
try
{
User user = userService.login(name, password);
// 登录成功将登录用户信息保存到当前会话中
req.getSession().setAttribute(
"user"
, user);
return
"success"
;
}
catch
(NameOrPwdException e) {
e.printStackTrace();
req.setAttribute(
"message"
, e.getMessage());
return
"login-form"
;
}
catch
(NullParamException e) {
e.printStackTrace();
req.setAttribute(
"message"
, e.getMessage());
return
"login-form"
;
}
catch
(RuntimeException e) {
e.printStackTrace();
req.setAttribute(
"message"
, e.getMessage());
return
"error"
;
}
}
@RequestMapping
(
"/login-action3.form"
)
public
String checkLogin3(User user, HttpServletRequest req) {
System.out.println(
"---方法三---"
);
// 自动填充到bean对象
System.out.println(user);
try
{
user = userService.login(user.getName(), user.getPwd());
// 登录成功将登录用户信息保存到当前会话中
req.getSession().setAttribute(
"user"
, user);
return
"success"
;
}
catch
(NameOrPwdException e) {
e.printStackTrace();
req.setAttribute(
"message"
, e.getMessage());
return
"login-form"
;
}
catch
(NullParamException e) {
e.printStackTrace();
req.setAttribute(
"message"
, e.getMessage());
return
"login-form"
;
}
catch
(RuntimeException e) {
e.printStackTrace();
req.setAttribute(
"message"
, e.getMessage());
return
"error"
;
}
}
@RequestMapping
(
"/login-action4.form"
)
public
ModelAndView checkLogin4(String name, String pwd,
HttpServletRequest req) {
System.out.println(
"---方法四---"
);
Map<String, Object> data =
new
HashMap<String, Object>();
try
{
User user = userService.login(name, pwd);
// 登录成功将登录用户信息保存到当前会话中
req.getSession().setAttribute(
"user"
, user);
return
new
ModelAndView(
"success"
, data);
}
catch
(NameOrPwdException e) {
e.printStackTrace();
data.put(
"message"
, e.getMessage());
return
new
ModelAndView(
"login-form"
, data);
}
catch
(NullParamException e) {
e.printStackTrace();
data.put(
"message"
, e.getMessage());
return
new
ModelAndView(
"login-form"
, data);
}
catch
(RuntimeException e) {
e.printStackTrace();
data.put(
"message"
, e.getMessage());
return
new
ModelAndView(
"error"
, data);
}
}
@RequestMapping
(
"/login-action5.form"
)
public
String checkLogin5(String name, String pwd, ModelMap model,
HttpServletRequest req) {
System.out.println(
"---方法五---"
);
try
{
User user = userService.login(name, pwd);
// 登录成功将登录用户信息保存到当前会话中
req.getSession().setAttribute(
"user"
, user);
return
"success"
;
}
catch
(NameOrPwdException e) {
e.printStackTrace();
model.addAttribute(
"message"
, e.getMessage());
return
"login-form"
;
}
catch
(NullParamException e) {
e.printStackTrace();
model.addAttribute(
"message"
, e.getMessage());
return
"login-form"
;
}
catch
(RuntimeException e) {
e.printStackTrace();
model.addAttribute(
"message"
, e.getMessage());
return
"error"
;
}
}
@RequestMapping
(
"/login-action6.form"
)
public
String checkLogin6(
@ModelAttribute
(
"name"
) String name,
@ModelAttribute
(
"password"
) String pwd,
ModelMap model, HttpServletRequest req){
System.out.println(
"---方法六---"
);
try
{
User user = userService.login(name, pwd);
// 登录成功将登录用户信息保存到当前会话中
req.getSession().setAttribute(
"user"
, user);
return
"success"
;
}
catch
(NameOrPwdException e) {
e.printStackTrace();
model.addAttribute(
"message"
, e.getMessage());
return
"login-form"
;
}
catch
(NullParamException e) {
e.printStackTrace();
model.addAttribute(
"message"
, e.getMessage());
return
"login-form"
;
}
catch
(RuntimeException e) {
e.printStackTrace();
model.addAttribute(
"message"
, e.getMessage());
return
"error"
;
}
}
@RequestMapping
(
"/login-action7.form"
)
public
String checkLogin7(ModelMap model, HttpServletRequest req) {
System.out.println(
"---方法七---"
);
String name1=req.getParameter(
"name"
);
String pwd1=req.getParameter(
"pwd"
);
try
{
User user = userService.login(name1, pwd1);
// 登录成功将登录用户信息保存到当前会话中
req.getSession().setAttribute(
"user"
, user);
return
"success"
;
}
catch
(NameOrPwdException e) {
e.printStackTrace();
model.addAttribute(
"message"
, e.getMessage());
return
"redirect:login"
;
}
catch
(NullParamException e) {
e.printStackTrace();
model.addAttribute(
"message"
, e.getMessage());
return
"redirect:login"
;
}
catch
(RuntimeException e) {
e.printStackTrace();
model.addAttribute(
"message"
, e.getMessage());
return
"error"
;
}
}
private
String[] msg = {
"再来一次"
,
"下次就对了"
,
"没关系还有机会"
};
@ModelAttribute
(
"next"
)
public
String getNext() {
Random r =
new
Random();
return
msg[r.nextInt(msg.length)];
}
}
|
5.测试login-action1.form登录流程
通过网址“http://localhost:8080/SpringValues/login/login.form”请求Tomcat服务器:
访问请求的信息打印在控制台:
|
1
2
3
4
5
6
7
8
9
10
11
12
13
14
15
|
---方法一---
Tom
123
利用JDBC技术查找User信息
---方法二---
Tom
123
利用JDBC技术查找User信息
---方法三---
0,Tom,123,null
利用JDBC技术查找User信息
---方法四---
利用JDBC技术查找User信息
---方法五---
利用JDBC技术查找User信息
|
总结
以上就是这篇文章的全部内容了,希望本文的内容对大家的学习或者工作能带来一定的帮助,如果有疑问大家可以留言交流,谢谢大家对脚本之家的支持。
原文链接:http://blog.csdn.net/hustwht/article/details/52374559