线程ID
示例代码如下:
public class TestMain {
    public static void main(String[] args) {
        System.out.println("主线程id=" + Thread.currentThread().getId());
        Thread thread = new Thread();
        System.out.println("子线程id=" + thread.getId());
    }
}
运行结果是:
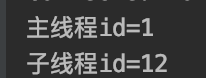
可以发现线程id是从1开始的,而子线程的id直接到了12,这是因为除了主线程,JVM还帮我们创建了一些其他的线程,所以子线程id不是2而是12。
设置线程id的部分源码
//线程ID
private long tid;
//long变量,默认为0
private static long threadSeqNumber;

//线程初始化方法
private void init(ThreadGroup g, Runnable target, String name,
                      long stackSize, AccessControlContext acc,
                      boolean inheritThreadLocals)
{       //前面的代码都省略了,这段代码就是在新建线程时初始化线程的id
        tid = nextThreadID();
}

//同步方法为线程的取下一个id,发现它是++i,所以是先加再用,所以线程从1开始
private static synchronized long nextThreadID() {
        return ++threadSeqNumber;
    }
线程的名字
示例代码如下:
public class TestMain {

    public static void main(String[] args) {
        System.out.println("主线程name=" + Thread.currentThread().getName());
        Thread thread = new Thread();
        System.out.println("子线程name=" + thread.getName());
    }
}
运行结果如下:
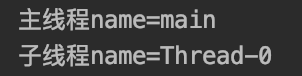
可以发现主线程名称是main,子线程名称默认是Thread-0。
设置线程名称的部分源码
//long变量,默认为0
private static int threadInitNumber;

//线程的构造方法之一,可以发现有【"Thread-" + nextThreadNum()】,这个就是默认的线程名字了
public Thread() {
        init(null, null, "Thread-" + nextThreadNum(), 0);
    }

//同步方法取threadInitNumber的下一个long值,发现它是i++,所以是先用再加,所以值从0开始
private static synchronized int nextThreadNum() {
        return threadInitNumber++;
   }
因为nextThreadNum()方法取的第一个值是0,所以子线程的名字才会是Thread-0。
当然线程的名称在运行时也是可以做修改的,示例代码如下:
public class TestMain {

    public static void main(String[] args) {
        System.out.println("主线程name=" + Thread.currentThread().getName());
        Thread thread = new Thread();
        System.out.println("子线程name=" + thread.getName());
        thread.setName("测试线程");
        System.out.println("子线程name=" + thread.getName());
    }
}
运行结果如下:

可以发现子线程的名称变成了测试线程。
看下setName()方法的源码:
public final synchronized void setName(String name) {
        checkAccess();
        //设置的name不能为null
        if (name == null) {
            throw new NullPointerException("name cannot be null");
        }
        this.name = name;
        //如果线程不是新建状态,就不能再设置线程的NativeName
        if (threadStatus != 0) {
            setNativeName(name);
        }
    }
所以如果线程不是新建状态,线程的NativeName就不会随着setName()方法的参数而改变。
把线程设置成守护线程
public class TestMain {

    public static void main(String[] args) {
        Thread thread = new Thread();
        System.out.println("主线程是守护线程" + Thread.currentThread().isDaemon());
        //通过setDaemon(true)方法把线程设置为守护线程
        thread.setDaemon(true);
        System.out.println("子线程是守护线程:" + thread.isDaemon());
    }
}
运行结果如下:
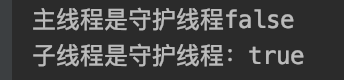
可以发现通过setDaemon(true)方法就可以把线程设置为守护线程了,同时如果线程已经开始运行了,就不能再把线程设置成守护线程了。
示例代码如下:
public class TestMain {

    public static void main(String[] args) {
        Thread thread = new Thread();
        System.out.println("主线程是守护线程" + Thread.currentThread().isDaemon());
        thread.start();
        thread.setDaemon(true);
        System.out.println("子线程是守护线程:" + thread.isDaemon());
    }
}
这样运行会报IllegalThreadStateException异常:

最后补充一句,守护线程的存在不影响JVM的退出。
线程的优先级
示例代码:
public class TestMain {

    public static void main(String[] args) {
        Thread thread = new Thread();
        System.out.println("主线程的优先级:" + Thread.currentThread().getPriority());
        thread.setPriority(6);
        System.out.println("子线程的优先级:" + thread.getPriority());
    }
}
运行结果如下:
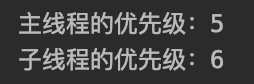
从运行结果可以知道,线程默认的优先级是5,子线程的优先级被设置成了6。
线程的优先级范围是:1~10
   //最小优先级
   public final static int MIN_PRIORITY = 1;

   //默认优先级
   public final static int NORM_PRIORITY = 5;

   //最大有限级
   public final static int MAX_PRIORITY = 10;
优先级了解下就好了,这个属性使用起来也不是很那么的顺人心意,优先级高的也不一定就会比优先级的先运行,还得看操作系统,而Java的特性之一就是平台无关性,所以还是不要通过设置优先级来试图控制线程的执行顺序。
总结
这里把线程的几个重要属性做了个介绍,简单了解下,有个印象就好。
