前言:
本文章教你如何用微信小程序开发简历,使HR和面试官耳目一新~
学习要求:懂得基本的Css语法,Js语法,Flex页面布局,以及拥有一个自己注册好的微信小程序开发者号 。
后面会有如何发布的教程
话不多说直接开始~
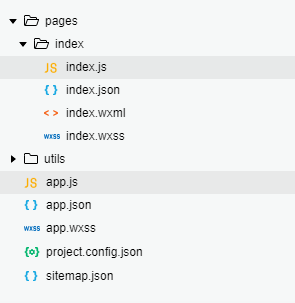
1、打开微信开发者工具 并修改目录结构
2、第二步打开index/index.js文件
在模型层定义两个变量
  data: {
    width:0,
    height:0
  },
3、获取屏幕宽度和高度
在index.js中加入
/**
   * 生命周期函数--监听页面显示
   */
  onShow: function () {
    //获取屏幕宽度
    var width=wx.getSystemInfoSync().windowWidth
    //获取屏幕高度
    var height=wx.getSystemInfoSync().windowHeight
    // 把值赋给模型层变量
    this.setData({
      width:width,
      height:height
    })
  },
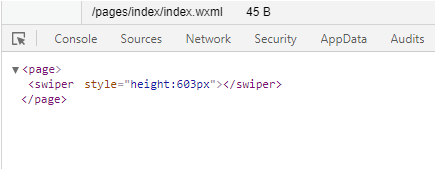
4、打开页面文件index.wxml 定义页面标签
//定义页面标签
<swiper style="height:{{height}}px"></swiper>
定义完成在调试器中可以看到所对应标签
5、创建一个img目录 并放入自己的照片(图片是网图大家可以放入自己的照片!)
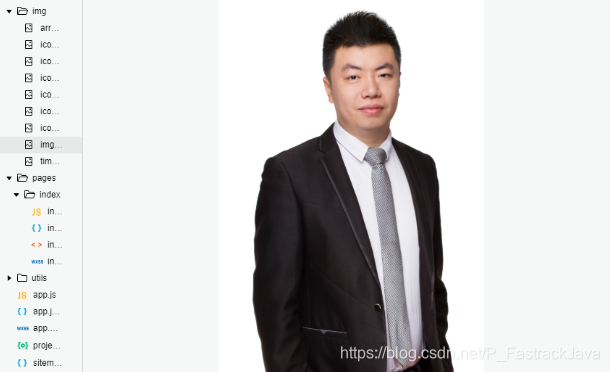
6、在页面标签页面index.wxml中引入自己的照片
<swiper style="height:{{height}}px">
  <swiper-item>
    <image src="../../img/timg.jpg" mode="widthFix" class="timg"></image>
  </swiper-item>
</swiper>
效果图:

7、在标签页面index.wxml中再加入三个块标签,用于存放姓名等属性
<swiper style="height:{{height}}px">
  <swiper-item>
    <image src="../../img/timg.jpg" mode="widthFix" class="timg"></image>
    <view class="cover-info">
      <text class="cover-name">{{name}}</text>
      <text class="cover-spell">{{spell}}</text>
    </view>
  </swiper-item>
</swiper>
8、回到index.js在模型层中加入name和spell属性
  data: {
    width:0,
    height:0,
    // 首先在模型层定义两个变量
    name:"李亚鹏",
    spell:"Li Yapeng"
  }
9、接下来在index.wxss中给name和spell属性设置样式
.cover-info{
  position: absolute;
  left: 50px;
  top: 130px;
}
.cover-name{
  font-size: 30px;
  font-weight: bold;
  display: block;
  letter-spacing: 1px;
}
.cover-spell{
  font-size: 20px;
  letter-spacing: 1px;
}
效果如下,样式的属性可以随意改动,适合就好~
这里使用了偶像的名字,请粉丝不要介意。。。

10、接下来在index.wxml中定义彩色气泡标签
<swiper style="height:{{height}}px">
  <swiper-item>
    <image src="../../img/timg.jpg" mode="widthFix" class="timg"></image>
    <view class="cover-info">
      <text class="cover-name">{{name}}</text>
      <text class="cover-spell">{{spell}}</text>
    </view>
    <view class="big-circle"></view>
    <view class="medium-circle"></view>
    <view class="small-circle"></view>
  </swiper-item>
</swiper>
11、同样给彩色标签气泡定义样式
.big-circle{
  background-color: rgba(0, 165, 34, 0.7);
  width: 260px;
  height: 260px;
  border-radius: 130px;
  position: absolute;
  left: -150px;
  top: 110px;
}
.medium-circle{
  background-color: rgba(0, 165, 34, 0.7);
  width: 160px;
  height: 160px;
  border-radius: 80px;
  position: absolute;
  right: -80px;
  top: 110px;
}
.small-circle{
  background-color: rgba(0, 165, 34, 0.7);
  width: 50px;
  height: 50px;
  border-radius: 25px;
  position: absolute;
  left: -10px;
  bottom: 110px;
}
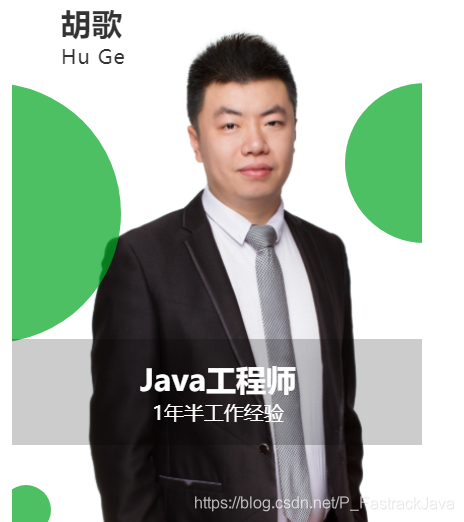
12、再定义两个工作标签
<swiper style="height:{{height}}px">
  <swiper-item>
    <image src="../../img/timg.jpg" mode="widthFix" class="timg"></image>
    <view class="cover-info">
      <text class="cover-name">{{name}}</text>
      <text class="cover-spell">{{spell}}</text>
    </view>
    <view class="big-circle"></view>
    <view class="medium-circle"></view>
    <view class="small-circle"></view>
    <view class="cover-work">
       <text class="cover-job">{{job}}</text>
       <text class="cover-exp">{{exp}}</text>
    </view>
  </swiper-item>
</swiper>
13、同样到模型层创建相应变量
  data: {
    width:0,
    height:0,
    // 首先在模型层定义两个变量
    name:"李亚鹏",
    spell:"Li Yapeng",
    job:"Java工程师",
    exp:"1年半工作经验"
  },
14、接下来还是和之前一样,定义变量的样式
.cover-work{
  position: absolute;
  bottom: 200px;
  text-align: center;
  background-color: rgba(0, 0, 0, 0.2);
  padding: 20px 0;
  width: 100%;
}
.cover-job{
  display: block;
  color: #fff;
  font-size: 30px;
  font-weight: bold;
}
.cover-exp{
  display: block;
  color: #fff;
  font-size: 20px;
}
效果图:
15、实现导航栏文字
    <view class="navigation">
      我的简历
      <image src="../../img/arrow-right.png" class="arrow-right"></image>
    </view>
.navigation{
  position: absolute;
  top: 40px;
  right: 10px;
  font-size: 18px;
}
.arrow-right{
  width: 20px;
  height: 20px;
  vertical-align: -5px;
}
到这里简历封面完成:

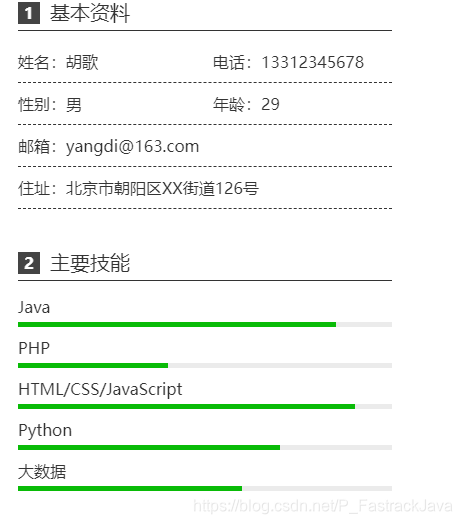
16、设计简历页面的标题栏
先在index.wxml中加入所需标签:
<swiper-item>
    <scroll-view scroll-y="true" style="width:{{width}}px;height:{{height}}px">
      <view class="resume">
        <view class="section">
          <view class="section-info">
            <view class="section-seq">1</view>
            <text class="section-title">基本资料</text>
          </view>
          <view class="column col-2">
            <text class="info">姓名:{{name}}</text>
            <text class="info">电话:{{tel}}</text>
          </view>
          <view class="column col-2">
            <text class="info">性别:{{sex}}</text>
            <text class="info">年龄:{{age}}</text>
          </view>
          <view class="column col-1">
            <text class="info">邮箱:{{email}}</text>
          </view>
          <view class="column col-1">
            <text class="info">住址:{{address}}</text>
          </view>
        </view>
        <view class="section">
          <view class="section-info">
            <view class="section-seq">2</view>
            <text class="section-title">主要技能</text>
          </view>
          <view class="skill" wx:for="{{skill}}" wx:key="item">
            <text class="skill-name">{{item.name}}</text>
            <progress class="progress" percent="{{item.percent}}" stroke-width="5"></progress>
          </view>
        </view>
        <view class="section">
          <view class="section-info">
            <view class="section-seq">3</view>
            <text class="section-title">教育经历</text>
          </view>
          <view class="education" wx:for="{{education}}" wx:key="item">
            <view class="school">
              <image src="../../img/icon_school.png" class="icon-school"></image>
              <text>{{item.school}}</text>
            </view>
            <view class="row">
              <view class="info">
                <image src="../../img/icon_book.png" class="icon-book"></image>
                <text>{{item.major}}</text>
              </view>
              <view class="info">
                <image src="../../img/icon_calendar.png" class="icon-calendar"></image>
                <text>{{item.year}}</text>
              </view>
            </view>
            <rich-text class="desc">{{item.desc}}</rich-text>
          </view>
        </view>
        <text class="page">1/4</text>
      </view>
    </scroll-view>
  </swiper-item>
加入样式代码:
.resume{
  margin: 0 20px;
}
.section{
  padding-bottom: 30px;
}
.section-info{
  display: flex;
  border-bottom: 1px solid #333;
  padding-bottom: 5px;
  margin: 10px 0;
}
.section-seq{
  background-color: #444;
  width: 22px;
  height: 22px;
  color: #fff;
  text-align: center;
  line-height: 22px;
  margin-right: 10px;
  font-weight: bold;
  margin-top: 3px;
}
.section-title{
  font-size: 20px;
}
.column{
  font-size: 16px;
  border-bottom: dashed 1px #333;
  padding: 10px 0;
}
.col-2{
  column-count: 2;
}
.col-1{
  column-count: 1;
}
.info{
  display: block;
}
在模型层加入数据
  data: {
    width:0,
    height:0,
    // 首先在模型层定义两个变量
    name:"胡歌",
    spell:"Hu Ge",
    job:"Java工程师",
    exp:"1年半工作经验",
    tel: "13312345678",
    sex: "男",
    age: 29,
    email: "[email protected]",
    address: "北京市朝阳区XX街道126号",
  },
效果如下:

17、主要技能模块开发
数据模型层引入数组形成进度条的样式
data: {
    width:0,
    height:0,
    // 首先在模型层定义两个变量
    name:"胡歌",
    spell:"Hu Ge",
    job:"Java工程师",
    exp:"1年半工作经验",
    tel: "13312345678",
    sex: "男",
    age: 29,
    email: "[email protected]",
    address: "北京市朝阳区XX街道126号",
    skill: [
      { name: "Java", percent: 85 },
      { name: "PHP", percent: 40 },
      { name: "HTML/CSS/JavaScript", percent: 90 },
      { name: "Python", percent: 70 },
      { name: "大数据", percent: 60 }
    ],
  },
为数据加入样式:
.skill{
  padding: 5px 0;
}
.skill-name{
  font-size: 16px;
  display: block;
  margin-bottom: 5px;
}
.progress{

}
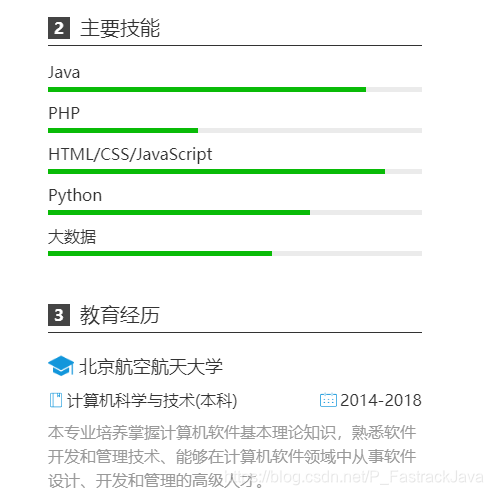
18、教育经历的开发
首先还是在数据模型层加入教育经历数组
 data: {
    width:0,
    height:0,
    // 首先在模型层定义两个变量
    name:"胡歌",
    spell:"Hu Ge",
    job:"Java工程师",
    exp:"1年半工作经验",
    tel: "13312345678",
    sex: "男",
    age: 29,
    email: "[email protected]",
    address: "北京市朝阳区XX街道126号",
    skill: [
      { name: "Java", percent: 85 },
      { name: "PHP", percent: 40 },
      { name: "HTML/CSS/JavaScript", percent: 90 },
      { name: "Python", percent: 70 },
      { name: "大数据", percent: 60 }
    ],
    education: [
      {
        school: "北京航空航天大学",
        major: "计算机科学与技术(本科)",
        year: "2014-2018",
        desc: "本专业培养掌握计算机软件基本理论知识,熟悉软件开发和管理技术、能够在计算机软件领域中从事软件设计、开发和管理的高级人才。"
      }
    ],
  },
同样把相应的数据模型加入样式:
//同样把相应的数据模型加入样式
.education,.work,.project,.introduction{
  border-bottom: dashed 1px #999;
  padding: 10px 0;
}
.education:last-of-type{
  border-bottom:none;
}
.work:last-of-type{
  border-bottom:none;
}
.project:last-of-type{
  border-bottom:none;
}
.introduction:last-of-type{
  border-bottom:none;
}
.school,.company,.project-name{
  font-size: 18px;
  margin-bottom: 10px;
}
.icon-school{
  width: 26px;
  height: 26px;
  vertical-align: -6px;
  margin-right: 5px;
}
.row{
  display: flex;
  justify-content: space-between;
}
.info{
  font-size: 16px;
  margin-bottom: 10px;
}
.icon-book{
  width: 16px;
  height: 16px;
  vertical-align: -2px;
  margin-right: 3px;
}
.icon-calendar{
  width: 17px;
  height: 17px;
  vertical-align: -2px;
  margin-right: 3px;
}
.desc{
  color: #999;
  line-height: 1.5;
}
.page{
  display: block;
  width: 100%;
  text-align: center;
  font-size: 16px;
  padding-bottom: 15px;
}
效果如下图:
到这里是不是已经有些感觉了呢?样式都是什么意思还是需要大家学习些相关基础的知识。
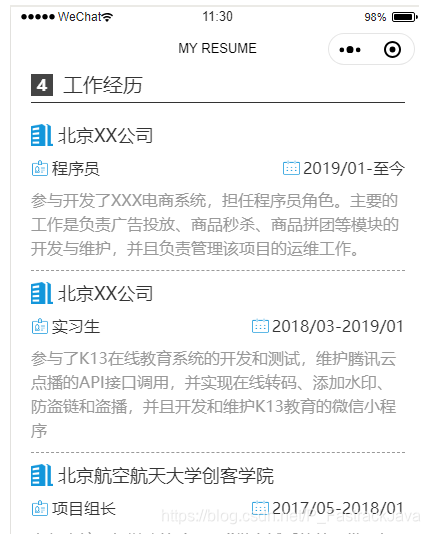
19、工作经历模块的开发
//在数据模型层中加入工作经历数据
  data: {
    width:0,
    height:0,
    // 首先在模型层定义两个变量
    name:"胡歌",
    spell:"Hu Ge",
    job:"Java工程师",
    exp:"1年半工作经验",
    tel: "13312345678",
    sex: "男",
    age: 29,
    email: "[email protected]",
    address: "北京市朝阳区XX街道126号",
    skill: [
      { name: "Java", percent: 85 },
      { name: "PHP", percent: 40 },
      { name: "HTML/CSS/JavaScript", percent: 90 },
      { name: "Python", percent: 70 },
      { name: "大数据", percent: 60 }
    ],
    education: [
      {
        school: "北京航空航天大学",
        major: "计算机科学与技术(本科)",
        year: "2014-2018",
        desc: "本专业培养掌握计算机软件基本理论知识,熟悉软件开发和管理技术、能够在计算机软件领域中从事软件设计、开发和管理的高级人才。"
      }
    ],
    work: [
      {
        company: "北京XX公司",
        job: "程序员",
        year: "2019/01-至今",
        desc: "参与开发了XXX电商系统,担任程序员角色。主要的工作是负责广告投放、商品秒杀、商品拼团等模块的开发与维护,并且负责管理该项目的运维工作。"
      },
      {
        company: "北京XX公司",
        job: "实习生",
        year: "2018/03-2019/01",
        desc: "参与了K13在线教育系统的开发和测试,维护腾讯云点播的API接口调用,并实现在线转码、添加水印、防盗链和盗播,并且开发和维护K13教育的微信小程序"
      },
      {
        company: "北京航空航天大学创客学院",
        job: "项目组长",
        year: "2017/05-2018/01",
        desc: "参与本校创新学院的Litemall微商城系统的开发,担任项目组长职务,参与了商品管理、订单管理、微信支付、购物车等模块的设计与开发。"
      }
    ],
  },
在标签页面加入工作经历的标签:
 <swiper-item>
    <scroll-view scroll-y="true" style="width:{{width}}px;height:{{height}}px">
      <view class="resume">
        <view class="section">
          <view class="section-info">
            <view class="section-seq">4</view>
            <text class="section-title">工作经历</text>
          </view>
          <view class="work" wx:for="{{work}}" wx:key="item">
            <view class="company">
              <image src="../../img/icon_company.png" class="icon-company"></image>
              <text>{{item.company}}</text>
            </view>
            <view class="row">
              <view class="info">
                <image src="../../img/icon_job.png" class="icon-job"></image>
                <text>{{item.job}}</text>
              </view>
              <view class="info">
                <image src="../../img/icon_calendar.png" class="icon-calendar"></image>
                <text>{{item.year}}</text>
              </view>
            </view>
            <rich-text class="desc">{{item.desc}}</rich-text>
          </view>
        </view>
        <text class="page">2/4</text>
      </view>
    </scroll-view>
  </swiper-item>
  <swiper-item>
    <scroll-view scroll-y="true" style="width:{{width}}px;height:{{height}}px">
      <view class="resume">
        <view class="section">
          <view class="section-info">
            <view class="section-seq">5</view>
            <text class="section-title">工作经历</text>
          </view>
          <view class="project" wx:for="{{project}}" wx:key="item">
            <view class="project-name">
              <image src="../../img/icon_computer.png" class="icon-computer"></image>
              <text>{{item.name}}</text>
            </view>
            <rich-text class="desc">{{item.desc}}</rich-text>
          </view>
        </view>
        <text class="page">3/4</text>
      </view>
    </scroll-view>
  </swiper-item>
加入样式代码:
.icon-company{
  width: 22px;
  height: 22px;
  vertical-align: -4px;
  margin-right: 5px;
}
.icon-job{
  width: 18px;
  height: 18px;
  vertical-align: -3px;
  margin-right: 3px;
}
效果如图:
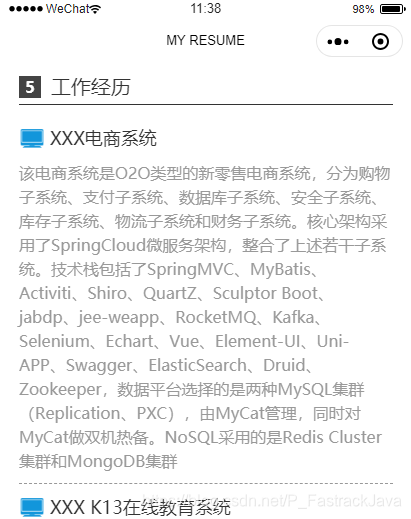
20、项目经历栏目的设计
添加项目经历模型数据:
  project:[
      {
        name:"XXX电商系统",
        desc:"该电商系统是O2O类型的新零售电商系统,分为购物子系统、支付子系统、数据库子系统、安全子系统、库存子系统、物流子系统和财务子系统。核心架构采用了SpringCloud微服务架构,整合了上述若干子系统。技术栈包括了SpringMVC、MyBatis、Activiti、Shiro、QuartZ、Sculptor Boot、jabdp、jee-weapp、RocketMQ、Kafka、Selenium、Echart、Vue、Element-UI、Uni-APP、Swagger、ElasticSearch、Druid、Zookeeper,数据平台选择的是两种MySQL集群(Replication、PXC),由MyCat管理,同时对MyCat做双机热备。NoSQL采用的是Redis Cluster集群和MongoDB集群"
      },
      {
        name:"XXX K13在线教育系统",
        desc:"该系统是针对中小学生提供的K13在线教育系统,采用的是视频点播形式,分为B/S形式和C/S形式。我主要负责的是教学视频管理业务。授课教师向K13平台上传教学视频后,经过专业人员剪辑之后,由K13平台调用腾讯云点播API接口,来实现在线转码和压缩,并且添加水印,最后生成防盗播的URL路径,渲染到HTML网页或者APP上面。该系统使用的技术栈包括SpringBoot、SpringMVC、MyBatis、SpringSecurity、Kafka、QuartZ、Flowable,该系统最终部署在腾讯云平台。"
      },
      {
        name:"北京航空航天大学创客学院",
        desc:"Litemall微商城系统是本校创新学院联合北京XX商超集团联合打造的B2C电商系统,该系统采用前后端分离的架构设计,一共分为5个子系统,分别是微商城前后台系统、商城管理前后台系统、商城核心系统。业务上具备微商城所有的功能,包括微信支付。技术架构上面后台项目选择的SpringBoot、SpringMVC和MyBatis组成的SSM框架,并且融合了Shiro、Swagger、PowerMock、阿里云等技术。前端项目采用了VUE+ElementUI技术架构,小程序采用的微信原生框架。Litemall微商城采用分布式集群部署,发布在DockerSwarm环境中,并且实现高负载、高性能和高可用。"
      }
    ],
    introduction:"本人性格开朗、稳重、有活力,待人热情、真诚;对待工作认真负责,善于沟通、协调有较强的组织能力与团队精神;上进心强、勤于学习能不断提高自身的能力与综合素质。在未来的工作中,我将以充沛的精力,刻苦钻研的精神来努力工作,稳定地提高自己的工作能力,与企业同步发展。"
  },
加入对应样式:
.icon-computer{
  width: 26px;
  height: 26px;
  vertical-align: -6px;
  margin-right: 5px;
}
21、自我评价模块开发
在标签index.wxml页面加入自我评价相应的标签模块:
<swiper style="height:{{height}}px">
  <swiper-item>
    <image src="../../img/imgs.png" mode="widthFix" class="timg"></image>
    <view class="cover-info">
      <text class="cover-name">{{name}}</text>
      <text class="cover-spell">{{spell}}</text>
    </view>
    <view class="big-circle"></view>
    <view class="medium-circle"></view>
    <view class="small-circle"></view>
    <view class="cover-work">
       <text class="cover-job">{{job}}</text>
       <text class="cover-exp">{{exp}}</text>
    </view>
    <view class="navigation">
      我的简历
      <image src="../../img/arrow-right.png" class="arrow-right"></image>
    </view>
  </swiper-item>
  <swiper-item>
    <scroll-view scroll-y="true" style="width:{{width}}px;height:{{height}}px">
      <view class="resume">
        <view class="section">
          <view class="section-info">
            <view class="section-seq">1</view>
            <text class="section-title">基本资料</text>
          </view>
          <view class="column col-2">
            <text class="info">姓名:{{name}}</text>
            <text class="info">电话:{{tel}}</text>
          </view>
          <view class="column col-2">
            <text class="info">性别:{{sex}}</text>
            <text class="info">年龄:{{age}}</text>
          </view>
          <view class="column col-1">
            <text class="info">邮箱:{{email}}</text>
          </view>
          <view class="column col-1">
            <text class="info">住址:{{address}}</text>
          </view>
        </view>
        <view class="section">
          <view class="section-info">
            <view class="section-seq">2</view>
            <text class="section-title">主要技能</text>
          </view>
          <view class="skill" wx:for="{{skill}}" wx:key="item">
            <text class="skill-name">{{item.name}}</text>
            <progress class="progress" percent="{{item.percent}}" stroke-width="5"></progress>
          </view>
        </view>
        <view class="section">
          <view class="section-info">
            <view class="section-seq">3</view>
            <text class="section-title">教育经历</text>
          </view>
          <view class="education" wx:for="{{education}}" wx:key="item">
            <view class="school">
              <image src="../../img/icon_school.png" class="icon-school"></image>
              <text>{{item.school}}</text>
            </view>
            <view class="row">
              <view class="info">
                <image src="../../img/icon_book.png" class="icon-book"></image>
                <text>{{item.major}}</text>
              </view>
              <view class="info">
                <image src="../../img/icon_calendar.png" class="icon-calendar"></image>
                <text>{{item.year}}</text>
              </view>
            </view>
            <rich-text class="desc">{{item.desc}}</rich-text>
          </view>
        </view>
        <text class="page">1/4</text>
      </view>
    </scroll-view>
  </swiper-item>
    <swiper-item>
    <scroll-view scroll-y="true" style="width:{{width}}px;height:{{height}}px">
      <view class="resume">
        <view class="section">
          <view class="section-info">
            <view class="section-seq">4</view>
            <text class="section-title">工作经历</text>
          </view>
          <view class="work" wx:for="{{work}}" wx:key="item">
            <view class="company">
              <image src="../../img/icon_company.png" class="icon-company"></image>
              <text>{{item.company}}</text>
            </view>
            <view class="row">
              <view class="info">
                <image src="../../img/icon_job.png" class="icon-job"></image>
                <text>{{item.job}}</text>
              </view>
              <view class="info">
                <image src="../../img/icon_calendar.png" class="icon-calendar"></image>
                <text>{{item.year}}</text>
              </view>
            </view>
            <rich-text class="desc">{{item.desc}}</rich-text>
          </view>
        </view>
        <text class="page">2/4</text>
      </view>
    </scroll-view>
  </swiper-item>
  <swiper-item>
    <scroll-view scroll-y="true" style="width:{{width}}px;height:{{height}}px">
      <view class="resume">
        <view class="section">
          <view class="section-info">
            <view class="section-seq">5</view>
            <text class="section-title">工作经历</text>
          </view>
          <view class="project" wx:for="{{project}}" wx:key="item">
            <view class="project-name">
              <image src="../../img/icon_computer.png" class="icon-computer"></image>
              <text>{{item.name}}</text>
            </view>
            <rich-text class="desc">{{item.desc}}</rich-text>
          </view>
        </view>
        <text class="page">3/4</text>
      </view>
    </scroll-view>
  </swiper-item>
    <swiper-item>
    <scroll-view scroll-y="true" style="width:{{width}}px;height:{{height}}px">
      <view class="resume">
        <view class="section">
          <view class="section-info">
            <view class="section-seq">6</view>
            <text class="section-title">自我评价</text>
          </view>
          <view class="introduction">
            <rich-text class="desc">{{introduction}}</rich-text>
          </view>
        </view>
        <text class="page">4/4</text>
      </view>
    </scroll-view>
  </swiper-item>
</swiper>
效果图:

到这里就已经完成了,是不是很有成就感呢,接下来学习如何发布吧!!
22、小程序上线发布教程
点击上传–>>确定
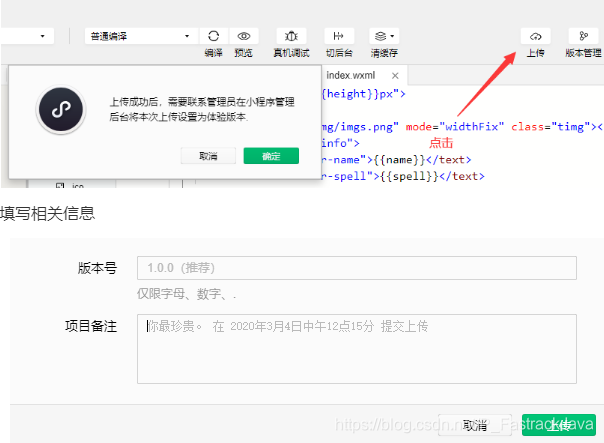
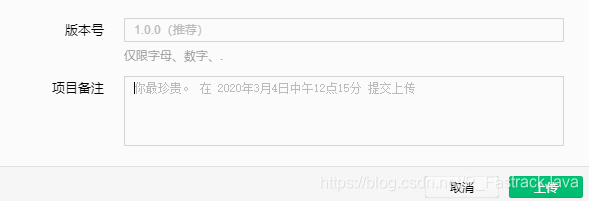
填写相关信息:
成功后打开微信开发者平台:
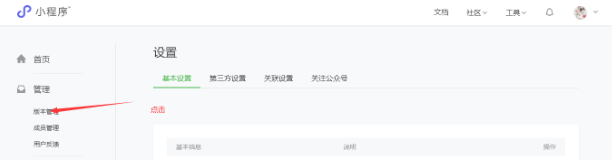
点击版本管理 进入后找到开发版本 填写相关信息就可以了~~~~
以上就是一整套的微信小程序开发和发布教程~感谢阅读!
以往不变附上10道小程序面试题~10道小程序面试题了解一下
注:创作不易,如有需求可以给我发邮件联系我:[email protected]
