准备工作:
1.阿里云 ubuntu 系统的服务器
2.安装好Xshell软件,如果不会请参照我之前的博客
3.以及自己已经写好的flask的web工程
废话少说,进入正题:
1.首先用Xshell软件连接我们的云服务器

2.更新软件源
键入命令 sudo apt update

键入命令 sudo apt upgrade

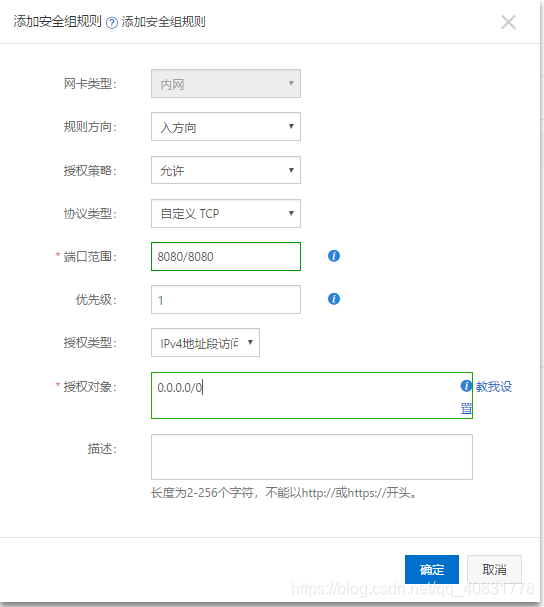
3. 设置安全组
4. 部署 Ngin
键入命令 sudo apt-get install software-properties-common

键入命令 sudo add-apt-repository ppa:nginx/stable

键入命令 sudo apt-get update

键入sudo apt-get install nginx

键入命令 nginx -v 查看 nginx的版本

5.运行nginx
键入 sudo /etc/init.d/nginx start

在浏览器输入你的公网ip能看到 下图页面

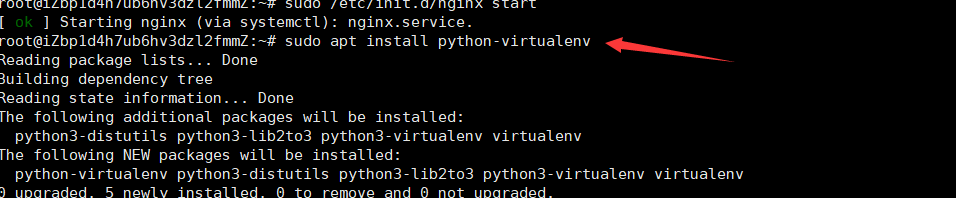
6.安装python虚拟环境
键入 sudo apt install python-virtualenv
键入 sudo easy_install virtualenvwrapper

创建一个目录用来存放虚拟环境 键入命令 cd .. 在键入 sudo mkdir /flask/root 在键入 cd /flask/root

创建python虚拟环境 键入virtualenv -p /usr/bin/python3 py3env

激活虚拟环境 键入source py3env/bin/activate
![]()
安装flask 键入pip install flask

在flask所在路径创建一个hello.py的文件(虚拟环境)
键入 vi hello.py
在hello.py 文件中输入一下代码
from flask import Flask
app = Flask(__name__)

@app.route("/")
def hello():
    return "Hello World!"

if __name__ == "__main__":
    app.run(host='0.0.0.0', port=8080)
书写完成之后,我们按ESC键,键入:wq 退出并保存

键入命令 python hello.py ,在虚拟环境中 执行flask应用

重新打开一个 xshell窗口, 连接服务器之后 输入 curl -i http://0.0.0.0:8080/ ,你可以看弄到hello.py,退出就行
7.修改nginx配置
为了方便管理,我们把配置文件还是放在/flask/root目录下,然后在/etc/nginx/conf.d下做个链接。
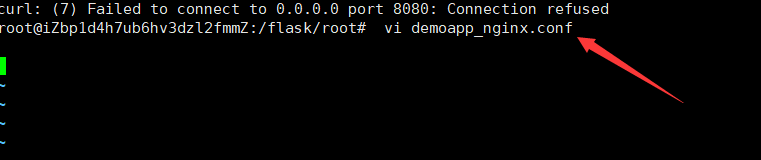
退出虚拟环境 创建一个 我们应用使用的新配置文件:/flask/root/demoapp_nginx.conf
键入 vi demoapp_nginx.conf
将下面这段代码编写进去
server {
listen 80;
server_name 公网地址;
charset utf-8;
client_max_body_size 75M;
location / {
proxy_set_header X-Fforwarded-For $proxy_add_x_forwarded_for;
proxy_set_header Host $host;
proxy_set_header Host $host; proxy_pass http://127.0.0.1:8080;
}
}

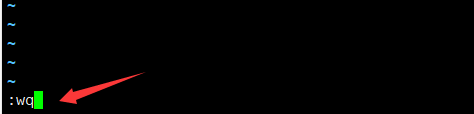
按esc 键入:wq 保存并退出
将刚建立的配置文件使用符号链接到Nginx配置文件文件夹中,
键入命令 sudo ln -s /flask/root/demoapp_nginx.conf /etc/nginx/conf.d

重启Nginx:
键入sudo /etc/init.d/nginx start

8.在虚拟环境中安装gunicorn
进入虚拟环境
键入 pip install gunicorn

键入/flask/root//py3env/bin/gunicorn -w2 hello:app -b 0.0.0.0:8080

按ctrl+c退出
9.使用supervisor守护gunicorn
同样在虚拟环境中 键入 sudo apt-get install supervisor

键入 echo_supervisord_conf > /etc/supervisor/supervisord.conf
![]()
10.修改/etc/supervisor/supervisord.conf
修改 supervisord.conf 键入 vim /etc/supervisor/supervisord.conf

在文件结尾添加
[include]
files = /flask/root/demoapp_supervisor.conf
按键盘字母 i 插入 之后退出并保存

键入 vi /flask/root/demoapp_supervisor.conf
将下面代码输入进去

[program:demoapp]
command=/flask/root/py3env/bin/gunicorn -w 2 hello:app -b 0.0.0.0:8080
directory=/flask/root/
autostart=true
user=root
startsecs=10
startretries=10
stdout_logfile=/flask/log/supervisor/supervisor.log
stdout_logfile_maxbytes=50MB
stderr_logfile=/flask/log/supervisor/supervisor_err.log
stderr_logfile_maxbytes=50MB

编辑完成之后退出并保存
新建supervisor.log文件 ,就新建就行,什么都不用写。 路径看好

新建 supervisor_err.log 文件同上
11.杀掉supervisord,重新启动:
键入pgrep -ax supervisord
键入 kill 28501

键入 supervisord -c /etc/supervisor/supervisord.conf

键入
supervisorctl -c /etc/supervisor/supervisord.conf status demoapp RUNNING pid 1153, uptime 0:00:11
重新启动

12.浏览器搜索地址 你的公网:8080 就会显示 hello world

假如我的 博客有幸帮到了您,您帮忙 麻点个赞,又不花钱,想一同学习的朋友可以关注我一下。
