上篇文章介绍了Matrix基本原理方法,这篇文章介绍下Matrix的其他比较常用的方法。
1、mapPoints:计算一组点基于当前Matrix变换后的位置。
其有三个重载方法:
void mapPoints (float[] pts)

void mapPoints (float[] dst, float[] src)

void mapPoints (float[] dst, int dstIndex,float[] src, int srcIndex, int pointCount)
<1> void mapPoints(float [ ] pts) -- 计算结果依然放置pts中,示例如下:
//初始数据为三个点 (0, 0) (80, 100) (400, 300)
float[] pts = new float[] {0, 0, 80, 100, 400, 300};
//构造一个Matrix,并使其x轴坐标缩放0.5
Matrix mMatrix = new Matrix();
mMatrix.setScale(0.5f, 1f);
//输出原有的pts值
Logger.d("before:" + Arrays.toString(pts));
//调用mapPoints方法计算,即将Matrix的值映射至pts中
mMatrix.mapPoints(pts);
//属于计算后的pts值
Logger.d("after:" + Arrays.toString(pts));
<2> void mapPoints(float[ ] dst, float[ ] src) -- 用于存放原始数据与目标数据:
/**
* 原始数据需要保留,用此方法
*/
float[] src = new float[] {0, 0, 80, 100, 400, 300};
float[] dst = new float[] {0, 0, 0, 0, 0, 0};
mMatrix.setScale(0.5f, 1f);
Logger.d("before:\n" + "src:" + Arrays.toString(src) + "  dst:" + Arrays.toString(dst));
mMatrix.mapPoints(dst, src);
Logger.d("after:\n" + "src:" + Arrays.toString(src) + "  dst:" + Arrays.toString(dst));
<3> void mapPoints (float[] dst, int dstIndex,float[] src, int srcIndex, int pointCount) -- 可以指定只计算一部分数值:
/**
* 将第二个第三个计算后存储在dst最初始位置
*/
float[] src = new float[] {0, 0, 80, 100, 400, 300};
float[] dst = new float[6];
mMatrix.setScale(0.5f,1f);
Logger.d("before:\n" + "src:" + Arrays.toString(src) + "  dst:" + Arrays.toString(dst));
mMatrix.mapPoints(dst,0,src,2,2);
Logger.d("before:\n" + "src:" + Arrays.toString(src) + "  dst:" + Arrays.toString(dst));

2、mapRadius: 测量半径(由于圆可能会因为画布变换变成椭圆,所以此处测量的是平均半径)。
float mapRadius(float radius) float radius = 100;
float result;
mMatrix.setScale(0.5f, 1f);
Logger.d("before:mapRadius " + radius);
result = mMatrix.mapRadius(radius);
Logger.d("after:mapRadius " + result);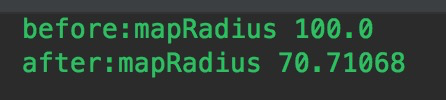
3、mapRect: 测量矩阵变换后位置,将结果放置rect中:
其有两个重载方法(第二种与mapPoint同参数方法类似,故不做过多介绍):
boolean mapRect (RectF rect)
boolean mapRect (RectF dst, RectF src)
/**
* 返回值是boolean值,表示矩阵经过变换后是否依然为矩阵(这里使用了斜切,故返回值是false)
*/
RectF rectF = new RectF(400, 400, 1000, 800);
mMatrix.setScale(0.5f, 1f);
mMatrix.postSkew(1, 0);
Logger.d("before:mapRect:" + rectF.toString());
boolean result = mMatrix.mapRect(rectF);
Logger.d("after:mapRect:" + rectF.toString());
Logger.d("result:" + result);
4、mapVectors:测量向量,与mapPoints的构造方法及使用基本相同,唯一的区别是测量向量不受位移的影响。
float[] src = new float[]{1000, 800};
float[] dst = new float[2];

// 构造一个matrix
Matrix matrix = new Matrix();
matrix.setScale(0.5f, 1f);
matrix.postTranslate(100,100);

// 计算向量, 不受位移影响
matrix.mapVectors(dst, src);
Log.i(TAG, "mapVectors: "+Arrays.toString(dst));

// 计算点
matrix.mapPoints(dst, src);
Log.i(TAG, "mapPoints: "+Arrays.toString(dst));
5、setPolyToPoly:根据数组点参数将矩形变换成其他多边形。
/**
* src:原始数组,存储内容为一组点(包含x,y坐标)
* srcIndex:原始数组开始位置
* dst:目标数组,存储内容为一组点(包含x,y坐标)
* dstIndex:目标数组开始位置
* pointCount:测控点的数量,取值范围(0~4)
*/
boolean setPolyToPoly(float[] src, int srcIndex,
                      float[] dst, int dstIndex,
                      int pointCount)
下面通过一个具体的实例View,来看一下矩阵的setPolyToPoly方法产生的效果:
public class MatrixSetPolyToPolyView extends View {

    private Matrix mMatrix;
    private Bitmap mBitmap;
    private Paint mPaint;

    public MatrixSetPolyToPolyView(Context context, @Nullable AttributeSet attrs) {
        super(context, attrs);

        initBitmapAndMatrix();
    }

    private void initBitmapAndMatrix() {
        mPaint = new Paint();
        mPaint.setColor(Color.BLUE);
        mMatrix = new Matrix();
        mBitmap = BitmapFactory.decodeResource(getResources(), R.drawable.avatar);

        float[] src = new float[] {0, 0, mBitmap.getWidth(), 0, mBitmap.getWidth(), mBitmap.getHeight(), 0,
            mBitmap.getHeight()};
        float[] dst = new float[] {0, 0, mBitmap.getWidth(), 100, mBitmap.getWidth(), mBitmap.getHeight() - 100, 0,
            mBitmap.getHeight()};
        //多边形变换
        mMatrix.setPolyToPoly(src, 0, dst, 0, 4);
        mMatrix.postTranslate(0, 200);

    }

    @Override
    protected void onDraw(Canvas conDrawanvas) {
        super.onDraw(conDrawanvas);
        conDrawanvas.drawBitmap(mBitmap, mMatrix, mPaint);
    }
}
实例效果如下:

6、setRectToRect:将源矩阵的内容添加到目标矩阵中。
/**
* src:源区域
* dst:目标区域
* stf:缩放适配模式
*/
boolean setRectToRect(RectF src, RectF dst, ScaleToFit stf)
其中stf参数类似于ImageView的ScaleType属性,但只有四个参数可供选择:
| 模式 | 摘要 |
|---|---|
| CENTER | 居中,对src等比例缩放,将其居中放置在dst中。 |
| START | 顶部,对src等比例缩放,将其放置在dst的左上角。 |
| END | 底部,对src等比例缩放,将其放置在dst的右下角。 |
| FILL | 充满,拉伸src的宽和高,使其完全填充满dst。 |
我们使用CENTE来举例说明,初始代码如下:
public class MatrixSetRectToRectView extends View {

    private Matrix mMatrix;
    private Bitmap mBitmap;
    private Paint mPaint;

    public MatrixSetRectToRectView(Context context, @Nullable AttributeSet attrs) {
        super(context, attrs);
        initBitmaAndMatrix();
    }

    private void initBitmaAndMatrix() {
        mMatrix = new Matrix();
        mBitmap = BitmapFactory.decodeResource(getResources(), R.drawable.avatar);
        mPaint = new Paint();
    }


    @Override
    protected void onDraw(Canvas conDrawanvas) {
        super.onDraw(conDrawanvas);
        conDrawanvas.drawBitmap(mBitmap, mMatrix, mPaint);
    }
}
代码很简单,我们使用一个自定义View来展示一张图片,效果如下:

下面我们使用setRectToRect方法,stf属性选择CENTER,代码如下:
public class MatrixSetRectToRectView extends View {

    private Matrix mMatrix;
    private Bitmap mBitmap;
    private Paint mPaint;
    private int mViewWidth, mViewHeight;

    public MatrixSetRectToRectView(Context context, @Nullable AttributeSet attrs) {
        super(context, attrs);
        Logger.d("MatrixSetRectToRectView--执行顺序1");
        initBitmaAndMatrix();
    }

    private void initBitmaAndMatrix() {
        mMatrix = new Matrix();
        mBitmap = BitmapFactory.decodeResource(getResources(), R.drawable.avatar);
        mPaint = new Paint();
    }

    @Override
    protected void onSizeChanged(int w, int h, int oldw, int oldh) {
        super.onSizeChanged(w, h, oldw, oldh);
        Logger.d("onSizeChanged--执行顺序2");
        mViewWidth = w;
        mViewHeight = h;
    }

    @Override
    protected void onDraw(Canvas conDrawanvas) {
        super.onDraw(conDrawanvas);
        Logger.d("onDraw--执行顺序3");

        RectF src = new RectF(0, 0, mBitmap.getWidth(), mBitmap.getHeight());
        RectF dst = new RectF(0, 0, mViewWidth, mViewHeight);
        //使用矩阵的setRectToRect方法,stf属性选用CENTER(即等比居中显示)
        mMatrix.setRectToRect(src, dst, ScaleToFit.CENTER);
        //使用画布根据目标区域绘制mBitmap
        conDrawanvas.drawBitmap(mBitmap, mMatrix, mPaint);
    }
}
这里需要注意的一点是View的关键生命周期为(可自行验证):
构造View() –> onMeasure() –> onSizeChanged() –> onLayout() –> onDraw()。
故代码中三个方法执行顺序如下:
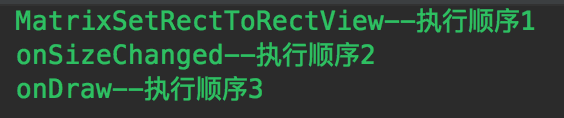
这样我们在绘制(onDraw)的时候已经获取到ImageView的mViewWidth和mViewHeight,而其均已设置为屏幕的宽高,故修改后的图片展示效果如下:

可以看到,原有的图片在源区域的基础上已经等比缩放居中至目标区域。
7、isIdentity:判断当前矩阵是否是单位矩阵。
boolean isIdentity() 8、isAffine:判断当前矩阵是否是仿射矩阵(需要API 21及以上)。
boolean isAffine()较少使用,了解下仿射矩阵的概念即可:仿射变换其实就是二维坐标到二维坐标的线性变换,保持二维图形的“平直性”(即变换后直线还是直线不会打弯,圆弧还是圆弧)和“平行性”(指保持二维图形间的相对位置关系不变,平行线还是平行线,而直线上点的位置顺序不变),可以通过一系列的原子变换的复合来实现,原子变换就包括:平移、缩放、翻转、旋转和错切。这里除了透视可以改变z轴以外,其他的变换基本都是上述的原子变换。所以,只要最后一行是0,0,1则是仿射矩阵。
9、rectStaysRect:判断矩形经过变换后是否仍为矩形。
boolean rectStaysRect()当矩阵是单位矩阵,或者只进行平移,缩放,以及旋转90度的倍数的时候,返回true。
10、reset:重置矩阵为单位矩阵。
void reset() 本篇基本讲解了Matrix的一些常用方法,在做图形变换的时候,某些方法还是会经常用到的,建议先阅读下上篇Matrix基本原理方法,理解可能会更深刻一些。
