文章目录
使用/refresh 端点手动刷新配置
很多场景下,需要在运行期间动态调整配置。如果配置发生了修改,微服务要如何实现配置的刷新呢?
之前我们在git上更改了配置文件,还需要重启服务才能够读取到最新的配置。
如果要想实现配置刷新,须对之前config client端的代码进行一点改造。
下面我们开始改造之前的cloud-service-member和cloud-service-order服务。
- 为项目添加spring-boot-starter-actuator的依赖,该依赖包含了/refresh端点,用于配置的刷新。
<dependency>
    <groupId>org.springframework.boot</groupId>
    <artifactId>spring-boot-starter-actuator</artifactId>
</dependency>
- 在Controller 上添加注解@RefreshScope。添加@RefreshScope的类会在配置更改时得到特殊的处理。
package com.cc.cloud.member.controller;

import com.cc.cloud.member.feign.OrderFeign;
import com.google.common.collect.Lists;
import org.springframework.beans.factory.annotation.Autowired;
import org.springframework.beans.factory.annotation.Value;
import org.springframework.cloud.context.config.annotation.RefreshScope;
import org.springframework.http.HttpStatus;
import org.springframework.web.bind.annotation.GetMapping;
import org.springframework.web.bind.annotation.RequestMapping;
import org.springframework.web.bind.annotation.ResponseStatus;
import org.springframework.web.bind.annotation.RestController;

import java.util.List;

@RefreshScope
@RestController
@RequestMapping("/member")
public class MemberController {

    private OrderFeign orderFeign;

    @Value("${cloud.service.member}")
    private String memberConfig;

    @Autowired
    public void setOrderFeign(OrderFeign orderFeign) {
        this.orderFeign = orderFeign;
    }

    @RequestMapping("/orders")
    @ResponseStatus(HttpStatus.OK)
    public List<String> getOrderList() {
        return orderFeign.getAllOrderList();
    }

    @RequestMapping("/members")
    @ResponseStatus(HttpStatus.OK)
    public List<String> getMemberList() {
        List<String> memberList = Lists.newArrayList();
        memberList.add("member 1");
        memberList.add("member 2");
        memberList.add("member 3");
        return memberList;
    }


    @GetMapping("/config")
    @ResponseStatus(HttpStatus.OK)
    public String getMemberConfig(){
        return memberConfig;
    }
}
package com.cc.cloud.order.controller;

import com.cc.cloud.order.feign.MemberFeign;
import com.google.common.collect.Lists;
import org.slf4j.Logger;
import org.slf4j.LoggerFactory;
import org.springframework.beans.factory.annotation.Autowired;
import org.springframework.beans.factory.annotation.Value;
import org.springframework.cloud.context.config.annotation.RefreshScope;
import org.springframework.http.HttpStatus;
import org.springframework.web.bind.annotation.GetMapping;
import org.springframework.web.bind.annotation.RequestMapping;
import org.springframework.web.bind.annotation.ResponseStatus;
import org.springframework.web.bind.annotation.RestController;

import java.util.List;

@RefreshScope
@RestController
@RequestMapping("/order")
public class OrderController {

    private final Logger logger = LoggerFactory.getLogger(OrderController.class);

    private MemberFeign memberFeign;

    @Value("${cloud.service.order}")
    private String orderConfig;

    @Autowired
    public void setMemberFeign(MemberFeign memberFeign) {
        this.memberFeign = memberFeign;
    }

    @RequestMapping("/members")
    @ResponseStatus(HttpStatus.OK)
    public List<String> getMemberList() {
        return memberFeign.getAllMemberList();
    }


    @GetMapping("/orders")
    @ResponseStatus(HttpStatus.OK)
    public List<String> getOrders() {
        List<String> orders = Lists.newArrayList();
        orders.add("order 1");
        orders.add("order 2");
        return orders;
    }

    @GetMapping("/config")
    @ResponseStatus(HttpStatus.OK)
    public String getOrderConfig(){
        return orderConfig;
    }
}
- 并且在cloud-service-member中添加如下配置:
cloud:
  service:
    member: 'Hello Member!'
在cloud-service-order中添加如下配置:
cloud:
  service:
    order: 'Hello Order!'
-
然后启动cloud-eureka,cloud-zuul,cloud-service-member,cloud-service-order,cloud-config-server服务。
-
然后访问 http://localhost:8769/api/cloud-member/member/config

然后访问 http://localhost:8769/api/cloud-order/order/config

- 然后我们分别修改cloud-service-member和cloud-service-order的配置.
cloud:
  service:
    member: 'Hello Member!!!'
cloud:
  service:
    order: 'Hello Order!!!'
- 然后我们通过发送POST请求到
/refresh端点去刷新配置,如下。
$ curl -X POST http://localhost:8762/actuator/refresh
["config.client.version","cloud.service.member"]
$ curl -X POST http://localhost:8765/actuator/refresh
["config.client.version","cloud.service.order"]
- 然后重新访问 http://localhost:8769/api/cloud-member/member/config
可以看到多了两个感叹号。

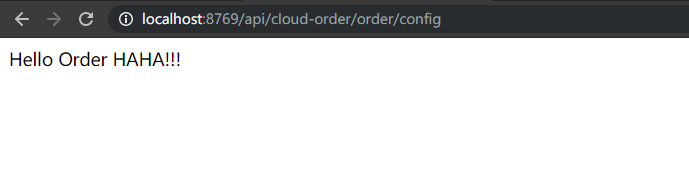
然后重新访问 http://localhost:8769/api/cloud-order/order/config

使用Spring Cloud Bus自动刷新配置
前面我们使用/refresh端点手动刷新配置,但如果所有微服务节点的配置都需要手动去刷新,工作量可想而知。不仅如此,随着系统的不断扩张,会越来越难以维护。因此,实现配置的自动刷新是很有必要的,下面我们将使用如何Spring Cloud Bus实现配置的自动刷新。
Spring Cloud Bus简介
Spring Cloud Bus使用轻量级的消息代理(例如RabbitMQ、Kafka等)连接分布式系统的节点,这样就可以广播传播状态的更改(例如配置的更新)或者其他的管理指令。可将Spring Cloud Bus想象成一个分布式的Spring Boot Actuator。使用Spring Cloud Bus后的架构如下图所示。

微服务A的所有实例都通过消息总线连接到了一起,每个实例都会订阅配置更新事件。当其中一个微服务节点的/bus/refresh端点(当前版本已经修改成/bus-refresh端点)被请求时,该实例就会向消息总线发送一个配置更新事件,其他实例获得该事件后也会更新配置。
Docker安装RabbitMQ
下面我们需要使用RbbitMQ作为消息总线。所以我们先介绍如何在Docker中安装RabbitMQ。
- 获取带有管理页面的RabbitMQ镜像
$ docker pull rabbitmq:management
management: Pulling from library/rabbitmq
5667fdb72017: Already exists
d83811f270d5: Already exists
ee671aafb583: Already exists
7fc152dfb3a6: Already exists
511da93b5ba5: Already exists
34ed6c3ce222: Already exists
efe6df6279a7: Already exists
3ca75f81239b: Already exists
ded8ef942d92: Already exists
c319281f11ad: Already exists
b8109dc0ceda: Pull complete
1596b64dcd88: Pull complete
Digest: sha256:4cab9fe2eed84840e60ecb99b0a902883ef6d26f4dab2439d1119b6bdab4f2c8
Status: Downloaded newer image for rabbitmq:management
docker.io/library/rabbitmq:management
下载速度慢的话可以换成国内的镜像源(比如阿里云的镜像仓库),我这里使用的是Docker ToolBox,可以参考下面的文章:
- 建立容器运行镜像并建立好端口号映射
docker run -d --name rabbitmq -p 15672:15672 -p 5672:5672 rabbitmq:management
然后我们访问 http://192.168.99.100:15672 (IP是docker machine的IP),然后用户名和密码都是guest

实现自动刷新
我们需要对我们的config client端进行改造,也就是对我们之前的cloud-service-member和cloud-service-order进行改造。
- 首先加入spring cloud bus的pom依赖。
<dependency>
    <groupId>org.springframework.cloud</groupId>
    <artifactId>spring-cloud-starter-bus-amqp</artifactId>
</dependency>
- 我们需要把RabbitMQ的配置加入到application.yml中。
spring:
  rabbitmq:
    host: 192.168.99.100
    port: 5672
    username: guest
    password: guest
当然我们需要开启bus-refresh这个端点,我们这里直接暴露出全部的端点。
management:
  endpoints:
    web:
      exposure:
        include: "*"
ps:需要刷新配置的地方需要打上@RefreshScope注解
这样我们的客户端就改造完成了。
- 启动cloud-eureka,cloud-zuul,cloud-config-server,cloud-service-member,cloud-service-order。
我们访问 http://localhost:8769/api/cloud-member/member/config

访问 http://localhost:8769/api/cloud-order/order/config

加下来我们修改一下配置,之后push到git 仓库上。
然后通过如下URL刷新配置:
$ curl -X POST http://localhost:8762/actuator/bus-refresh
注意下这里是访问/actuator/bus-refresh而不是/bus/refresh
重新访问 http://localhost:8769/api/cloud-member/member/config

重新访问 http://localhost:8769/api/cloud-order/order/config
说明两个客户端均已经拿到了最新配置文件的信息。
架构改进
在前面的示例中,通过请求某个微服务/bus/refresh端点(当前版本已经修改成/bus-refresh端点)的方式来实现配置刷新,但这种方式并不优雅。原因如下:
- 破坏了微服务的职责单一原则。业务微服务只应关注自身业务,不应承担配置刷新的职责。
- 破坏了微服务各节点的对等性。
- 有一定的局限性。例如,微服务在迁移时,网络地址常常会发生变化。此时如果想自动刷新配置,就不得不修改WebHook的配置。
将Config Server也加入到消息总线中,并使用Config Server的/bus/refresh端点来实现配置的刷新。这样,各个微服务只需要关注自身的业务,而不再承担配置刷新的职责。
新的架构如下:

我们需要在config server端的代码做一些改动,来支持bus/refresh
- 我们需要把
spring-cloud-starter-bus-amqp依赖加进来,增加对消息总线的支持
<dependency>
    <groupId>org.springframework.cloud</groupId>
    <artifactId>spring-cloud-starter-bus-amqp</artifactId>
</dependency>
- 我们需要加入RabbitMQ的配置到config server的application.yml文件。
spring:
  rabbitmq:
    host: 192.168.99.100
    port: 5672
    username: guest
    password: guest
还有需要把bus-refresh的端点暴露出来。
management:
  endpoints:
    web:
      exposure:
        include: "*"
Spring Cloud Bus会向外提供一个http接口,即/actuator/bus-refresh。我们可以将这个接口配置到远程的git上,当git上的文件内容发生变动时,就会自动调用/bus-refresh接口。Bus就会通知config-server,config-server会发布更新消息到消息队列中,其他服务订阅到该消息就会信息刷新,从而实现整个微服务进行自动刷新。
Spring Cloud Config 使用安全认证后无法刷新配置端点
现在我们直接启动cloud-eureka还有cloud-config-server。然后我们通过postman工具或者其他Rest API工具测试一下。
我们通过POST请求 http://localhost:8090/actuator/bus-refresh
结果提示我们需要认证,这里是一个 HTTP Basic认证。

因为我们为config server加入了Spring Security的依赖,Spring Boot 会默认启用Basic认证拦截所有浏览器请求,你可以设置为spring.security.basic.enabled 为false来禁用。
但是Spring Boot 2以后,已经把spring.security.basic.enabled给去掉了,
所以我们推荐我们去创建一个自己的WebSecurityConfig类去实现WebSecurityConfigAdapter。然后在里面配置权限过滤的逻辑。
默认的配置如下(默认是开启的):
/**
* http.authorizeRequests().anyRequest().authenticated().and().formLogin().and().httpBasic();
**/
 protected void configure(HttpSecurity http) throws Exception {
        this.logger.debug("Using default configure(HttpSecurity). If subclassed this will potentially override subclass configure(HttpSecurity).");
        ((HttpSecurity)((HttpSecurity)((AuthorizedUrl)http.authorizeRequests().anyRequest()).authenticated().and()).formLogin().and()).httpBasic();
    }
通过调用authorizeRequests()和 anyRequest().authenticated()就会要求所有进入应用的
HTTP请求都要进行认证。Spring Security支持基于表单的登录以及HTTP Basic方式的认证。formLogin()方式会生成默认登录页面。httpBasic()则是Http Basic 验证,也就是上图我们请求的时候会弹出让你输入用户用和密码,你也可以通过http://${user}:${password}@${host}:${port}/xxx/这种方式登录。还有就是可以通过Rest API 工具,在请求中加入Authorization Headers 进行请求。一会下面会演示这两种方式。
然后我们通过Rest API工具带Authorization Header进行请求,发现并没有起效果,依然是弹出让我们登录。

执行如下命令,发现执行完毕之后也是没有刷新配置。
curl -X POST http://admin:admin@localhost:8090/actuator/bus-refresh
这是为什么?默认的配置上已经开启了HTTP Basic认证了,为什么我们通过这种方式还是认证不了?原因就是Spring Security 为了防止跨站提交攻击提供了CSRF保护功能,该功能在Spring Security 3时就已经存在,默认是不启用,Spring Security 4默认启用了。
启用csrf后,所有http请求都被会CsrfFilter拦截,而CsrfFilter中有一个私有类DefaultRequiresCsrfMatcher。
public final class CsrfFilter extends OncePerRequestFilter {

//...

    private static final class DefaultRequiresCsrfMatcher implements RequestMatcher {
        private final HashSet<String> allowedMethods;

        private DefaultRequiresCsrfMatcher() {
            this.allowedMethods = new HashSet(Arrays.asList("GET", "HEAD", "TRACE", "OPTIONS"));
        }

        public boolean matches(HttpServletRequest request) {
            return !this.allowedMethods.contains(request.getMethod());
        }
    }
}
从这段源码可以发现,POST方法被排除在外了,也就是说只有GET|HEAD|TRACE|OPTIONS这4类方法会被放行,其它Method的http请求,都要验证_csrf的token是否正确,而通常post方式调用rest服务时,又没有_csrf的token,所以校验失败。
所以我们需要禁用CSRF保护功能,所以我们需要加上http.csrf().disable(),代码如下:
package com.cc.cloud.config.server.security;

import org.springframework.context.annotation.Configuration;
import org.springframework.security.config.annotation.web.builders.HttpSecurity;
import org.springframework.security.config.annotation.web.configuration.EnableWebSecurity;
import org.springframework.security.config.annotation.web.configuration.WebSecurityConfigurerAdapter;
import org.springframework.security.config.http.SessionCreationPolicy;

@Configuration
@EnableWebSecurity
public class WebSecurityConfig extends WebSecurityConfigurerAdapter {

    @Override
    protected void configure(HttpSecurity http) throws Exception {
        http.sessionManagement().sessionCreationPolicy(SessionCreationPolicy.NEVER);
        http.csrf().disable();//禁用CSRF
        http.authorizeRequests().anyRequest().authenticated().and().formLogin().and().httpBasic();
    }
}
我们重启cloud-config-server服务。
我们访问 http://localhost:8769/api/cloud-member/member/config 和 http://localhost:8769/api/cloud-order/order/config


然后我们修改配置,push到远程仓库。
然后执行下面的命令。
curl -X POST http://admin:admin@localhost:8090/actuator/bus-refresh
等待执行完毕之后,重新刷新页面,就可以看到如下结果。


然后我们在重新修改配置。试试用Rest API工具进行请求。
首先加上Authorization的HEADERS

然后可以发现返回是204.

重新刷新页面,可以看到如下结果。


这样就完成了我们使用Spring Cloud Bus自动刷新配置。
参考
SpringBoot 使用 Spring Security 开启了 CSRF 防跨站攻击防护后 POST 方法无效
Spring Security中HttpSecurity常用方法及说明
使用Spring Security实现HTTP Basic认证
spring cloud config 使用用户认证后 刷新配置端点bus-refresh 403
一起来学SpringBoot | 第十四篇:强大的 actuator 服务监控与管理
SpringBoot2.0 Config客户端自动刷新时没有/bus/refresh端点
spring-cloud-config 使用安全认证后 刷新配置端点 /actuator/bus-refresh 返回403
springcloud(九):配置中心和消息总线(配置中心终结版)
Config Server——使用Spring Cloud Bus自动刷新配置
springcloud(九):配置中心和消息总线(配置中心终结版)
Spring cloud config Actuator健康监测
SpringCloud学习系列之五-----配置中心(Config)和消息总线(Bus)完美使用版
源代码
https://gitee.com/cckevincyh/spring-cloud-demo/tree/config-refresh/
https://gitee.com/cckevincyh/spring-cloud-demo/tree/config-bus-refresh-v1/
https://gitee.com/cckevincyh/spring-cloud-demo/tree/config-bus-refresh-v2/
