1.统一版本依赖管理
1.1配置方式
- 使用properties标签内使用自定义标签–声明版本号
- 需要在统一版本的位置,使用${自定义标签名}引用声明的版本号
如:
<project xmlns="http://maven.apache.org/POM/4.0.0" xmlns:xsi="http://www.w3.org/2001/XMLSchema-instance" xsi:schemaLocation="http://maven.apache.org/POM/4.0.0 http://maven.apache.org/xsd/maven-4.0.0.xsd">
  <modelVersion>4.0.0</modelVersion>
  <groupId>com.zzc</groupId>
  <artifactId>helloworld2</artifactId>
  <version>0.0.1-SNAPSHOT</version>
  <packaging>war</packaging>

  <properties>
  	<zzc.spring.version>4.0.0.RELEASE</zzc.spring.version>
  </properties>

  <dependencies>

  	<dependency>
  		<groupId>org.springframework</groupId>
  		<artifactId>spring-core</artifactId>
  		<version>${zzc.spring.version}</version>
  		<scope>compile</scope>
  	</dependency>

  </dependencies>
</project>
要想修改版本号,直接修改properties标签内的版本即可
2.继承
2.1统一各个模板工程中对版本依赖管理
思路:将依赖统一到父工程中,在子工程中声明依赖时不指定版本号,以父工程设定的为准。同时,也便于修改
步骤:
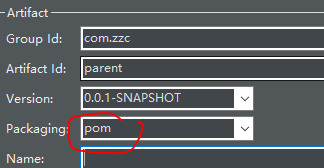
【第一步】、创建一个Maven工程作为父工程,打包方式pom。如:parent
【第二步】、在子工程中声明对父工程的引用
【第三步】、在子工程的坐标中与父工程坐标中重复的删除
父工程中的pom.xml文件
<project xmlns="http://maven.apache.org/POM/4.0.0"
	xmlns:xsi="http://www.w3.org/2001/XMLSchema-instance"
	xsi:schemaLocation="http://maven.apache.org/POM/4.0.0 http://maven.apache.org/xsd/maven-4.0.0.xsd">
	<modelVersion>4.0.0</modelVersion>
	<groupId>com.zzc</groupId>
	<artifactId>parent</artifactId>
	<version>0.0.1-SNAPSHOT</version>
	<packaging>pom</packaging>

	<!-- 配置依赖的管理 -->
	<dependencyManagement>
		<dependencies>
			<dependency>
				<groupId>junit</groupId>
				<artifactId>junit</artifactId>
				<version>4.0</version>
				<scope>test</scope>
			</dependency>
		</dependencies>
	</dependencyManagement>

</project>
子工程中pom.xml文件
<project xmlns="http://maven.apache.org/POM/4.0.0"
	xmlns:xsi="http://www.w3.org/2001/XMLSchema-instance"
	xsi:schemaLocation="http://maven.apache.org/POM/4.0.0 http://maven.apache.org/xsd/maven-4.0.0.xsd">
	<modelVersion>4.0.0</modelVersion>
	<artifactId>son</artifactId>

	<!-- 子工程中声明父工程 -->
	<parent>
		<groupId>com.zzc</groupId>
		<artifactId>parent</artifactId>
		<version>0.0.1-SNAPSHOT</version>
		<!-- 以当前文件为基准的父工程的pom文件的相对路径 -->
		<relativePath>../parent/pom.xml</relativePath>
	</parent>

	<dependencies>
		<dependency>
  			<groupId>junit</groupId>
  			<artifactId>junit</artifactId>
  			<scope>test</scope>
  		</dependency>
	</dependencies>

</project>
【注意】:配置继承后,执行安装命令时,要先安装父工程
3.聚合
作用:一键安装各个模块工程
配置方式:在一个总的聚合工程中配置各个参与聚合的模块
	<!-- 配置聚合 -->
	<modules>
		<!-- 指定各个子工程的相对路径 -->
		<module>../son</module>
	</modules>
使用方式:在聚合工程的pom.xml上点右键->Run As -> Maven Install
