优化Android 布局 —— ConstraintLayout
为什么要用ConstraintLayout?
在开发过程中经常能遇到一些复杂的UI,可能会出现布局嵌套过多的问题,嵌套得越多,设备绘制视图所需的时间和计算功耗也就越多
举栗说明: 如下图:
使用 ConstraintLayout 和 RelativeLayout 的对比
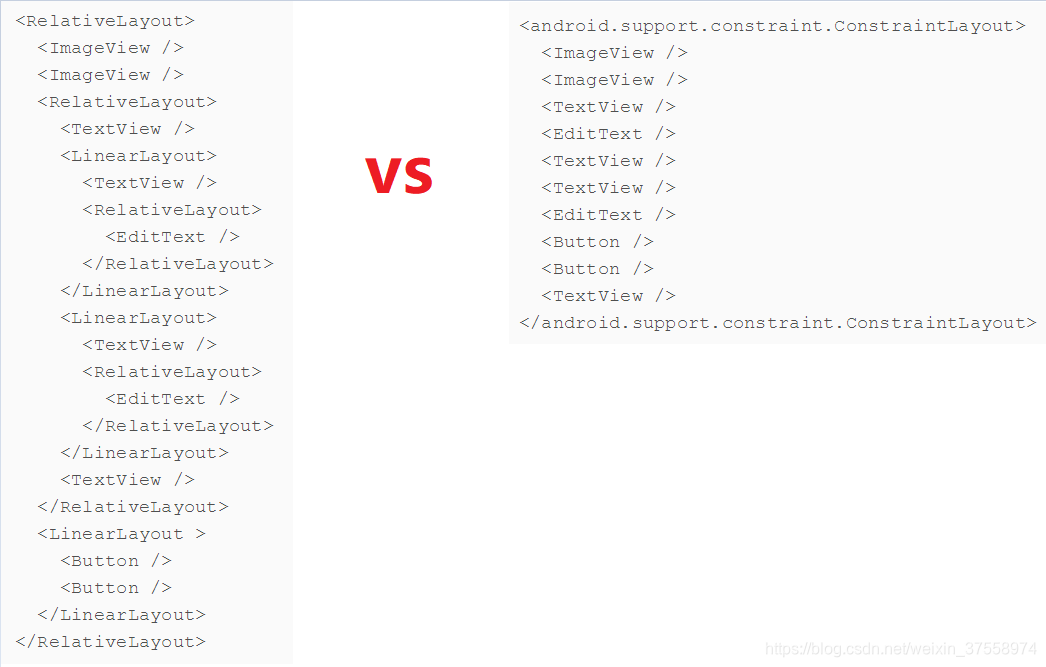
ConstraintLayout 在测量/布局阶段的性能比 RelativeLayout大约高 40%:
可以实现 拖拽绘制布局,不用手动编写XML(缺点,不是很精准)。
使用 ConstraintLayout 但是 【拒绝拖拽】
参考资料(郭神博客):
Android新特性介绍,ConstraintLayout完全解析
通过上面文章,我们了解了怎么拖拽摆放和约束布局之间的关系。
还有约束布局的工具等(个人收获很多)。
下面进入正题
我们平常在简化布局深度时通常会使用 【RelativeLayout】 和 【GridLayout】
但是在简化布局 【ConstraintLayout】 几乎可以做到极致
先引入: compile 'com.android.support.constraint:constraint-layout:1.0.2'
然后来记录一些属性的使用吧
app:layout_constraintLeft_toLeftOf="@id/viewB"
- 在父组件中左对齐
- 或者相对某个控件的左面
依此类推
layout_constraintRight_toLeftOf
layout_constraintRight_toRightOf
layout_constraintTop_toTopOf
layout_constraintTop_toBottomOf
layout_constraintBottom_toTopOf
layout_constraintBottom_toBottomOf
layout_constraintBaseline_toBaselineOf
和RL的差异
看了上面的可以发现 它和RL非常相似,他们具体上有什么不同呢?
简单的说 RL 能做到的 CL 都能做到,还支持一些不一样的特性
1.预期上的不同
RL效果:
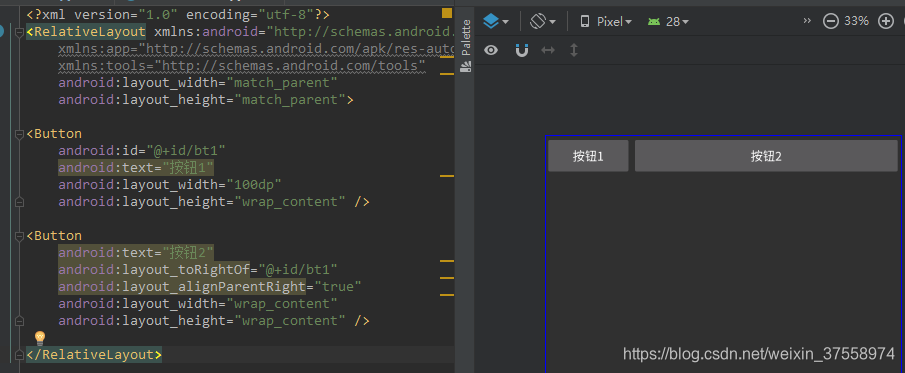
然后我们使用 CL 并且将属性替换一下
将:
android:layout_toRightOf="@+id/bt1"
android:layout_alignParentRight="true"
替换成:
app:layout_constraintLeft_toRightOf="@+id/bt1"
app:layout_constraintRight_toRightOf="parent"
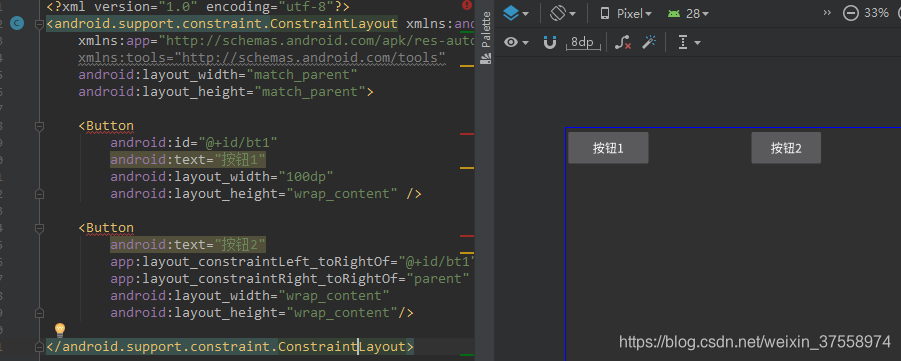
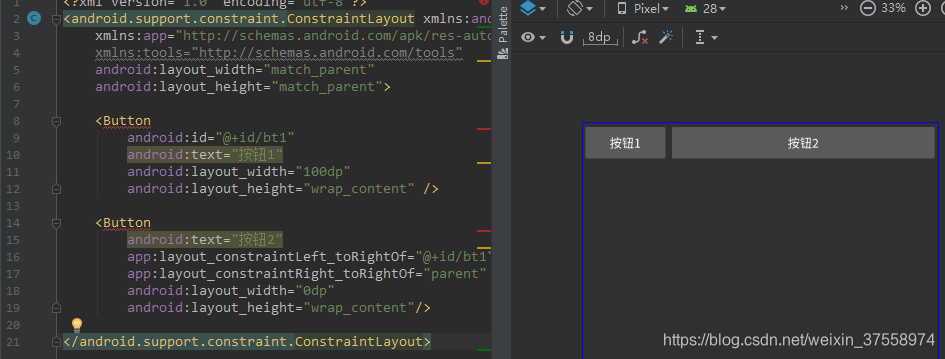
发现效果还是有明显区别的 ,那么久想要 RL的那种效果怎么办呢?
可以将 width 设置成 0dp --> 在 CL中 0dp 相当于 match_parent
2. 这下 RL 不说话了 ,CL请你继续。
CL:来点你不会的 ~~~
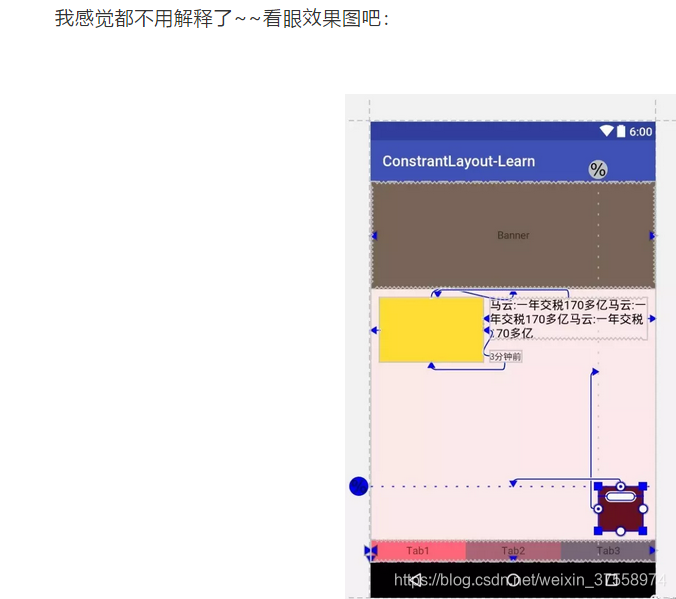
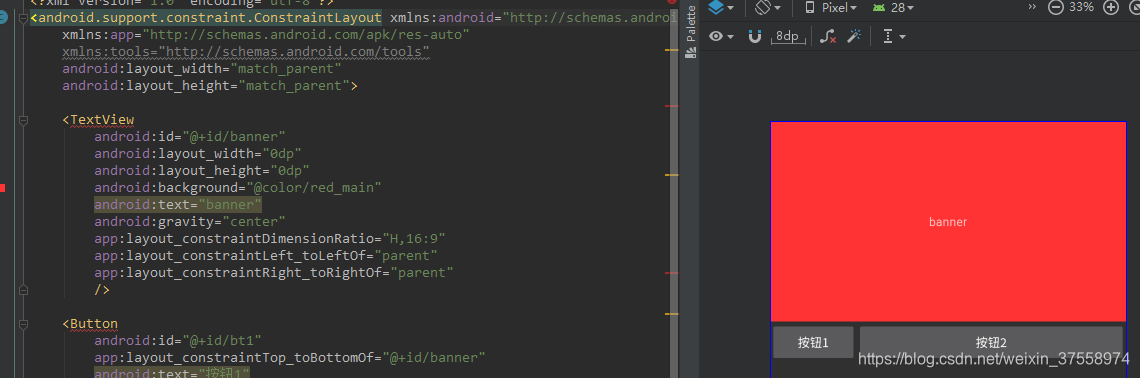
第一招 比如 我们想要添加一个 banner 宽度整个屏幕 宽高比 16:6 怎么做;
话不多说,来亮个相吧
第二招 在底部添加几个tab
CL 是不是想用 LL 来实现 ?
我们用 3个 TextView 来实现,来对比一下吧
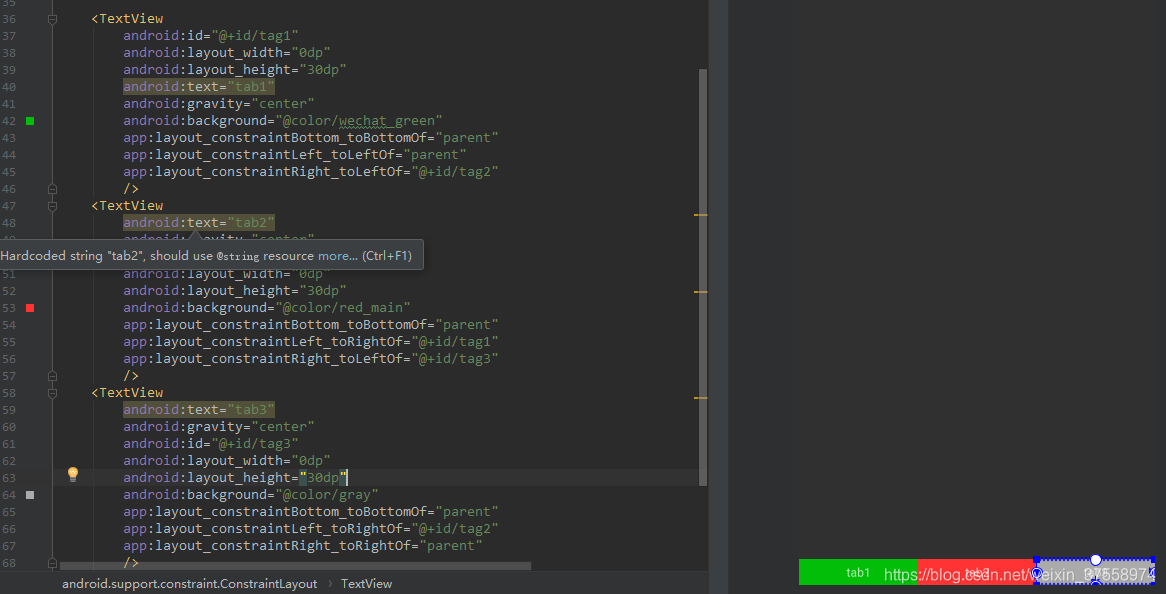
CL 通过属性两两相互依赖实现
然后 CL 实现了此效果,发现比 LL 实现要多很多代码 (LL漏出了微笑)
CL:我的表演还没结束 看我加上他 ==》 app:layout_constraintHorizontal_weight
- 分别加上 效果如下:
- app:layout_constraintHorizontal_weight=“2”
- app:layout_constraintHorizontal_weight=“1”
- app:layout_constraintHorizontal_weight=“2”

这这这。。。 LL 配合 weight 也能啊, 还有别的不?
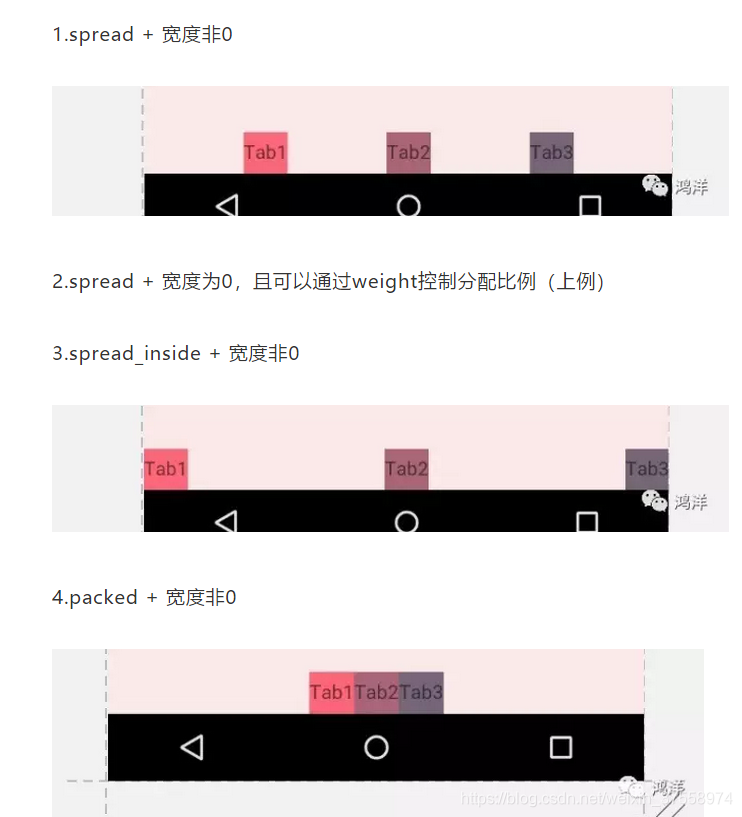
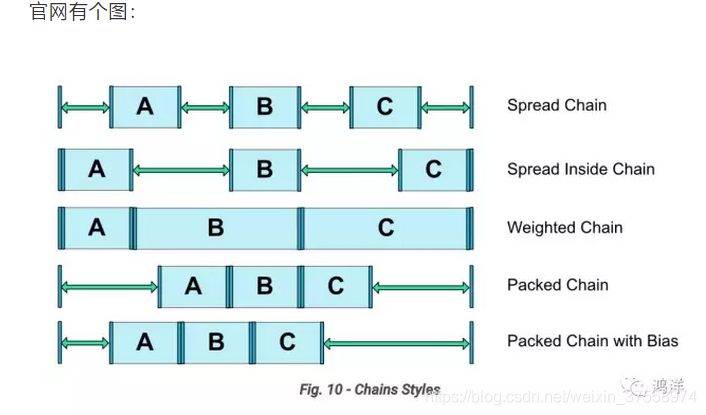
过来看 app:layout_constraintHorizontal_chainStyle=“spread” 有三个值
- spread
- packed
- spread_inside
直接上图吧
第三招 加个 浮动按钮
使用一个TextView 代替 浮动按钮
    <TextView
    android:layout_width="60dp"
    android:layout_height="60dp"
    android:background="@color/gray"
    app:layout_constraintBottom_toBottomOf="parent"
    app:layout_constraintTop_toTopOf="parent"
    app:layout_constraintLeft_toLeftOf="parent"
    app:layout_constraintRight_toRightOf="parent"
    app:layout_constraintHorizontal_bias="0.9"
    app:layout_constraintVertical_bias="0.9"
    />
现在从上下左右 四个方向去 “拉”这个 TextView 然后通过:
- app:layout_constraintHorizontal_bias=“0.9”
- app:layout_constraintVertical_bias=“0.9”
控制方向的拉力比;
总结下 属性吧:
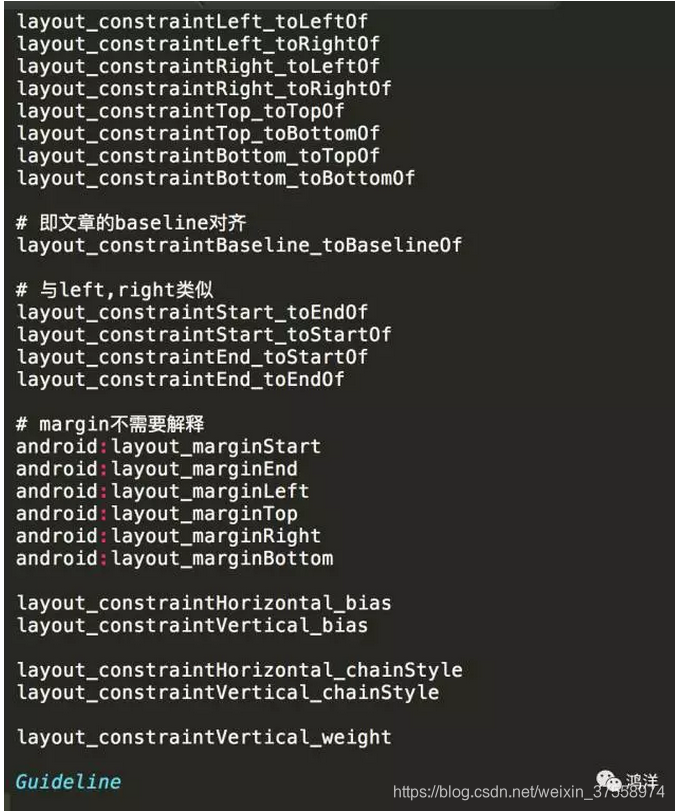
还有Guideline (布局辅助线)
它不会显示在布局中,愿意了解的去熟悉一下吧。