文章目录
1、使用tensorflow_datasets
tensorflow_datasets是一个非常有用的库,其中包含了很多数据集,通过运行:
tfds.list_builders()
可以查看其中包含的所有数据集。
在这里,使用猫狗数据集举例。
1.1 导入需要的库
import os
import numpy as np
import tensorflow as tf
import matplotlib.pyplot as plt
import tensorflow_datasets as tfds
1.2 加载数据集
(raw_train, raw_validation, raw_test), metadata = tfds.load(
    'cats_vs_dogs',
    split=['train[:80%]', 'train[80%:90%]', 'train[90%:]'],
    shuffle_files=False,
    batch_size=None,
    with_info=True,
    as_supervised=True,
)
上述函数说明:
输入:
- name:数据集的名称,可以通过运行tfds.list_builders()获得。
- split:如何划分数据集,如果不进行划分,则只得到训练集(即全部样本)。
- shuffle_files:是否打乱。
- batch_size:是否每次分批取出。如果为None,则每次取出一个样本,shape为三维;如果为一个大于1的数字,则每次取出多个样本,shape为四维;如果为1,每次取出一个样本,shape为四维(第一维为1)。
- with_info:是否输出数据集信息。
- as_supervised:为True时,函数会返回一个二元组 (input, label),而不是返回 FeaturesDict。
输出:
- (raw_train, raw_validation, raw_test):split之后的数据。
- metadata:数据集信息。
1.3 查看数据集中某些样本的信息
for image, label in raw_train.take(2):
    print(image.shape)
    print(label)
上述代码中,我们取出了两个训练样本的特征(图片)和标签,得到结果为:
(262, 350, 3)
tf.Tensor(0, shape=(), dtype=int64)
(428, 500, 3)
tf.Tensor(1, shape=(), dtype=int64)
由此可见,此数据集中的图片大小是不一致的。如果我们想知道标签所代表的种类(猫or狗?)我们可以通过以下代码查看:
get_label_name = metadata.features['label'].int2str
for image, label in raw_train.take(2):
    print(image.shape)
    print(label)
    print(get_label_name(label))
此时会输出:
(262, 350, 3)
tf.Tensor(0, shape=(), dtype=int64)
cat
(428, 500, 3)
tf.Tensor(1, shape=(), dtype=int64)
dog
1.4 将样本标准化
IMG_SIZE = 160 # All images will be resized to 160x160

def format_example(image, label):
    image = tf.cast(image, tf.float32)
    image = (image/127.5) - 1
    image = tf.image.resize(image, (IMG_SIZE, IMG_SIZE))
    return image, label
train = raw_train.map(format_example)
validation = raw_validation.map(format_example)
test = raw_test.map(format_example)
当然,这里也可以用下面的代码代替:
for image, label in raw_train:
    image = tf.cast(image, tf.float32)
    image = (image/127.5) - 1
    image = tf.image.resize(image, (IMG_SIZE, IMG_SIZE))
但这将会非常花时间!!!
1.5 将样本打乱、分批
如果在导入数据集的时候没有shuffle和分批,那么可以在之后进行。
BATCH_SIZE = 32
SHUFFLE_BUFFER_SIZE = 1000
train_batches = train.shuffle(SHUFFLE_BUFFER_SIZE).batch(BATCH_SIZE)
validation_batches = validation.batch(BATCH_SIZE)
test_batches = test.batch(BATCH_SIZE)
1.6 查看最终的训练样本
至此,通过运行
for image_batch, label_batch in train_batches.take(1):
    print(image_batch.shape)
    print(label_batch.shape)
我们可以得到:
(32, 160, 160, 3)
(32,)
将此输入模型,即可进行训练。
2、将已有的csv文件作为数据集
在这里,使用鸢尾花数据集举例。
首先,先下载鸢尾花数据集。
train_dataset_url = "https://storage.googleapis.com/download.tensorflow.org/data/iris_training.csv"
train_dataset_fp = tf.keras.utils.get_file(fname=os.path.basename(train_dataset_url),
                                          origin=train_dataset_url)
print(train_dataset_fp)
train_dataset_fp即鸢尾花数据集在电脑上的地址。
2.1 将数据从csv文件中取出
在这里,有两种方法查看csv文件中的数据,一是使用Pandas库,二是使用numpy库。
2.1.1 用Pandas库查看数据
features = pd.read_csv(train_dataset_fp)
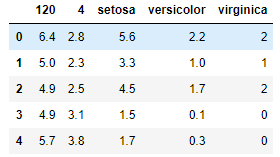
print(features.head())
dataset_ = features.values
可以查看前五行数据为:
2.1.2 用numpy库查看数据
dataset_ = np.loadtxt(open(train_dataset_fp), skiprows=1, delimiter=",")
2.2 数据标准化
data_mean = dataset_.mean(axis=0)
data_std = dataset_.std(axis=0)

dataset_ = (dataset_-data_mean)/data_std
2.3 划分训练集和测试集
因为这个数据集本身不分训练集和测试集,所以在这里要用sklearn库进行划分。
from sklearn.model_selection import train_test_split
train, test = train_test_split(dataset_, test_size=0.2)
2.4 划分特征与标签
train_x = train[:, :-1].astype(np.float32)
train_y = train[:, -1].astype(np.float32)
test_x = test[:, :-1].astype(np.float32)
test_y = test[:, -1].astype(np.float32)
2.5 切片处理
dataset_train = tf.data.Dataset.from_tensor_slices((train_x, train_y)).shuffle(train_y.shape[0]).batch(32)
dataset_test = tf.data.Dataset.from_tensor_slices((test_x, test_y)).shuffle(test_y.shape[0]).batch(32)
将此输入模型,即可进行训练。
3、使用tf.keras.datasets
3.1导入数据集
(x, y), (x_test, y_test) = tf.keras.datasets.fashion_mnist.load_data()
3.2 特征归一化
因为这里特征是图片,所以除以255即可。
def preprocess(x, y):

    x = tf.cast(x, dtype=tf.float32) / 255.
    y = tf.cast(y, dtype=tf.int32)
    return x,y
3.3 切片
batchsz = 128

db = tf.data.Dataset.from_tensor_slices((x,y))
db = db.map(preprocess).shuffle(10000).batch(batchsz)

db_test = tf.data.Dataset.from_tensor_slices((x_test,y_test))
db_test = db_test.map(preprocess).batch(batchsz)
将此输入模型,即可进行训练。
4、使用tf.feature_column(主要针对结构化数据)
在这里,我们使用心脏病数据集进行举例。
数据集中有数值(numeric)和类别(categorical)类型的列,如下图所示:

4.1 导入需要的库
import numpy as np
import pandas as pd
import tensorflow as tf
from tensorflow import feature_column
from tensorflow.keras import layers
from sklearn.model_selection import train_test_split
4.2 导入数据集
URL = 'https://storage.googleapis.com/applied-dl/heart.csv'
dataframe = pd.read_csv(URL)
dataframe.head()

4.3 划分训练集、测试集和验证集
train, test = train_test_split(dataframe, test_size=0.2)
train, val = train_test_split(train, test_size=0.2)
print(len(train), 'train examples')
print(len(val), 'validation examples')
print(len(test), 'test examples')
193 train examples
49 validation examples
61 test examples
4.4 定义从 Pandas Dataframe 创建 tf.data 数据集的函数
def df_to_dataset(dataframe, shuffle=True, batch_size=32):
    dataframe = dataframe.copy()
    labels = dataframe.pop('target')
    ds = tf.data.Dataset.from_tensor_slices((dict(dataframe), labels))
    if shuffle:
        ds = ds.shuffle(buffer_size=len(dataframe))
    ds = ds.batch(batch_size)
    return ds
4.5 创建 tf.data 数据集
batch_size = 5 # 小批量大小用于演示
train_ds = df_to_dataset(train, batch_size=batch_size)
val_ds = df_to_dataset(val, shuffle=False, batch_size=batch_size)
test_ds = df_to_dataset(test, shuffle=False, batch_size=batch_size)
此处返回的皆为字典形式。
可以通过以下方式查看数据集信息:
for feature_batch, label_batch in train_ds.take(1):
    print('Every feature:', list(feature_batch.keys()))
    print('A batch of ages:', feature_batch['age'])
    print('A batch of targets:', label_batch )
Every feature: ['age', 'sex', 'cp', 'trestbps', 'chol', 'fbs', 'restecg', 'thalach', 'exang', 'oldpeak', 'slope', 'ca', 'thal']
A batch of ages: tf.Tensor([61 59 58 42 40], shape=(5,), dtype=int32)
A batch of targets: tf.Tensor([1 1 0 1 0], shape=(5,), dtype=int32)
4.6 按照类别转换数据
feature_columns = []

# 数值列
for header in ['age', 'trestbps', 'chol', 'thalach', 'oldpeak', 'slope', 'ca']:
    feature_columns.append(feature_column.numeric_column(header))

# 分桶列
age = feature_column.numeric_column("age")
age_buckets = feature_column.bucketized_column(age, boundaries=[18, 25, 30, 35, 40, 45, 50, 55, 60, 65])
feature_columns.append(age_buckets)

# 分类列
thal = feature_column.categorical_column_with_vocabulary_list(
      'thal', ['fixed', 'normal', 'reversible'])
thal_one_hot = feature_column.indicator_column(thal)
feature_columns.append(thal_one_hot)

# 嵌入列
thal_embedding = feature_column.embedding_column(thal, dimension=8)
feature_columns.append(thal_embedding)

# 组合列
crossed_feature = feature_column.crossed_column([age_buckets, thal], hash_bucket_size=1000)
crossed_feature = feature_column.indicator_column(crossed_feature)
feature_columns.append(crossed_feature)
数值列
数值列(numeric column) 是最简单的列类型。它用于表示实数特征。使用此列时,模型将从 dataframe 中接收未更改的列值。
用‘age’列举例:
age_column = feature_column.numeric_column('age')
for x, y in train_ds.take(1):
    print(tf.keras.layers.DenseFeatures(age_column)(x).numpy())
[[66.]
 [39.]
 [70.]
 [48.]
 [63.]]
可见数值列并不发生变化。
分桶列
如果不希望将数字直接输入模型,而是根据数值范围将其值分成不同的类别。考虑代表一个人年龄的原始数据。我们可以用 分桶列(bucketized column)将年龄分成几个分桶(buckets),而不是将年龄表示成数值列。
age_column = feature_column.numeric_column('age')
age_buckets = feature_column.bucketized_column(age_column, boundaries=[18, 25, 30, 35, 40, 45, 50, 55, 60, 65])
for x, y in train_ds.take(1):
    print(tf.keras.layers.DenseFeatures(age_buckets)(x).numpy())
[[0. 0. 0. 0. 0. 1. 0. 0. 0. 0. 0.]
 [0. 0. 0. 0. 0. 1. 0. 0. 0. 0. 0.]
 [0. 0. 0. 0. 0. 0. 0. 0. 1. 0. 0.]
 [0. 0. 0. 0. 0. 0. 0. 1. 0. 0. 0.]
 [0. 0. 0. 0. 0. 0. 1. 0. 0. 0. 0.]]
分类列
在此数据集中,thal 用字符串表示(如 ‘fixed’,‘normal’,或 ‘reversible’)。我们无法直接将字符串提供给模型。相反,我们必须首先将它们映射到数值。分类词汇列(categorical vocabulary columns)提供了一种用 one-hot 向量表示字符串的方法(就像您在上面看到的年龄分桶一样)。词汇表可以用 categorical_column_with_vocabulary_list 作为 list 传递,或者用 categorical_column_with_vocabulary_file 从文件中加载。
thal = feature_column.categorical_column_with_vocabulary_list(
      'thal', ['fixed', 'normal', 'reversible'])
thal_one_hot = feature_column.indicator_column(thal)
for x, y in train_ds.take(1):
    print(tf.keras.layers.DenseFeatures(thal_one_hot)(x).numpy())
[[0. 0. 1.]
 [0. 1. 0.]
 [0. 1. 0.]
 [0. 0. 1.]
 [0. 1. 0.]]
嵌入列
假设我们不是只有几个可能的字符串,而是每个类别有数千(或更多)值。 由于多种原因,随着类别数量的增加,使用 one-hot 编码训练神经网络变得不可行。我们可以使用嵌入列来克服此限制。嵌入列(embedding column)将数据表示为一个低维度密集向量,而非多维的 one-hot 向量,该低维度密集向量可以包含任何数,而不仅仅是 0 或 1。嵌入的大小(在下面的示例中为 8)是必须调整的参数。
thal_embedding = feature_column.embedding_column(thal, dimension=8)
for x, y in train_ds.take(1):
    print(tf.keras.layers.DenseFeatures(thal_embedding)(x).numpy())
[[ 0.36323512 -0.10599072 -0.16521429 -0.44111866  0.39538452  0.25446087
  -0.56295955 -0.1078408 ]
 [ 0.36323512 -0.10599072 -0.16521429 -0.44111866  0.39538452  0.25446087
  -0.56295955 -0.1078408 ]
 [-0.1679268  -0.14216028  0.52936536  0.34576175 -0.10905012 -0.09870762
   0.15268394 -0.40206134]
 [ 0.36323512 -0.10599072 -0.16521429 -0.44111866  0.39538452  0.25446087
  -0.56295955 -0.1078408 ]
 [ 0.36323512 -0.10599072 -0.16521429 -0.44111866  0.39538452  0.25446087
  -0.56295955 -0.1078408 ]]
组合列
将多种特征组合到一个特征中,称为特征组合(feature crosses),它让模型能够为每种特征组合学习单独的权重。此处,我们将创建一个 age 和 thal 组合的新特征。
crossed_feature = feature_column.crossed_column([age_buckets, thal], hash_bucket_size=5)
crossed_feature = feature_column.indicator_column(crossed_feature)
for x, y in train_ds.take(1):
    print(tf.keras.layers.DenseFeatures(crossed_feature)(x).numpy())
[[0. 0. 0. 0. 1.]
 [0. 0. 0. 1. 0.]
 [0. 1. 0. 0. 0.]
 [0. 0. 1. 0. 0.]
 [0. 1. 0. 0. 0.]]
维数通过调整hash_bucket_size来改变。
4.7 建立一个新的特征层
现在我们已经定义了我们的特征列,我们将使用密集特征(DenseFeatures)层将特征列输入到我们的 Keras 模型中。
feature_layer = tf.keras.layers.DenseFeatures(feature_columns)
本来在这一步之后就属于模型建立方面的了,但是在建模时我们需要将feature_layer作为一层写入模型,如4.8所示。
4.8 建模
model = tf.keras.Sequential([
  feature_layer,
  layers.Dense(128, activation='relu'),
  layers.Dense(128, activation='relu'),
  layers.Dense(1, activation='sigmoid')
])

model.compile(optimizer='adam',
              loss='binary_crossentropy',
              metrics=['accuracy'],
              run_eagerly=True)

model.fit(train_ds,
          validation_data=val_ds,
          epochs=5)
5、直接从文件夹中读取图片
我们用horse2zebra数据集举例:此数据集中包含4个文件夹,分别是horse训练集、zebra训练集、horse测试集以及zebra测试集。每个训练集中都包含1000多张 (256, 256, 3) 的彩色图片(掺有一些灰度图片,之后会在代码中删掉)。
5.1 将图片导入
PATH = 'C:\\Users\\ThinkPad\\.keras\\datasets\\horse2zebra/'
train_horses = tf.data.Dataset.list_files(PATH+'trainA/*.jpg')
train_zebras = tf.data.Dataset.list_files(PATH+'trainB/*.jpg')
test_horses = tf.data.Dataset.list_files(PATH+'testA/*.jpg')
test_zebras = tf.data.Dataset.list_files(PATH+'testB/*.jpg')
此时导入的是字符串类型的dataset。
5.2 将图片转换为需要的类型
def load(image_file):
    image = tf.io.read_file(image_file)
    image = tf.image.decode_jpeg(image)
    image = tf.cast(image, tf.float32)

    return image
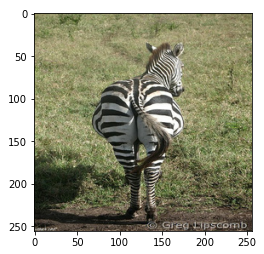
打印出一张图片查看:
img = load(PATH+'trainB/n02391049_2.jpg')
# casting to int for matplotlib to show the image
plt.figure()
plt.imshow(img/255.0)
5.3 删除dataset中的灰度图
for dirname, _, filenames in os.walk(PATH+'trainB'):
    for filename in filenames:
        img = load(os.path.join(dirname, filename))
        if img.shape != (256, 256, 3):
            print(filename)
            print(img.shape)
            os.remove(os.path.join(dirname, filename))
5.4 加入batch和shuffle
AUTOTUNE = tf.data.experimental.AUTOTUNE
train_horses = train_horses.map(
    load, num_parallel_calls=AUTOTUNE).cache().shuffle(
    1000).batch(1)

train_zebras = train_zebras.map(
    load, num_parallel_calls=AUTOTUNE).cache().shuffle(
    1000).batch(1)

test_horses = test_horses.map(
    load, num_parallel_calls=AUTOTUNE).cache().shuffle(
    1000).batch(1)

test_zebras = test_zebras.map(
    load, num_parallel_calls=AUTOTUNE).cache().shuffle(
    1000).batch(1)
将此输入模型,即可进行训练。
