参考博客:博客园 - Spring Boot 操作 Excel
示例GitHub:spring-boot-study/spring-boot-study-excel/
1、新建 Spring Boot Maven 示例工程项目
注意:本示例是用 IDEA 开发工具
-
File > New > Project,如下图选择 Spring Initializr 然后点击 【Next】下一步
-
填写 GroupId(包名)、Artifact(项目名) 即可。点击 下一步
groupId=com.fishpro
artifactId=excel -
选择依赖 Spring Web Starter 前面打钩。
-
项目名设置为 spring-boot-study-excel.
文件上传不需要引入第三方组件。
2、依赖引入 Pom.xml
	<dependencies>
        <dependency>
            <groupId>org.springframework.boot</groupId>
            <artifactId>spring-boot-starter-web</artifactId>
        </dependency>
        <!-- https://mvnrepository.com/artifact/org.apache.poi/poi-ooxml -->
        <dependency>
            <groupId>org.apache.poi</groupId>
            <artifactId>poi-ooxml</artifactId>
            <version>4.0.1</version>
        </dependency>

        <dependency>
            <groupId>org.springframework.boot</groupId>
            <artifactId>spring-boot-starter-test</artifactId>
            <scope>test</scope>
        </dependency>
    </dependencies>
3、操作 Excel
不同的 Excel 版本具有不同的类来操作本示例中使用 xls 后缀版本。详细请参见 poi - 官方文档
3.1 创建 Workbook
HSSFWorkbook 是操作 Excel2003 以前(包括2003)的版本,扩展名是.xls;
XSSFWorkbook 是操作 Excel2007 后的版本,扩展名是.xlsx;
SXSSFWorkbook 是操作 Excel2007 后的版本,扩展名是.xlsx;
public static void CreateNewWorkbook() {
    Workbook wb = new HSSFWorkbook();
    try {
        OutputStream fileOut = new FileOutputStream("workbook.xls");
        wb.write(fileOut);
    } catch (Exception e) {
        e.printStackTrace();
    }
    Workbook wb2 = new XSSFWorkbook();
    try (OutputStream fileOut = new FileOutputStream("workbook.xlsx")) {
        wb2.write(fileOut);
    } catch (Exception e) {
        e.printStackTrace();
    }
}
3.2 创建工作表 Sheet
工作表名称不要超过 31 个字符
名称不能含有特殊字符
可以使用 WorkbookUtil.createSafeSheetName 来创建安全的工作表名称
public static void CreateNewSheet() {
    Workbook wb = new HSSFWorkbook();  // or new XSSFWorkbook();
    Sheet sheet1 = wb.createSheet("new sheet");
    Sheet sheet2 = wb.createSheet("new second sheet");
    String safeName = WorkbookUtil.createSafeSheetName("[O'Brien's sales*?]"); // returns " O'Brien's sales   "
    Sheet sheet3 = wb.createSheet(safeName);
    try {
        OutputStream fileOut = new FileOutputStream("workbook.xls");
        wb.write(fileOut);
    } catch (Exception e) {
        e.printStackTrace();
    }
}
3.3 创建单元格 Cells
先有行在有列,先要创建 Row 在创建 Cell
- 创建一个样式
- 创建一个日期类型的值
- 创建日期、小数、字符 、布尔等类型
- 创建一个边框类型单元格
- 数据格式化单元格
/**
 *## 3.3 创建单元格 Cells
 * - 先有行在有列,先要创建 Row 在创建 Cell
 * */
public void CreateNewCell() {
    Workbook wb = new HSSFWorkbook();  // or new XSSFWorkbook();
    Sheet sheet1 = wb.createSheet("new sheet");
    //先行后列
    Row row = sheet1.createRow(0);

    //创建列
    Cell cell = row.createCell(0);
    cell.setCellValue(new Date());
    //创建一个列的样式
    CellStyle cellStyle = wb.createCellStyle();
    //获取一个帮助类设置样式
    CreationHelper createHelper = wb.getCreationHelper();
    cellStyle.setDataFormat(createHelper.createDataFormat().getFormat("m/d/yy h:mm"));
    cell = row.createCell(1);
    cell.setCellValue(new Date());
    cell.setCellStyle(cellStyle);
    //使用 Calendar
    cell = row.createCell(2);
    cell.setCellValue(Calendar.getInstance());
    cell.setCellStyle(cellStyle);
    //创建不同的类型的单元格
    row.createCell(3).setCellValue(1.1);
    row.createCell(4).setCellValue(new Date());
    row.createCell(5).setCellValue(Calendar.getInstance());
    row.createCell(6).setCellValue("a string");
    row.createCell(7).setCellValue(true);
    row.createCell(8).setCellType(CellType.ERROR);

    try {
        OutputStream fileOut = new FileOutputStream("workbook.xls");
        wb.write(fileOut);
    } catch (Exception e) {
        e.printStackTrace();
    }
}
3.4 读取与获取Excel
使用 File 的方式读取 Excel
public static void OpenExcelByFile(){
try {
	Workbook wb = WorkbookFactory.create(new File("workbook.xls"));
	//读取
	Sheet sheet=wb.getSheetAt(0);//第一个
	Sheet sheet1=wb.getSheet("sheet1");//根据名称读取
	Row row=sheet.getRow(0);//获取行
	Cell cell=row.getCell(0);//获取第一行
    }catch (Exception ex){
		// do something
    }
}
使用 FileInputStream 需要内存支持
public static void OpenExcelByFileInputStream(){
    try {
        Workbook wb = WorkbookFactory.create(new FileInputStream("workbook.xls"));
        //遍历
    }catch (Exception ex){
		// do something
    }
}
4、使用示例
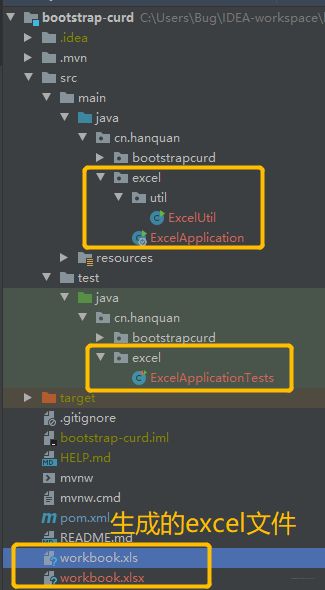
使用方式:运行ExcelApplicationTests.java即可生成excel文件,效果如下图

4.1 项目结构
因为和另外一个项目合并了,所以只看黄色框中的文件即可
4.2 源码
ExcelUtil.java
package cn.hanquan.excel.util;

import org.apache.poi.hssf.usermodel.HSSFWorkbook;
import org.apache.poi.ss.usermodel.*;
import org.apache.poi.ss.util.WorkbookUtil;
import org.apache.poi.xssf.usermodel.XSSFWorkbook;

import java.io.*;
import java.util.Calendar;
import java.util.Date;

public class ExcelUtil {

    public static void main(String [] args){

    }
    /**
     * ## 3.1 创建 Workbook
     * - `HSSFWorkbook` 是操作 Excel2003 以前(包括2003)的版本,扩展名是.xls;
     * - `XSSFWorkbook` 是操作 Excel2007 后的版本,扩展名是.xlsx;
     * - `SXSSFWorkbook` 是操作 Excel2007 后的版本,扩展名是.xlsx;
     *
     * 返回空 输出 workbook.xls workbook.xlsx 注意此时 excel元素不全,还不能打开
     */
    public static void CreateNewWorkbook() {
        Workbook wb = new HSSFWorkbook();
        try {
            System.out.println("创建workbook.xls");
            OutputStream fileOut = new FileOutputStream("workbook.xls");
            wb.write(fileOut);
        } catch (Exception e) {
            e.printStackTrace();
        }
        Workbook wb2 = new XSSFWorkbook();
        try (OutputStream fileOut = new FileOutputStream("workbook.xlsx")) {
            wb2.write(fileOut);
        } catch (Exception e) {
            System.out.println("创建workbook.xlsx");
            e.printStackTrace();
        }

    }

    /**
     *## 3.2 创建工作表 Sheet
     * - 工作表名称不要超过 31 个字符
     * - 名称不能含有特殊字符
     * - 可以使用 WorkbookUtil.createSafeSheetName 来创建安全的工作表名称
     * 返回空 输出 workbook.xls  注意此时 excel元素不全,还不能打开
     * */
    public static void CreateNewSheet() {
        Workbook wb = new HSSFWorkbook();  // or new XSSFWorkbook();
        Sheet sheet1 = wb.createSheet("new sheet");
        Sheet sheet2 = wb.createSheet("new second sheet");
        String safeName = WorkbookUtil.createSafeSheetName("[O'Brien's sales*?]"); // returns " O'Brien's sales   "
        Sheet sheet3 = wb.createSheet(safeName);
        try {
            System.out.println("创建工作表");
            OutputStream fileOut = new FileOutputStream("workbook.xls");
            wb.write(fileOut);
            System.out.println("创建工作表成功");
        } catch (Exception e) {
            System.out.println("创建工作表失败");
            e.printStackTrace();
        }
    }


    /**
     *## 3.3 创建单元格 Cells
     * - 先有行在有列,先要创建 Row 在创建 Cell
     * - 创建一个样式
     * - 创建一个日期类型的值
     * - 创建日期、小数、字符 、布尔等类型
     * - 创建一个边框类型单元格
     * - 数据格式化单元格
     * -
     * */
    public static void CreateNewCell() {
        Workbook wb = new HSSFWorkbook();  // or new XSSFWorkbook();
        Sheet sheet = wb.createSheet("new sheet");
        //先行后列:先创建i行
        Row row_0 = sheet.createRow(0);
        Row row_1 = sheet.createRow(1);
        Row row_2 = sheet.createRow(2);
        Row row_3 = sheet.createRow(3);
        Row row_4 = sheet.createRow(4);
        Row row_5 = sheet.createRow(5);
        Row row_6 = sheet.createRow(6);

        //第0行第i列:标题
        row_0.createCell(0).setCellValue("编号");
        row_0.createCell(1).setCellValue("姓名");
        row_0.createCell(2).setCellValue("爱好");


        //创建列

        //创建不同的类型的单元格
        row_1.createCell(0).setCellValue(219);
        row_1.createCell(1).setCellValue("张三");
        row_1.createCell(2).setCellValue("敲代码");

        row_2.createCell(0).setCellValue(220);
        row_2.createCell(1).setCellValue("李四");
        row_2.createCell(2).setCellValue("看代码");

        row_3.createCell(0).setCellValue(221);
        row_3.createCell(1).setCellValue("李四");
        row_3.createCell(2).setCellValue("抄代码");

        row_4.createCell(0).setCellValue(222);
        row_4.createCell(1).setCellValue("王五");
        row_4.createCell(2).setCellValue("配环境");

        row_5.createCell(0).setCellValue(223);
        row_5.createCell(1).setCellValue("赵六");
        row_5.createCell(2).setCellValue("吃东西");

        row_6.createCell(0).setCellValue(224);
        row_6.createCell(1).setCellValue("小七");
        Cell specialCell = row_6.createCell(2);
        specialCell.setCellValue("写博客");


        // 边框
        CellStyle style = wb.createCellStyle();
        style.setBorderBottom(BorderStyle.MEDIUM_DASHED);//底部边框
        style.setBottomBorderColor(IndexedColors.BLACK.getIndex());
        style.setBorderLeft(BorderStyle.MEDIUM_DASHED);//左边
        style.setLeftBorderColor(IndexedColors.GREEN.getIndex());
        style.setBorderRight(BorderStyle.MEDIUM_DASHED);//右边
        style.setRightBorderColor(IndexedColors.BLUE.getIndex());
        style.setBorderTop(BorderStyle.MEDIUM_DASHED);//上边
        style.setTopBorderColor(IndexedColors.BLUE.getIndex());//颜色
        specialCell.setCellStyle(style);


        try {
            OutputStream fileOut = new FileOutputStream("workbook.xls");
            wb.write(fileOut);
        } catch (Exception e) {
            e.printStackTrace();
        }finally {
            // 关闭流
            try {
                wb.close();
            } catch (IOException e) {
                e.printStackTrace();
            }
        }
    }


    /**
     * 使用 File 的方式读取 Excel
     * 读取单元格
     * */
    public static void OpenExcelByFile(){
        Workbook wb=null;
        try {
            System.out.println("使用 File 的方式读取 Excel");
            wb = WorkbookFactory.create(new File("workbook.xls"));
            //读取
            Sheet sheet = wb.getSheetAt(0);//第一个
            Sheet sheet1 = wb.getSheet("sheet1");//根据名称读取
            Row row = sheet.getRow(0);//获取行
            Cell cell = row.getCell(0);//获取第一行

            System.out.println("In OpenExcelByFile, cell = " + cell);
        } catch (Exception ex) {
            ex.printStackTrace();
        }finally {
            // 关闭流
            try {
                wb.close();
            } catch (IOException e) {
                e.printStackTrace();
            }
        }

    }

    /**
     * 使用 FileInputStream
     * */
    public static void OpenExcelByFileInputStream(){
        Workbook wb=null;
        try {
            System.out.println("使用 FileInputStream 的方式读取 Excel");
            wb = WorkbookFactory.create(new FileInputStream("workbook.xls"));
            //读取
            Sheet sheet = wb.getSheetAt(0);//第一个
            Sheet sheet1 = wb.getSheet("sheet1");//根据名称读取
            Row row = sheet.getRow(0);//获取行
            Cell cell = row.getCell(1);
            System.out.println("In OpenExcelByFile, OpenExcelByFileInputStream = " + cell);
        }catch (Exception ex){
            ex.printStackTrace();
        }finally {
            // 关闭流
            try {
                wb.close();
            } catch (IOException e) {
                e.printStackTrace();
            }
        }
    }
}
ExcelApplication.java
package cn.hanquan.excel;

import org.springframework.boot.SpringApplication;
import org.springframework.boot.autoconfigure.SpringBootApplication;

@SpringBootApplication
public class ExcelApplication {

    public static void main(String[] args) {
        SpringApplication.run(ExcelApplication.class, args);
    }
}
ExcelApplicationTests.java
package cn.hanquan.excel;

import cn.hanquan.excel.util.ExcelUtil;
import org.junit.Test;
import org.junit.runner.RunWith;
import org.springframework.boot.test.context.SpringBootTest;
import org.springframework.test.context.junit4.SpringRunner;


@RunWith(SpringRunner.class)
@SpringBootTest
public class ExcelApplicationTests {

    @Test
    public void contextLoads() {
    }

    @Test
    public void TestCreateWorkbook(){
        ExcelUtil.CreateNewWorkbook();
    }

    @Test
    public void TestCreateSheet(){
        ExcelUtil.CreateNewSheet();
    }
    @Test
    public void TestCreateCell(){
        ExcelUtil.CreateNewCell();
    }

    @Test
    public void OpenAndReadExcel(){
        ExcelUtil.OpenExcelByFile();
        ExcelUtil.OpenExcelByFileInputStream();
    }

    /**
     * 应该串行执行吧,不能直接跑全部,顺序会乱
     * 所以写了这个
     */
    @Test
    public void TestAllInOrder(){
        ExcelUtil.CreateNewWorkbook();
        ExcelUtil.CreateNewSheet();
        ExcelUtil.CreateNewCell();
        ExcelUtil.OpenExcelByFile();
        ExcelUtil.OpenExcelByFileInputStream();
    }
}
