文章目录
目录
本篇文章是上篇文章的补充,主要内容概要如下:

一、配置文件后缀的2种方式
配置文件有2种*.properties和*.yml,可以单独使用也可以混合使用(不过项目中不知道有没这么干的).
application.properties
jdbc.username=root
application.yml
jdbc:
  username: hufanglei
  password: 123456
运行入口函数,测试下:
@SpringBootApplication
public class Demo3Application {

   public static void main(String[] args) {
       ConfigurableApplicationContext context = SpringApplication.run(Demo3Application.class, args);
       System.out.println(context.getEnvironment().getProperty("jdbc.username"));
       System.out.println(context.getEnvironment().getProperty("jdbc.password"));
    }
运行结果:

打印了yml的jdbc.password和properties的username。
结果说明:
1.这2个配置文件都生效了。
2.如果2个配置文件重名,properties的优先级高。都有jdbc.username但是显示的是properties的。
二、配置文件属性注入扩展:集合和数组
配置文件属性可以写数组或集合,现在我们展示用这2种方式接受并读取出来属性值:
application.properties
ds.hosts[0]=192.168.157.1
ds.hosts[1]=192.168.157.2
ds.hosts[2]=192.168.157.3

#ds.ports=8080,8081,8082 //这种写法也可以
ds.ports[0]=8080
ds.ports[1]=8081
ds.ports[2]=8082
@Component
@ConfigurationProperties("ds")
public class TomcatProperties {
    private List<String> hosts = new ArrayList<>();
    private String[] ports;
    public List<String> getHosts() {
        return hosts;
    }
    public void setHosts(List<String> hosts) {
        this.hosts = hosts;
    }


    public String[] getPorts() {
        return ports;
    }

    public void setPorts(String[] ports) {
        this.ports = ports;
    }

    @Override
    public String toString() {
        return "TomcatProperties{" +
                "hosts=" + hosts +
                ", ports=" + Arrays.toString(ports) +
                '}';
    }
}
开始测试:
@SpringBootApplication
public class Demo3Application {

   public static void main(String[] args) {
       ConfigurableApplicationContext context = SpringApplication.run(Demo3Application.class, args);
       System.out.println(context.getBean(TomcatProperties.class));
       context.close();
   }
运行结果:


三、EnvironmentPostProcessor 动态加载配置文件
配置文件的属性我们从上篇博客了解到可以使用@Value和Environment的getProperty方法获取, 也可以通过@PropertySource编码方式读取。
其实如果还有一种方式:
可以动态的从不同的地方收集配置文件,加入到自己的项目中并获取。这个就是通过EnvironmentPostProcessor接口。
使用和其他的后置处理器一样,自己实现这个接口,加载就可以。
准备一个配置文件:D:/tmp/springboot.properties
springboot.name=springboot
写自己的环境后置处理器:
@Component
public class MyEnvironmentPostProcessor implements EnvironmentPostProcessor {

    @Override
    public void postProcessEnvironment(ConfigurableEnvironment environment, SpringApplication application) {
        try(InputStream input = new FileInputStream("D:/tmp/springboot.properties")) {
            Properties source = new Properties();
            source.load(input);
            PropertiesPropertySource propertySource = new PropertiesPropertySource("my", source);
            environment.getPropertySources().addLast(propertySource);
        }catch (Exception e){
            e.printStackTrace();
        }
    }
}
如果想让我们的自定义的后置处理器生效还需要做一步:

在resource下配置META-INF下配置后置器到spring.factoryries中。
org.springframework.boot.env.EnvironmentPostProcessor=com.springboot.demo3.MyEnvironmentPostProcessor

这样外部的配置文件就注入进来了,我们测试下:
@SpringBootApplication
public class Demo3Application {

   public static void main(String[] args) {
       ConfigurableApplicationContext context = SpringApplication.run(Demo3Application.class, args);
      System.out.println(context.getEnvironment().getProperty("springboot.name"));
       context.close();
   }
运行结果显示已经打印:

四、指定多个profile
在开发时可能有多个环境,开发环境dev,测试环境test,默认环境default,生成环境prod,现在我们来切换和指定不同的环境。
准备三个配置文件:
application.properties
jdbc.url=mysql:jdbc;//127.0.0.1/db_springboot
application-dev.properties
jdbc.url=mysql:jdbc;//127.0.0.1/db_springboot_dev
application-test.properties
jdbc.url=mysql:jdbc;//127.0.0.1/db_springboot_test
①硬编码编程方式:
主要是在入口函数中,硬编码指定:
@SpringBootApplication
public class Demo3Application {

    public static void main(String[] args) {
        //编程的方式指定:生效的profie
        SpringApplication app = new SpringApplication(Demo3Application.class);
        app.setAdditionalProfiles("dev");
//        app.setAdditionalProfiles("test");
        ConfigurableApplicationContext context = app.run(args);
        System.out.println(context.getEnvironment().getProperty("jdbc.url"));
    }
}
运行:

@SpringBootApplication
public class Demo3Application {

    public static void main(String[] args) {
        //编程的方式指定:生效的profie
        SpringApplication app = new SpringApplication(Demo3Application.class);
//        app.setAdditionalProfiles("dev");
        app.setAdditionalProfiles("test");
        ConfigurableApplicationContext context = app.run(args);
        System.out.println(context.getEnvironment().getProperty("jdbc.url"));
    }
}
运行结果:

@SpringBootApplication
public class Demo3Application {

    public static void main(String[] args) {
        //编程的方式指定:生效的profie
        SpringApplication app = new SpringApplication(Demo3Application.class);
//        app.setAdditionalProfiles("dev");
//        app.setAdditionalProfiles("test");
        ConfigurableApplicationContext context = app.run(args);
        System.out.println(context.getEnvironment().getProperty("jdbc.url"));
    }
}
运行结果:

结果显示,根据编码方式切换了不同的配置文件
那在启动的时候可以切换吗?
可以的。可以在启动时候添加参数,指定一个或者多个配置文件。
②参数方式:
在启动参数中配置:
--spring.profiles.active=xx

运行结果,显示一切换到test环境下。

bean注入的时候: 方法或者类上添加@Profile
某个类或者某个方法想要在指定的环境下执行,可以通过@Profile注解指定:
我们写个配置类:
@SpringBootConfiguration
public class MyConfig {

    @Bean
    public Runnable createRunnable(){
        System.out.println("========1=====");
        return () -> {};
    }

    @Bean
    @Profile("test")
    public Runnable createRunnable2(){
        System.out.println("========2=====");
        return () -> {};
    }

    @Bean
    @Profile("dev")
    public Runnable createRunnable3(){
        System.out.println("========3=====");
        return () -> {};
    }
}
我们想要createRunnable方法在默认配置下执行(其实在所有的环境下都会触发),createRunnable2在test环境下执行,createRunnable3在dev环境下执行,就可这样定义:
结合上面的启动参数,我们让其生效:

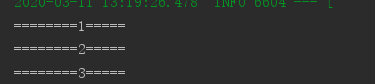
触发了默认和test方法:

指定多个文件:

启动后运行结果:都触发了。
我们也可以在类上指定一个@Profile,虽然没有-prod配置文件,但是我们可以在类上这样写,只有启动参数上加上才可以触发这个类的方法:
@SpringBootConfiguration
@Profile("prod")
public class MyConfig {

    @Bean
    public Runnable createRunnable(){
        System.out.println("========1=====");
        return () -> {};
    }

    @Bean
    public Runnable createRunnable2(){
        System.out.println("========2=====");
        return () -> {};
    }

    @Bean
    public Runnable createRunnable3(){
        System.out.println("========3=====");
        return () -> {};
    }
}
如果启动参数不写,不会打印这几个方法,如下图,空的啥也没打印:

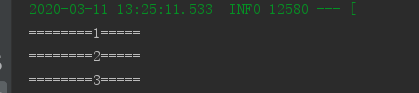
如果我们这样配置了,就会出触发这个类的所有方法:

再次运行:
个人微信公号:
搜索: 怒放de每一天
不定时推送相关文章,期待和大家一起成长!!

完
