学成在线 第3天 讲义-CMS页面管理开发
1 自定义条件
1.1 需求分析
在页面输入查询条件,查询符合条件的页面信息。
查询条件如下:
站点Id:精确匹配
模板Id:精确匹配
页面别名:模糊匹配
...
自定义模板查询,根据站点ID,模板ID等各种属性得查询都是将其封装到一个对象里面,然后给对象设置属性,最后,在查询对象进行得赋值操作,模糊查询得时候,要先构造出来模糊查询得条件,在根据查询得条件封装到对应得查询条件器里面最好,最好在执行查询方法。
 //自定义模板查询
    @Test
    public void findByExample(){
        int page=0;
        int size=10;
        Pageable pageable=PageRequest.of(page,size);
        CmsPage cmsPage=new CmsPage();
       // cmsPage.setSiteId("5a751fab6abb5044e0d19ea1");//设置站点得ID
        //模糊查询
        cmsPage.setPageAliase("轮播");
        ExampleMatcher exampleMatcher=ExampleMatcher.matching();
        exampleMatcher= exampleMatcher.withMatcher("pageAliase",ExampleMatcher.GenericPropertyMatchers.contains());
        Example<CmsPage> example=Example.of(cmsPage,exampleMatcher);

        Page<CmsPage> all = cmsPageRepository.findAll(example, pageable);
        List<CmsPage> content = all.getContent();
        System.out.println(content);

    }

后台Service根据条件查询的接口
     //如果查询条件为空,则新建
        if (queryPageRequest==null){
            queryPageRequest=new QueryPageRequest();
        }
        //构建查询器
        ExampleMatcher exampleMatcher=ExampleMatcher.matching().withMatcher("pageAliase",ExampleMatcher.GenericPropertyMatchers.contains());
        CmsPage cmsPage=new CmsPage();
        //如果SiteId不为空
        if (StringUtils.isNotEmpty(queryPageRequest.getSiteId()))
        {
            cmsPage.setSiteId(queryPageRequest.getSiteId());
        }
        //如果TemplagtId不为空
        if (StringUtils.isNotEmpty(queryPageRequest.getTemplateId())){
            cmsPage.setTemplateId(queryPageRequest.getTemplateId());
        }
        //如果PageAliase不为空
        if (StringUtils.isNotEmpty(queryPageRequest.getPageAliase())){
            cmsPage.setPageAliase(queryPageRequest.getPageAliase());
        }
        //构建查询器
        Example example=Example.of(cmsPage,exampleMatcher);
        if (page<=0){
            page=0;
        }
        if (size<=0){
            size=10;
        }
        //构建分页对象
        PageRequest pageRequest = PageRequest.of(page, size);
        Page all = cmsPageRepository.findAll(example, pageRequest);
        QueryResult<CmsPage> queryResult=new QueryResult<>();
        List content = all.getContent();
        long totalElements = all.getTotalElements();
        queryResult.setList(content);
        queryResult.setTotal(totalElements);
        return new QueryResponseResult(CommonCode.SUCCESS,queryResult);
    }
请求成功

前端页面的自定义查询条件的添加,当接口查询成功之后,前端页面的接口和后端的接口对接即可,还是比较简单的
page_list中的前端代码:其实最重要的事Stringfy这个前端函数的应用,是把字符串拼接组合一下,这个的应用非常重要
   query(){
        page_list(this.param.page,this.param.size,this.param).then(res=>{
          console.log(res.queryResult.list)
          this.list=res.queryResult.list;
          this.total=res.queryResult.total;
          this.siteList=res.queryResult.list;
          console.log(this.siteList)
        });
      },
export const page_list=(page,size,queryparam)=>{
    let params=  querystring.stringify(queryparam);
  return http.requestQuickGet(apiUrl+'/cms/page/list/'+page+'/'+size+''+'/?'+params);
}
还有一点就是这个page是从0开始的,所以一开始的时候搜所这个轮播是没有的,代码没有过BUG,只是把page=0这个条件给忽略了需要从后台才能加上


创建唯一索引

新增页面的接口编写,pageService
 public CmsPageResult insertCmsPage(CmsPage cmsPage) {
        //检查cmspage在数据库中是否存在,如果不存在就新增
        CmsPageResult result = cmsPageRepository.findBySiteIdAndPageWebPathAndPageName(cmsPage.getSiteId(), cmsPage.getPageWebPath(), cmsPage.getPageName());
        if (result==null){
            cmsPage.setPageId(null);
            CmsPage cmsPage1 = cmsPageRepository.save(cmsPage);
            return new CmsPageResult(CommonCode.SUCCESS,cmsPage1);
        }
        return new CmsPageResult(CommonCode.FAIL,null);
    }
完成测试:

关于返回路由带上参数,其实大部分还是涉及到了Vue的相关的知识,多学一些练一练手
添加gobakc返回按钮的代码:
<el-button type="primary" @click="go_back" >返回</el-button>
接下来就是定义go_back方法,这个页面主要也就是页面校验信息规则的添加已经页面的部分新增表单的完善,整体的功能部分还是关于Vue的知识的应用,涉及到的后端的知识不多
  go_back(){
          this.$router.push(
            {
              path:'/cms/page/list',
              query:{
                page:this.$route.query.page,
                siteId:this.$route.query.siteId
              }
            }
          )
        },


==========================================
created() {
      this.param.page=Number.parseInt(this.$route.query.page||1),
      this.param.siteId=this.$route.query.siteId || ''
    },
完成测试

 新增页面的表单提交:
 addSubmit(){
          this.$refs.pageForm.validate(validate=>{
            if (validate){
              this.$confirm('您确定要提交么?, 是否继续?', '提示', {
              }).then(() => {
                page_add(this.pageForm).then(res=>{
                  if (res.success){
                    this.$message({
                      type: 'success',
                      message: '提交成功!'
                    });
                    this.$refs['pageForm'].resetFields();
                  }
                })
              })
            }else {
              this.$message.error("提交失败")
            }
          })
      }
更新页面要根据ID查询出来这个实体对象,之后在根据这个实体对象更新出来具体的值得内容之后便可以进行更新得操作了
Cotroller &Service中得部分代码:
================================Controller=================
 @Override
    @GetMapping("/get/{id}")
    public CmsPage findById(@PathVariable("id") String id) {
            return pageService.findById(id);
    }

    @Override
    @PutMapping("/edit/{id}")
    public CmsPageResult edit(@PathVariable("id") String id,@RequestBody CmsPage cmsPage) {
        return pageService.edit(id,cmsPage);
    }
================================Service=================
    public CmsPage findById(String id) {
        Optional<CmsPage> cmsPage = cmsPageRepository.findById(id);
        if (cmsPage.isPresent()){
            CmsPage cmsPage1 = cmsPage.get();
            return cmsPage1;
        }
        return null;
    }

    public CmsPageResult edit(String id, CmsPage cmsPage) {
        CmsPage one = this.findById(id);
        if (one!=null){
            one.setTemplateId(cmsPage.getTemplateId());//更新所属站点
            one.setSiteId(cmsPage.getSiteId()); //更新页面别名
            one.setPageAliase(cmsPage.getPageAliase()); //更新页面名称
            one.setPageName(cmsPage.getPageName()); //更新访问路径
            one.setPageWebPath(cmsPage.getPageWebPath()); //更新物理路径
            one.setPagePhysicalPath(cmsPage.getPagePhysicalPath());
            CmsPage save = cmsPageRepository.save(one);
            return new CmsPageResult(CommonCode.SUCCESS,save);
        }
        return new CmsPageResult(CommonCode.FAIL,null);
    }
完成测试:

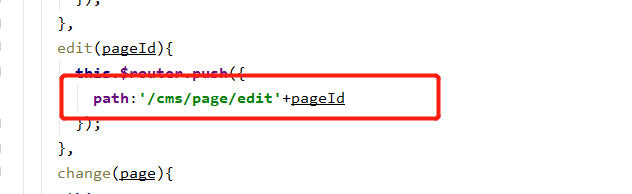
 页面修改得前端代码,因为大部分得页面模板都一样,所以这个时候直接复制前一个模板就可以了,首先得思路和后端得思路一样需要将页面中需要编辑得信息,回显到页面中,然后在执行保存得按钮,在修改前得得代码得时候,第一步先将页面复制进来,之后,在index.js中添加路由,定义字节点,之后在cmsApi中定义请求根据ID查询得方法和edit保存 得ajax请求,这个路由相关得就定义完了,有个比较重要得地方,就是根据ID查询数据回显得时候,需要传入这条记录得ID值,所以在定义路由得时候要把ID这个变量跟到后面,这样在LIST这个页面用路由得方法得时候,可以直接在后面拼ID,就很方便得查询回显得数据了


前得代码定义完毕之后可以直接进行测试了:
数据回显成功:

开始数据编辑:提交成功,之后编辑成功

删除操作得相关代码:
   public ResponseResult delByID(String id) {
        Optional<CmsPage> cmsPage = cmsPageRepository.findById(id);
        if (cmsPage.isPresent()){
            cmsPageRepository.deleteById(id);
            return new ResponseResult(CommonCode.SUCCESS);
        }
        return new ResponseResult(CommonCode.FAIL);
    }
前端执行删除操作,前端得操作基本和编辑得操作一样,只要把ID获取到,直接发送请求到后台就可以直接删除了
  del(pageId){
        this.$confirm('您确定要删除么?, 是否继续?', '提示', {
        }).then(() => {
          page_del(pageId).then(res=>{
            if (res.success){
              this.$message({
                type: 'success',
                message: '删除成功!'
              });
            }
          })
        })
      },

可预知异常得补货,因为要针对不同得情况,设置出来不同得异常信息,以便给用户更友好得提示
代码设计得时候分为了CunstomerException抛出异常类,以及异常捕获类,这些都是工具类,只要把这工具类设计到异常出现得地方,就可以避免少些try ,catch

真对不可预知异常,处理得时候也是真对不同的情况,来处理的,主要思路是封装到一个map,中map中已经有的是针对框架跑出来的异常,重写或覆盖掉框架抛出的异常,就可以实现自定义异常,个人感觉这个自定义抛出异常的处理的方式还是很不友好,但是课程中展示的解决的方式还是很特别的一种解决方式,也是学习的一种方式
public class CustomException  extends RuntimeException{

    //错误代码
    ResultCode resultCode;

    /**
     * Constructs a new runtime exception with {@code null} as its
     * detail message.  The cause is not initialized, and may subsequently be
     * initialized by a call to {@link #initCause}.
     */
    public CustomException(ResultCode resultCode) {
        this.resultCode = resultCode;
    }

    public ResultCode getResultCode() {
        return resultCode;
    }

    public void setResultCode(ResultCode resultCode) {
        this.resultCode = resultCode;
    }
}
public class ExceptionCast {
public static void cast(ResultCode resultCode){
throw new CustomException(resultCode);
}
}
@ControllerAdvice
public class ExceptionCatch {
    private static  final Logger LOGGER=LoggerFactory.getLogger(ExceptionCatch.class);

    private static ImmutableMap<Class<? extends Throwable>,ResultCode> EXCEPTION;
    public static ImmutableMap.Builder<Class<? extends Throwable>,ResultCode>builder= ImmutableMap.builder();


    @ExceptionHandler(CustomException.class)
    @ResponseBody
    public ResponseResult customerException(CustomException customer){
        LOGGER.error("errors--------"+customer.getMessage());
        ResultCode resultCode = customer.getResultCode();
        return new ResponseResult(resultCode);
    }

    @ExceptionHandler(CustomException.class)
    @ResponseBody
    public ResponseResult Exception(CustomException customer){
        LOGGER.error("errors--------"+customer.getMessage());
        if (EXCEPTION==null){
            EXCEPTION=     builder.build();//构建成功
            //找对应得代码,返回给响应给用户,响应9999得移仓
            ResultCode resultCode = EXCEPTION.get(customer.getClass());
            if (resultCode!=null){
                return new ResponseResult(resultCode);
            }else {
                return new ResponseResult(CommonCode.SERVER_ERROR);
            }
        }
        return new ResponseResult(CommonCode.SERVER_ERROR);
    }
    static {
        builder.put(HttpMessageNotReadableException.class,CommonCode.FAIL);
    }
}
