1.由于项目越来越大,没有进行封装复用,引起的代码就会冗余,所以今天就来封装一下请求。
1.安装:npm install axios
2.简单使用,
      params:{
          id:1
      }
  })
  .then(data=>{})
  .catch(err=>{})
    axios.post("url",{

    })
但是由于只是简单的请求,如果需要加请求拦截就会变得麻烦。所以进行封装下。
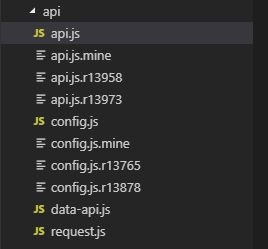
3…新建一个文件夹,里面分别放api.js和config.js和request.js
4.首先定义全局的Js,也就是在config.js种定义。
const hostName = "http://172.0.0.1:8080";
export default hostName;
5.第二步我们要对get、post方法、请求拦截、错误处理进行封装(也是最终要的一步),在request.js文件中进行。
import axios from "axios"; //导入axios
import qs from "qs";//吧json对象在转换成,name=1&age=2这种形式的
import hostName from "./config.js";//导入全局的url
import Vue from "vue"; //vue
import router from "../router/index.js";//路由
//定义一个方法名为httpRequest的函数,并且传入一个对象作为形参:url,method,data,headers,cancalToken
function httpRequest({
  url,
  method = "get",
  data = {},
  headers = {},
  cancelToken
})
//定义请求头
{   let _headers = {
    "content-type": "application/json",
    access_token: sessionStorage.getItem("token"),
    ...headers //拓展运算符,相当于和并对象,(如果headers里面有内容就合并到_headers里面去)
  };
  let _data = data;
  //如果是post请求,content-type=="application/json",就装换为json的data
  if (headers['"content-type'] === "application/json") {
    _data = JSON.stringify(data);
  }
  return new Promise((resolve, reject) => {
    axios({
      url: hostName + url,
      method: method,
      headers: _headers,
      data: method == "post" ? _data : {},
      params: method == "get" ? data : {},
      paramsSerializer: function(params) {
        return qs.stringify(params);
      },
      cancelToken: cancelToken,
      timeout: 2500
    })
    //后端返回的不同状态提示处理
      .then(res => {
        console.log(url+'===',res.data)
        if (res.data.code == "000") {
        //异步操作成功
          resolve(res.data);
        } else {
          if (res.data.code == "002") {
            //登录失效
            sessionStorage.setItem("isLoginTimeout", "1");
            router.push("/login?redirect=" + router.currentRoute.fullPath);
          } else {
            if (res.data.msg) {
            //提示消息,
              Vue.prototype.$message({
                message: res.data.msg,
                type: "warning"
              });
            }
          }
        }
      })
       .catch(res => {
         reject(res);
       });
  });
}

export let CancelToken = axios.CancelToken;
export default httpRequest;
6.直接可以条用httpRequest方法,传入实参url,method(默认get),data等,如果是post,可以加上 // headers:{“content-type”:"application/json}
import httpRequest from "./request"
import {
    http
} from "./data-api";
import hostName from './config'
const api = {
    //登录
    login(data) {
        return httpRequest({
            url: "/user/login",
            method: "post",
            data: data,
                //   headers:{
            //     "content-type":"application/json"
            // }
        })
    },
    // ceshi(data){
    //     return httpRequest({
    //         url:"/resource/queryAllResources",method:"get",data:data
    //     })
    // }
    //机构管理菜单
    orgquery(data) {
        return httpRequest({
            url: "/org/query",
            method: "get",
            data: data
        })
    },
    orgsync(data) {
        return httpRequest({
            url: "/org/sync",
            data: data
        })
    },};
export default api;
7.最后要在main.js中挂载。
import api from "./api/api" //导入api.js文件
Vue.prototype.$http=api;//挂载到vue原型上面,即可使用
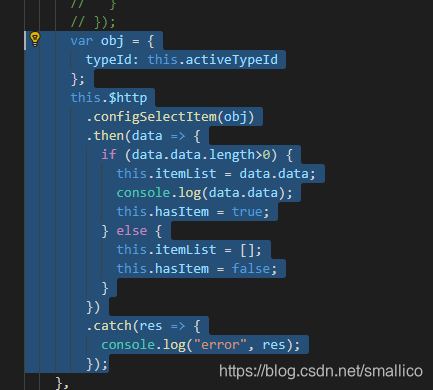
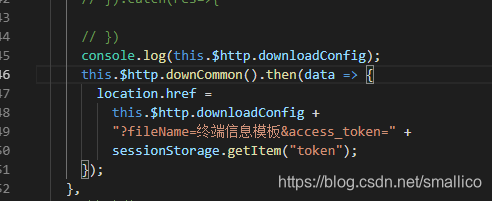
8.页面中的使用
另附vue时间转换函数:
//时间转换函数
Vue.prototype.timestampFormateDate = function(timestamp) {
  if (timestamp == null) {
    return "--";
  }
  var time = new Date(timestamp);

  var sign = "-";
  var Y = time.getFullYear();
  var M =
    time.getMonth() + 1 < 10
      ? "0" + (time.getMonth() + 1)
      : time.getMonth() + 1;
  var D = time.getDate() < 10 ? "0" + time.getDate() : time.getDate();
  var h = time.getHours() < 10 ? "0" + time.getHours() : time.getHours();
  var m = time.getMinutes() < 10 ? "0" + time.getMinutes() : time.getMinutes();
  var s = time.getSeconds() < 10 ? "0" + time.getHours() : time.getSeconds();
  var result = Y + sign + M + sign + D + " " + h + ":" + m + ":" + s;
  return result;
};
