前言
在我们做项目时会用到许多场景启动器,我们只需要引入对应的starter就可以使用相应的功能,我们可以在配置文件中根据需要修改一些属性,我们也可以自定义一些starter来使用,首先我们需要直到starter的原理
原理
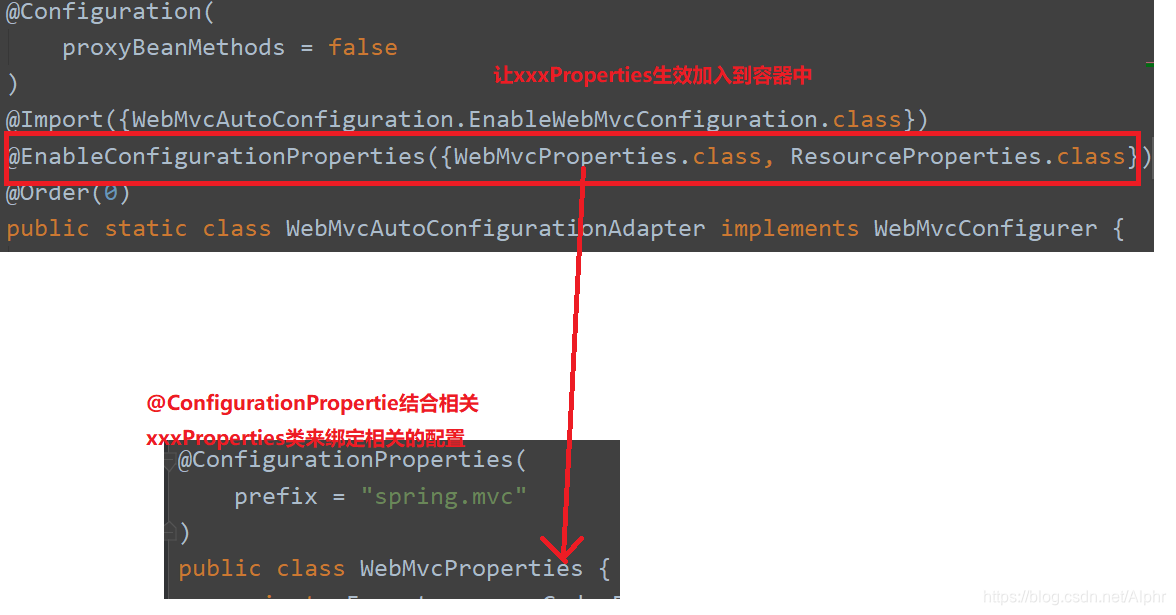
1.我们以WebMvcAutoConfiguration为例,看这个类上标注的注解
@Configuration  //指定这个类是一个配置类
@ConditionalOnWebApplication //在指定条件成立的情况下自动配置类生效,这里值在web模式下生效
@AutoConfigureAfter  //指定自动配置类的顺序
2.观察这个类中的信息
如果这个自动配置类生效,就可以往容器中添加各种组件,比如:
		@Bean
        public FormattingConversionService mvcConversionService() {
            WebConversionService conversionService = new WebConversionService(this.mvcProperties.getDateFormat());
            this.addFormatters(conversionService);
            return conversionService;
        }
往容器中添加组件时可能会用上一些属性
如上情况都配置好的情况下,我们要想让这个自动配置类生效,必须加载这些自动配置类,我之前的文章爷谈到了spring boot是如何加载这些自动配置类的点击跳转
将需要启动就加载的自动配置类,配置在META-INF/spring.factories
org.springframework.boot.autoconfigure.EnableAutoConfiguration=\
org.springframework.boot.autoconfigure.admin.SpringApplicationAdminJmxAutoConfiguration,\
org.springframework.boot.autoconfigure.aop.AopAutoConfiguration,\
模式
我们用web模块来举例
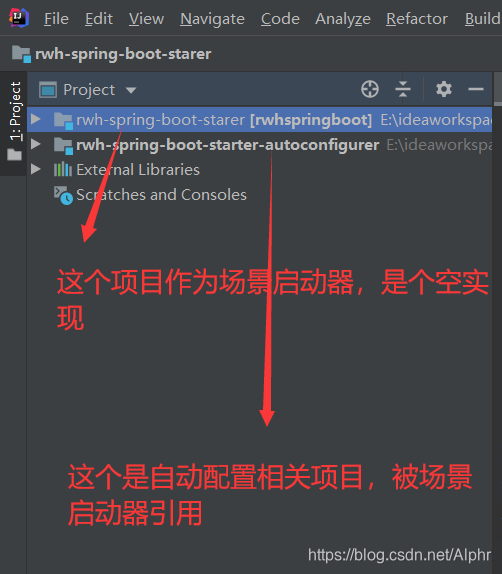
自定义配置
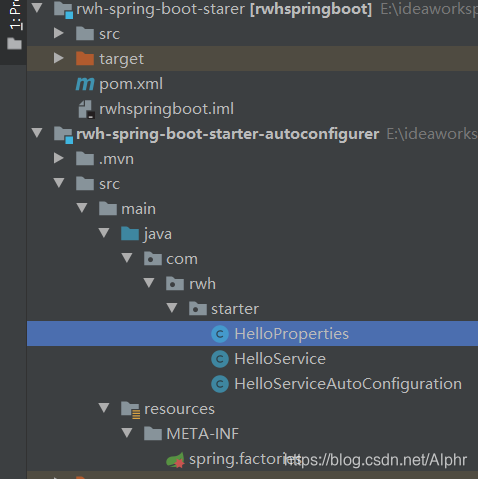
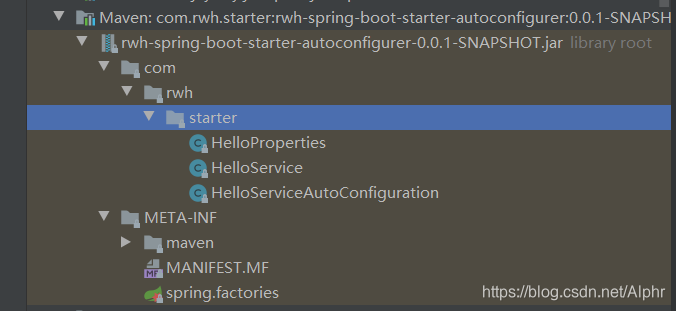
1.工程目录结构

如图中所示
2.自动配置
我们新建几个类,并且往容器中添加
/**
属性类
*/
@ConfigurationProperties(prefix = "rwh.hello")
public class HelloProperties {
    private String prefix;
    private String suffix;

    public String getPrefix() {
        return prefix;
    }

    public void setPrefix(String prefix) {
        this.prefix = prefix;
    }

    public String getSuffix() {
        return suffix;
    }

    public void setSuffix(String suffix) {
        this.suffix = suffix;
    }
}


public class HelloService {

    HelloProperties helloProperties;

    public HelloProperties getHelloProperties() {
        return helloProperties;
    }

    public void setHelloProperties(HelloProperties helloProperties) {
        this.helloProperties = helloProperties;
    }

    public String sayHello(String name){
        return helloProperties.getPrefix() +"-"+ name + helloProperties.getSuffix();
    }
}


/**
配置类
*/
@Configuration
@ConditionalOnWebApplication
@EnableConfigurationProperties(HelloProperties.class)//往容器中添加HelloProperties,使之生效
public class HelloServiceAutoConfiguration {

    @Autowired
    HelloProperties helloProperties;

    @Bean
    public HelloService helloService(){
        HelloService service = new HelloService();
        service.setHelloProperties(helloProperties);
        return service;
    }
}
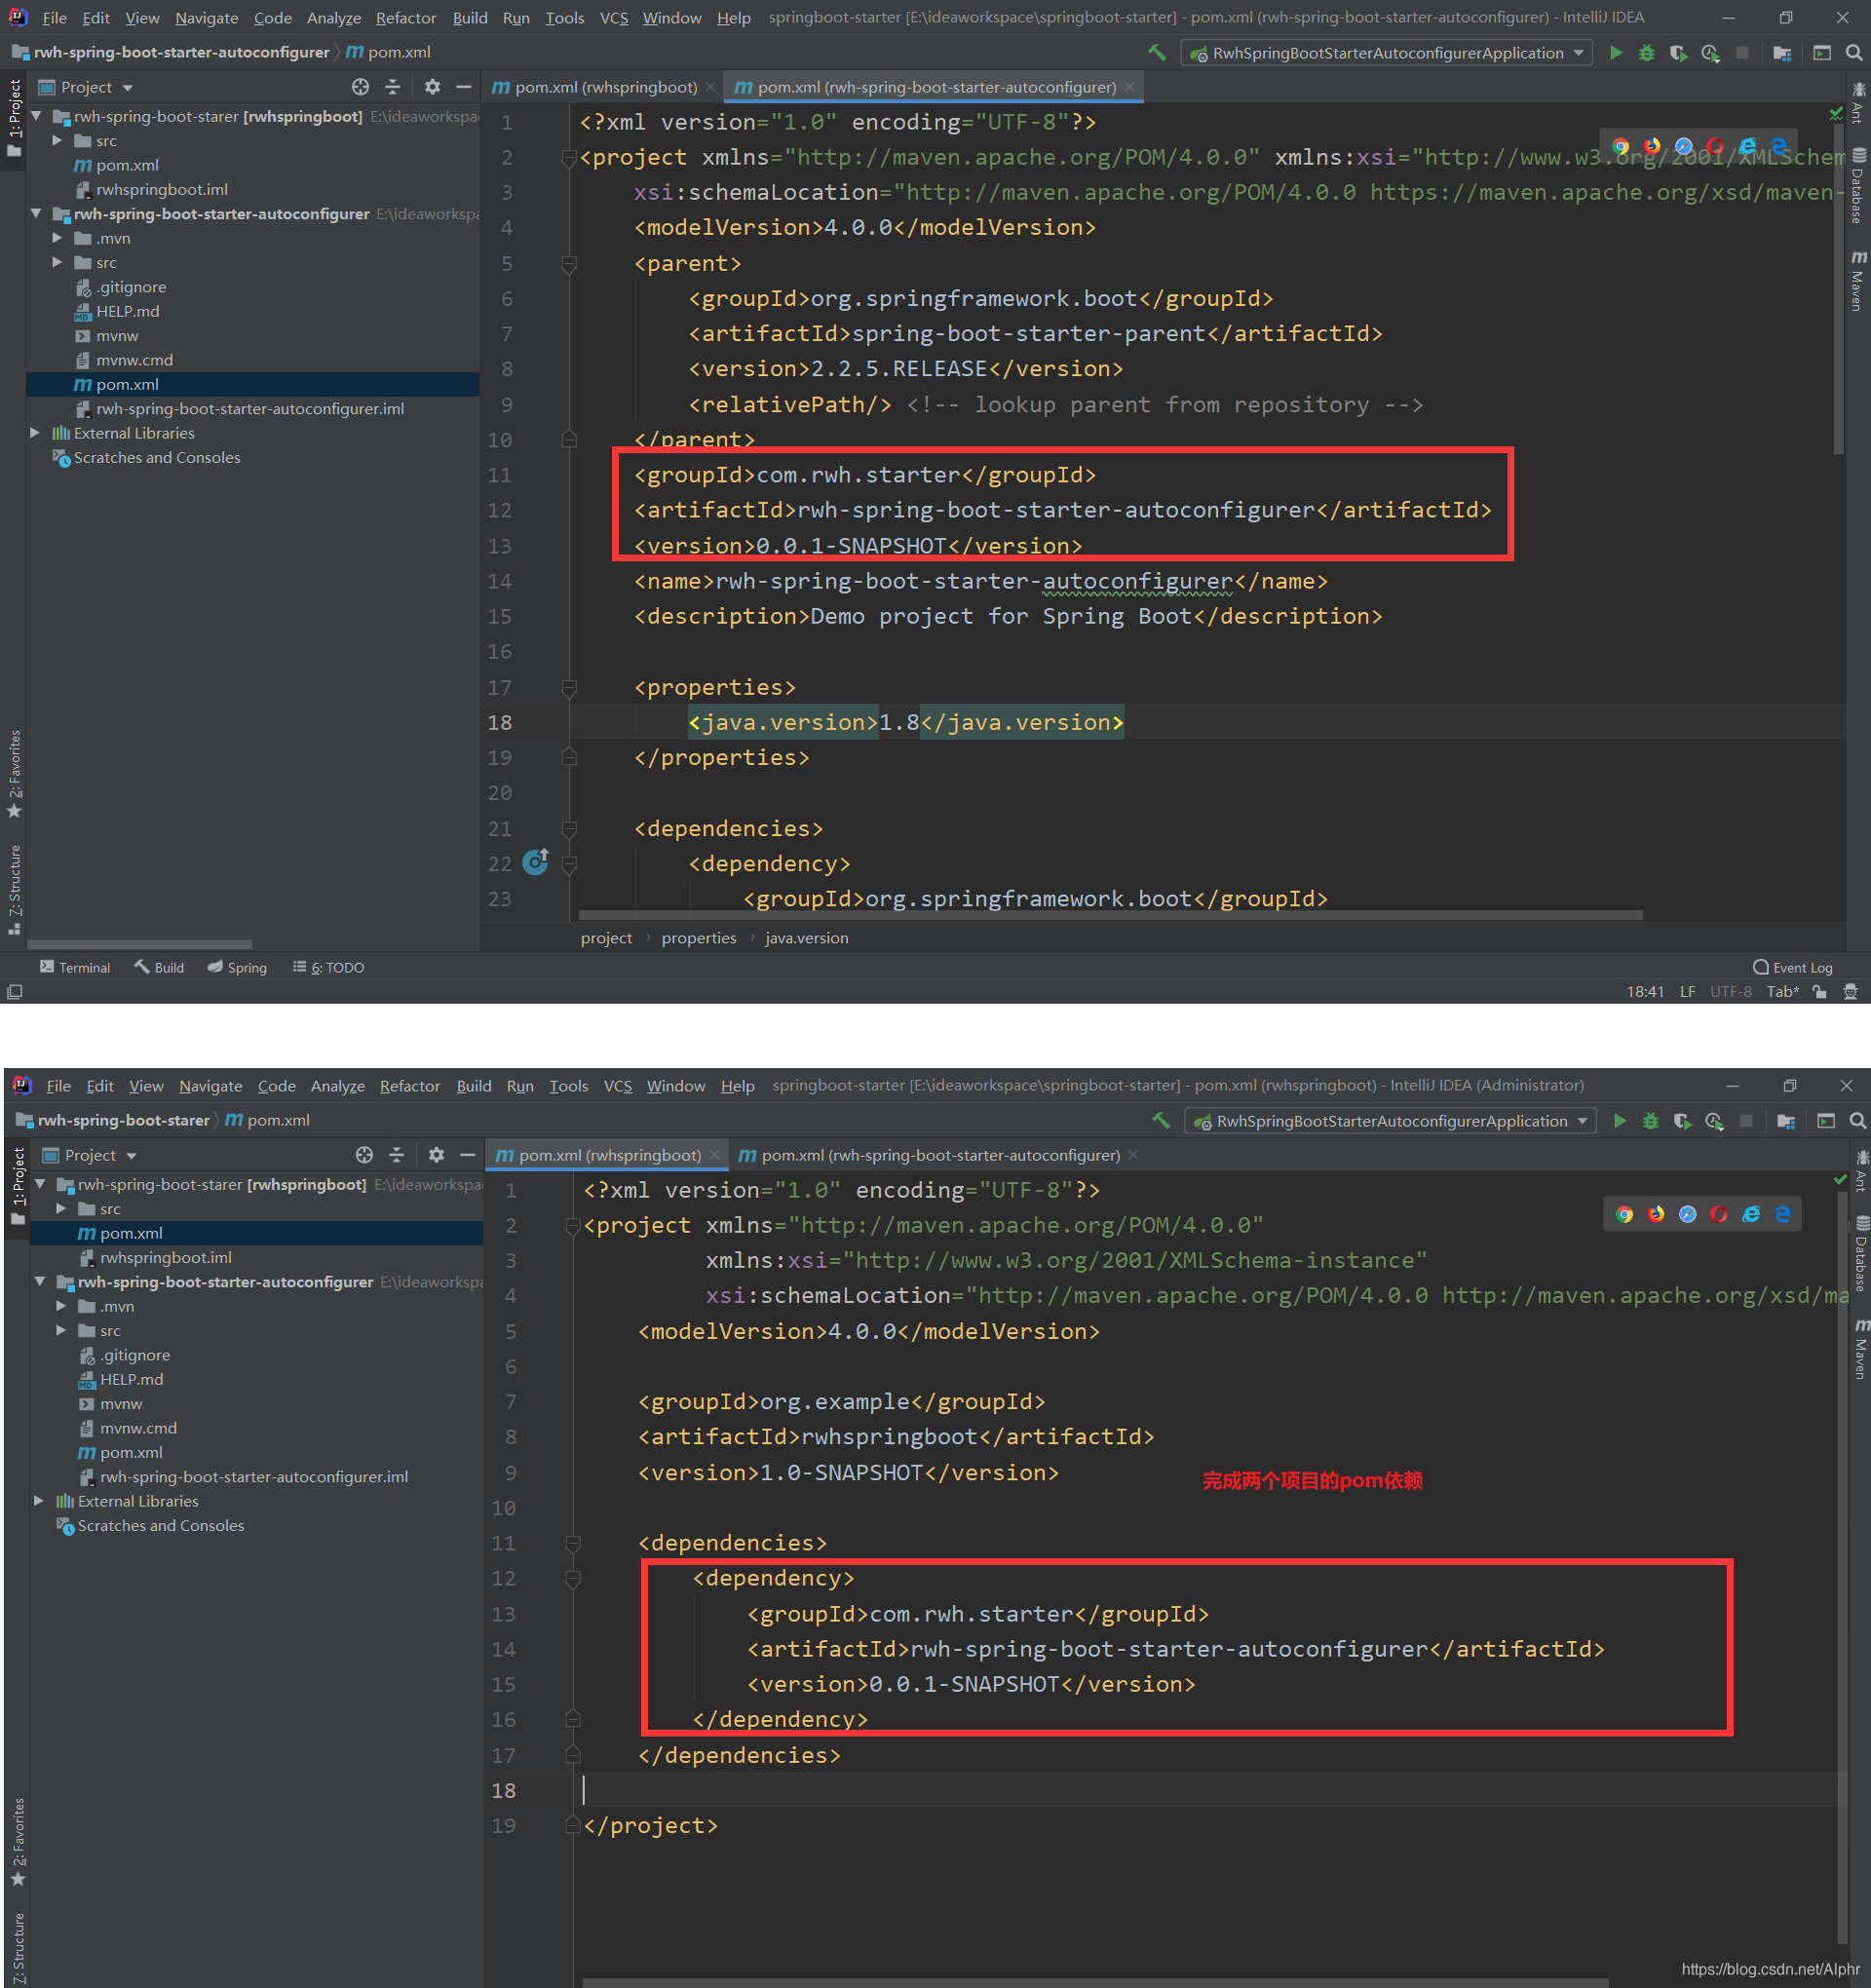
光有这几个类还不够,我们还要将这个自动配置包设置为程序启动时启动,也就是之前说的将需要启动就加载的自动配置类,配置在META-INF/spring.factories

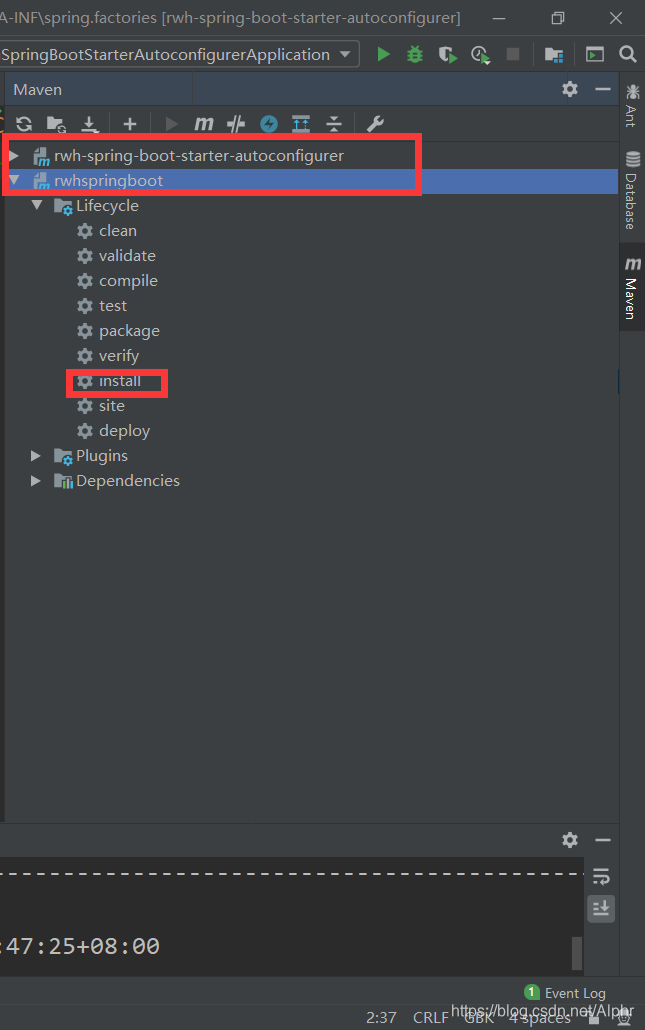
然后再maven中点击install,将我们自定义的包导入maven仓库
到此为止我们自定义的配置包就写好了,我们新建一个springboot应用来测试
		<dependency>
            <groupId>org.example</groupId>
            <artifactId>rwhspringboot</artifactId>
            <version>1.0-SNAPSHOT</version>
        </dependency>
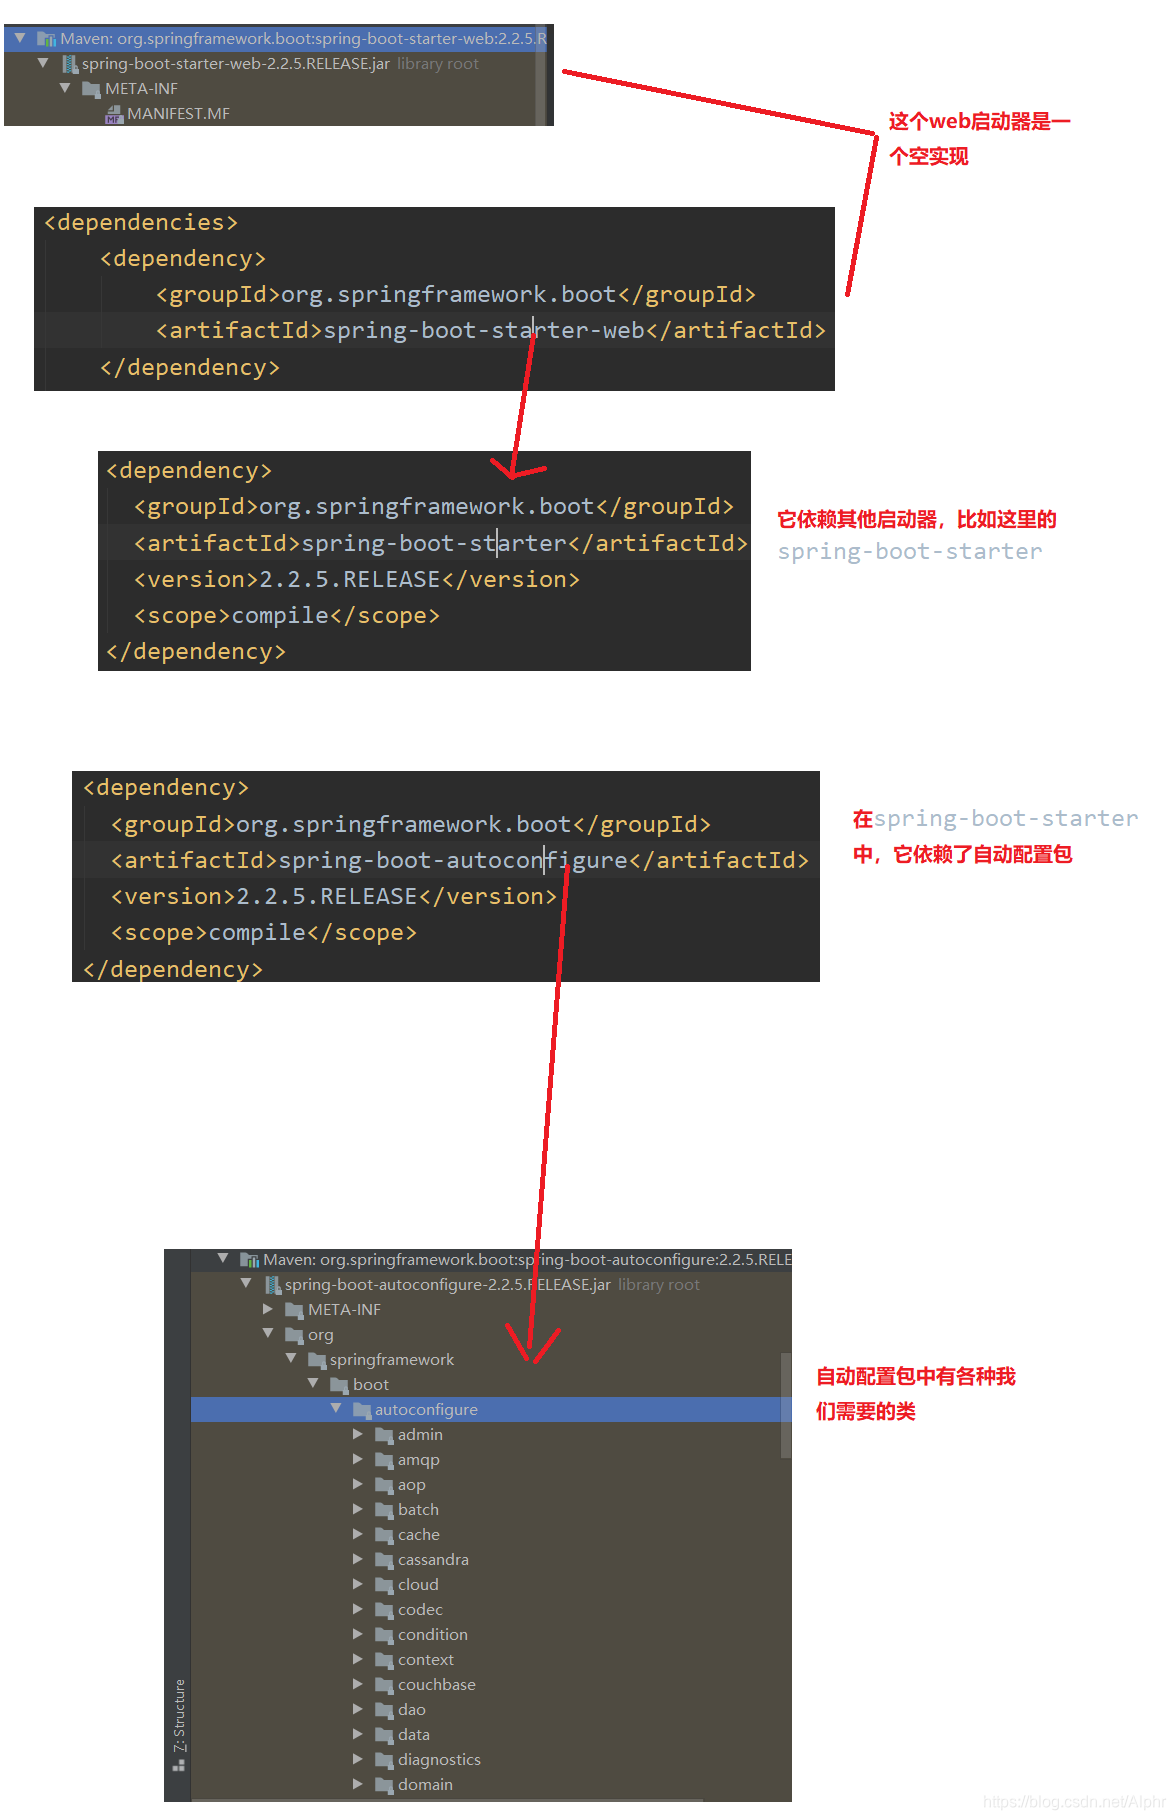
在新建的springboot项目的pom导入我们的场景启动器starter(空实现的那一个)
我们可以看到我们的包被导入进来了,我们写一个controller
@RestController
public class HelloController {

    @Autowired
    HelloService helloService;

    @GetMapping("/hello")
    public String hello(){
        return helloService.sayHello("hello");
    }
}
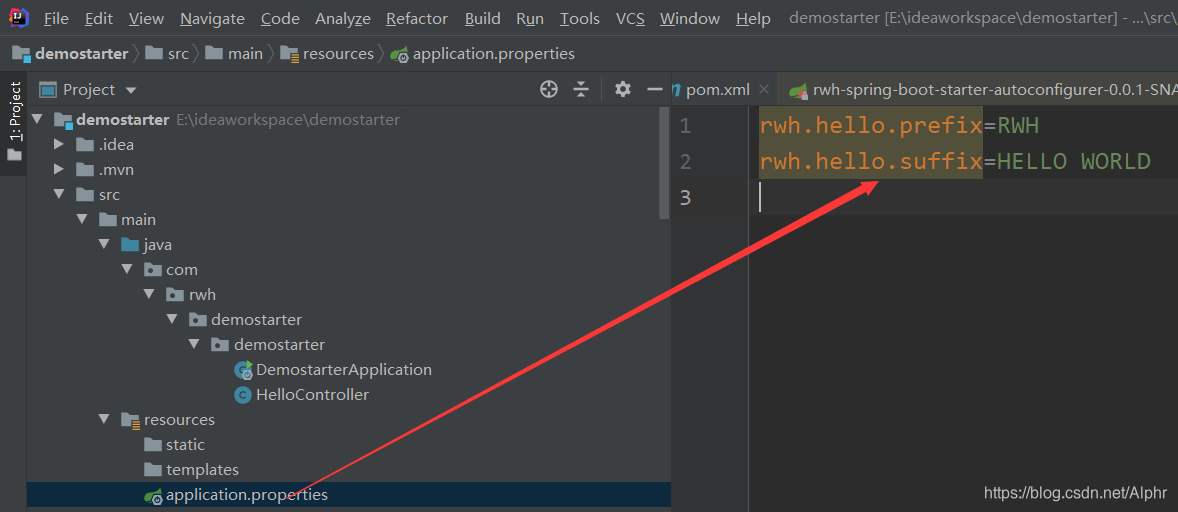
修改我们的属性
我们打开浏览器
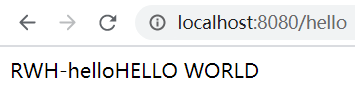
测试成功
