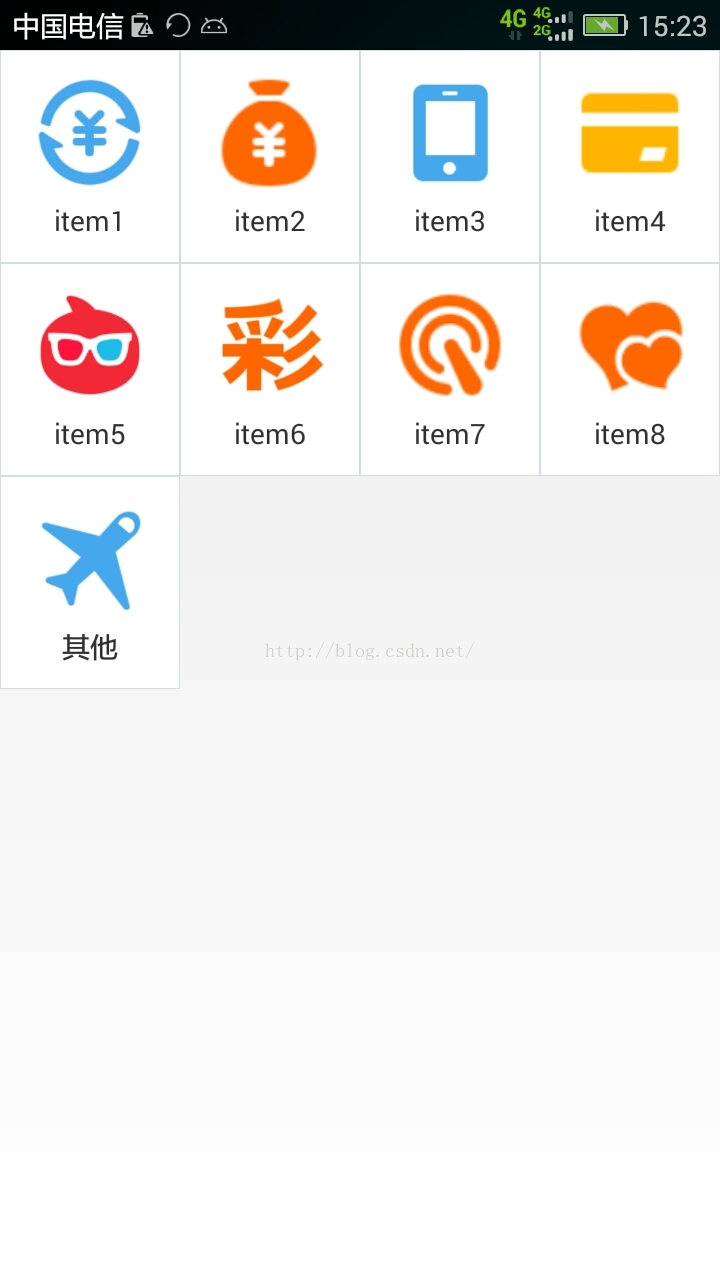
由于项目需要,实现一个类似支付宝首页九宫格的功能。参考了网络多个项目都不能满足需求。最后决定自己修改一个,先看下效果图
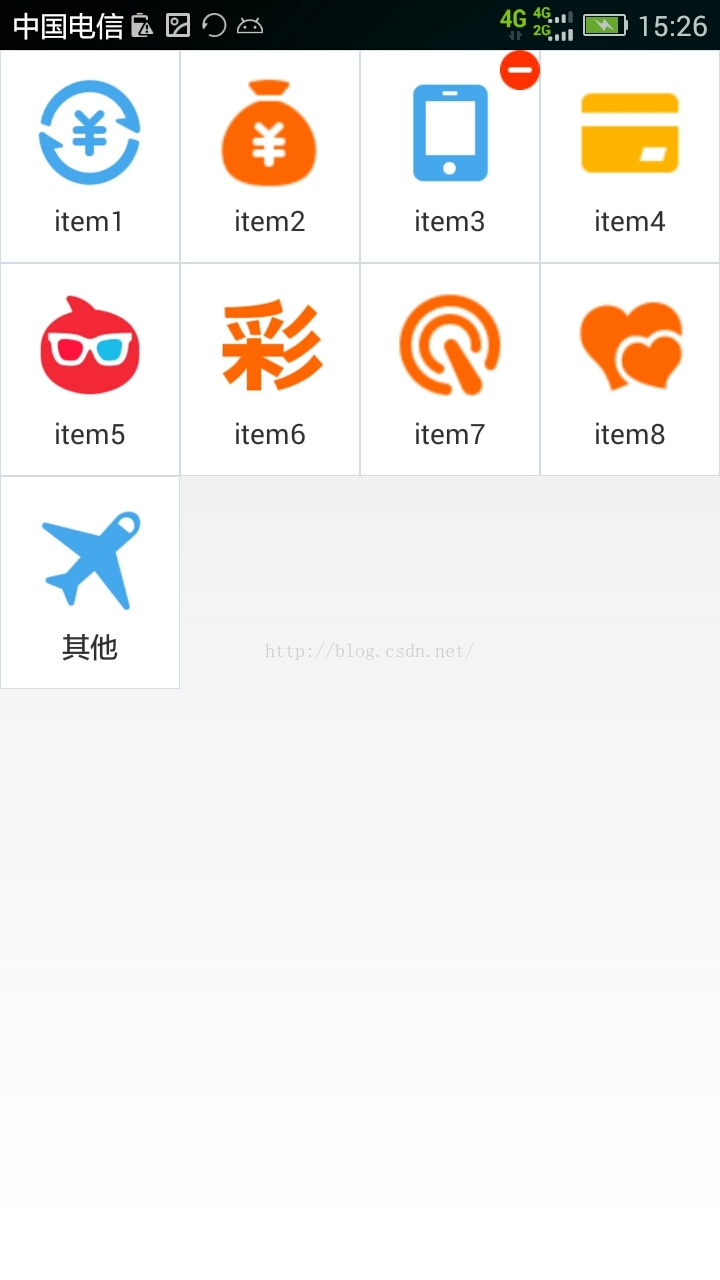
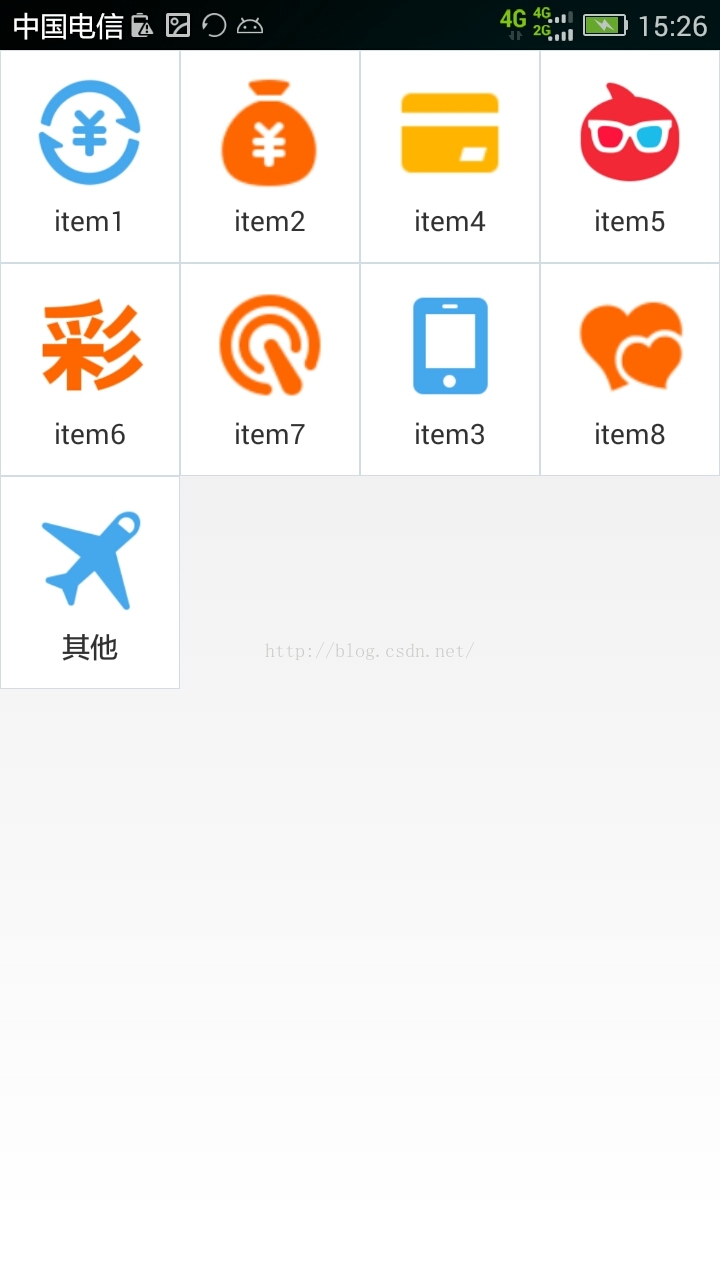
第三张图片是拖动修改过位置的。
下面是主函数的布局
<?xml version="1.0" encoding="utf-8"?>
<LinearLayout xmlns:android="http://schemas.android.com/apk/res/android"
    android:layout_width="match_parent"
    android:layout_height="match_parent"
    android:orientation="vertical" >


    <LinearLayout
        android:layout_width="fill_parent"
        android:layout_height="wrap_content"
        android:orientation="vertical" >

        <com.tisson.test.DragGrid
            android:id="@+id/userGridView"
            android:layout_width="fill_parent"
            android:layout_height="match_parent"
            android:layout_gravity="center_horizontal"
            android:gravity="center"
            android:listSelector="@android:color/transparent"
            android:numColumns="4"
            android:scrollbars="vertical"
            android:stretchMode="columnWidth" />

    </LinearLayout>

</LinearLayout><?xml version="1.0" encoding="utf-8"?>
<selector xmlns:android="http://schemas.android.com/apk/res/android">
<item android:state_pressed="true"><shape android:shape="rectangle">
<stroke android:width="1.0px" android:color="#ffd3dde6" />
<gradient android:angle="270.0" android:endColor="#ffe8ecef" android:startColor="#ffe8ecef" />
</shape></item>
<item android:state_focused="true"><shape android:shape="rectangle">
<gradient android:angle="270.0" android:endColor="#ffe8ecef" android:startColor="#ffe8ecef" />
<stroke android:width="1.0px" android:color="#ffd3dde6" />
</shape></item>
<item><shape android:shape="rectangle">
<gradient android:angle="270.0" android:endColor="#ffffffff" android:startColor="#ffffffff" />
<stroke android:width="1.0px" android:color="#ffd3dde6" />
</shape></item>
</selector>
继承GridView自定义DragGrid,ITEM的拖动是通过cache机制保存为bitmap。隐藏点击的ITEM。通过onTouchEvent(MotionEvent ev)在里面修改bitmap的位置。拖动完成之后通过适配器DragAdapter更新ITEM的位置,显示之前被隐藏的ITEM。
下面是部分代码
dragItemView = (ViewGroup) getChildAt(downPos- getFirstVisiblePosition());
win_view_x = windowX - dragItemView.getLeft();// VIEW相对自己的X,
win_view_y = windowY - dragItemView.getTop();// VIEW相对自己的y,
//cache机制保存为bitmap
dragItemView.destroyDrawingCache();
dragItemView.setDrawingCacheEnabled(true);
	Bitmap dragBitmap = Bitmap.createBitmap(dragItemView.getDrawingCache());
	mVibrator.vibrate(50);// 设置震动时间
	startDrag(dragBitmap, (int) ev.getRawX(),(int) ev.getRawY());
	hideDropItem();
	dragItemView.setVisibility(View.INVISIBLE);
ViewGroup dragViewGroup = (ViewGroup) getChildAt(clickPos- getFirstVisiblePosition());
ImageView deleteIcon = (ImageView) dragViewGroup.findViewById(R.id.delete_icon);
int dragIconViewX = dragViewGroup.getRight() - deleteIcon.getWidth();
int dragIconViewY = dragViewGroup.getTop();
if (dragIconViewX<clickX && clickX<dragViewGroup.getRight() &&
   dragIconViewY < clickY && clickY < (dragIconViewY + deleteIcon.getHeight())) {
DragAdapter mDragAdapter = (DragAdapter) getAdapter();
mDragAdapter.remove(clickPos);
mDragAdapter.setReset(true);
return;
}项目链接:项目源码
补充:关于反馈说ITEM8不能拖动的问题,之前的构想是ITEM8是作为添加模块功能的,而不是作为可拖动的功能模块。解决办法:在DragGrid.java中找到这个段代码,if (startPosition == getCount() - 1) {return false;}注释掉就可以了。