1.RequestParam:可以获取传递来的参数。
@Controller
public class GreetingController {


	@GetMapping("/greeting")
	public String greeting(@RequestParam(name="name", required=false, defaultValue="World") String name, Model model) {


		model.addAttribute("name", name);
		return "greeting";
	}
}
http://localhost:8080/hello?name=zxw 在浏览器中通过这样去传参访问,或者说能够得到浏览器在url中传出的参数。
Model 是内置的一个类,通过model.addAttribute将变量赋值
return 一个字符串的时候,会到resources下的templates中寻找同名的html文件。
2.将GitHub上的项目下载到本地
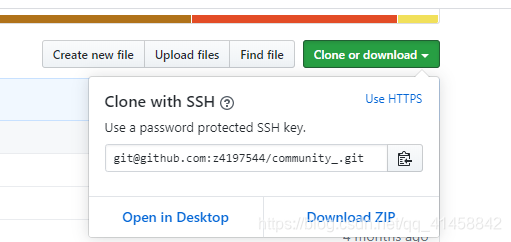
在本地目标文件夹,按住shift并点击鼠标右键,找到“在本地打开Powershell窗口”或者“在此处打开命令窗口”,输入命令行 git clone [email protected]:z4197544/community_.git即可下载到本地

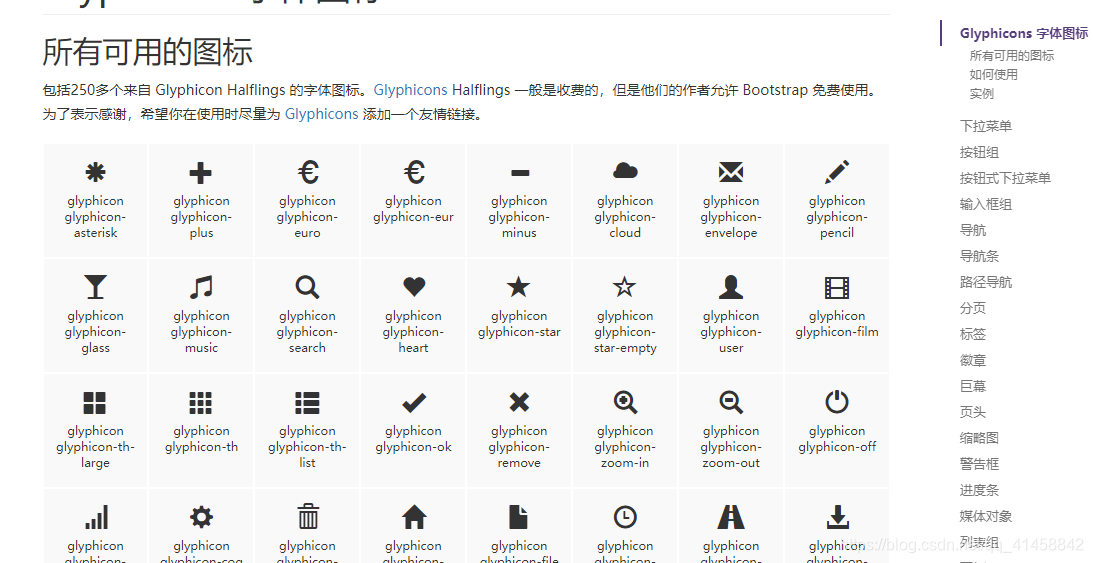
3.Bootstrap(一)


<!DOCTYPE HTML>
<html xmlns:th="http://www.thymeleaf.org">
<head>
    <title>xw社区</title>

    #引用相应的css,js格式,可直接从文件列表中拖过去
    <meta http-equiv="Content-Type" content="text/html; charset=UTF-8" />
    <link rel="stylesheet" href="../static/css/bootstrap.min.css">
    <link rel="stylesheet" href="../static/css/bootstrap-theme.min.css">
    <script src="../static/js/bootstrap.min.js"></script>
</head>

<body>
<nav class="navbar navbar-default">
    <div class="container-fluid">
        <div class="navbar-header">
            <button type="button" class="navbar-toggle collapsed" data-toggle="collapse" data-target="#bs-example-navbar-collapse-1" aria-expanded="false">
                <span class="sr-only">XW社区</span>
            </button>
            <a class="navbar-brand" href="#">XW社区</a>
        </div>

        <div class="collapse navbar-collapse" id="bs-example-navbar-collapse-1">
            <form class="navbar-form navbar-left">
                <div class="form-group">
                    <input type="text" class="form-control" placeholder="搜索问题">
                </div>
                <button type="submit" class="btn btn-default">搜索</button>
            </form>
            <ul class="nav navbar-nav navbar-right">
                <li><a href="#">登录</a></li>
                <li class="dropdown">
                    <a href="#" class="dropdown-toggle" data-toggle="dropdown" role="button" aria-haspopup="true" aria-expanded="false">我 <span class="caret"></span></a>
                    <ul class="dropdown-menu">
                        <li><a href="#">消息</a></li>
                        <li><a href="#">消息中心</a></li>
                        <li><a href="#">退出登录</a></li>
                    </ul>
                </li>
            </ul>
        </div>
    </div>
</nav>
</body>
</html>
将用于生产环境的Bootstrap下载下来,并将其解压到resources/static下,在相应的html文件中使用相应的Bootstrap的组件,并引用相应的css,js格式(引用格式的时候,可以直接拖过去)。
直接拖过去有一个问题~:样式不显式,因为它采取的是相对路径的方式来引用资源, 这时候我们要把css或js之前的删除!下面文章有介绍!
https://blog.csdn.net/qq_33342904/article/details/94505548
4.利用**@Value()**注入值
application.properties定义好相应的值,相应位置注入。
github.client.id=1
github.client.secret=2
github.client.url=2
@Value("${github.client.id}")
private String client_id;

@Value("${github.client.secret}")
private String client_secret;

@Value("${github.client.url}")
private String client_url;
5.OkHttp:HTTP框架。使用OkHttp来进行get和post请求。
6.fastjson:阿里研发的用于java开发,可实现json对象与JavaBean对象的相互转化(json是键值对形式的)。下面是一个小小栗子。
public static void main(String[] args) {


    String json_String = "{\"name\":\"zxw\",\"age\":18,\"sex\":\"男\"}";

    People p = JSON.parseObject(json_String, People.class);    				      			System.out.println(p.toString());

    String json__ = JSON.toJSONString(p);
    System.out.println(json__);
}

People{

    name='zxw', age=18, sex='男'}

{

    "age":18,"name":"zxw","sex":"男"}
7.Session:在网络应用中被称为会话。
Cookie:
HttpServletRequest:对象代表客户端的请求,当客户端通过HTTP协议访问服务器时,HTTP请求头中的所有信息都封装在这个对象中,通过这个对象提供的方法,可以获得客户端请求的所有信息。
HttpServletResponse:服务器端的相应。
首先,我们在Controller中接收到request。
  public String callback(@RequestParam(name = "code")String code,
                           HttpServletRequest request,
                           HttpServletResponse response)
其次,我们调用getSession().setAttribute()方法来将信息保存到session的作用域的user中。
request.getSession().setAttribute("user", user);
最后,我们从html文件中调用相应的值。
<li class="dropdown" th:if="${session.user!=null}">
8.整合Mybatis
https://blog.csdn.net/qq_41458842/article/details/99291573 (注解版)
https://blog.csdn.net/qq_41458842/article/details/99302385 (xml版)
视频中使用的内嵌的数据库,我使用的mysql,之前用内嵌的h2问题太多!
9.知识点(一)
Ctrl+Alt+V:定义一个变量出来
Ctrl+Alt+F:更换所有变量的名称
String.valueOf:将string类型的变量转换为其他类型的
System.currentTimeMillis():显式当前的秒数
UUID.randomUUID().toString():生成唯一的ID码
Ctrl+Alt+L:格式化代码
BeanUtils.copyProperties(p,d); 将p类对象的值传到d。
10.持久化登陆:通过标识生成的唯一标识user_token来实现持久化登陆
首先在AuthorizeController中,通过response将token放入到cookie中
response.addCookie(new Cookie("token", token));
然后在IndexController中通过request将cookie取出,在数据中找到相应的用户并将其加入到Session中。
   public String index(HttpServletRequest request){


   		Cookie[] cookies = request.getCookies();
   		for (Cookie cookie:cookies){


//            cookie是字典的形式存在的,当找到名字为token时,就要查看它的值,即getValue()            		if (cookie.getName().equals("token")){
			String token = cookie.getValue();
			User user = userMapper.findByToken(token);
			if(user!=null){


			request.getSession().setAttribute("user", user);
           }
       }
 }
 			return "index";
}
11.Flyway: 数据库的版本控制工具。
具体我没有实现,一直报错。
[ERROR] Failed to execute goal org.flywaydb:flyway-maven-plugin:6.1.3:migrate (default-cli) on project community: org.flywaydb.core.api.FlywayException: Found non-empty schema(s) test but no schema history table. Us
e baseline() or set baselineOnMigrate to true to initialize the schema history table. -> [Help 1]
12.BootStrap(二):
利用栅格系统设计页面布局(.col-xs-, .col-sm- , .col-md- , .col-lg- ),按钮样式设计页面格式。
在页面利用 th:if=“${}"";来进行判断,所在组件只有条件为真的时候才进行。
13.@GetMapping,@PostMapping
@GetMapping: 用于处理请求方法的GET类型 , 将HTTP get请求映射到特定处理程序的方法注解 。
可以将信息映射此 http://localhost:8080/publish
@GetMapping("/publish")
public String publish() {


    return "publish";
}
@PostMapping: 用于处理请求方法的POST类型 , 将HTTP post请求映射到特定处理程序的方法注解 。
在 publish form表单action里面填一个地址如publish,method = post,会路由到 PostMapping("/publish"),表单中填写的内容提交到PostMapping里面,然后通过@RequestParam获得。
<form action="/publish" method="post">
@PostMapping("/publish")
public String doPublish(
	@RequestParam("title") String title,
	@RequestParam("description") String description,
	@RequestParam("tag") String tag,
	HttpServletRequest request,
	Model model)
14.Model:将内容回显到页面上去。将相应的值传入到定义好的变量中,在页面中利用。th:value="${}”获得
model.addAttribute("title", title);
model.addAttribute("description", description);
model.addAttribute("tag", tag);
<input type="text" class="form-control"  th:value="${title}" name="title" id="title" placeholder="问题标题:简短,扼要">

<textarea name="description" id="description"  th:text="${description}" class="form-control" cols="30" rows="30"></textarea>
13.14 利用起来就可以实现一个场景:当用户填好了相关信息,但是提交后出现问题,不能正确提交到数据库,但是他所输入的信息是可以保留在页面上的,方便客户再次提交。
需要通过 th:value回显
标签–需要通过th:text回显
15.Lombok:一个java库,能够极大地简化代码。 能通过注解的形式自动生成构造器、getter/setter、equals、hashcode、toString等方法,提高了一定的开发效率 。
属性做修改时,也简化了维护为这些属性所生成的getter/setter方法等
16.完成首页问题列表功能
在访问IndexController时,要跳转回index这个页面,所以我们要在跳转之前把问题列表数据放进到 model中,
因此我们需要构造一个QuestionDTO,来获取问题列表数据以及用户的数据。
因为DTO中需要将Question和User联合起来,所以我们需要写一个QuestionService来调用相应的Mapper查询Question和User。
在inde页面中,我们首先还是利用栅格系统进行页面布局,然后利用th:each标签循环获取问题。
<ul class="media-list" th:each="question:${questions}">
    <li class="media">
        <div class="media-left">
            <a href="#">
                <img class="media-object"               					                               th:src="${question.user.avatar_url}">
            </a>
        </div>
        <div class="media-body">
            <h4 class="media-heading" th:text="${question.title}"></h4>
            <span th:text="${question.description}"></span>            <br>                			   <span class="text-desc">
            <span th:text="${question.comment_count}"></span>个回复 #
            <span th:text="${question.view_count}"></span>次浏览 #
            <span th:text="${#dates.format(question.gmt_create,'yyyy-MM-dd HH:mm')}">				</span>
            </span>
        </div>
    </li>
</ul>
17.热部署
<dependency>
    <groupId>org.springframework.boot</groupId>
    <artifactId>spring-boot-devtools</artifactId>
    <version>2.2.2.RELEASE</version>
</dependency>
在setting中找到如下位置:
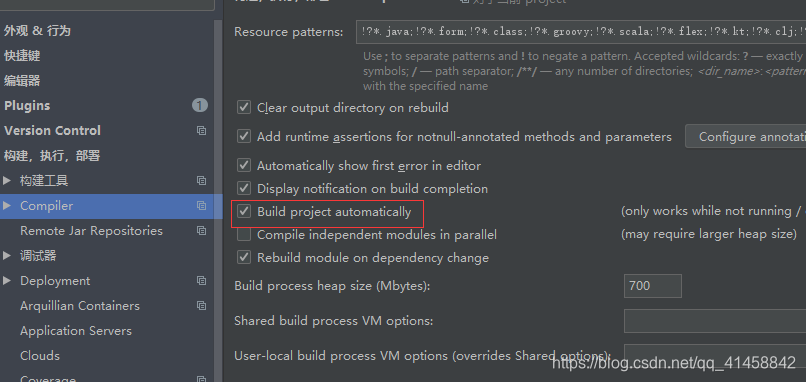
Ctrl+Alt+Shift+?点击注册

就可以实现了。
贴一下教程地址: https://www.bilibili.com/video/av65117012?p=1